7 min read
Overview
The NEAR Protocol is a layer-1 blockchain that follows the Proof-of-Stake (PoS) consensus mechanism and sharding architecture, allowing it to scale to 100,000+ transactions per second. The NEAR ecosystem also has a diverse set of 750 projects (and counting!).
This guide will cover the fundamentals of NEAR and teach you how to build and deploy a fungible token smart contract on the NEAR Testnet. We'll also interact with the fungible token we created using the NEAR CLI.
**What You Will Do
**
-
Learn about the NEAR Protocol
-
Build and deploy a Fungible Token (FT) Contract
-
Interact with the FT Contract with the NEAR CLI
**What You Will Need
**
- A basic understanding of blockchain and Rust programming skills
- Code editor (e.g., VSCode)
- Rust installed
- Node.js and npm installed
- NEAR CLI installed
- NEAR Wallet set up
What is NEAR Protocol?
Apart from being a layer-1 blockchain that uses Proof-of-Stake (PoS) consensus mechanisms, the NEAR protocol offers an alternative design called sharding (i.e., the NightShade algorithm) which allows it to divide network infrastructure across many components, enabling validators (a.k.a nodes; computers) to only handle a portion of the network's activity. This enables NEAR to scale, equaling a greater amount of transactions per second and lower transaction fees.
With this algorithm, the NEAR Protocol maintains one main chain while distributing the computation needed to power the protocol into chunks that different validators will handle. In the end, each validator's finished processes are added to the main chain. Dividing these compute tasks allows the protocol to have fewer points of failure as the work is isolated between validators.
NEAR also provides a bridge called Rainbow Bridge that allows users on EVM-based chains (e.g., Polygon, Ethereum, Arbitrum) to transfer tokens to and from the NEAR protocol. This is available on both NEAR mainnet and test network. EVM developers (a.k.a Solidity; Vyper developers) can also deploy smart contracts on NEAR using the Aurora Network, a layer-2 scaling solution that allows developers to deploy EVM-compatible dApps onto the NEAR protocol.
Some key features that NEAR offers are:
- Human-readable accounts (e.g., vitalik.near): These are similar to ENS names on EVM-based chains but are, by default, for NEAR.
- Fast and cost-effective transactions: Generally ~1-second transactions and cheap (1¢) fees.
- Smart contracts: built with Javascript, Typescript, and Rust.
Creating a NEAR Endpoint on QuickNode
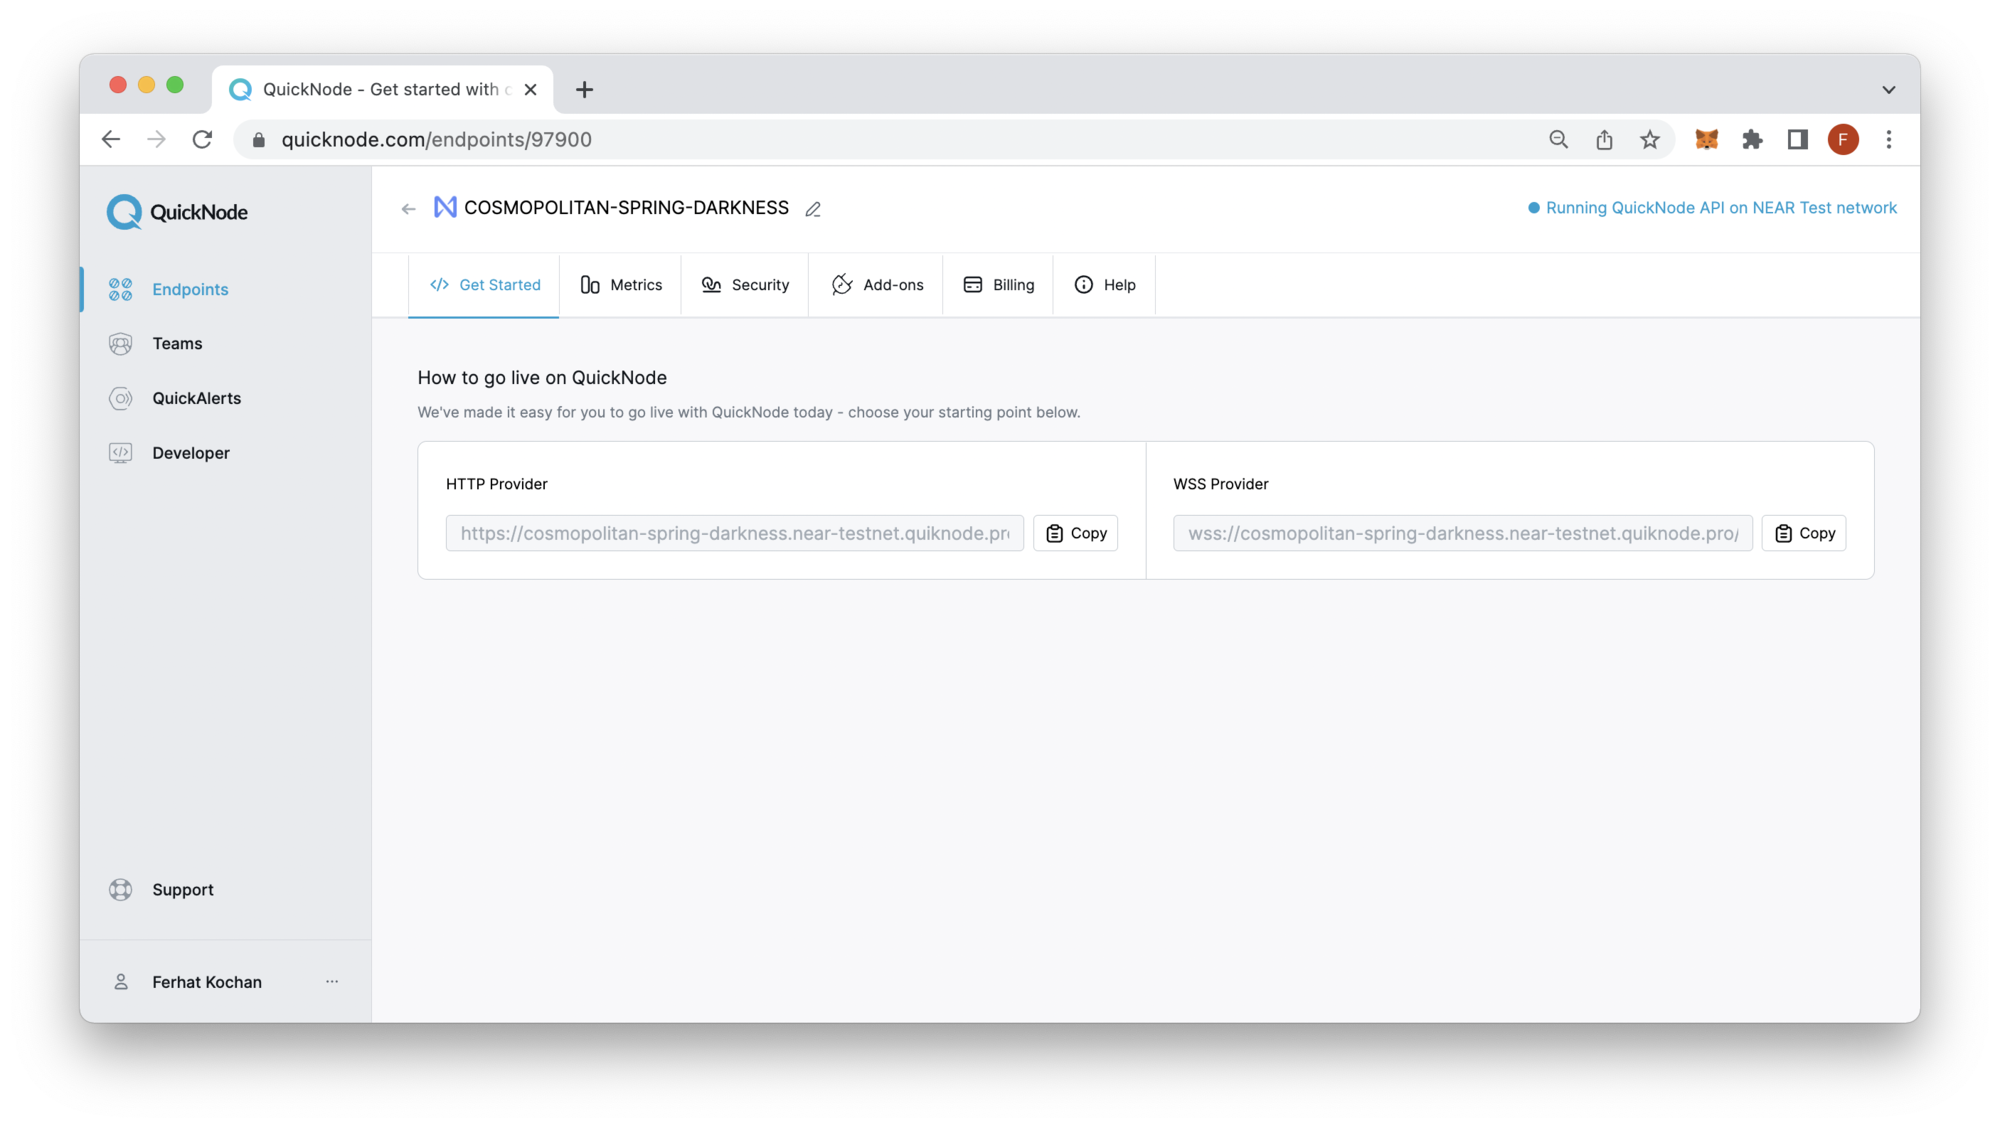
To build on NEAR, you'll need an API endpoint to connect with the network. You're welcome to use public nodes or deploy and manage your own infrastructure; however, if you'd like 8x faster response times, you can leave the heavy lifting to us. Sign up for a free account here.
Once logged in, click the Create an endpoint button, then select the NEAR chain and Testnet protocol.
After creating your endpoint, copy the HTTP Provider link:
Building a Fungible Token Contract
This section will show you how to create a fungible token using the NEP-141 & NEP-145 spec, which is NEAR's version of EIP standards called NEPs (NEAR Enhancement Proposals).
Now, let's move on to building the fungible token contract.
Navigate to the near-sdk-rs repository and clone the repo into your local machine.
git clone https://github.com/near/near-sdk-rs.git
You can now access Logs for your RPC endpoints, helping you troubleshoot issues more effectively. If you encounter an issue with your RPC calls, simply check the logs in your QuickNode dashboard to identify and resolve problems quickly. Learn more about log history limits on our pricing page.
Open the directory in a code editor such as VSCode and navigate to the examples/fungible-token/ft/src/lib.rs file. You can edit details about your fungible token in this file, such as the token name, symbol, metadata, etc. These details are contained within the new_default_meta function.
In our example, we've updated the metadata to reflect these details:
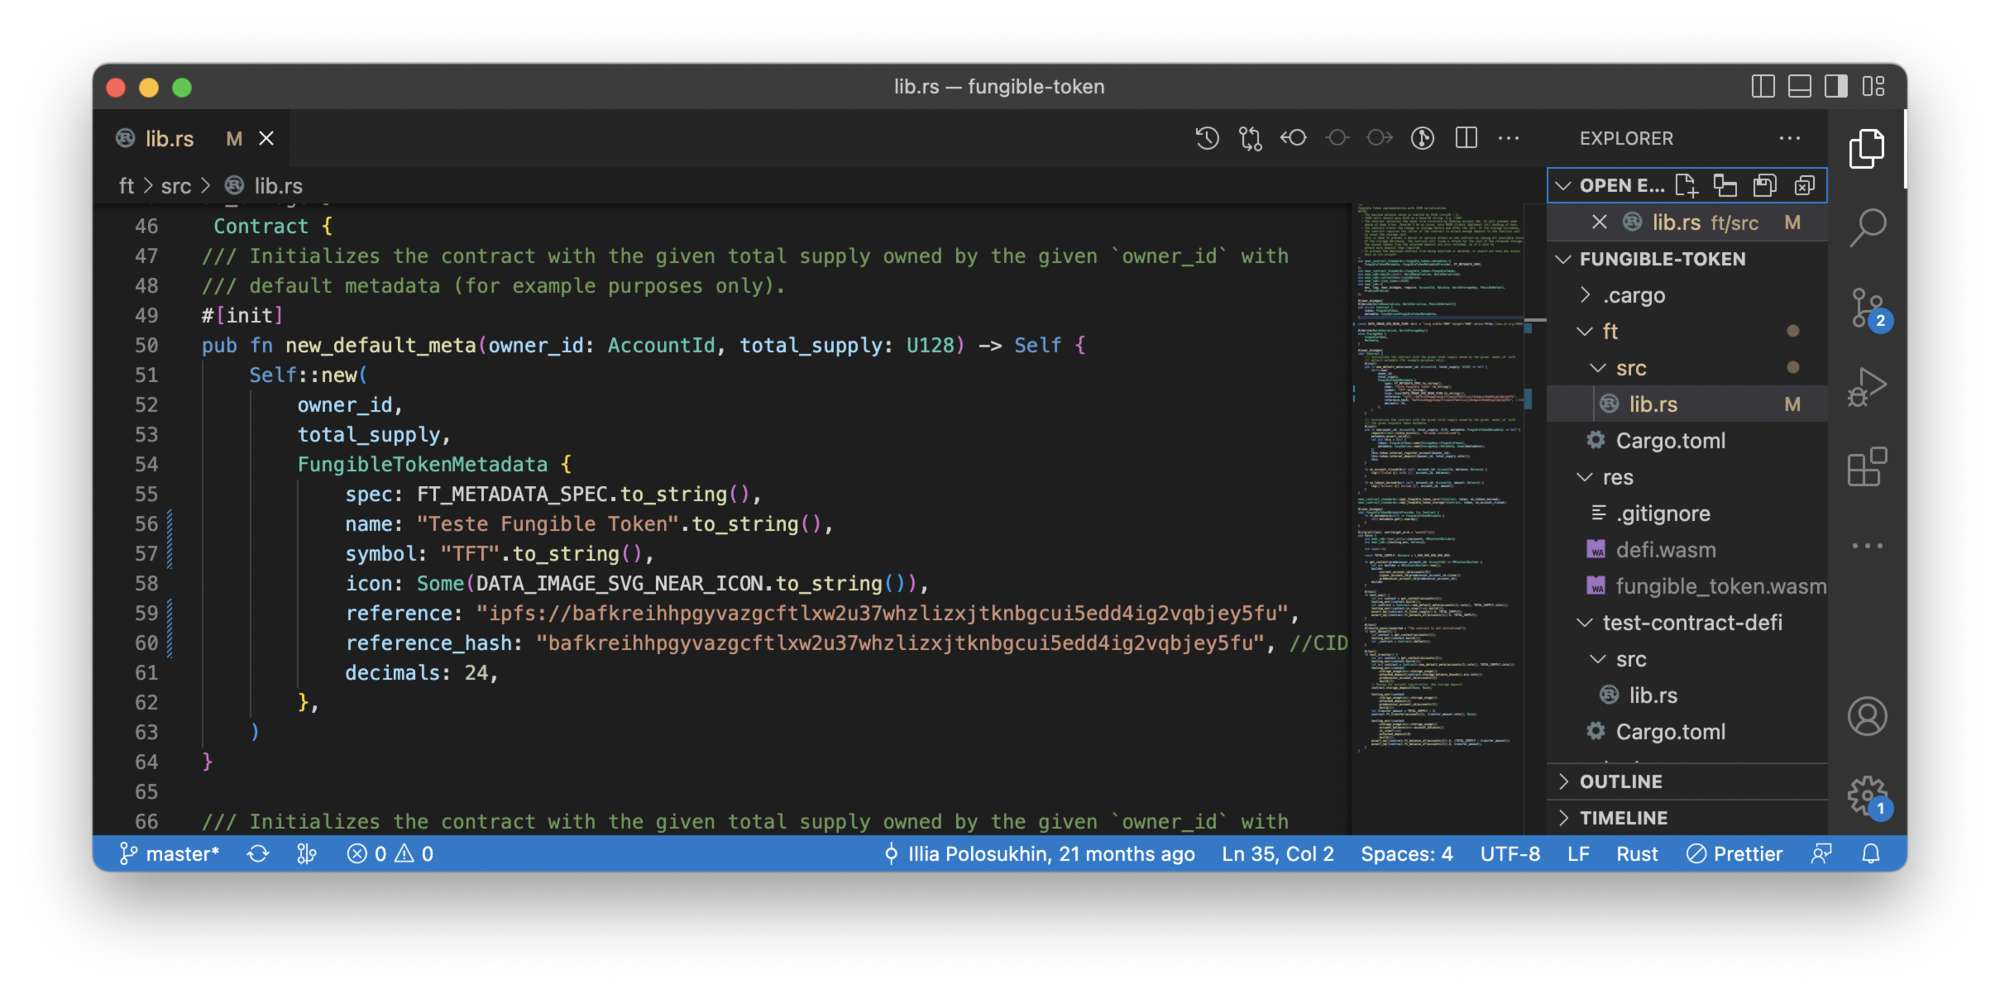
Take a moment to fill out your own fungible token specifications and save the file.
Compiling the Fungible Token Contract
Now that our fungible token details are configured, we can compile the contract. In the examples/fungible-token directory, run the following command:
./build.
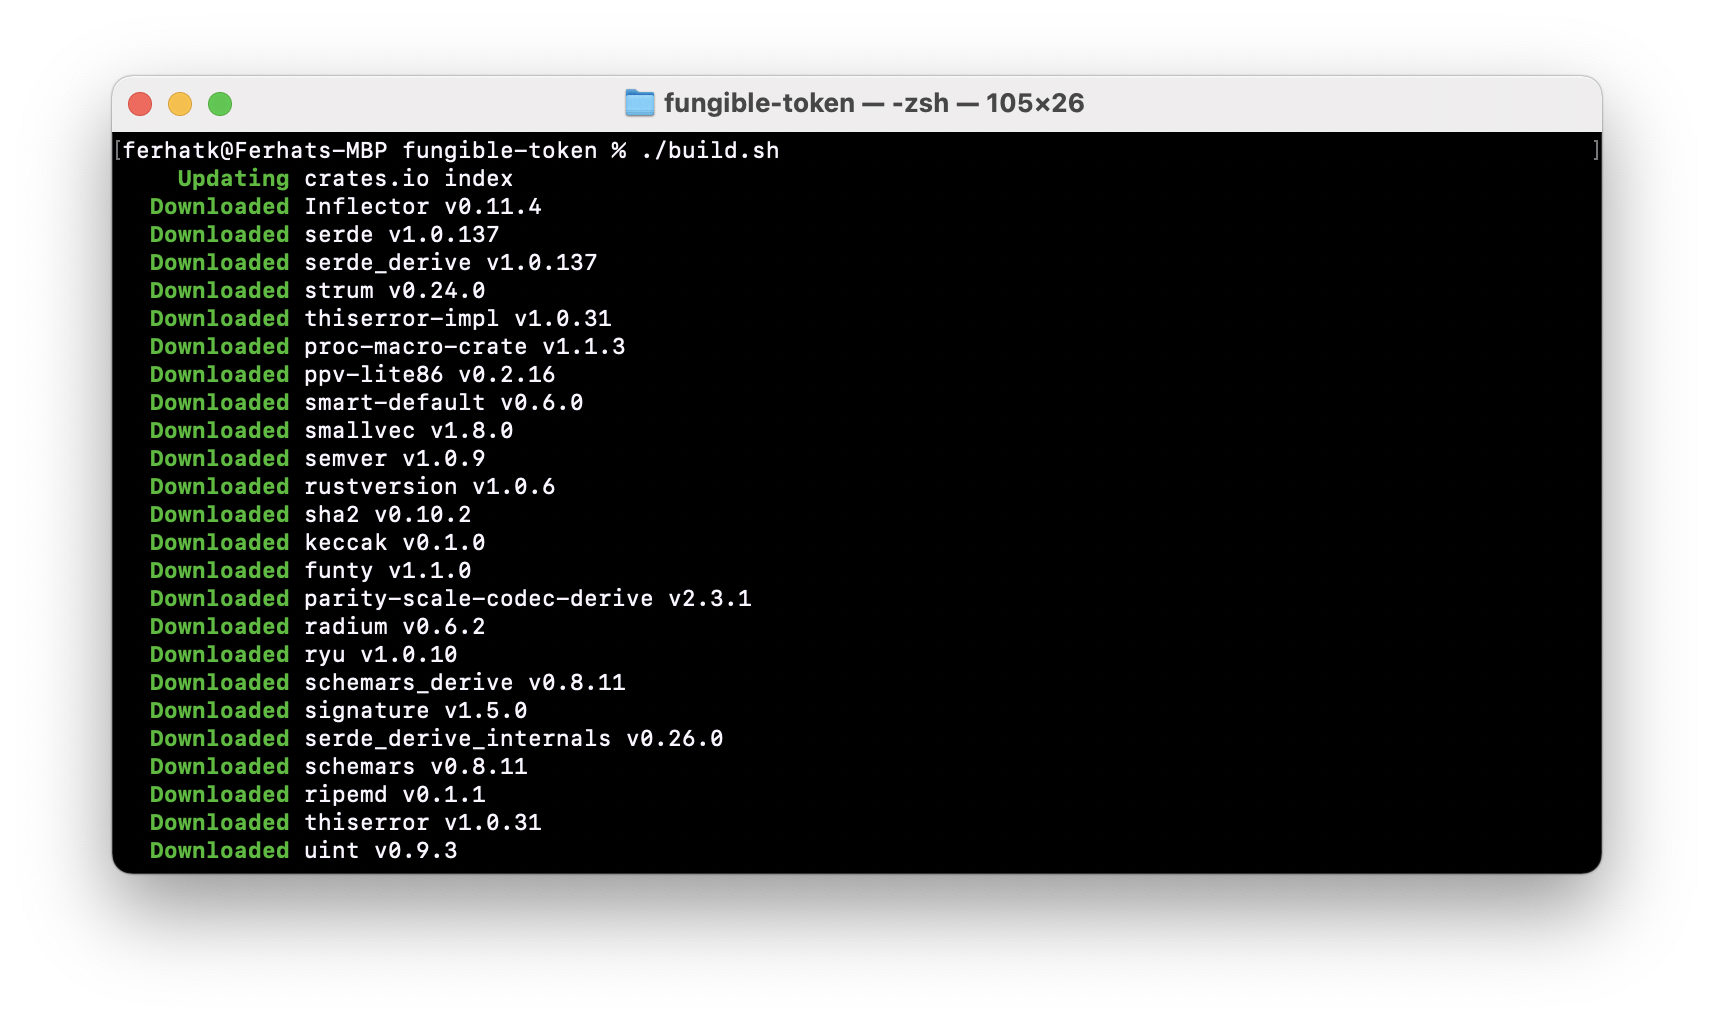
Now that the contract is compiled, in the next section we'll go over how to deploy the fungible token contract.
Deploying the Fungible Token Contract
If you don't have a NEAR Wallet, create one by clicking the Create Account button, then reserve an Account ID. Remember that NEAR uses human-readable names for accounts (unlike Ethereum). In our example, we're creating an Account ID called wentoken.testnet, which will be a unique ID. In the next step, you'll be prompted to store your seed phrase and verify that you know it.
To deploy the contract, we'll need to configure our account details via the near-cli. If you still need to install it, take a moment to install it via the npm install -g near-cli command.
Next, run the following command to be forwarded to the NEAR Wallet page, where you will grant access to the near-cli.
near login
In the end, you'll be asked to grant access:

Click Next, then click Connect, and verify your account details. Lastly, click Confirm.
Once you have successfully granted access, your terminal window should show a login message similar to the following:
Logged in as [ wentoken.testnet ] with public key [ ed25519:DT7SMM... ] successfully
Your newly created wallet address should also be pre-funded with some testnet NEAR tokens. You can go to the NEAR blockchain explorer to verify.
Now for the fun part, deploying the contract!
In your terminal window within the fungible-token directory, run the following command:
near deploy --wasmFile res/fungible_token.wasm --accountId YOUR_ACCOUNT_ID.testnet
Remember to replace YOUR_ACCOUNT_ID with your actual account ID
The output should look similar to the following:

Note - the node field in your terminal window should show your QuickNode endpoint URL
You can navigate to the block explorer URL to see the transaction! In the next section, we will interact with the fungible token contract we just deployed.
Interacting with the Token contract using the NEAR CLI
We can use the NEAR CLI to interact with the fungible token contract we just deployed. The NEAR CLI is a shell-communication tool that helps users interact with NEAR in the following capacity:
-
Login with your NEAR account and sign transactions
-
Deploy smart contracts
-
Interact with smart contracts
But before we can call certain methods on the fungible token contract, we must first initialize the contract. We can do this by calling the new_default_meta or new methods. In our example, we're calling the new_default_meta method, which takes two arguments: the contract's owner and the total supply you want to set.
near call <contract_name> new_default_meta '{"owner_id":"<account_id>", "total_supply":"1000"}' --accountId <account_id>
Note - The contract name is the same as your account ID. You can only have 1 contract per account. If you redeploy a contract onto the same account, you need to make sure you clear the state of the old one first.
To interact with a contract with NEAR CLI, you must make the request in the following format:
near call <contract_name> <method_name> --accountId <account_id>
Note to remove the < > from the actual request.
Let's now take a look at the metadata of the fungible token by running the following terminal command in a terminal window:
near call <contract_name> ft_metadata --accountId <account_id>
You should get a response similar to the following:
{
  spec: 'ft-1.0.0',
  name: 'Teste Fungible Token',
  symbol: 'TFT',
  icon: "data:image/svg+xml,%3Csvg width='800' height='600' xmlns='http://www.w3.org/2000/svg'%3E%3Ctext xml:space='preserve' font-family='Noto Sans JP' font-size='24' y='259' x='348.5' stroke-width='0' stroke='%23000'%3E!Teste%3F%3C/text%3E%3C/svg%3E",
  reference: null,
  reference_hash: null,
  decimals: 24
}
Now let us try to transfer tokens to another address (e.g., account id). However, note that you must first register the recipient on the contract. You can accomplish this with the following command:
near call <contract_name> storage_deposit '{"account_id":"<recipient_to_register>"}' --accountId <account_id> --amount 0.00125
More about contract storage can be found here. TLDR; The NEAR blockchain stores all data in key/value pairs. When you deploy a smart contract to NEAR, you use a mechanism known as storage staking to pay for this contract's storage. Storage staking requires the account that owns a smart contract to stake tokens based on the amount of data stored in that smart contract, effectively reducing the contract's account balance.
The response should have the transaction ID, a URL to the transaction on a block explorer, and the registered amount of tokens for the recipient.
Next, we can transfer tokens to the recipient with the following command:
near call <contract_name> ft_transfer '{"receiver_id":"<recipient_account_id>", "amount":"<token_amount>"}' --accountId <account_id> --depositYocto 1
The output should contain an event log that looks like this:
Log [<account_id>]: EVENT_JSON:{"standard":"nep141","version":"1.0.0","event":"ft_transfer","data":[{"old_owner_id":"<account_id>","new_owner_id":"<recipient_account_id>","amount":"<transferred_amount>"}]}
You may be wondering what the --depositYocto flag in the previous command is. This is to attach tokens to your function call as it is required. Note that one Yocto NEAR (e.g., 10^-24) is the smallest denomination of one NEAR.
Now, you can also verify that the recipient received the tokens by calling the ft_balance_of function:
near call <contract_name> ft_balance_of '{"account_id":"<recipient_account_id"}' --accountId <account_id>
This isn't an extensive fungible token contract walkthrough, so be sure to experiment with different ideas and try deploying other types of smart contracts on NEAR. Check out the resources in the next section!
Resources
Final Thoughts
That's it! Ready to create the next big dApp on the NEAR blockchain? Show us your skills on Twitter or Discord. We'd love to know what you're building!
We ❤️ Feedback
If you have any feedback on this guide, let us know!