
33 min read
Overview
Jupiter, Solana's leading swap aggregator and routing protocol, is a powerful tool for developers looking to build trading tools, dApps, and other DeFi applications. In this guide, we will use Metis, Jupiter's onchain routing engine, via Quicknode's Metis add-on to create a simple Solana trading bot.
- Metis is Jupiter's onchain routing engine, hosted as a managed endpoint via Quicknode's Metis add-on
- Build a TypeScript trading bot that polls Jupiter's
/quoteendpoint and executes swaps when price thresholds are met - Use
@jup-ag/apiwith@solana/kitto fetch swap instructions, build versioned transactions, and submit them directly to Solana - The bot tracks SOL/USDC balances, logs each trade to a JSON file, and updates its thresholds after every swap
Prefer a video walkthrough? Follow along with Sahil and learn how to create a trading bot on Solana using Jupiter API.
Note: This guide is for educational purposes only. Quicknode does not provide financial advice or endorse any trading strategies. Always do your own research and consult with a financial advisor before making any investment decisions.
What You Will Do
In this guide, you will:
- Get an overview of Jupiter
- Learn how to use the Metis API via Quicknode's Metis add-on
- Create a class-based trading bot that swaps SOL for USDC using Jupiter's API. The bot will use the Jupiter API to monitor the market for specific conditions and execute Jupiter trades when met.
What You Will Need
This guide assumes you have a basic understanding of building TypeScript dApps, DeFi, and working with Solana wallets.
You will also need:
- Basic knowledge of Solana Fundamentals
- Basic experience with Solana Versioned Transactions
- Node.js v20 or later installed
- TypeScript installed; tsx available via
npx(no global install needed) - A Quicknode account with a Solana mainnet endpoint and the Metis Jupiter Swap API add-on enabled
- A Solana file system wallet with a SOL and USDC balance
This guide uses the following dependencies:
| Dependency | Version |
|---|---|
| @jup-ag/api | ^6.0.48 |
| @solana/kit | ^6.9.0 |
| @solana-program/token | ^0.13.0 |
| @solana-program/address-lookup-table | ^0.11.0 |
Reliable and high-performance blockchain infrastructure is critical to get the most out of your Solana trading bot. Quicknode provides fast and scalable Solana RPC node endpoints that significantly enhance your bot's responsiveness and efficiency. Sign Up for an account and get started with Quicknode today.
In addition to a solid RPC endpoint, consider leveraging the Quicknode's Jupiter API plugin, Metis for optimized trade execution. This add-on hosts the Metis binary on Quicknode's infrastructure, giving you a private, managed endpoint for quote fetching and swap execution. Never worry about setting up or maintaining a server with our rolling restarts and low latency. Markets and pools show up immediately.
This add-on will not use your account credits as it depends on its own Solana validator node, segmented from our pro network for maximum reliability.
Alternatively, you can access a Public endpoint for Jupiter's API here: https://public.jupiterapi.com/.
What is Jupiter?
Jupiter is a Web3 Swap program on Solana. Jupiter allows users to find efficient routes for swapping tokens on Solana. Token swapping is a core feature of DeFi that enables users to trade one token for another while accounting for the market value of each token.
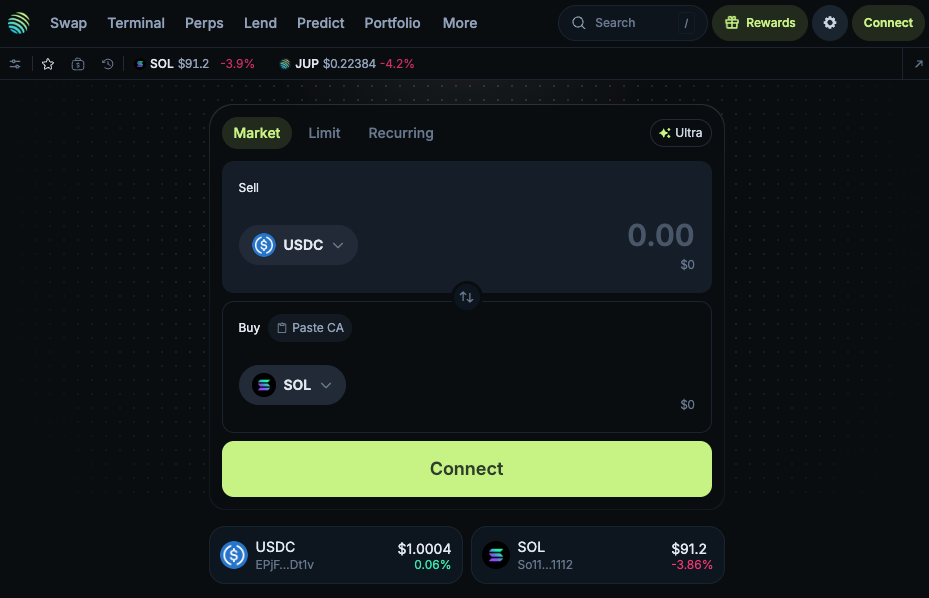 Source: jup.ag
Jupiter aggregates pricing from many decentralized exchanges (DEXs) and automated market makers (AMMs) and employs a unique algorithm called "smart routing" that allows users to find the best price for their swap.
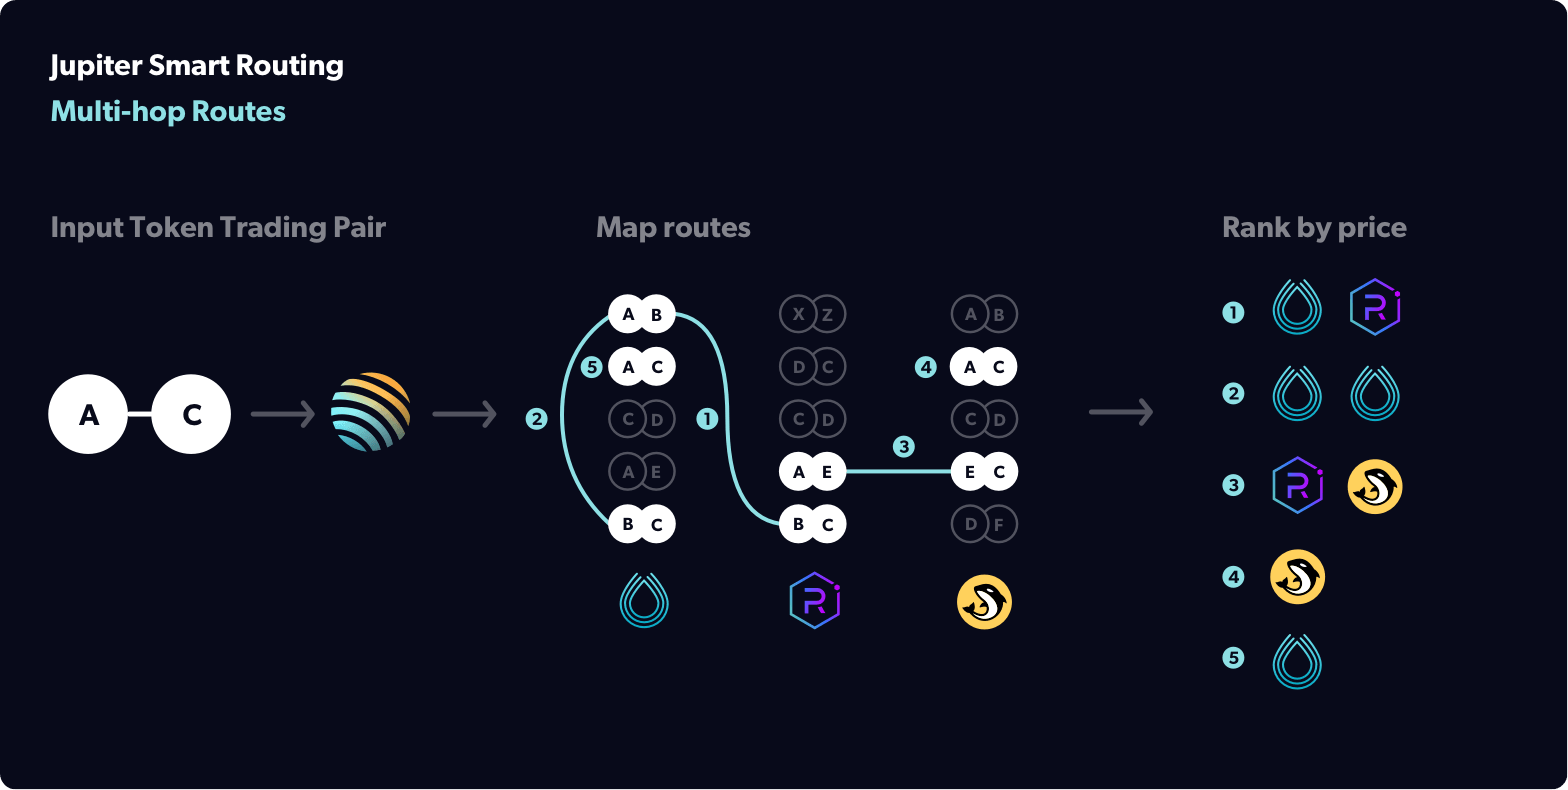 Source: Jupiter Docs
Jupiter will also search for inefficiencies in intermediary swaps (e.g., USDC-mSOL-SOL instead of USDC-SOL) to find lower costs for users. When executing swaps, Jupiter also utilizes a concept called Trade Splitting, which breaks a trade into smaller trades across multiple DEXs to find the best price.
Using the Jupiter Metis API
The Metis API exposes Jupiter's onchain routing engine as an HTTP service for developers building trading tools, dApps, and other DeFi applications. It gives you access to Jupiter's smart routing algorithm, returning swap quotes and Solana transaction instructions. Quicknode's Metis add-on runs the Metis binary on its infrastructure, so you have a stable, managed endpoint. The API includes five main methods:
| Endpoint | JS Method Name(s) | Type | Description |
|---|---|---|---|
/quote | quoteGet quoteGetRaw | GET | Get best-priced quote for a swap given two tokens and a swap amount |
/swap | swapPost swapPostRaw | POST | Returns a Solana swap transaction from a quote |
/swap-instructions | swapInstructionsPost swapInstructionsPostRaw | POST | Returns Solana swap instructions from a quote |
/program-id-to-label | programIdToLabelGet programIdToLabelGetRaw | GET | Returns a mapping of names/labels for all program ID |
/indexed-route-map | indexedRouteMapGet indexedRouteMapGetRaw | GET | Returns a hash map, input mint as key and an array of valid output mint as values |
Requests can be made with the following format: {server}/{endpoint}?{query/body}. Here's an example for getting a quote for a swap of 100 USDC to SOL with a cURL:
curl -L 'https://jupiter-swap-api.quiknode.pro/YOUR_ENDPOINT/quote?inputMint=EPjFWdd5AufqSSqeM2qN1xzybapC8G4wEGGkZwyTDt1v&outputMint=So11111111111111111111111111111111111111112&amount=100000000' \
-H 'Accept: application/json'
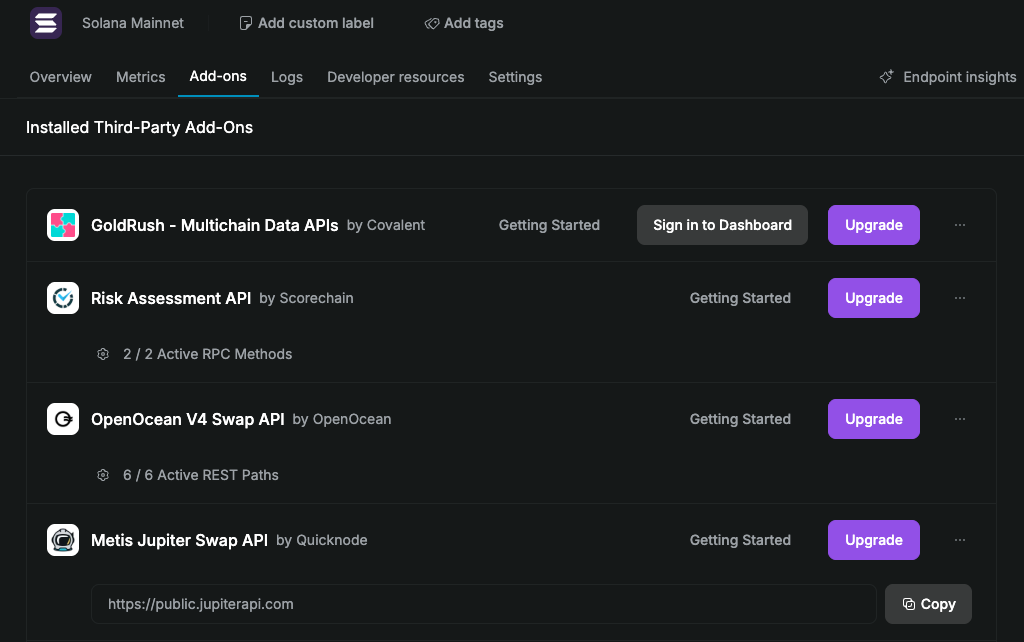
Make sure to replace https://jupiter-swap-api.quiknode.pro/YOUR_ENDPOINT with our own Metis endpoint. Alternatively, you can use our public endpoint: https://public.jupiterapi.com (some methods may not be available). You can find your Metis address from your Quicknode Dashboard's add-on page (https://dashboard.quicknode.com/endpoints/YOUR_ENDPOINT/add-ons):
To use the Jupiter JS Client, you can install it via npm:
npm install @jup-ag/api
You will need to create an instance of the Jupiter API client and pass in your Metis key (e.g., https://jupiter-swap-api.quiknode.pro/YOUR_ENDPOINT) or a public endpoint available here :
import { createJupiterApiClient } from '@jup-ag/api';

const ENDPOINT = `https://jupiter-swap-api.quiknode.pro/XX123456`; // 👈 Replace with your Metis Key or a public one https://public.jupiterapi.com/
const CONFIG = {
    basePath: ENDPOINT
};
const jupiterApi = createJupiterApiClient(CONFIG);
And then call the methods you need, for example:
jupiterApi.quoteGet({
    inputMint: "EPjFWdd5AufqSSqeM2qN1xzybapC8G4wEGGkZwyTDt1v",
    outputMint: "So11111111111111111111111111111111111111112",
    amount: 100_000_000,
}).then((quote) => {
    console.log(quote.outAmount, quote.outputMint);
}).catch((error) => {
    console.error(error);
});
All methods and documentation can be found at Jupiter Docs:
Let's test it out by creating a simple trading bot that uses Jupiter's API to monitor the market for specific conditions and execute trades when they are met.
Jupiter also offers Swap V2, a unified API with a managed execution path (Meta-Aggregator) and a raw instruction path (Router). Learn more about How to Swap Tokens With Jupiter Ultra API.
Trading Bot
This example is for educational purposes. Do not use this code in a production environment. Trades executed on Solana's mainnet are irreversible and can result in financial loss. Always do your own research and consult with a financial advisor before making any investment decisions.
Here's what our bot is going to do:
- The bot will expect a wallet with a SOL and USDC balance.
- The bot will monitor the market (using Jupiter's get quote method on a specified interval).
- The bot will execute a trade using Jupiter's swap method when the market price meets our defined conditions.
- The bot will log our swap if it is successful and update the next trade conditions so the bot will execute its next swap at a predefined % change from the previous swap.
- The bot will run until we terminate it or insufficient SOL is available to execute the next trade.
Set Up Your Project
First, let's create a new project directory:
mkdir jupiter-trading-bot
cd jupiter-trading-bot
Then, initialize a new Node.js project:
npm init -y
Next, install your dependencies. We will need the Jupiter API, Solana Kit, the SPL token program client, and the address lookup table program client:
npm install @jup-ag/api @solana/kit @solana-program/token @solana-program/address-lookup-table
npm install --save-dev @types/node
Create three files in your project directory: bot.ts, index.ts, and .env:
echo > bot.ts && echo > index.ts && echo > .env
Define .env Variables
Open the .env file and add the following variables:
# Replace with your Solana wallet secret key
SECRET_KEY=[00, 00, ... 00]
# Replace with your Quicknode Solana Mainnet RPC endpoint
SOLANA_ENDPOINT=https://example.solana-mainnet.quiknode.pro/123456/
# Replace with your Quicknode Jupiter API endpoint (or a public one: https://public.jupiterapi.com/)
METIS_ENDPOINT=https://jupiter-swap-api.quiknode.pro/123456
Make sure to replace the variables with your own. Add .env to your .gitignore to avoid committing your secret key.
If you do not have a file system wallet, you can create one by running:
solana-keygen new --no-bip39-passphrase --silent --outfile ./my-keypair.json
Import Dependencies
Open bot.ts and import the necessary dependencies:
import { createSolanaRpc, createSolanaRpcSubscriptions, address, Address, KeyPairSigner, createKeyPairSignerFromBytes, Instruction, AccountRole, pipe, createTransactionMessage, setTransactionMessageFeePayerSigner, setTransactionMessageLifetimeUsingBlockhash, appendTransactionMessageInstructions, compressTransactionMessageUsingAddressLookupTables, signTransactionMessageWithSigners, getSignatureFromTransaction, sendAndConfirmTransactionFactory, AddressesByLookupTableAddress } from "@solana/kit";
import { createJupiterApiClient, SwapApi, ResponseError, QuoteGetRequest, QuoteResponse, Instruction as JupiterInstruction, AccountMeta } from '@jup-ag/api';
import { findAssociatedTokenPda } from "@solana-program/token";
import { fetchAddressLookupTable } from "@solana-program/address-lookup-table";
import * as fs from 'fs';
import * as path from 'path';

const LAMPORTS_PER_SOL = 1_000_000_000n;
Define Interfaces
Let's create a couple of interfaces to define the bot's configuration and the trade conditions:
interface ArbBotConfig {
    solanaEndpoint: string; // e.g., "https://ex-am-ple.solana-mainnet.quiknode.pro/123456/"
    metisEndpoint: string;  // e.g., "https://jupiter-swap-api.quiknode.pro/123456/"
    secretKey: Uint8Array;
    firstTradePrice: number; // e.g. 94 USDC/SOL
    targetGainPercentage?: number;
    checkInterval?: number;
    initialInputToken: SwapToken;
    initialInputAmount: number;
}

interface NextTrade extends QuoteGetRequest {
    nextTradeThreshold: number;
}

export enum SwapToken {
    SOL,
    USDC
}

interface LogSwapArgs {
    inputToken: string;
    inAmount: string;
    outputToken: string;
    outAmount: string;
    txId: string;
    timestamp: string;
}
- ArbBotConfig will be used to define the bot's configuration, including the Solana and Jupiter API endpoints, the secret key, the initial trade price, the target gain percentage, the check interval, and the initial input token and amount.
- NextTrade will be used to define the next trade's conditions, including the input and output tokens, the amount, and the threshold.
- LogSwapArgs will be used to log the details of each trade to a json file.
Define Bot Class
Let's frame an ArbBot class that will handle the bot's logic. We will predefine the class and its methods and then fill in the details in the next section. We will also populate a few helper methods so we can save time on those. Add the following to bot.ts:
export class ArbBot {
    private rpc: ReturnType<typeof createSolanaRpc>;
    private rpcSubscriptions: ReturnType<typeof createSolanaRpcSubscriptions>;
    private sendAndConfirmTransaction!: ReturnType<typeof sendAndConfirmTransactionFactory>;
    private jupiterApi: SwapApi;
    private wallet!: KeyPairSigner;
    private secretKey: Uint8Array;
    private usdcMint: Address = address("EPjFWdd5AufqSSqeM2qN1xzybapC8G4wEGGkZwyTDt1v");
    private solMint: Address = address("So11111111111111111111111111111111111111112");
    private usdcTokenAccount!: Address;
    private solBalance: bigint = 0n;
    private usdcBalance: number = 0;
    private checkInterval: number = 1000 * 10;
    private lastCheck: number = 0;
    private priceWatchIntervalId?: NodeJS.Timeout;
    private targetGainPercentage: number = 1;
    private nextTrade: NextTrade;
    private waitingForConfirmation: boolean = false;

    constructor(config: ArbBotConfig) {
        // TODO
    }

    async init(): Promise<void> {
        this.wallet = await createKeyPairSignerFromBytes(this.secretKey);
        this.sendAndConfirmTransaction = sendAndConfirmTransactionFactory({ rpc: this.rpc, rpcSubscriptions: this.rpcSubscriptions });
        const [usdcTokenAccount] = await findAssociatedTokenPda({
            mint: this.usdcMint,
            owner: this.wallet.address,
            tokenProgram: address('TokenkegQfeZyiNwAJbNbGKPFXCWuBvf9Ss623VQ5DA'),
        });
        this.usdcTokenAccount = usdcTokenAccount;
        console.log(`🤖 Initiating arb bot for wallet: ${this.wallet.address}.`)
        await this.refreshBalances();
        console.log(`🏦 Current balances:\nSOL: ${Number(this.solBalance) / Number(LAMPORTS_PER_SOL)},\nUSDC: ${this.usdcBalance}`);
        this.initiatePriceWatch();
    }

    private async refreshBalances(): Promise<void> {
        // TODO
    }


    private initiatePriceWatch(): void {
        // TODO
    }

    private async getQuote(quoteRequest: QuoteGetRequest): Promise<QuoteResponse> {
        // TODO
    }

    private async evaluateQuoteAndSwap(quote: QuoteResponse): Promise<void> {
        // TODO
    }

    private async executeSwap(route: QuoteResponse): Promise<void> {
        // TODO
    }

    private async updateNextTrade(lastTrade: QuoteResponse): Promise<void> {
        // TODO
    }

    private async logSwap(args: LogSwapArgs): Promise<void> {
        const { inputToken, inAmount, outputToken, outAmount, txId, timestamp } = args;
        const logEntry = {
            inputToken,
            inAmount,
            outputToken,
            outAmount,
            txId,
            timestamp,
        };

        const filePath = path.join(__dirname, 'trades.json');

        try {
            if (!fs.existsSync(filePath)) {
                fs.writeFileSync(filePath, JSON.stringify([logEntry], null, 2), 'utf-8');
            } else {
                const data = fs.readFileSync(filePath, { encoding: 'utf-8' });
                const trades = JSON.parse(data);
                trades.push(logEntry);
                fs.writeFileSync(filePath, JSON.stringify(trades, null, 2), 'utf-8');
            }
            console.log(`✅ Logged swap: ${inAmount} ${inputToken} -> ${outAmount} ${outputToken},\n  TX: ${txId}`);
        } catch (error) {
            console.error('Error logging swap:', error);
        }
    }

    private terminateSession(reason: string): void {
        console.warn(`❌ Terminating bot...${reason}`);
        console.log(`Current balances:\nSOL: ${Number(this.solBalance) / Number(LAMPORTS_PER_SOL)},\nUSDC: ${this.usdcBalance}`);
        if (this.priceWatchIntervalId) {
            clearInterval(this.priceWatchIntervalId);
            this.priceWatchIntervalId = undefined; // Clear the reference to the interval
        }
        setTimeout(() => {
            console.log('Bot has been terminated.');
            process.exit(1);
        }, 1000);
    }

    private jupiterInstructionToKitInstruction(
        instruction: JupiterInstruction | undefined
    ): Instruction | null {
        if (instruction === null || instruction === undefined) return null;
        return {
            programAddress: address(instruction.programId),
            accounts: instruction.accounts.map((key: AccountMeta) => ({
                address: address(key.pubkey),
                role: key.isWritable && key.isSigner ? AccountRole.WRITABLE_SIGNER
                    : key.isSigner ? AccountRole.READONLY_SIGNER
                    : key.isWritable ? AccountRole.WRITABLE
                    : AccountRole.READONLY,
            })),
            data: new Uint8Array(Buffer.from(instruction.data, 'base64')),
        };
    };

    private async getAddressLookupTableAccounts(
        keys: string[]
    ): Promise<AddressesByLookupTableAddress> {
        const result: AddressesByLookupTableAddress = {};
        await Promise.all(
            keys.map(async (key) => {
                const altAccount = await fetchAddressLookupTable(this.rpc, address(key));
                result[address(key)] = altAccount.data.addresses;
            })
        );
        return result;
    };

    private async postTransactionProcessing(quote: QuoteResponse, txid: string): Promise<void> {
        const { inputMint, inAmount, outputMint, outAmount } = quote;
        await this.updateNextTrade(quote);
        await this.refreshBalances();
        await this.logSwap({ inputToken: inputMint, inAmount, outputToken: outputMint, outAmount, txId: txid, timestamp: new Date().toISOString() });
    }
}
Before moving on, let's walk through what we have here:
- First, we define a few class properties, including the Solana RPC client, the Jupiter API, the wallet signer, the USDC and SOL mint addresses, the USDC token account, the check interval, the last check, the price watch interval id, the target gain percentage, the next trade, and a flag to indicate if the bot is waiting for confirmation. We will use these to track the bot's state and manage the trading logic.
- We define a constructor that takes a configuration object and initializes the bot's properties. We also define an
initmethod that handles async setup (creating the wallet signer, deriving the token account) and starts the price watch interval. - We are defining a few helper methods:
logSwapwill be used to log the details of each trade to a json file.terminateSessionwill be used to terminate the bot and log the reason for termination.jupiterInstructionToKitInstructionwill convert a Jupiter instruction into a KitIInstruction.getAddressLookupTableAccountswill be used to fetch address lookup table accounts.postTransactionProcessingwill trigger necessary steps after a successful swap (updateNextTrade,refreshBalances, andlogSwap). We will define those methods in the next section.
Constructor
Let's build our constructor to initiate an instance of ArbBot. We have already defined our ArbBotConfig interface, so we can use that to define the constructor's parameters. Add the following to bot.ts:
    constructor(config: ArbBotConfig) {
        const {
            solanaEndpoint,
            metisEndpoint,
            secretKey,
            targetGainPercentage,
            checkInterval,
            initialInputToken,
            initialInputAmount,
            firstTradePrice
        } = config;
        this.rpc = createSolanaRpc(solanaEndpoint);
        this.rpcSubscriptions = createSolanaRpcSubscriptions(solanaEndpoint.replace('https://', 'wss://'));
        this.jupiterApi = createJupiterApiClient({ basePath: metisEndpoint });
        this.secretKey = secretKey;
        if (targetGainPercentage) { this.targetGainPercentage = targetGainPercentage }
        if (checkInterval) { this.checkInterval = checkInterval }
        this.nextTrade = {
            inputMint: initialInputToken === SwapToken.SOL ? this.solMint : this.usdcMint,
            outputMint: initialInputToken === SwapToken.SOL ? this.usdcMint : this.solMint,
            amount: initialInputAmount,
            slippageBps: 300,
            nextTradeThreshold: firstTradePrice,
        };
    }
- First, we destructure the configuration object and assign the properties to the class instance.
- We then use the Solana endpoint to create a Solana RPC client and an RPC subscriptions client (the WebSocket equivalent, used for transaction confirmation).
- We store the secret key for use in
init(), wherecreateKeyPairSignerFromBytes(async) creates the wallet signer andfindAssociatedTokenPdaderives the USDC token account. - We set the target gain percentage and check interval if they are provided (recall we have included default values for these in the class).
- Finally, we set the next trade conditions based on the initial input token (and amount) and the first trade price. The direction of the trade depends on which token is passed into the initial input token configuration argument.
We have already defined a public .init() method. This method can be used in conjunction with the constructor to initialize the bot and start the price watch interval.
Here is a preview of how the client will look (you will write this in full in the Create Client section):
    const bot = new ArbBot({
        solanaEndpoint: process.env.SOLANA_ENDPOINT ?? defaultConfig.solanaEndpoint,
        metisEndpoint: process.env.METIS_ENDPOINT ?? defaultConfig.jupiter,
        secretKey: decodedSecretKey,
        firstTradePrice: 900_000,       // min USDC out (6 decimals) — $0.90 for 0.01 SOL at ~$90/SOL
        targetGainPercentage: 1.5,
        initialInputToken: SwapToken.SOL,
        initialInputAmount: 10_000_000, // 0.01 SOL in lamports
    });

    await bot.init();
Let's define the refreshBalances and initiatePriceWatch methods that we call in the constructor's init method.
Refresh Balances
The refreshBalances method will be used to fetch the current SOL and USDC balances of the bot's wallet. Add the following to bot.ts:
    private async refreshBalances(): Promise<void> {
        try {
            const results = await Promise.allSettled([
                this.rpc.getBalance(this.wallet.address).send(),
                this.rpc.getTokenAccountBalance(this.usdcTokenAccount).send()
            ]);

            const solBalanceResult = results[0];
            const usdcBalanceResult = results[1];

            if (solBalanceResult.status === 'fulfilled') {
                this.solBalance = solBalanceResult.value.value;
            } else {
                console.error('Error fetching SOL balance:', solBalanceResult.reason);
            }

            if (usdcBalanceResult.status === 'fulfilled') {
                this.usdcBalance = usdcBalanceResult.value.value.uiAmount ?? 0;
            } else {
                this.usdcBalance = 0;
            }

            if (this.solBalance < LAMPORTS_PER_SOL / 100n) {
                this.terminateSession("Low SOL balance.");
            }
        } catch (error) {
            console.error('Unexpected error during balance refresh:', error);
        }
    }
Here's what we're doing:
- Using
Promise.allSettledto fetch the SOL and USDC balances in parallel, using thegetBalanceandgetTokenAccountBalancemethods on the Kit RPC client. Note that.send()is required to execute the RPC call. Kit uses a builder pattern that lets you configure the request before sending. - We then update the bot's SOL and USDC balances based on the results if they are successful, otherwise we log the error.
- We also check if the SOL balance is less than 0.01 SOL and terminate the bot if it is.
Initiate Price Watch
The initiatePriceWatch method will be used to start the price watch interval. Add the following to bot.ts:
    private initiatePriceWatch(): void {
        this.priceWatchIntervalId = setInterval(async () => {
            const currentTime = Date.now();
            if (currentTime - this.lastCheck >= this.checkInterval) {
                this.lastCheck = currentTime;
                try {
                    if (this.waitingForConfirmation) {
                        console.log('Waiting for previous transaction to confirm...');
                        return;
                    }
                    const quote = await this.getQuote(this.nextTrade);
                    this.evaluateQuoteAndSwap(quote);
                } catch (error) {
                    console.error('Error getting quote:', error);
                }
            }
        }, this.checkInterval);
    }
This is just a simple interval that will call the getQuote method and then the evaluateQuoteAndSwap method if:
- The time since the last check is greater than the check interval and
- The bot is not waiting for confirmation before proceeding (we will include toggles for this in the
executeSwapandpostTransactionProcessingmethods to ensure the bot does not attempt to execute a trade while waiting for confirmation).
Let's define the getQuote, evaluateQuoteAndSwap, and executeSwap methods next.
Get Quote
To get a quote, we will rely on Jupiter's quoteGet method. Add the following to bot.ts:
    private async getQuote(quoteRequest: QuoteGetRequest): Promise<QuoteResponse> {
        try {
            const quote: QuoteResponse | null = await this.jupiterApi.quoteGet(quoteRequest);
            if (!quote) {
                throw new Error('No quote found');
            }
            return quote;
        } catch (error) {
            if (error instanceof ResponseError) {
                console.log(await error.response.json());
            }
            else {
                console.error(error);
            }
            throw new Error('Unable to find quote');
        }
    }
This should look familiar to our example in the overview sections. We are simply passing the quote request to the quoteGet method and returning the quote if it exists, otherwise we log the error and throw a new error. If you refer back to initiatePriceWatch, you can see that we will pass this.nextTrade to this method. Our NextTrade interface extends the QuoteGetRequest interface, so we can pass it directly to the quoteGet method 🙌.
Evaluate Quote and Swap
We need a way to ensure a quote meets our conditions before executing a trade. We will define the evaluateQuoteAndSwap method to handle this. Add the following to bot.ts:
    private async evaluateQuoteAndSwap(quote: QuoteResponse): Promise<void> {
        let difference = (parseInt(quote.outAmount) - this.nextTrade.nextTradeThreshold) / this.nextTrade.nextTradeThreshold;
        console.log(`📈 Current price: ${quote.outAmount} is ${difference > 0 ? 'higher' : 'lower'
            } than the next trade threshold: ${this.nextTrade.nextTradeThreshold} by ${Math.abs(difference * 100).toFixed(2)}%.`);
        if (parseInt(quote.outAmount) > this.nextTrade.nextTradeThreshold) {
            try {
                this.waitingForConfirmation = true;
                await this.executeSwap(quote);
            } catch (error) {
                console.error('Error executing swap:', error);
            }
        }
    }
Our evaluateQuoteAndSwap method will accept the response from the quoteGet method and then calculate the difference between the quote's output amount and the next trade threshold. If the difference is positive, we will execute the swap. We will also set the waitingForConfirmation flag to true to prevent the bot from attempting to execute another trade while waiting for confirmation. For debugging/demonstration, we will also log the current price and the difference between the current price and the next trade threshold.
Confirm Transaction
Rather than writing a manual polling loop, we use Kit's sendAndConfirmTransactionFactory. We initialize it in init() alongside the wallet:
this.sendAndConfirmTransaction = sendAndConfirmTransactionFactory({
    rpc: this.rpc,
    rpcSubscriptions: this.rpcSubscriptions,
});
Under the hood it uses the WebSocket subscriptions client to watch for the transaction signature and throws if the transaction fails or times out. We call it in executeSwap after signing.
Execute Swap
Finally, if our bot detects that market conditions are appropriate to satisfy our trade requirements, we should execute the trade. We are going to pack a lot into this method:
- Fetch the swap instructions from Jupiter's API
- Refactor our received instruction data to transaction instructions
- Fetch the address lookup table accounts
- Create and send a Solana Transaction
- On success, log the swap and update the next trade conditions
Let's add our code, and then we will break it down:
    private async executeSwap(route: QuoteResponse): Promise<void> {
        try {
            const {
                computeBudgetInstructions,
                setupInstructions,
                swapInstruction,
                cleanupInstruction,
                addressLookupTableAddresses,
            } = await this.jupiterApi.swapInstructionsPost({
                swapRequest: {
                    quoteResponse: route,
                    userPublicKey: this.wallet.address,
                    prioritizationFeeLamports: {
                        priorityLevelWithMaxLamports: {
                            priorityLevel: 'high',
                            maxLamports: 1_000_000,
                        }
                    }
                },
            });

            const instructions: Instruction[] = [
                ...computeBudgetInstructions.map(this.jupiterInstructionToKitInstruction.bind(this)),
                ...setupInstructions.map(this.jupiterInstructionToKitInstruction.bind(this)),
                this.jupiterInstructionToKitInstruction(swapInstruction),
                this.jupiterInstructionToKitInstruction(cleanupInstruction),
            ].filter((ix): ix is Instruction => ix !== null);

            const alts = await this.getAddressLookupTableAccounts(addressLookupTableAddresses);

            const { value: latestBlockhash } = await this.rpc.getLatestBlockhash().send();

            const message = pipe(
                createTransactionMessage({ version: 0 }),
                (m) => setTransactionMessageFeePayerSigner(this.wallet, m),
                (m) => setTransactionMessageLifetimeUsingBlockhash(latestBlockhash, m),
                (m) => appendTransactionMessageInstructions(instructions, m),
                (m) => compressTransactionMessageUsingAddressLookupTables(m, alts),
            );

            const signedTx = await signTransactionMessageWithSigners(message);
            const signature = getSignatureFromTransaction(signedTx);
            await this.sendAndConfirmTransaction(signedTx, { commitment: 'confirmed', skipPreflight: true });
            await this.postTransactionProcessing(route, signature);
        } catch (error) {
            if (error instanceof ResponseError) {
                console.log(await error.response.json());
            }
            else {
                console.error(error);
            }
            throw new Error('Unable to execute swap');
        } finally {
            this.waitingForConfirmation = false;
        }
    }
- First, we are fetching the swap instructions from Jupiter's API by calling
this.jupiterApi.swapInstructionsPost. We are passing in the quote received from thegetQuotemethod, our wallet's address (necessary to build a user-specific instruction set), and a prioritization fee (we are usingpriorityLevelWithMaxLamportswith ahighpriority level and a cap of 1,000,000 lamports). You can explore additional optional arguments by checking the Jupiter API Docs. - We then convert the Jupiter instruction objects to Kit
IInstructiontypes usingjupiterInstructionToKitInstruction. This maps each account'sisSigner/isWritableflags to Kit'sAccountRoleenum and decodes the base64 instruction data to aUint8Array. - We fetch the address lookup table accounts using
getAddressLookupTableAccounts. Complex swap routes reference many pool and vault accounts; the ALT data lets us compress those addresses in the final transaction and stay within Solana's 1232-byte transaction size limit. - We build the transaction message using Kit's
pipepattern: create a V0 message, set the fee payer signer (which also embeds the signing key for the next step), attach the blockhash lifetime, append instructions, then compress with address lookup tables. - We sign with
signTransactionMessageWithSigners(which reads the embedded signer from the fee payer), extract the signature for logging, then send and confirm in one call. - After confirming the transaction was successful, we call the
postTransactionProcessingmethod to trigger necessary steps after a successful swap (updateNextTrade,refreshBalances, andlogSwap). We already haverefreshBalancesandlogSwapdefined, so we will defineupdateNextTradein the next section.
Update Next Trade
Finally, after a trade executes, we need to change our arguments for the next swap (redefining our NextTrade interface). We will define the updateNextTrade method to handle this. Add the following to bot.ts:
    private async updateNextTrade(lastTrade: QuoteResponse): Promise<void> {
        const priceChange = this.targetGainPercentage / 100;
        this.nextTrade = {
            inputMint: this.nextTrade.outputMint,
            outputMint: this.nextTrade.inputMint,
            amount: parseInt(lastTrade.outAmount),
            slippageBps: 300,
            nextTradeThreshold: parseInt(lastTrade.inAmount) * (1 + priceChange),
        };
    }
For simplicity in this example, we will just swap the input and output mints (meaning, if we were buying SOL with USDC before, the next swap should sell USDC for SOL). We will also set the next trade thresholds. Our amount is the number of tokens we will put into our next trade. We are defining that as the amount of tokens we got out of the previous trade. Our nextTradeThreshold is the price at which we will execute our next trade. We define that as the number of tokens we put into our previous trade plus our target gain percentage. For example, if we used 10 USDC to buy 0.1 SOL in our previous trade and our target gain percentage is 15%; our next trade input (amount) will be 0.1 SOL, and the next trade threshold will be 11.5 USDC (meaning we expect our next trigger to yield 11.5 USDC).
Great work! You have now defined the core logic of our trading bot. All we need to do is create a client and run the bot. Let's do that now.
Create Client
Open index.ts and add the following code:
import { ArbBot, SwapToken } from './bot';

const defaultConfig = {
    solanaEndpoint: 'https://api.mainnet-beta.solana.com',
    jupiter: "https://quote-api.jup.ag/v6",
};

async function main() {
    if (!process.env.SECRET_KEY) {
        throw new Error("SECRET_KEY environment variable not set");
    }
    let decodedSecretKey = Uint8Array.from(JSON.parse(process.env.SECRET_KEY));

    const bot = new ArbBot({
        solanaEndpoint: process.env.SOLANA_ENDPOINT ?? defaultConfig.solanaEndpoint,
        metisEndpoint: process.env.METIS_ENDPOINT ?? defaultConfig.jupiter,
        secretKey: decodedSecretKey,
        firstTradePrice: 900_000,       // min USDC out (6 decimals) — $0.90 for 0.01 SOL at ~$90/SOL
        targetGainPercentage: 1.5,
        initialInputToken: SwapToken.SOL,
        initialInputAmount: 10_000_000, // 0.01 SOL in lamports
    });

    await bot.init();

}

main().catch(console.error);
This simple client will create an instance of our ArbBot and call the init method. Environment variables are loaded from the .env file at startup via Node's --env-file flag. We have included a default configuration object that will be used if the environment variables are not set. Let's explain our other input parameters to make sure we understand what's happening:
firstTradePriceis the minimum output amount we expect to receive in our first trade, expressed in the output token's smallest unit. In our example, the bot sells SOL for USDC, so900_000means we expect at least 0.90 USDC (6 decimals) out.targetGainPercentageis the percentage gain we want to achieve in our trades. In our example, we are setting this to 1.5%. This means subsequent trades will be triggered when the price moves 1.5% above the previous trade's input amount.initialInputTokenis the token we will use to initiate our first trade. In our example, we are setting this to SOL.initialInputAmountis the amount of tokens we will use to initiate our first trade, in the token's smallest unit. In our example,10_000_000lamports = 0.01 SOL.
In short, we are setting up our bot to sell 0.01 SOL and expect at least 0.90 USDC out. Subsequent trades will be triggered when the output amount is 1.5% above the previous trade's input amount.
Run the Bot
Currently, Jupiter trading API is only available on Mainnet, meaning any trades executed will be real and irreversible. Please ensure you have a good understanding of the bot's logic and the potential risks before running it on Mainnet.
In your terminal, run the following command to start the bot:
npx tsx --env-file=.env index.ts
And that's it! You should see our 🤖 log initiating the bot and regular logs for price updates and confirmation of successful trades!
🤖 Initiating arb bot for wallet: JUPz...Q1ie.
🏦 Current balances:
SOL: 0.01271548,
USDC: 10.087
📈 Current price: 97624457 is lower than the next trade threshold: 100000000 by 2.38%.
✅ Logged swap: 10000000 So11111111111111111111111111111111111111112 -> 910723 EPjFW...Dt1v,
  TX: BoC7...i2nr
You can find our complete code on our GitHub.
Frequently Asked Questions
What is Jupiter API and how does it integrate with Quicknode?
Metis is Jupiter's onchain routing engine, now an independent project at metis.builders. It exposes an HTTP API (/quote, /swap-instructions) for fetching swap quotes and building Solana transactions. Quicknode's Metis add-on hosts the Metis binary on Quicknode's infrastructure, giving you a private, managed endpoint that works alongside your Solana RPC endpoint without any setup on your part.
How does the trading strategy work in the example bot?
The bot starts with an initial token (SOL or USDC), monitors prices at set intervals using Jupiter quotes, and swaps when the price meets a target gain threshold (e.g., 1.5% profit). After a successful trade, it updates conditions for the reverse trade and logs all swap details to a JSON file.
What role does Quicknode's Metis add-on play?
Quicknode's Metis add-on hosts the Metis binary (Jupiter's onchain routing engine) on Quicknode's infrastructure. It provides the basePath for the @jup-ag/api client and exposes the same /quote and /swap-instructions endpoints the bot uses. The add-on runs on its own Solana validator node with rolling restarts and low latency, and doesn't use your account credits.
How does the bot execute a swap transaction?
The bot fetches swap instructions from Jupiter, converts them to Solana transaction instructions, adds address lookup tables, signs the transaction with your wallet, and sends it. Upon success, it confirms the transaction, logs the swap details, refreshes balances, and updates next trade conditions.
Is Jupiter API free to use?
Jupiter API can be accessed through Quicknode's Metis add-on (which doesn't use your account credits) or through a public endpoint at jupiterapi.com. The guide uses Quicknode's infrastructure for enhanced performance and reliability.
Wrap Up
You have now experimented with the Jupiter API and Quicknode's Metis add-on. You have also built a simple trading bot that uses Jupiter's API to monitor the market for specific conditions and execute trades when those conditions are met. You can now experiment with different trade conditions and strategies to see how the bot performs. Looking for inspiration? Here are a few ideas:
- Integrate durable nonces into your bot to increase transaction speed
- Utilize Solana's Websocket Methods to monitor your bot's trading activity in real-time
- Integrate Jupiter Terminal in your website
Resources
- Jupiter API Docs
- Metis Binary
- Metis: Quicknode Jupiter API Add-on
- Public Jupiter API Endpoint
- Guide: How to Swap Tokens With Jupiter Ultra API
- Jupiter Trading Bot Sample App
If you have a question or idea you want to share, drop us a line on Discord or Twitter!
We ❤️ Feedback!
Let us know if you have any feedback or requests for new topics. We'd love to hear from you.