10 min read
Overview
A critical component of Solana programming is the Program Derived Address (PDA). PDAs are particular addresses for which a program can programmatically generate valid transaction signatures. This enables programs to offer trustless services like escrow accounts for safely managing trades, bets, or DeFi protocols.
Solana deterministically derives PDAs based on seeds defined by the program and the program ID. You can find more information about generated Program Addresses at docs.solana.
What You Will Do
In this guide, you will create a Solana Program using Anchor and Solana Playground. The Program will allow any user (wallet) to create or edit a review for any restaurant. For each entry, the program will store the reviewer, the restaurant name, the rating, and the review.
You will learn:
- What "seeds" are
- How to create PDAs in your Solana Program
- How to use transaction instructions to invoke PDAs based on client-side input
- How to find and use PDAs from your client
What You Will Need
- Basic experience with Solana Programming using Anchor (Complete our Counter Program Guide)
- Basic knowledge of Solana Fundamentals
- Basic knowledge of the JavaScript/TypeScript and Rust programming languages
- A modern web browser (e.g., Google Chrome)
Overview of PDAs
A Program Derived Address (PDA) is a type of account on the Solana blockchain that is associated with and owned by a program rather than a specific user or account. PDAs allow us to create unique data associations, manage escrow balances, and handle many other trustless applications. PDAs are deterministically generated by passing an array of seeds (e.g., escrow_account, signer_id, etc.) and the program ID. Unlike typical keypairs, PDAs do not have corresponding private keys. They are generated by passing the seeds and program ID through a sha256 hash function to look for an address that is not on the ed25519 elliptic curve (addresses on the curve are keypairs). The "bump" is effectively a set distance off the curve we use to find our PDA deterministically.
In our program, we will use a PDA to store each review. We will allow any users to generate a review for any restaurant. To do this, we will need to deterministically generate a PDA for every unique reviewer-restaurant pair submitted. The figure below illustrates how this might work in practice:
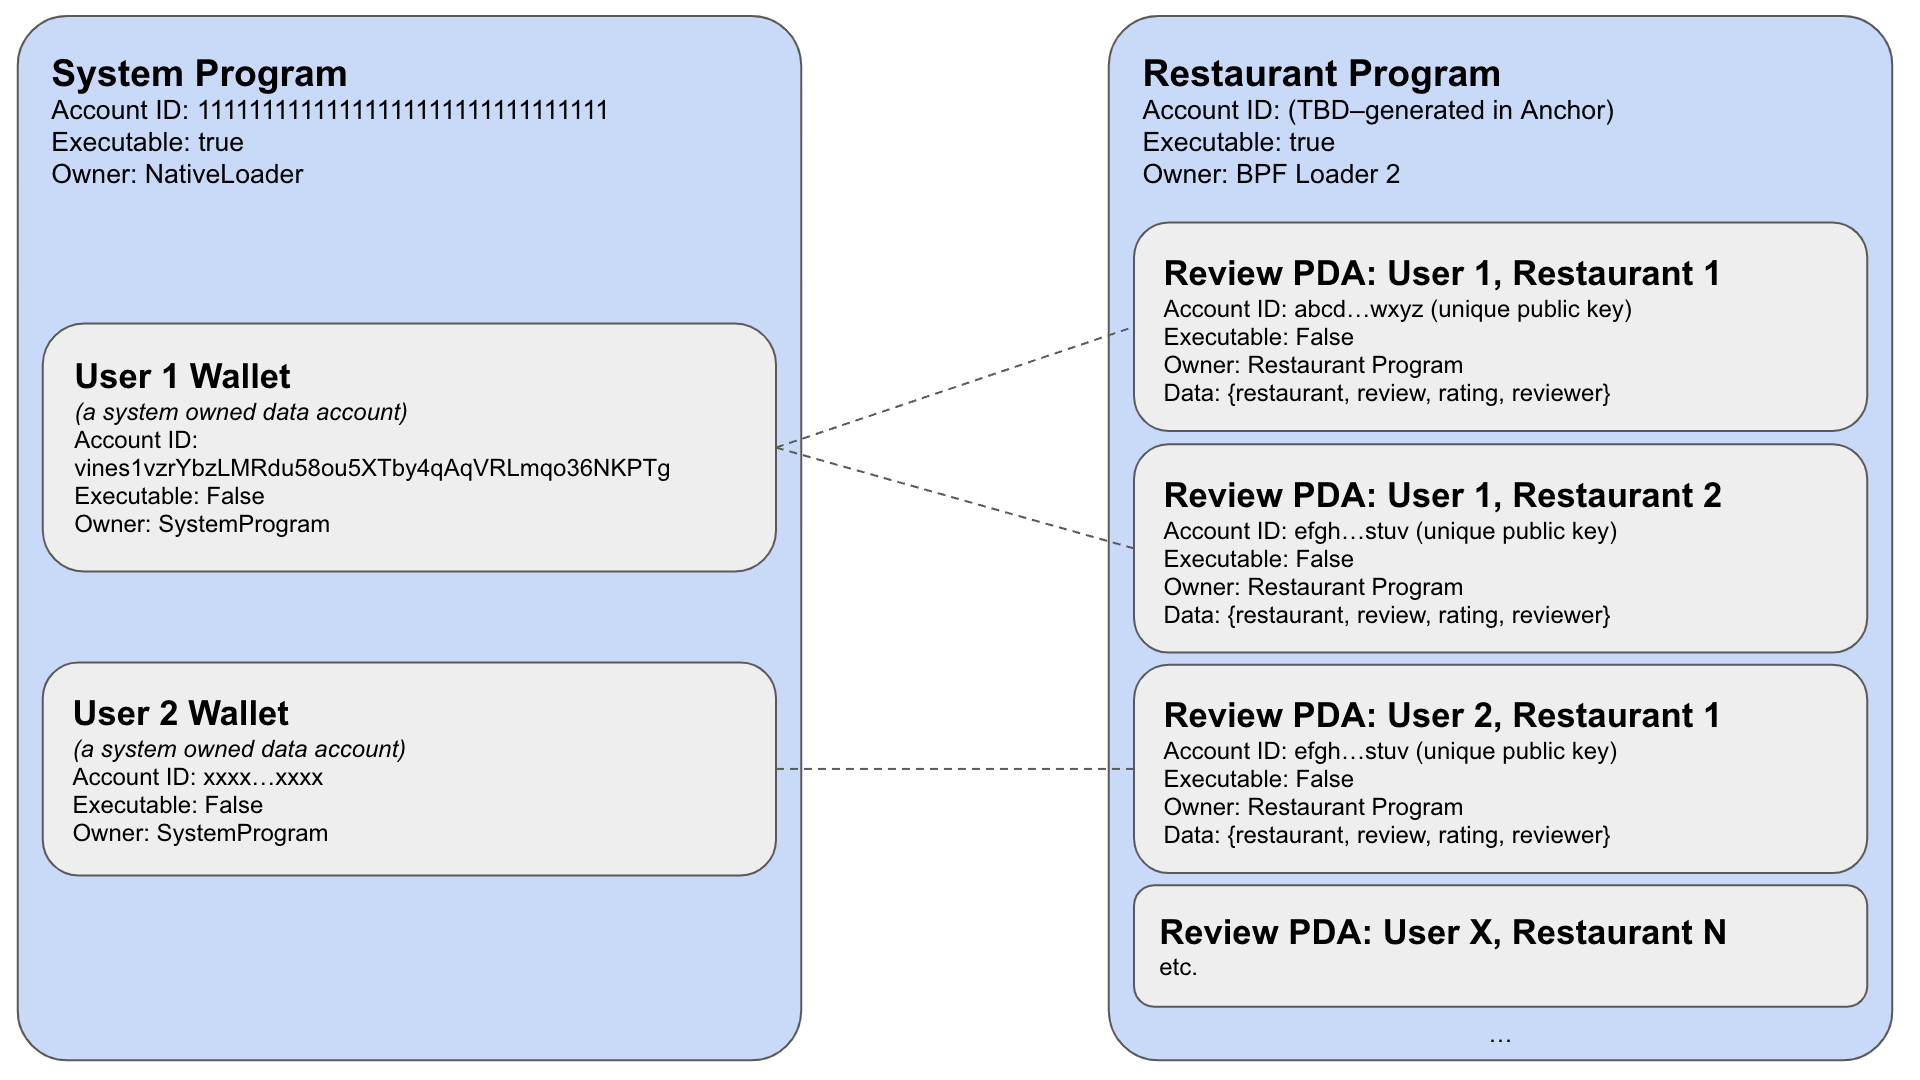
As you can see, any reviewer may have any number of PDAs associated with each restaurant they review. Do not worry if this does not entirely make sense just yet. Practice helps these concepts sink in a bit more. Let's jump in and build it!
Initiate Your Project
Create a new Anchor project on Solana Playground. Open lib.rs. Delete the existing contents, and paste this code:
use anchor_lang::prelude::*;

declare_id!("11111111111111111111111111111111");

#[program]
mod restaurant_review {
    use super::*;
    pub fn post_review(ctx: Context<ReviewAccounts>, restaurant: String, review: String, rating: u8) -> Result<()> {
        msg!("New restaurant review!");
        Ok(())
    }
}

#[derive(Accounts)]
#[instruction(restaurant: String, review: String)]
pub struct ReviewAccounts<'info> {

}

#[account]
pub struct Review {

}
Create and Connect a Wallet
If you have used Solana Playground and already have a wallet connected with a balance, feel free to skip this step.
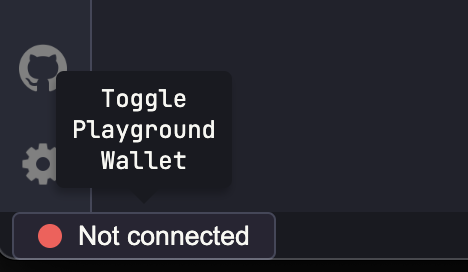
Since this project is just for demonstration purposes, we can use a "throw-away" wallet. Solana Playground makes it easy to create one. You should see a red dot "Not connected" in the bottom left corner of the browser window. Click it:
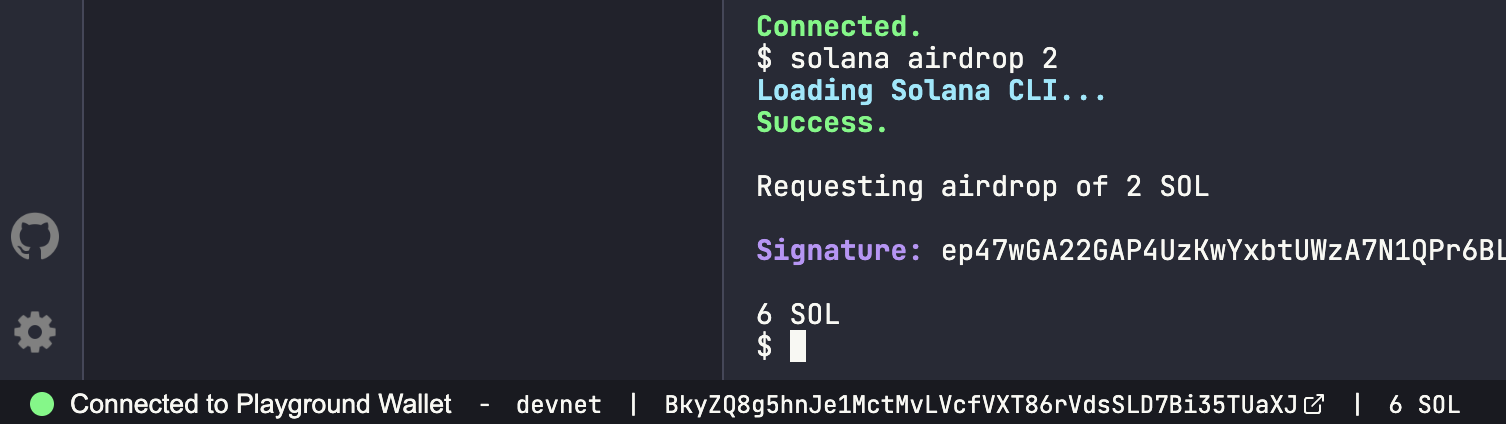
Solana Playground will generate a wallet for you (or you can import your own). Feel free to save it for later use if you like, and click continue when you're ready. A new wallet will be initiated and connected to Solana devnet. Solana Playground airdrops some SOL to your new wallet automatically, but we will request a little extra to ensure we have enough for deploying our program. In the browser terminal, you can use Solana CLI commands. Enter solana airdrop 2 to drop 2 SOL into your wallet. Your wallet should now be connected to devnet with a balance of 6 SOL:
You are ready to go! Let's build!
Define a Review Account
It is helpful to define our structs first. Ultimately, we will store each review in a data account called Review. Each Review account will store four elements:
- the Public Key of the reviewer,
- the Restaurant that they will be reviewing,
- a numeric rating, and
- a brief review
Inside lib.rs, find your account definition for Review and replace it with:
#[account]
pub struct Review {
    pub reviewer: Pubkey,
    pub restaurant: String,
    pub review: String,
    pub rating: u8
}
Any time a review is submitted or updated, it should take this form. Now, let's create our accounts context to ensure we save our Reviews in the correct PDA.
Create Review Account Context
As you know from previous exercises, our Contexts are essential in defining which accounts we must pass into our program. Our program will need the ability to create (and pay for) a new Review account if one does not already exist. As such, we will need to pass the System Program, our signer wallet, and the PDA of the Review.
Find your ReviewAccounts struct place holder and add the three required accounts: review, signer, and system_program:
#[derive(Accounts)]
#[instruction(restaurant: String)]
pub struct ReviewAccounts<'info> {
    #[account(
        init_if_needed,
        payer = signer,
        space = 500,
        seeds = [restaurant.as_bytes().as_ref(), signer.key().as_ref()],
        bump
    )]
    pub review: Account<'info,Review>,
    #[account(mut)]
    pub signer: Signer<'info>,
    pub system_program: Program<'info, System>,
}
Let's break that down.
- First, we must pass in our review account. This will ultimately be where our review data is stored. We must pass several constraints within the review account attributes:
- init_if_needed to create the account if it does not exist.
- payer the wallet signing the transaction will pay rent for a new account (required using init or init_if_needed).
- space the number of bytes the new account should hold (required using init or init_if_needed). Note: we are arbitrarily using 200 bytes here. This may limit the length of reviews a user can enter. We will cover dynamic space in a future guide.
- seeds and bump will check that the passed account is a PDA derived from the currently executing program, the seeds, and the bump. Because we want any user to be able to review any unique restaurant (just one time), we will pass the name of the restaurant we are reviewing and the signer's key. We need to reference both objects as a Byte Buffer, which is what Solana's find_program_address requires to find the PDA.
- The signer account must be marked as mutable as the account will be written (SOL debit to fund the new account).
- system_program will get called through a cross-program invocation to create the new account (always required for init or init_if_needed).
Awesome! Now that our structs are defined, we should be able to write our post_review function.
Create a Post Review Function
Though Anchor will do a lot of magic behind the scenes, we still need a function that sets the data in our new account. To do this, we must pass in our client-side inputs (the accounts context we defined in the previous step, the restaurant, the review, and the rating).
Find your post_review placeholder and replace it with the following code:
#[program]
mod restaurant_review {
    use super::*;
    pub fn post_review(ctx: Context<ReviewAccounts>, restaurant: String, review: String, rating: u8) -> Result<()> {
        let new_review = &mut ctx.accounts.review;
        new_review.reviewer = ctx.accounts.signer.key();
        new_review.restaurant = restaurant;
        new_review.review = review;
        new_review.rating = rating;
        msg!("Restaurant review for {} - {} stars", new_review.restaurant, new_review.rating);
        msg!("Review: {}", new_review.review);

        Ok(())
    }
}
First, we need to let our program know that the PDA account we passed is going to be mutable (the & allows us to access our account via reference, and mut makes the account mutable), and we define that as new_review. Then for each of the elements of the Review struct, we set the value of new_review to the parameters we pass in from the client side (and set the reviewer equal to the signer).
Finally, we log our review to the Solana message logs.
When deploying production applications, you will want to include some error handling and protections in your instruction, but this should work for our purposes today. We will cover error handling in a future guide.
Deploy Your Program
Before testing our program, we will need to compile it and deploy it to Devnet:
- Click 🔧 Build on the left side of your screen to compile your code and check for errors. You should not see any errors if you follow our examples exactly as we did. If you see errors, try and follow the error message to locate your issue (often, it's a spelling or capitalization issue). If you get stuck, feel free to shoot us a note on Discord, and we will be happy to help.
- Click the Tools Icon 🛠 on the left side of the page, and then click "Deploy." This will deploy the program to devnet.
- Note: Solana Playground is still in beta. I had to refresh after deploying for my client-side Types to update with my new function. You may need to do this as well.
Test Your Program
Head back to your Solana Playground explorer by clicking the Documents Icon 📑 in the top left and navigate to client.ts. We are going to write a simple script that invokes our program.
// Step 1 - Define Review Inputs
const RESTAURANT = "Quick Eats";
const RATING = 5;
const REVIEW = "Always super fast!";

// Step 2 - Fetch the PDA of our Review account
const [REVIEW_PDA] = await anchor.web3.PublicKey.findProgramAddress(
  [Buffer.from(RESTAURANT), pg.wallet.publicKey.toBuffer()],
  pg.program.programId
);

console.log(`Reviewer: ${pg.wallet.publicKey.toString()}`);
console.log(`Review PDA: ${REVIEW_PDA.toString()}`);

// Step 3 - Fetch Latest Blockhash
let latestBlockhash = await pg.connection.getLatestBlockhash('finalized');

// Step 4 - Send and Confirm the Transaction
const tx = await pg.program.methods
  .postReview(
    RESTAURANT,
    REVIEW,
    RATING
  )
  .accounts({ review: REVIEW_PDA })
  .transaction();

const txId = await web3.sendAndConfirmTransaction(pg.connection, tx, [pg.wallet.keypair]);
console.log(`https://explorer.solana.com/tx/${txId}?cluster=devnet`);

// Step 5 - Fetch the data account and log results
const data = await pg.program.account.review.fetch(REVIEW_PDA);
console.log(`Reviewer: `,data.reviewer.toString());
console.log(`Restaurant: `,data.restaurant);
console.log(`Review: `,data.review);
console.log(`Rating: `,data.rating);
You can now access Logs for your RPC endpoints, helping you troubleshoot issues more effectively. If you encounter an issue with your RPC calls, simply check the logs in your QuickNode dashboard to identify and resolve problems quickly. Learn more about log history limits on our pricing page.
Let's break that down:
- Define the contents of the review we will be posting.
- Fetch the PDA of our review. Remember, in Solana programming, we must pass public keys for every account we will use into our transaction (even new ones). We call findProgramAddress and pass the same seeds we defined in our program: the restaurant name and the signer wallet. Both are converted to a byte buffer
- Fetch the latest blockhash. We need this to confirm that our transaction has been successfully added to the block.
- We use Anchor to call our program's post_review (note here in TypeScript, it is formatted postReview). We must pass the same parameters defined in our post_review method in lib.rs (restaurant, review, and rating). Anchor will allow us to pass the accounts defined in our ReviewAccounts struct using .accounts(): review PDA, signer, and system program. Anchor knows we need to pass the system program and signer, so we do not need to add that here.
- Finally, fetch the review by passing the REVIEW_PDA into review.fetch. This should return an object of type Review (as defined in our program struct). We then parse and log the results.
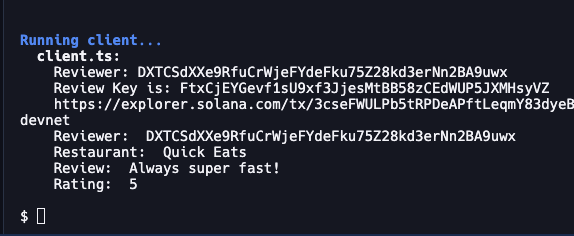
When you are ready with your review, click "▶️ Run." You should see that the program has logged your review!
Because we set our PDA up to depend on Restaurant and Signer key, you can add more entries by modifying the RESTAURANT in your client and running again. If you rerun it with the same RESTAURANT name, the program (as implemented) will overwrite the previous entry.
Great work!
Wrap Up
Great job with this! Understanding how to create and interact with PDAs is one of the most powerful tools to develop on Solana. Want to keep practicing? Here are a couple of ideas to modify this code to keep learning:
- How might you modify this code so that create_review and modify_review are two distinct instructions?
- How might you modify this code so a user could have multiple entries for a restaurant with multiple locations? (Hint: a new parameter locations and consider how you might use that in your PDA derivation)
- How might you modify this code to limit users' Reviews to predefined Restaurants? (Hint: try creating a new struct Restaurant and a new function add_restaurant)
If you're stuck, have questions, or just want to talk about what you're building, drop us a line on Discord or Twitter!
We ❤️ Feedback!
If you have any feedback on this guide, let us know. We’d love to hear from you.