
18 min read
Overview
Have you ever wanted to reward your users with a token for completing a task? Smart contracts allow you to create rules that govern how your token is distributed and used. This guide will teach you how to create and mint fungible SPL tokens on Solana using Anchor. We will cover the necessary code for both the program and tests to ensure a seamless transfer of tokens between accounts.
What You Will Do
- Create a Solana program using Anchor and Solana Playground
- Create a program instruction to create a new SPL token with metadata
- Create a program instruction to mint tokens to a specified account
- Write tests to verify and execute the instructions
What You Will Need
- Basic experience with building in Anchor (Guide: Getting Started with Anchor)
- Experience with Solana Fungible tokens
- Experience with Rust programming language
- Basic knowledge of the JavaScript/TypeScript
- A modern web browser (e.g., Google Chrome)
- About 8 SOL on Solana Devnet to deploy your program (check our Complete Guide to Airdropping Test SOL on Solana)
Dependencies Used in this Guide
| Dependency | Version |
|---|---|
| anchor-lang | 0.29.0 |
| anchor-spl | 0.29.0 |
| solana-program | 1.16.24 |
| spl-token | 4.0.0 |
Initiate Your Project
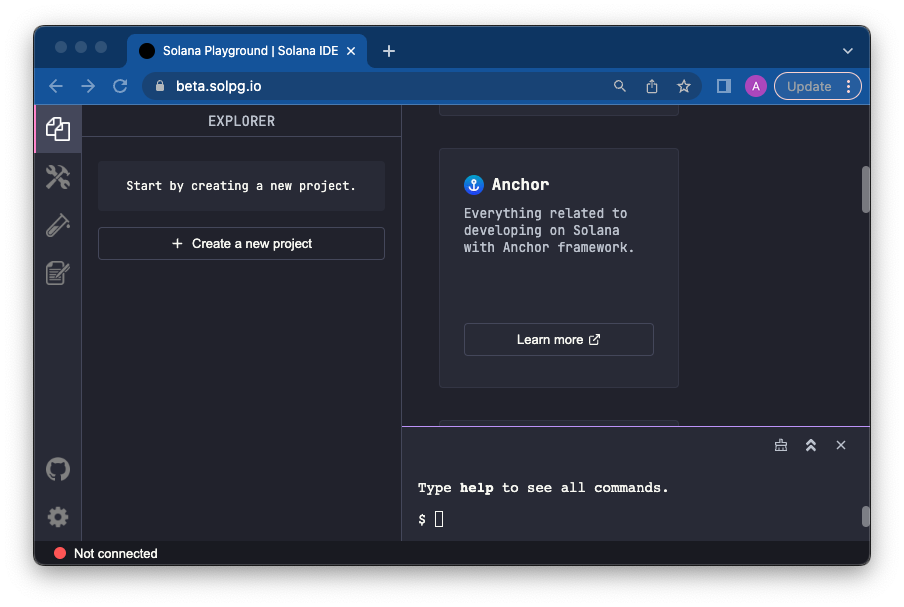
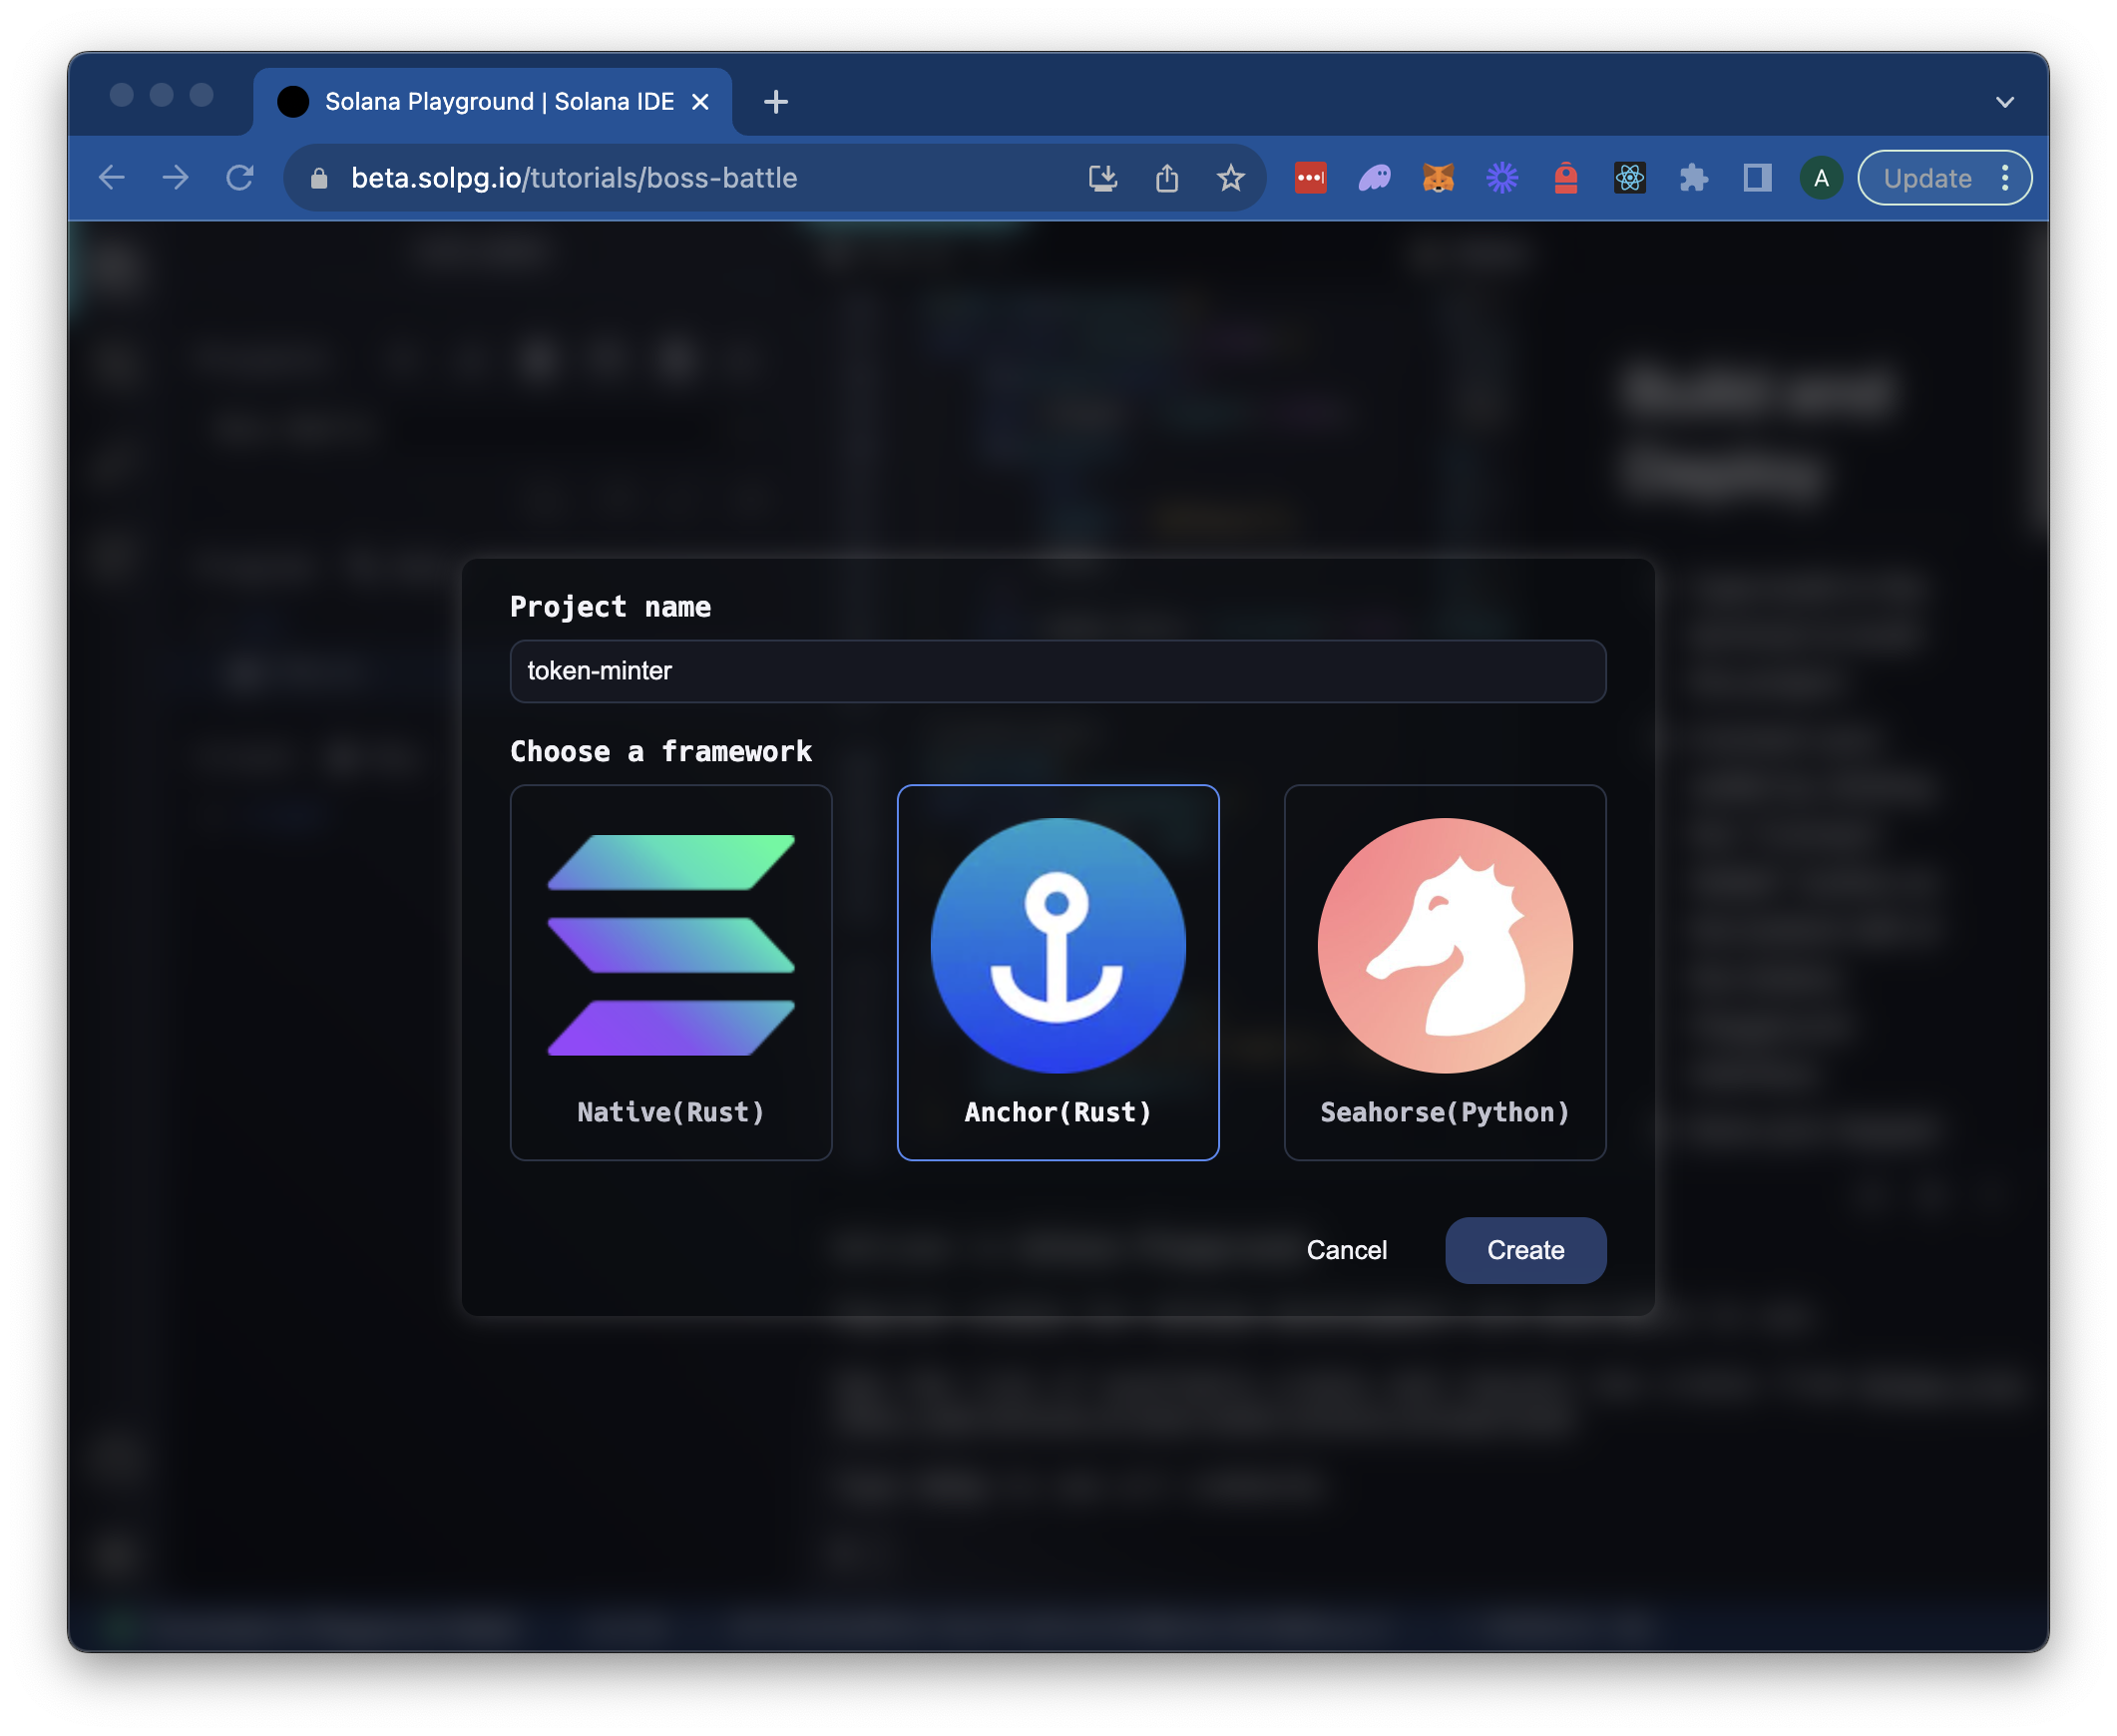
Create a new project in Solana Playground by going to https://beta.solpg.io/. Solana Playground is a browser-based Solana code editor that will allow us to get up and running with this project quickly. You're welcome to follow along in your own code editor, but this guide will be tailored to Solana Playground's required steps. First, click "Create a new project":
Enter a project name, "token-minter," and select "Anchor (Rust)":
Set up Your Workspace
Connect to a Solana Cluster with Your Quicknode Endpoint
To build on Solana, you'll need an API endpoint to connect with the network. You're welcome to use public nodes or deploy and manage your own infrastructure; however, if you'd like 8x faster response times, you can leave the heavy lifting to us.
See why over 50% of projects on Solana choose Quicknode and start your free trial here. We're going to use a Solana Devnet endpoint.
Copy the HTTP Provider link: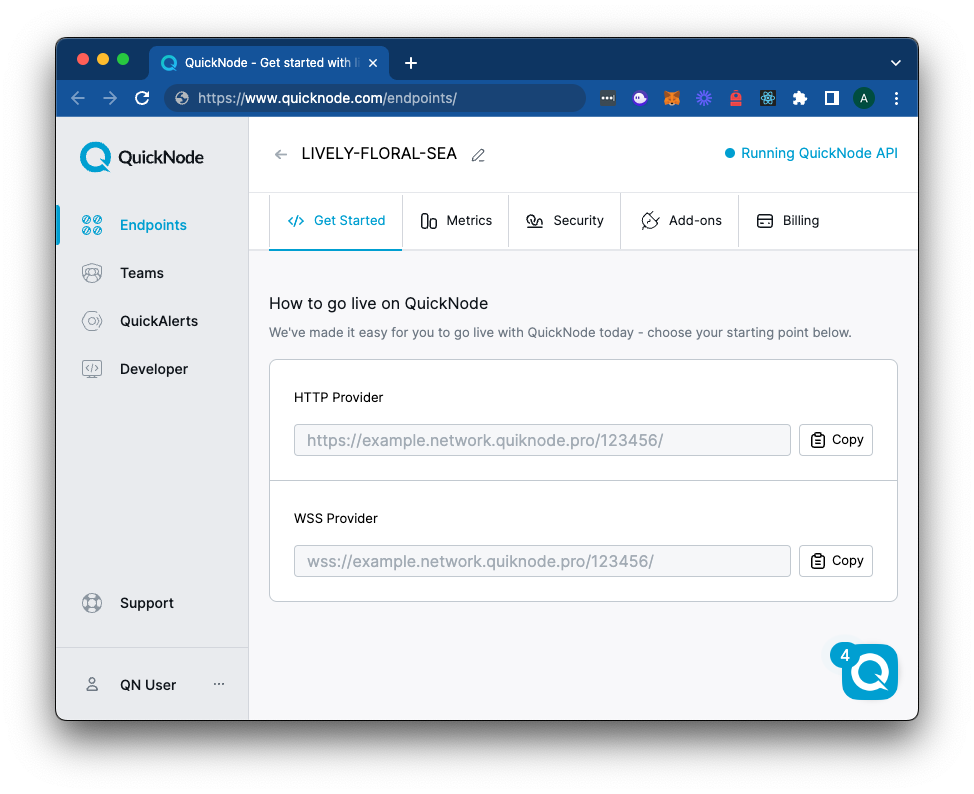
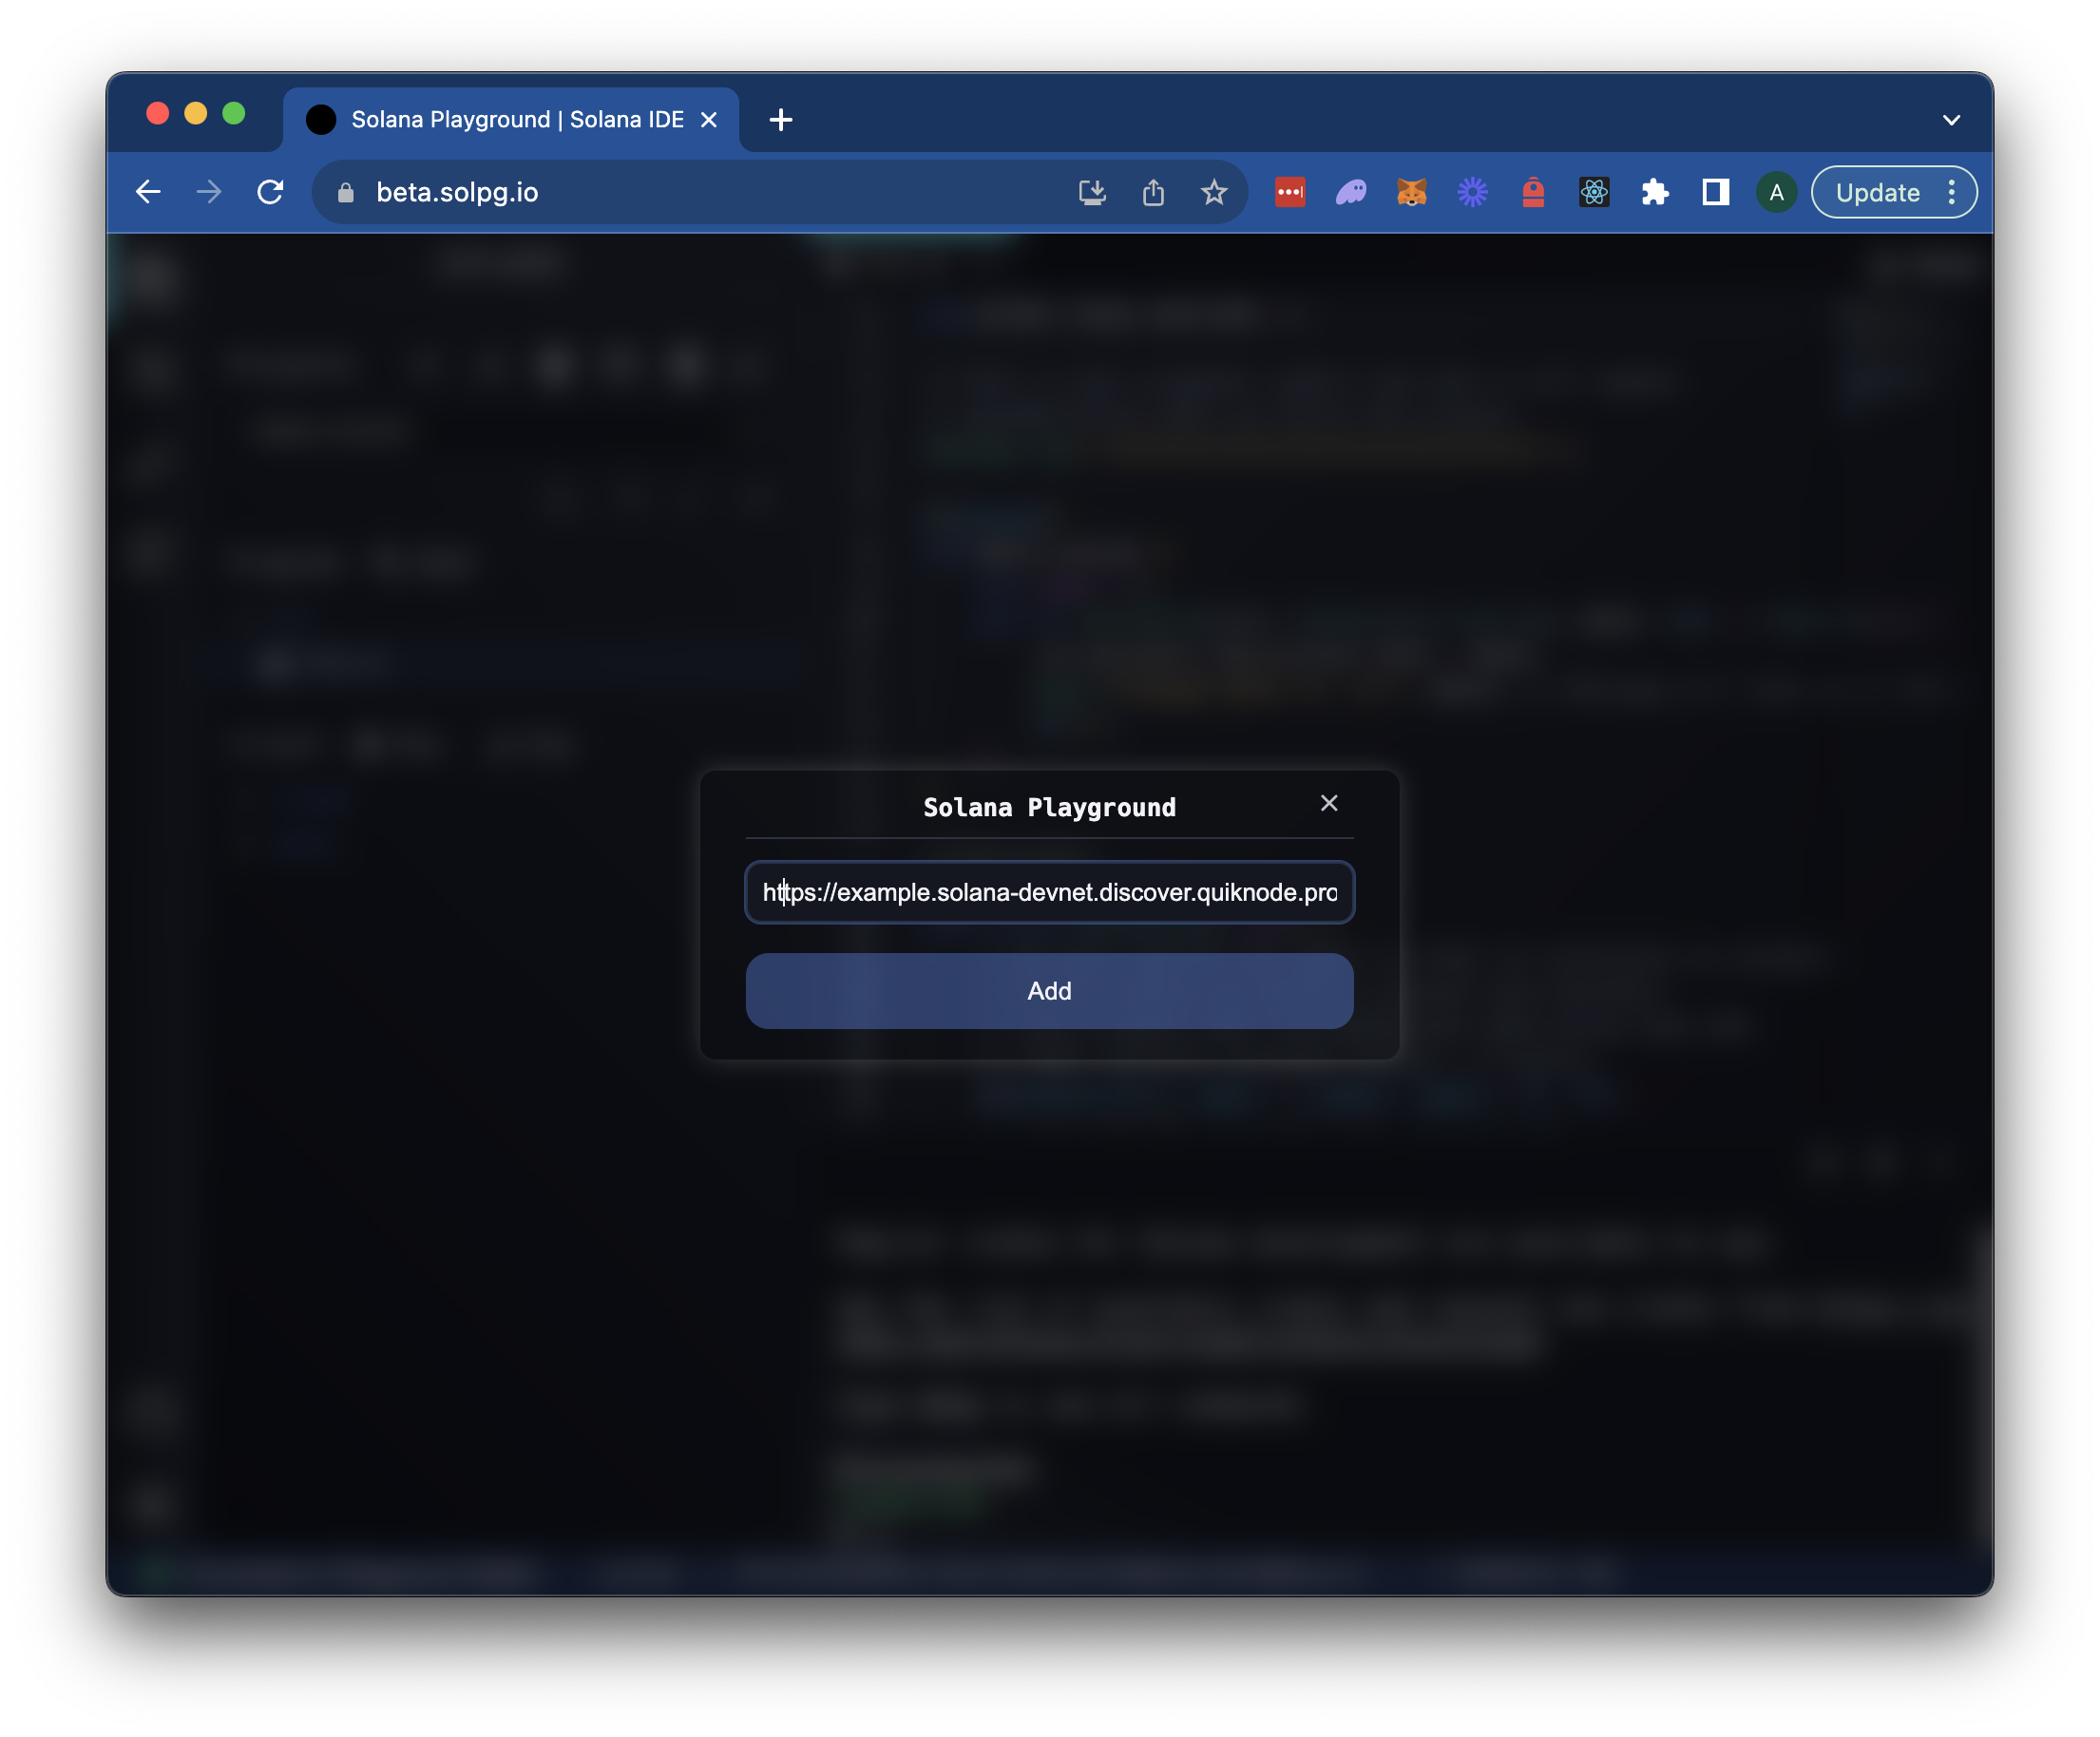
Now that you have an endpoint, head back to Solana Playground and click the Settings Gear (⚙️) button in the bottom left corner of the browser window. You will see a dropdown for "Endpoint". Open the dropdown and select "Custom":

Paste your Quicknode endpoint into the text box and click "Add":
Create and Connect a Wallet
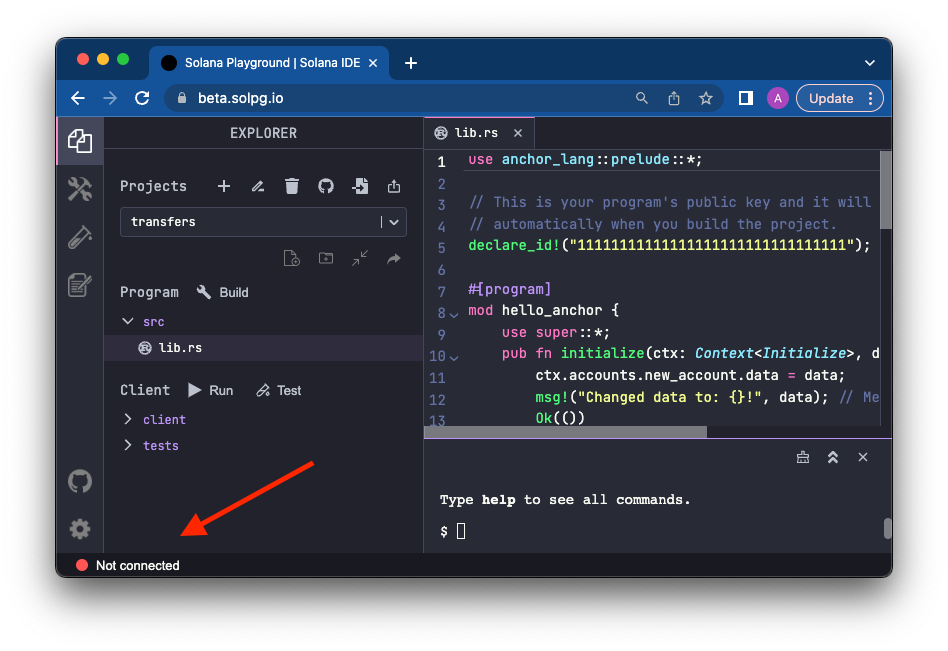
Since this project is just for demonstration purposes, we can use a "throw-away" wallet. Solana Playground makes it easy to create one. You should see a red dot "Not connected" in the bottom left corner of the browser window. Click it:
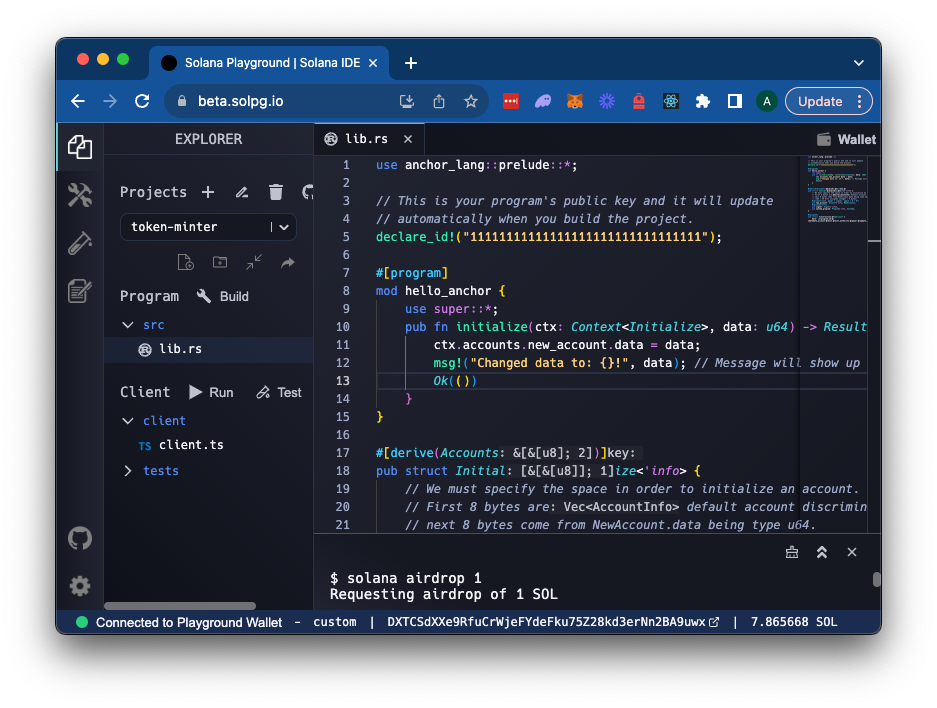
Solana Playground will generate a wallet for you (or you can import your own). Feel free to save it for later use, and click continue when you're ready. A new wallet will be initiated and connected to Solana devnet. Solana Playground airdrops some SOL to your new wallet automatically, but we will request a little extra to ensure we have enough for deploying our program. In the browser terminal, you can use Solana CLI commands. Enter solana airdrop 1 to drop 1 SOL into your wallet. Note: Due to limitations in SOL airdrops, you may have to run this multiple times over different periods. You may also claim additional SOL from the Quicknode Faucet.
Your wallet should now be connected to devnet with a balance of about 8 SOL (you may need to send yourself some additional devnet SOL from another address to have sufficient SOl to deploy to devnet.):
You are ready to go! Let's build!
Create the Minter Program
Let's start by opening lib.rs and deleting the starter code. Once you have a blank slate, we can start building our program. First, let's import some dependencies and frame out our program. Add the following to the top of the file:
// 1. Import dependencies
use anchor_lang::prelude::*;
use anchor_spl::{
    associated_token::AssociatedToken,
    token::{mint_to, Mint, MintTo, Token, TokenAccount},
    metadata::{
        create_metadata_accounts_v3,
        mpl_token_metadata::types::DataV2,
        CreateMetadataAccountsV3,
        Metadata as Metaplex,
    },
};

// 2. Declare Program ID (SolPG will automatically update this when you deploy)
declare_id!("11111111111111111111111111111111");

// 3. Define the program and instructions
#[program]
mod token_minter {
    use super::*;
    pub fn init_token(ctx: Context<InitToken>, metadata: InitTokenParams) -> Result<()> {
        // TODO Add init mint logic
        Ok(())
    }

    pub fn mint_tokens(ctx: Context<MintTokens>, quantity: u64) -> Result<()> {
        // TODO Add mint tokens logic
        Ok(())
    }
}

// 4. Define the context for each instruction
#[derive(Accounts)]
#[instruction(params: InitTokenParams)]
pub struct InitToken<'info> {
  //TODO: Add init accounts context
}

#[derive(Accounts)]
pub struct MintTokens<'info> {
  //TODO: Add mint tokens accounts context
}

// 5. Define the init token params
#[derive(AnchorSerialize, AnchorDeserialize, Debug, Clone)]
pub struct InitTokenParams {
    pub name: String,
    pub symbol: String,
    pub uri: String,
    pub decimals: u8,
}
Let's break down what's happening here:
- We import the necessary dependencies for our program. We will use the Anchor framework, the SPL Token program, and the Metaplex Token Metadata program (through
anchor-spl). - We declare the program ID. This ID will be used to identify our program on Solana. It is just a placeholder for now--Solana Playground will automatically update this when we deploy our program.
- We define the outline for our program and instructions. We will create two instructions:
init_tokenandmint_tokens. Theinit_tokeninstruction will initialize a new SPL token with metadata, and themint_tokensinstruction will mint tokens to a specified account. - We define the context for each instruction. The context contains the accounts that will be used for each instruction. We will define these accounts in the following steps.
- We create a struct for the
init_tokeninstruction's parameters. This struct will contain the metadata required to create a token on Solana (token's name, symbol, URI, and decimals). We use theAnchorSerializeandAnchorDeserializeattributes to allow the struct to be serialized and deserialized by Anchor. In ourinit_tokeninstruction, you will notice that we pass this struct as an argument.
Create the Init Token Context and Instruction
Now that we have the outline of our program, we can start filling in the details. Let's start with the init_token instruction. Our instruction will need a few accounts in order to execute:
- The new metadata account for the token
- The new mint account for the token (we will create this as a PDA owned by our program)
- A payer account that will pay for the transaction and rent exemption
- The Sysvar Rent account for determining the rent exemption for the new accounts
- Programs we will interact with:
- Solana System Program
- SPL Token Program
- Metaplex Token Metadata Program
Let's add these to the InitToken struct:
#[derive(Accounts)]
#[instruction(
    params: InitTokenParams
)]
pub struct InitToken<'info> {
    /// CHECK: New Metaplex Account being created
    #[account(mut)]
    pub metadata: UncheckedAccount<'info>,
    #[account(
        init,
        seeds = [b"mint"],
        bump,
        payer = payer,
        mint::decimals = params.decimals,
        mint::authority = mint,
    )]
    pub mint: Account<'info, Mint>,
    #[account(mut)]
    pub payer: Signer<'info>,
    pub rent: Sysvar<'info, Rent>,
    pub system_program: Program<'info, System>,
    pub token_program: Program<'info, Token>,
    pub token_metadata_program: Program<'info, Metaplex>,
}
A few things to note here:
- The Metaplex Token Metadata program will create the
metadataaccount. We will use the UncheckedAccount type to indicate that another program will create this account. - The
mintaccount will be created by our program, usinginit. We will seed the account with the word "mint," meaning only one mint account can be created per program (feel free to use different seeds to meet your needs). We will also specify the payer, the mint's authority (our program), and the mint's decimals (from our instruction parameters). You'll notice that we set the authority to themintaccount itself. This effectively gives authority to our program without having to create another PDA.
Now, let's use these accounts in our instruction. Update your init_token instruction to this:
    pub fn init_token(ctx: Context<InitToken>, metadata: InitTokenParams) -> Result<()> {
        let seeds = &["mint".as_bytes(), &[ctx.bumps.mint]];
        let signer = [&seeds[..]];

        let token_data: DataV2 = DataV2 {
            name: metadata.name,
            symbol: metadata.symbol,
            uri: metadata.uri,
            seller_fee_basis_points: 0,
            creators: None,
            collection: None,
            uses: None,
        };

        let metadata_ctx = CpiContext::new_with_signer(
            ctx.accounts.token_metadata_program.to_account_info(),
            CreateMetadataAccountsV3 {
                payer: ctx.accounts.payer.to_account_info(),
                update_authority: ctx.accounts.mint.to_account_info(),
                mint: ctx.accounts.mint.to_account_info(),
                metadata: ctx.accounts.metadata.to_account_info(),
                mint_authority: ctx.accounts.mint.to_account_info(),
                system_program: ctx.accounts.system_program.to_account_info(),
                rent: ctx.accounts.rent.to_account_info(),
            },
            &signer
        );

        create_metadata_accounts_v3(
            metadata_ctx,
            token_data,
            false,
            true,
            None,
        )?;

        msg!("Token mint created successfully.");

        Ok(())
    }
Here's what our instruction is doing:
- First, we declare our signer. We use the
seedswe defined in theInitTokenstruct and fetch our bump usingctx.bumps.mintto create the signer. - Next, we define our
token_dataas a DataV2 object. - Finally, we create a CPI Context using CreateMetadataAccountsV3 and pass it into
create_metadata_accounts_v3instruction from the Metaplex Token Metadata program. This instruction will create the metadata account for our token. We pass the necessary data and our CPI context as arguments. Note: Because we usedinitin ourmintaccount, we do not need to invoke thecreate_mintinstruction from the SPL Token program. This will be handled automatically by Anchor behind the scenes.
Create the Mint Tokens Context and Instruction
To mint tokens, we will need a similar but slightly different set of accounts:
- The mint account for the token (should match the same mint account we created in the
init_tokeninstruction) - The new token account for the minted tokens (owned by the recipient or, in this case, the payer)
- A payer account that will pay for the transaction and rent exemption
- The Sysvar Rent account for determining the rent exemption for the new accounts
- Programs we will interact with:
- Solana System Program
- SPL Token Program
- Associated Token Program
Add the following to your MintTokens struct:
#[derive(Accounts)]
pub struct MintTokens<'info> {
    #[account(
        mut,
        seeds = [b"mint"],
        bump,
        mint::authority = mint,
    )]
    pub mint: Account<'info, Mint>,
    #[account(
        init_if_needed,
        payer = payer,
        associated_token::mint = mint,
        associated_token::authority = payer,
    )]
    pub destination: Account<'info, TokenAccount>,
    #[account(mut)]
    pub payer: Signer<'info>,
    pub rent: Sysvar<'info, Rent>,
    pub system_program: Program<'info, System>,
    pub token_program: Program<'info, Token>,
    pub associated_token_program: Program<'info, AssociatedToken>,
}
A couple of important things to note here:
- We set our
minttomutto indicate that we will modify the account (in this case, minting new tokens/increasing supply). - We use the
init_if_neededattribute for thedestinationaccount. This will create the account if it does not already exist. We make sure the token mint and authority are set to themintaccount and thepayeraccount, respectively. Note: We do not need the metadata account or token metadata program for this instruction because we are not creating or using the token's metadata.
Finally, you will need to define the mint_tokens instruction. Add the following code:
    pub fn mint_tokens(ctx: Context<MintTokens>, quantity: u64) -> Result<()> {
        let seeds = &["mint".as_bytes(), &[ctx.bumps.mint]];
        let signer = [&seeds[..]];

        mint_to(
            CpiContext::new_with_signer(
                ctx.accounts.token_program.to_account_info(),
                MintTo {
                    authority: ctx.accounts.mint.to_account_info(),
                    to: ctx.accounts.destination.to_account_info(),
                    mint: ctx.accounts.mint.to_account_info(),
                },
                &signer,
            ),
            quantity,
        )?;

        Ok(())
    }
Here, we use the same signer PDA from the previous step and pass it into the mint_to instruction from the SPL Token program. This instruction will mint the specified quantity of tokens to the destination account. If you recall from our previous SPL token work, the instruction expects the quantity to be the expanded decimal value. For example, if the token has two decimals, and we want to mint 100 tokens, we would pass 10,000 as the quantity value.
Go ahead and build your program to ensure everything works by clicking "Build" or entering anchor build in the Solana Playground terminal.
If the program builds successfully, you can deploy it to the Solana devnet. If you have any issues, double-check your code in the guide above or look at our working example here. Got questions or need help? Feel free to reach out to us on Discord.
Deploy the Program
Click the Tools Icon 🛠 on the left side of the page, and then click "Deploy":

This will likely take a minute or two, but on completion, you should see something like this in your browser terminal:

Great job! Let's test it out.
Test the Program
Return to your main file window where you edited your lib.rs file by clicking the 📑 icon on the top left side of the page. Open anchor.test.ts and replace the contents with the following:
describe("Test Minter", () => {
    // Metaplex Constants
    const METADATA_SEED = "metadata";
    const TOKEN_METADATA_PROGRAM_ID = new web3.PublicKey("metaqbxxUerdq28cj1RbAWkYQm3ybzjb6a8bt518x1s");

    // Constants from our program
    const MINT_SEED = "mint";

    // Data for our tests
    const payer = pg.wallet.publicKey;
    const metadata = {
      name: "Just a Test Token",
      symbol: "TEST",
      uri: "https://5vfxc4tr6xoy23qefqbj4qx2adzkzapneebanhcalf7myvn5gzja.arweave.net/7UtxcnH13Y1uBCwCnkL6APKsge0hAgacQFl-zFW9NlI",
      decimals: 9,
    };
    const mintAmount = 10;
    const [mint] = web3.PublicKey.findProgramAddressSync(
      [Buffer.from(MINT_SEED)],
      pg.PROGRAM_ID
    );

    const [metadataAddress] = web3.PublicKey.findProgramAddressSync(
      [
        Buffer.from(METADATA_SEED),
        TOKEN_METADATA_PROGRAM_ID.toBuffer(),
        mint.toBuffer(),
      ],
      TOKEN_METADATA_PROGRAM_ID
    );

    // Test init token
    it("initialize", async () => {

    });

    // Test mint tokens
    it("mint tokens", async () => {

    });

  });
Here, we are creating our testing suite and defining some constants we will use in our tests. We will use a couple of seeds for PDA derivation, Metaplex Token Metadata program ID, the payer's public key, the metadata for our token (feel free to use your own), and the number of tokens we want to mint. We will also define a helper function to confirm transactions.
Finally, we derive two PDAs we will use in our tests:
- the
mintPDA for our token. We derive this using theMINT_SEEDand our program ID inside thefindProgramAddressSyncmethod. - the
metadataAddressthat will store our token's metadata. We derive this the same way, but this time, we pass theMETADATA_SEED, the Metaplex Token Metadata program ID, and themintPDA to the method. (Source: Metaplex Docs)
Test Init Token
Let's write an initialize test that will create a token mint if one does not already exist. Inside the it("initialize"...) block, add the following test:
    it("initialize", async () => {

      const info = await pg.connection.getAccountInfo(mint);
      if (info) {
        return; // Do not attempt to initialize if already initialized
      }
      console.log("  Mint not found. Attempting to initialize.");

      const context = {
        metadata: metadataAddress,
        mint,
        payer,
        rent: web3.SYSVAR_RENT_PUBKEY,
        systemProgram: web3.SystemProgram.programId,
        tokenProgram: anchor.utils.token.TOKEN_PROGRAM_ID,
        tokenMetadataProgram: TOKEN_METADATA_PROGRAM_ID,
      };

      const tx = await pg.program.methods
        .initToken(metadata)
        .accounts(context)
        .transaction();

      const txHash = await web3.sendAndConfirmTransaction(pg.connection, tx, [pg.wallet.keypair], {skipPreflight: true});
      console.log(`  https://explorer.solana.com/tx/${txHash}?cluster=devnet`);
      const newInfo = await pg.connection.getAccountInfo(mint);
      assert(newInfo, "  Mint should be initialized.");
    });
Here's what's happening in this initialize test:
- First, we check to see if the mint account already exists. If it does, we do not attempt to initialize it again and move to the next test.
- If the mint account does not exist, we attempt to initialize it.
- We create a context object with the accounts we will use for our instruction. The corresponding accounts should match the context we created in our program.
- We execute the
init_token(initTokenin TypeScript) instruction, passing the metadata and context as arguments. Therpc()method sends our transaction to the cluster. This will return the transaction hash. - Finally, we log the transaction URL and check that the mint account exists.
Test Mint Tokens
Let's write our second test to ensure the mint_tokens instruction works as intended. Replace your it("mint tokens"...) test block with the following code:
  it("mint tokens", async () => {

    const destination = await anchor.utils.token.associatedAddress({
      mint: mint,
      owner: payer,
    });

    let initialBalance: number;
    try {
      const balance = (await pg.connection.getTokenAccountBalance(destination))
      initialBalance = balance.value.uiAmount;
    } catch {
      // Token account not yet initiated has 0 balance
      initialBalance = 0;
    }

    const context = {
      mint,
      destination,
      payer,
      rent: web3.SYSVAR_RENT_PUBKEY,
      systemProgram: web3.SystemProgram.programId,
      tokenProgram: anchor.utils.token.TOKEN_PROGRAM_ID,
      associatedTokenProgram: anchor.utils.token.ASSOCIATED_PROGRAM_ID,
    };

    const tx = await pg.program.methods
      .mintTokens(new BN(mintAmount * 10 ** metadata.decimals))
      .accounts(context)
      .transction();
    const txHash = await web3.sendAndConfirmTransaction(pg.connection, tx, [pg.wallet.keypair], {skipPreflight: true});
    console.log(`  https://explorer.solana.com/tx/${txHash}?cluster=devnet`);

    const postBalance = (
      await pg.connection.getTokenAccountBalance(destination)
    ).value.uiAmount;
    assert.equal(
      initialBalance + mintAmount,
      postBalance,
      "Post balance should equal initial plus mint amount"
    );
  });
Here's what's happening in this mint tokens test:
- First, we derive the destination token account for the payer by passing the
mintandpayerpublic keys to theassociatedAddressmethod. - Check the initial balance of the destination account (set to 0 if it does not exist yet)
- Create a context object with the accounts we will use for our instruction. The corresponding accounts should match the context we created in our program.
- Execute the
mint_tokensinstruction (mintTokensin TypeScript) by passing themintAmountas an argument. Therpc()method sends our transaction to the cluster. This will return the transaction hash. - Check that the post balance of the destination account is equal to the initial balance plus the mint amount
Run the Tests
After our tests are complete, you can run them by clicking the "🧪 Test" button or entering anchor test in the Solana Playground terminal. You should see something like this:
Running tests...
  anchor.test.ts:
  Test Minter
      Mint not found. Attempting to initialize.
      https://explorer.solana.com/tx/4YEzstg3UxWBqfFBcTwjWvg4bdkXw47zLCieBGcr1WNPoZDNZrQxD5H6YL6fSxix3SumYGTYBPFY2vnYxYRAG8J6?cluster=devnet
    ✔ initialize (797ms)
      https://explorer.solana.com/tx/2Ws647Z4q5Lsdcm6zSqHqTRpqQZY8nuQaS5Z7fqbw925jjXoztqqydQZsyMA21yF3PecLzVLt936NMo1qfXHoQe1?cluster=devnet
    ✔ mint tokens (722ms)
  2 passing (2s)
Great job! You now have a working program that can create and mint tokens.
You can rerun the test function to mint additional tokens--since we added a check to see if the mint account already exists, it will not attempt to initialize it again. Alternatively, you can click the "🧪" (Test) icon on the left to use Solana Playground's UI for testing the mint instruction.
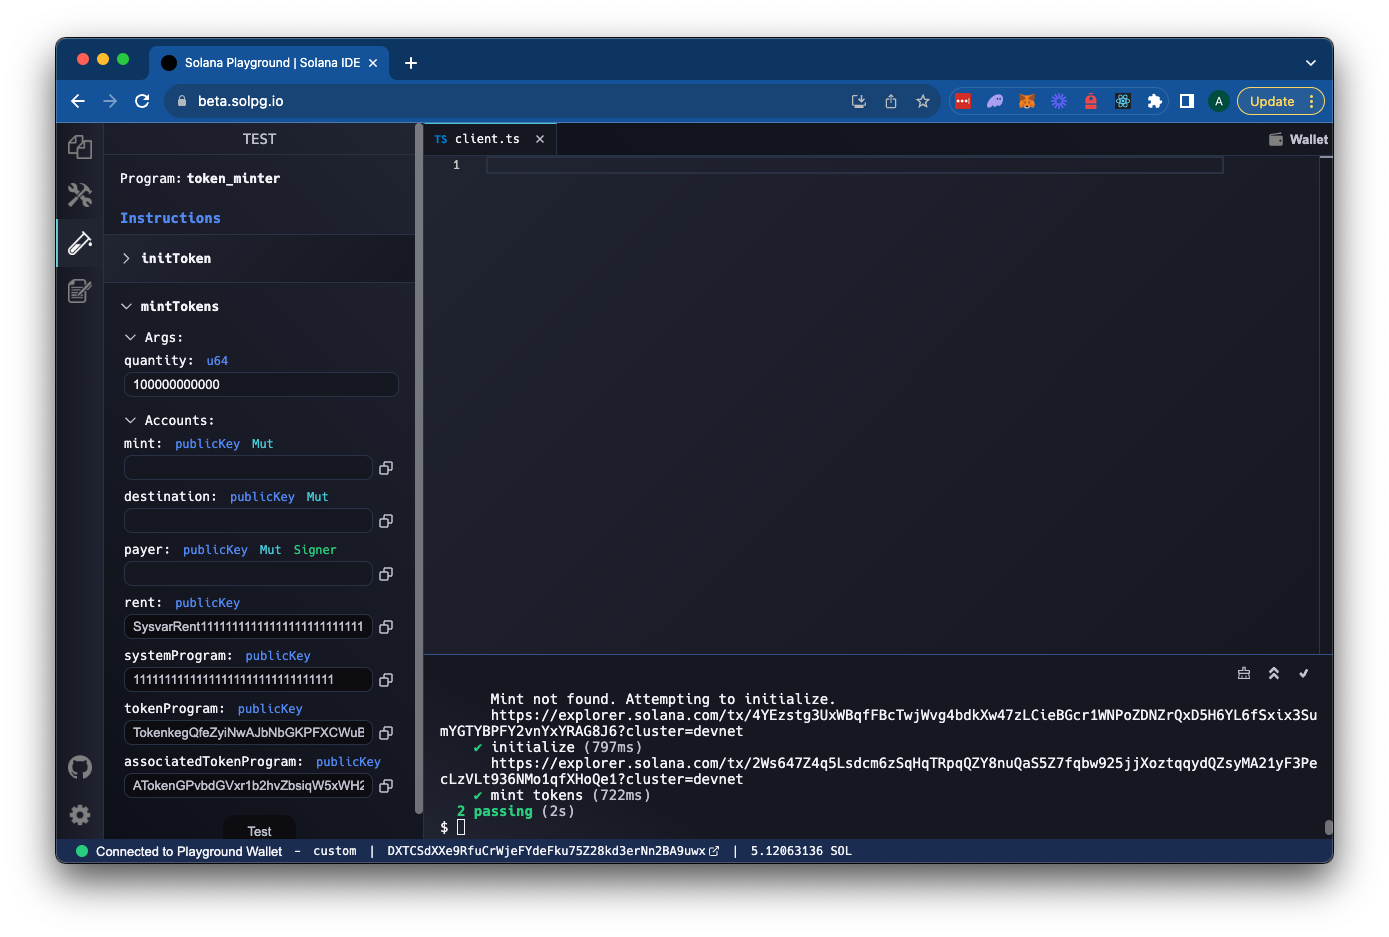
The UI can derive all the PDA and account addresses you need to test your program. Make sure you account for the decimals when minting tokens (add extra zeroes to the end of your quantity based on the number of decimals in your token).
Wrap up
You now have a working program that can create and mint tokens--this can have applications in any type of Solana project: e.g., rewards for defi users, NFTs, or game items. Keep building!
If you're stuck, have questions, or just want to talk about what you're building, drop us a line on Discord or Twitter!
We ❤️ Feedback!
Let us know if you have any feedback or requests for new topics. We'd love to hear from you.