
3 min read
Web3.js, the popular JavaScript library for Ethereum, is no longer being actively maintained. For all new development, we recommend using either Ethers.js or Viem instead. Both options offer modern tooling and active community support.
If you have any questions or need guidance in transitioning to alternative solutions, please reach out to us.
Overview
Libraries and frameworks make the development process a lot easier and faster. When it comes to Ethereum development, Web3.js is the go to library. That's because Web3.js is the official library, from the Ethereum foundation. It serves as the best way to develop a website/client application that interacts with the Ethereum blockchain's JSON RPC via HTTP, WebSocket or IPC connection.
In this guide, we will learn how to use Web3 to connect to the Ethereum blockchain using HTTP and grab the latest block number. The cool thing about this will be that our code will work for both a front-end (with a build system, like webpack) and back-end implementation (using NodeJS).
Prerequisites
- NodeJS installed on your system
- A text editor
- Terminal aka Command Line
Installing the Web3.js package
Let's make sure we have NodeJS installed. Pretty simple, open a terminal and run:
$ node -v
Next, let's get the web3 package installed - this is the package that lets you interact with the ethereum blockchain. You can install it with npm from your command line:
$ npm install web3
or you can use yarn, if that's your preferred package manager:
$ yarn add web3
The most common issue at this step is an internal failure with `node-gyp`. You can follow node-gyp installation instructions here.
Note: You will need to have your python version match one of the compatible versions listed in the instructions above if you encounter the node-gyp issue.
Set Up Your Quicknode Endpoint
For our purposes today, we could use pretty much any Ethereum client, such as Geth or OpenEthereum (fka Parity). Since that is a bit too involved for just querying for block height, we'll create a free Quicknode account here and generate an Ethereum endpoint. After you've created your free Ethereum endpoint, copy your HTTP Provider endpoint:
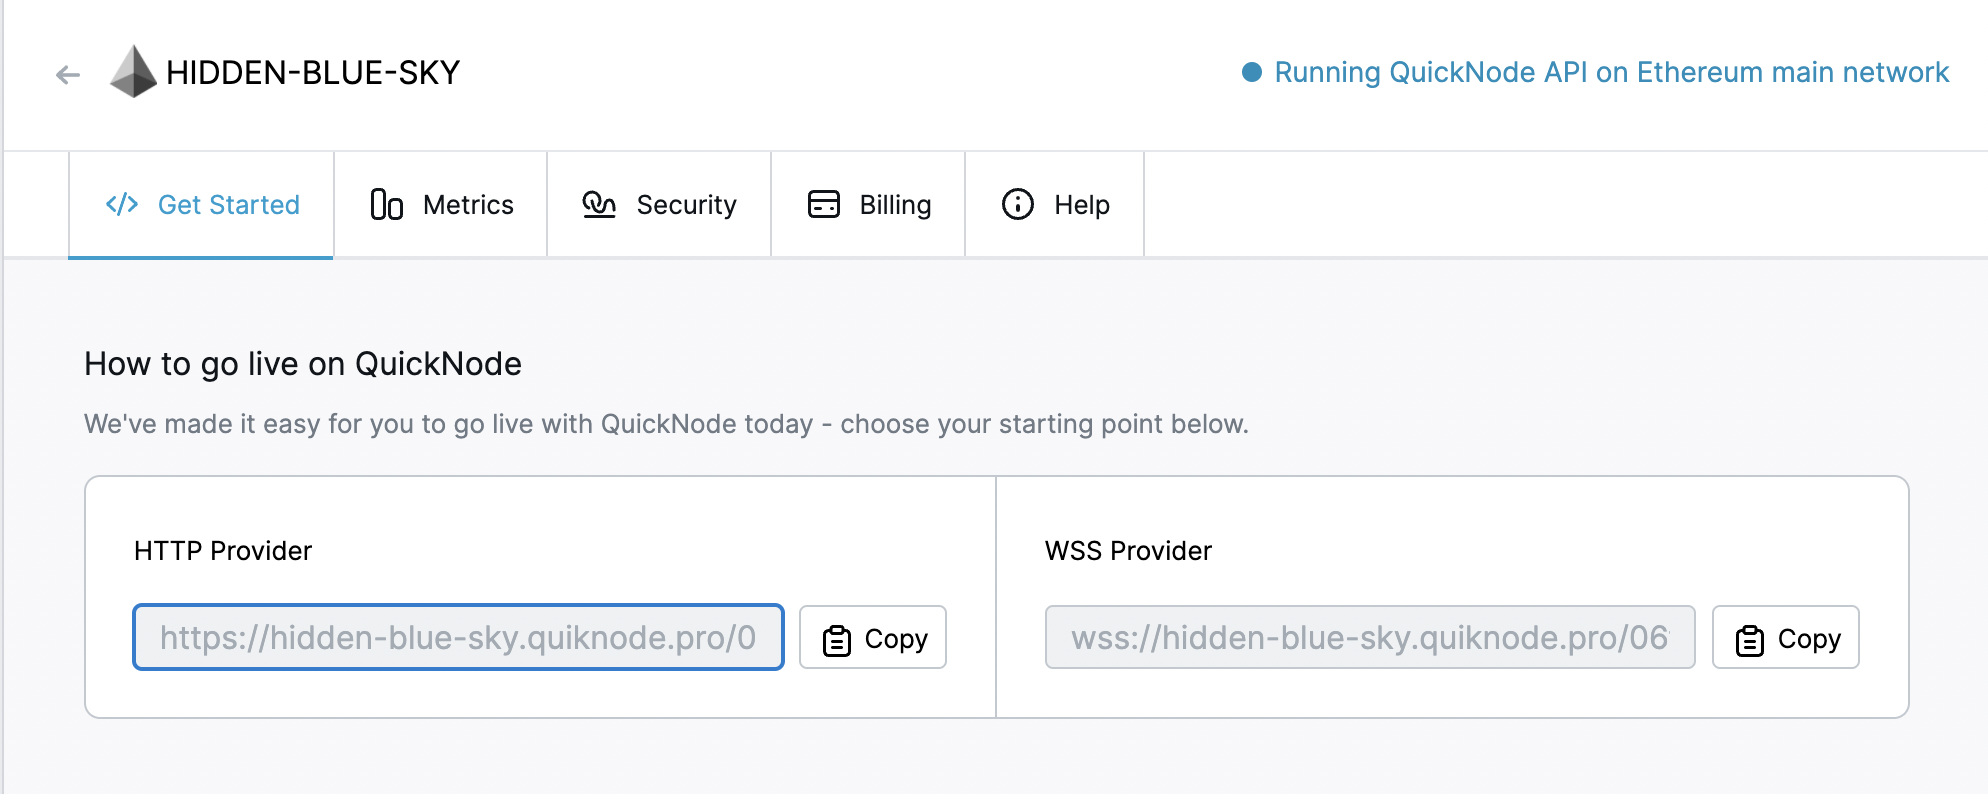
You'll need this later, so copy it and save it.
Connecting via Web3
Now let's create a short script, let's call it `index.js`, to fetch the block height from our node. You can copy/paste this into your code editor:
var Web3 = require('web3');
var provider = 'ADD_YOUR_ETHEREUM_NODE_URL';
var web3Provider = new Web3.providers.HttpProvider(provider);
var web3 = new Web3(web3Provider);
web3.eth.getBlockNumber().then((result) => {
  console.log("Latest Ethereum Block is ",result);
});
So go ahead and replace `ADD_YOUR_ETHEREUM_NODE_URL` with the http provider from the instructions above.
A quick explanation of the code above - we are importing the web3 library we installed earlier (line 1), setting our Ethereum node URL (line 2), instantiating a Web3 HttpProvider instance (line 3) and creating a Web3 instance (line 4). Finally, we're calling getBlockNumber on the web3 object and waiting for a successful result from the server (QuikNode) then logging the result to the console (lines 5-7).
Save this code snippet in a file index.js we're going to run this very shortly.
Confirm it's working
Run the file using the node command and you will see the latest Ethereum blockchain:
$ node index.js
You should see the following:
![]()
That’s it! You have connected to the Ethereum network using Web3.js. You can check out more APIs provided by web3 to build complex applications on Ethereum. If you want to use this in a front-end application, you can configure webpack to compile it into something suitable for a browser.
Subscribe to our newsletter for more articles and guide on Ethereum. If you have any feedback, please feel free to reach out to us via Twitter and you can always chat with us if you have a question via our community server on Discord, thanks :)