12 min read
Overview
Updated at: April 10, 2022
Welcome to another Quicknode guide on Solana - the up-and-coming blockchain that seeks to solve the scalability issues of Ethereum. We will be walking through step-by-step how to create an NFT on Solana. NFT, short for Non Fungible Token, is a cryptographically unique hash that is unreplicable. When you create an NFT, it is similar to creating an ERC20 token; however, the critical difference is only one token is ever issued. In this guide, we will be programmatically creating 2 separate accounts with wallets, one which will mint the NFT and another which will receive it. We will then be writing the code that will accomplish the minting and sending of the NFT on Solana. If you get stuck at any point, feel free to refer to the complete solution code at the end of the guide. Let us get to minting!
Prerequisites:
- NodeJS installed
- Terminal/CLI familiarity
- A Text editor
- TypeScript installed
What is Solana?
Solana's goal is singular in nature. That goal is to scale the blockchain for global adoption. Solana Labs, the developers of the Solana Protocol, are doing a few different things to achieve that dream.
Blockchain technology has a few knobs when it comes to tuning performance. One of which is the consensus mechanism. This is how nodes communicate together to arrive at an identical conclusion. Bitcoin uses Proof of Work or PoW, BNB Smart Chain, also known as BSC, uses a Proof of Staked Authority or PoSA. And Ethereum is migrating to Proof of Stake aka PoS. As you can tell, consensus is by no means a solved game at this point in time.
Solana uses a consensus called Proof of History. Proof of History works through a time-stamping solution; each transaction has a time stamp allocated to it that allows it to be verified as a legitimate transaction by the rest of the network in mere fractions of a second. Solana has a breakdown of the eight technologies that they believe position themselves as the fastest, most scalable, and most secure blockchain in the game.
Setting up the Project Locally
Open Terminal and navigate to a folder you'd like to create your project in. Next, run the following commands in this exact order:
mkdir SolanaNFT
npm install --prefix ./SolanaNFT @solana/web3.js@1 @solana/spl-token
cd SolanaNFT
touch index.ts
tsc -init --resolveJsonModule true
The first command creates a new project directory called SolanaNFT. With npm install --prefix ./SolanaNFT @solana/web3.js@1 @solana/spl-token, we're installing Solana's JavaScript API, @solana/web3.js and a TypeScript library @solana/spl-token, for interacting with the SPL Token program.
We then create a new TypeScript file, index.ts, where we'll be writing all of our code. Finally, we initiate a new Typescript project by running tsc -init. This will create a new file called tsconfig.json, which will contain all of the configurations for our TypeScript project. We initiate it with --resolveJsonModule true so that we can import JSON files into our project.
Connecting to Solana
Open the SolanaNFT project directory within your editor of choice, and let us start writing some code to connect to Solana!
Within the index.ts file, we'll want to start by importing all of the functionality we'll need from @solana/web3.js and @solana/spl-token. Add the following two import statements:
import { Connection, Keypair, LAMPORTS_PER_SOL } from  "@solana/web3.js";
import { createMint, getOrCreateAssociatedTokenAccount, mintTo, setAuthority, transfer } from  "@solana/spl-token";
Note: If you are seeing errors from these lines of code, then you likely do not have the libraries installed. Ensure you're in the correct directory and install them again.
Connect to a Solana Cluster with Your Quicknode Endpoint
To build on Solana, you'll need an API endpoint to connect with the network. You're welcome to use public nodes or deploy and manage your own infrastructure; however, if you'd like 8x faster response times, you can leave the heavy lifting to us.
See why over 50% of projects on Solana choose Quicknode and start your free trial here. We're going to use a Solana Devnet endpoint.
Copy the HTTP Provider link: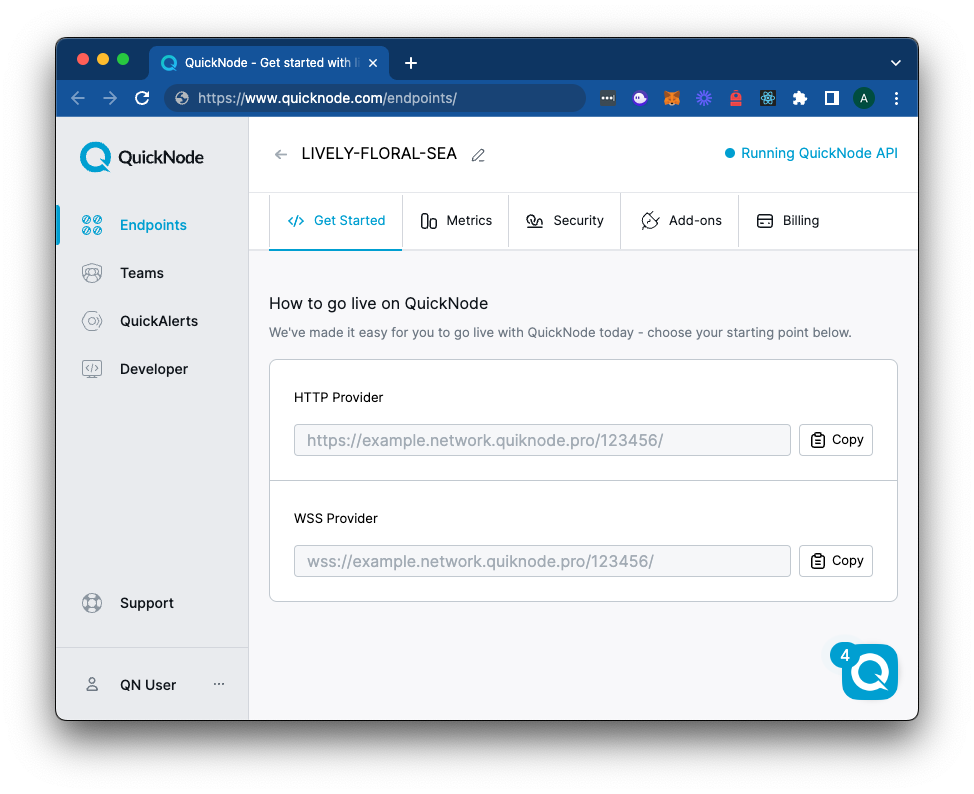
Below the import statements, add this code to create a new connection to the Solana Devnet using your Quicknode endpoint:
const quicknodeEndpoint = 'https://example.solana-devnet.quiknode.pro/0123456/';
const connection = new Connection(quicknodeEndpoint, "confirmed");
(async () => {
  // Remaining code goes here 👇

})()
Here we are instantiating a new connection instance. This requires two arguments, the first being a URL endpoint that points to the Solana Network. Solana has 3 different networks: the mainnet, the testnet, and the devnet. The devnet is a low-risk environment where you can "airdrop" SOL tokens to yourself.
With a connection established, we can now create the NFT and perform the other associated steps.
Note: Each of the code blocks we write going forward should be placed directly underneath the previous block, all within the curly braces of the top-level async function. We'll provide you with the full code at the end to check yours against.
Creating a New Wallet and Airdropping SOL
The first task we'll need to accomplish is creating a wallet and funding it. We'll be using the handy Airdrop Widget tool below to automatically generate a new wallet and airdrop 1 SOL to it. (You can also achieve this with the Keypair.generate() and requestAirdrop() functions if you prefer a more manual approach).
Note: Sending airdrop requests too frequently may trigger a 429 (Too Many Requests) error.
Once you've successfully generated your keypair, you'll notice two new constants: secret and fromWallet, a Keypair. The secret is a 32-byte array that is used to generate the public and private keys. The fromWallet is a Keypair instance that is used to sign transactions (we've airdropped some devnet SOL to cover the gas fees). Make sure to add it to your code below your connection declaration.
Creating a New Token Mint
We'll now need to create a new token mint and retrieve our token account.
const mint = await createMint(
  connection,
  fromWallet,            // Payer of the transaction
  fromWallet.publicKey,  // Account that will control the minting
  null,                  // Account that will control the freezing of the token
  0                      // Location of the decimal place
);
The createMint function will be what creates our actual token. It takes 6 arguments:
- The connection to the Solana Network. (connection)
- The account that will pay the fee. (fromWallet)
- The public key of the account that has the authority to mint tokens of this type. (fromWallet.publicKey)
- The public key of the account that has the authority to freeze tokens of this type. This argument is optional. (null)
- The location of the decimal place for the token.
For more information on this function and other spl-token functions used in this guide, visit this page in Solana-labs.github.io.
Once the token mint is created, we need to grab the token account from the fromWallet Solana address. If it does not exist, we must create it. For this, we will utilize the getorCreateAssociatedTokenAccount() function, passing in most of the previous values, and storing it in fromTokenAccount:
// Get the token account of the "fromWallet" Solana address. If it does not exist, create it.
const fromTokenAccount = await getOrCreateAssociatedTokenAccount(
  connection,
  fromWallet,
  mint,
  fromWallet.publicKey
);
You can think about the chain of custody like this: the NFT resides in the account, and your wallet owns this account.
Keys -> Wallet -> Account -> NFT (top to down)
Creating an Account with a Wallet to Send the NFT to
We have an account to send the NFT from; now, we need an account to send the NFT to. The code to achieve this should look very familiar as we'll be leveraging the same functions and variables to generate a new wallet and grab the token mint as we've done previously.
// Generate a new wallet to receive the newly minted token
const toWallet = Keypair.generate();

// Get the token account of the "toWallet" Solana address. If it does not exist, create it.
const toTokenAccount = await getOrCreateAssociatedTokenAccount(
    connection,
    fromWallet,
    mint,
    toWallet.publicKey
);
The above code block creates a wallet with a separate set of public/secret keys and then creates an account linking the mint variable to our newly created wallet.
Minting the NFT and Sending It
Now it's time to mint an NFT and send it to someone! Take a moment to look at the code below that achieves this and read the comments to understand what each function does.
// Minting 1 new token to the "fromTokenAccount" account we just returned/created.
let signature = await mintTo(
  connection,
  fromWallet,               // Payer of the transaction fees
  mint,                     // Mint for the account
  fromTokenAccount.address, // Address of the account to mint to
  fromWallet.publicKey,     // Minting authority
  1                         // Amount to mint
);

await setAuthority(
  connection,
  fromWallet,            // Payer of the transaction fees
  mint,                  // Account
  fromWallet.publicKey,  // Current authority
  0,                     // Authority type: "0" represents Mint Tokens
  null                   // Setting the new Authority to null
);

signature = await transfer(
  connection,
  fromWallet,               // Payer of the transaction fees
  fromTokenAccount.address, // Source account
  toTokenAccount.address,   // Destination account
  fromWallet.publicKey,     // Owner of the source account
  1                         // Number of tokens to transfer
);


 console.log("SIGNATURE", signature);
})();
We'll briefly touch on the setAuthority() function as it is one of the most crucial parts. This function will revoke minting privileges and ensure that we can not create additional tokens of this type. Note that this action cannot be undone.
To execute the program, run the following commands one after another:
tsc index.ts

node index.js
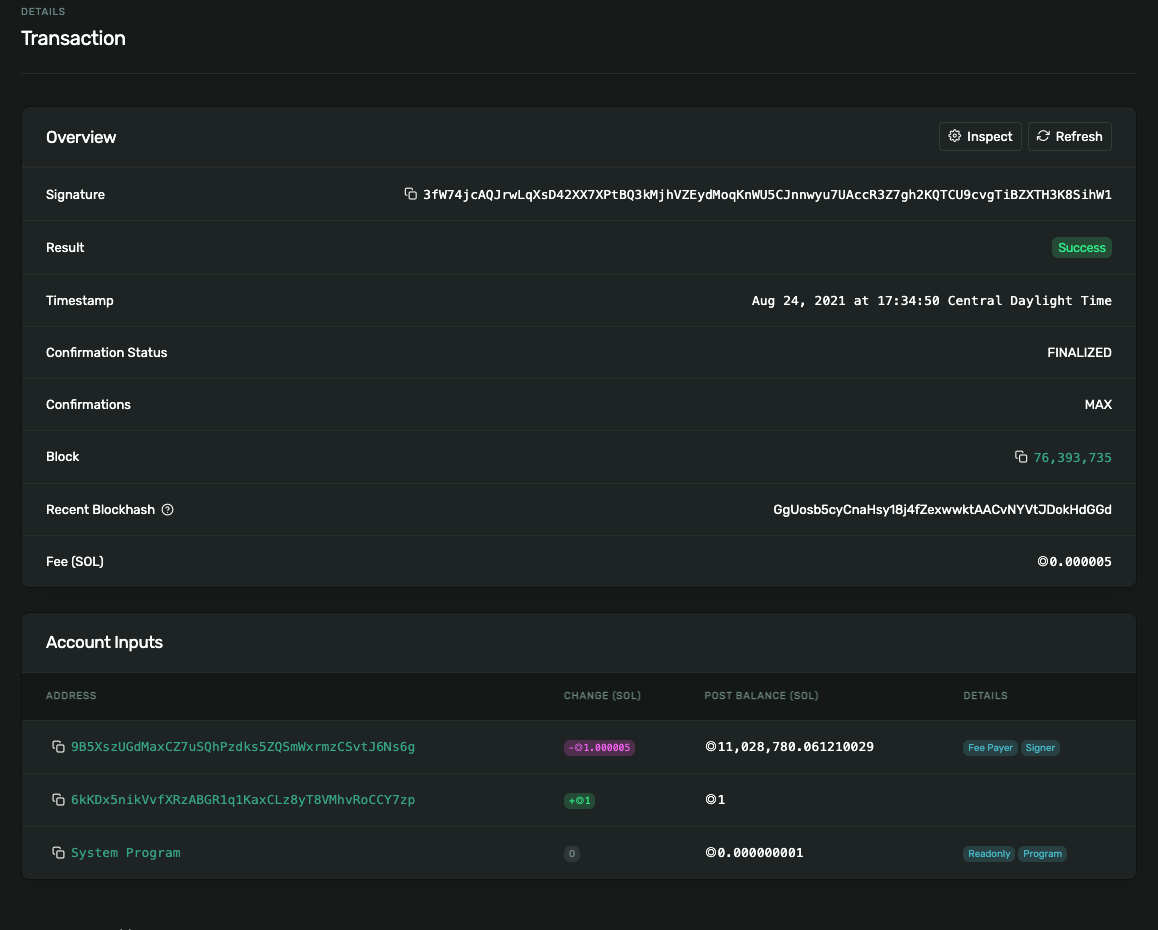
These two commands will run the TypeScript file, generate a JavaScript file with the same name, and run that file. You should see a signature logged in the terminal after some time.
If you visit the Solana Explorer, you should see your signature. It will look something like this:
Here's the complete code you should have:
import { Connection, Keypair } from  "@solana/web3.js";
import { createMint, getOrCreateAssociatedTokenAccount, mintTo, setAuthority, transfer } from  "@solana/spl-token";

const quicknodeEndpoint = 'https://example.solana-devnet.quiknode.pro/0123456/';
const connection = new Connection(quicknodeEndpoint, "confirmed");

const secret=[0...0]; // Replace with your secret key
const fromWallet = Keypair.fromSecretKey(new Uint8Array(secret));

(async () => {
  // Create a new token
  const mint = await createMint(
    connection,
    fromWallet,            // Payer of the transaction
    fromWallet.publicKey,  // Account that will control the minting
    null,                  // Account that will control the freezing of the token
    0                      // Location of the decimal place
  );

  // Get the token account of the fromWallet Solana address. If it does not exist, create it.
  const fromTokenAccount = await getOrCreateAssociatedTokenAccount(
    connection,
    fromWallet,
    mint,
    fromWallet.publicKey
  );

  // Generate a new wallet to receive the newly minted token
  const toWallet = Keypair.generate();

  // Get the token account of the toWallet Solana address. If it does not exist, create it.
  const toTokenAccount = await getOrCreateAssociatedTokenAccount(
    connection,
    fromWallet,
    mint,
    toWallet.publicKey
  );

  // Minting 1 new token to the "fromTokenAccount" account we just returned/created.
  let signature = await mintTo(
    connection,
    fromWallet,               // Payer of the transaction fees
    mint,                     // Mint for the account
    fromTokenAccount.address, // Address of the account to mint to
    fromWallet.publicKey,     // Minting authority
    1                         // Amount to mint
  );

  await setAuthority(
    connection,
    fromWallet,            // Payer of the transaction fees
    mint,                  // Account
    fromWallet.publicKey,  // Current authority
    0,                     // Authority type: "0" represents Mint Tokens
    null                   // Setting the new Authority to null
  );

  signature = await transfer(
    connection,
    fromWallet,               // Payer of the transaction fees
    fromTokenAccount.address, // Source account
    toTokenAccount.address,   // Destination account
    fromWallet.publicKey,     // Owner of the source account
    1                         // Number of tokens to transfer
  );

  console.log("SIGNATURE", signature);

})();
Conclusion
If you made it this far, you learned a few things from this tutorial and some from our other Solana guides, so congratulations! Having gone through this one, you have successfully created an NFT on the Solana blockchain. The next step for you to do would be to link this unique one-of-a-kind token, to some asset. Here are some guides to do just that and go deeper into Solana NFTs:
- How to Create an NFT Collection with Candy Machine Sugar
- How to Create and Mint a Solana NFT with Metadata using TypeScript
- Solana NFT Metadata Deep Dive
- Build an NFT Gallery with Quicknode API
Subscribe to our newsletter for more articles and guides on Ethereum. If you have any feedback, feel free to reach out to us via Twitter. You can always chat with us on our Discord community server, featuring some of the coolest developers you will ever meet :)
We ❤️ Feedback!
If you have any feedback on this guide, let us know. We'd love to hear from you.