8 min read
Overview
In this tutorial we will look at how we can setup a basic NEAR project from scratch, installing and configuring dependencies and customizing the project to work well with AssemblyScript.
We will first start by initializing our project with a package.json file using NPM, then setting up and configuring/customizing AssemblyScript for our NEAR contract development.
Prerequisites:
- Node.js installed
- Basic javascript/typescript knowledge
- Enthusiasm to complete tutorial
Setting Up the project
In this section, we will initialize our project from a blank folder and install the necessary dependencies for our project to work. We first create our project folder and name it whatever we want. I’ll be naming mine nearfromscratch. With the folder opened in our editor, we run the npm init command which will run us through some questions like project version, author, etc. When we are done initializing our project, we see our package.json file in our project folder. Below is the information we have in our package.json file.
// package.json
{
  "name": "near-singleton-concept",
  "version": "1.0.0",
  "description": "Learn how the singleton concept works",
  "scripts": {
    "test": "asp"
  },
  "author": "Uma Victor",
  "license": "ISC",
}
Next, we install the SDK library used in building smart contracts in AssembyScript and interact with the NEAR blockchain.
yarn add -D near-sdk-as
Once the installation is done, a package.json and a yarn.lock file is created with all the configurations.
Since we are building with AssemblyScript, the AssemblyScript compiler expects us to put our contract file in an assembly folder in our root directory. Let’s do that.
mkdir assembly
We also need to create an asconfig.json file which is a configuration file with different configurations for our AssemblyScript compiler to understand. In the file, we paste the following:
// asconfig.json
{
    "extends": "near-sdk-as/asconfig.json"
}
We have set up the project, it’s now time to write our smart contract and compile it. We will do this in the next section.
Writing Our Contract
In this section, we will look at the different ways we can write a smart contract for NEAR using AssemblyScript and create a greeting smart contract.
Smart contracts on NEAR can be written with two programming languages, which are RUST and AssemblyScript. For this tutorial, we will be making use of the AssemblyScript language to write our contract.
The two ways we can create AssemblyScript NEAR smart contracts is by:
- Having a collection of exported functions in the contract interface
- The singleton method, which involves having a class and writing our smart contract methods in the class and then exporting it.
We will be using the singleton method for our contract. First, let us create an index.ts file in our assembly folder, and in it we have:
// index.ts
import {Context, storage, logging } from "near-sdk-as";
// --- contract code goes below
/*
 * This is an example of an assembly smart contract on NEAR using the singleton method
 *
 * 1. setGreeting: accepts a greeting, such as "howdy", and records it for the
 *    user (account_id) who sent the request
 * 2. getGreeting: accepts an account_id and returns the greeting saved for it,
 *    defaulting to "Hello"
 *
 * Learn more about writing NEAR smart contracts with AssemblyScript:
 * https://docs.near.org/docs/develop/contracts/as/intro
 *
 */
@nearBindgen
export class Greeting {
  private DEFAULT_MESSAGE: string = "hello world"
 getGreeting(accountId: string): string | null {
    // This uses raw `storage.get`, a low-level way to interact with on-chain
    // storage for simple contracts.
    // If you have something more complex, check out persistent collections:
    // https://docs.near.org/docs/concepts/data-storage#assemblyscript-collection-types
    return storage.get<string>(accountId, this.DEFAULT_MESSAGE)
  }
  setGreeting(message: string): void {
    const accountId = Context.sender
    // Use logging.log to record logs permanently to the blockchain!
    logging.log(`Saving greeting "${message}" for account "${accountId}"`)
    storage.set(accountId, message)
  }
}
The above greeting contract is written using the singleton method. The smart contract code is commented on so you can understand what is happening. You can learn more about building smart contracts on NEAR from their official docs. Then play around a bit with the code and see how you can write the contract interface by just exporting the contract functions.
Let us see how we can set up our type configuration for our greeting smart contract and compile the the contract in the next section.
Setting Up Type Configuration And Compiling Our Contract
In this section, we will look at how to set up type configuration for typescript so the assembly script compiler can understand. Also, we will compile our contract into a web assembly file. The reason we are setting up the type configuration is due to the presence of certain types from the AssemblyScript language that the typescript compiler can’t understand. To do this, we create a tsconfig.json file at the root of our directory and paste the following configuration
// tsconfig.json
{
    "extends": "../node_modules/assemblyscript/std/assembly.json",
    "include": ["./**/*.ts"]
}
Now, we can compile our contract by running the command:
npx asb
This command compiles our index.ts file down to a .wasm file which can now be deployed on the NEAR blockchain. The compiled wasm file is located in the build folder created as we run the command. In the next section we will be running our tests and compiling our contracts.
Writing Tests For Our Contract
When writing smart contracts on NEAR, or any blockchain, writing tests can be very helpful because of the immutable nature of blockchain. That is why in this section, we will look at how to set up a testing suite in the AssemblyScript NEAR contract. To get started, let us first initialize a sample test with this command:
npx asp --init
When we run the command, we can see that an as-pect.config.js file is created in the root of our project and a __test__ folder is also created in the same directory as our index.ts file. In the as-pect.config.js, we configure our test to work with NEAR by pasting this config in the file:
module.exports = require("near-sdk-as/imports");
module.exports.include.push("**/*.unit.spec.ts");
In the __test__ folder we have example.spec.ts file which contains the sample test for our contract. We can clear the content of the file and now paste the actual tests for the contract we wrote:
The code above makes sure we set our greetings to hello world. To learn more about unit tests with AssemblyScript, you can read up on this tutorial. Now if we run the npx asp command, our test passes and we are good to go.
Deploying Our NEAR Contract Locally
In the last section, we looked at how to test our contract. All our tests are passing and in this section, we will look at how to deploy our contract and interact with the contract methods using the near-cli. To deploy our contract we need to compile it first. To compile our contract, we run this command:
npx asb
The command compiles our AssemblyScript contract into a Wasm file before it can be deployed to the NEAR blockchain. This wasm file is located in our build/release folder and is ready to be deployed to the NEAR blockchain.
Before we can continue, we need the near-cli installed. The near-cli is a node.js command-line interface that makes use of the NEAR API to connect and interact with the NEAR blockchain.
To install, run:
npm install -g near-cli
NOTE: make sure you have Node version 12 or higher installed.
Login to NEAR
Now that we have the near-cli installed, we need to create a testnet account that we can log into while we are deploying our contract to production. To deploy to production we first need to create a testnet account by visiting here.
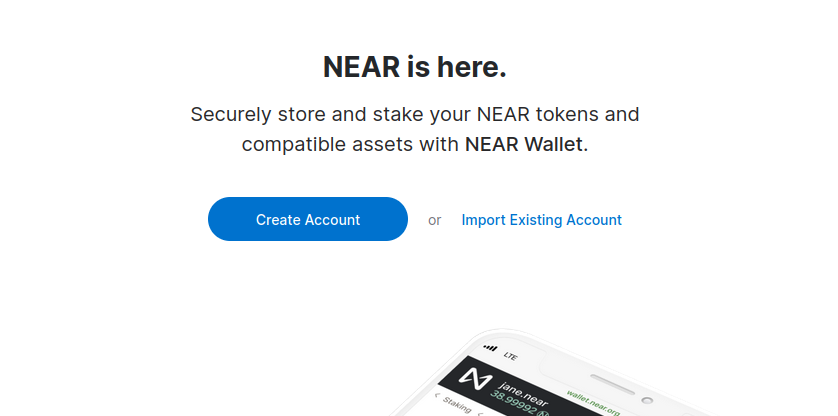
Click on Create Account, follow the prompts and you’ll have your testnet accountId created in less than a minute.
Your accountId identifies you and your wallet on the NEAR blockchain. You’ll be using your testnet accountId to log into the near-cli and also deploying your contracts to it.
We have created a testnet account and the near-cli installed globally, next we run the command:
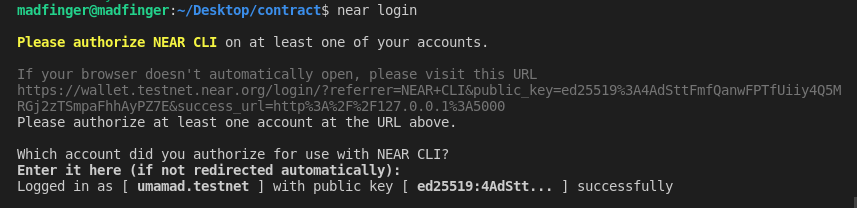
near login
The near login command redirects us to a browser window where we select the account we just created.
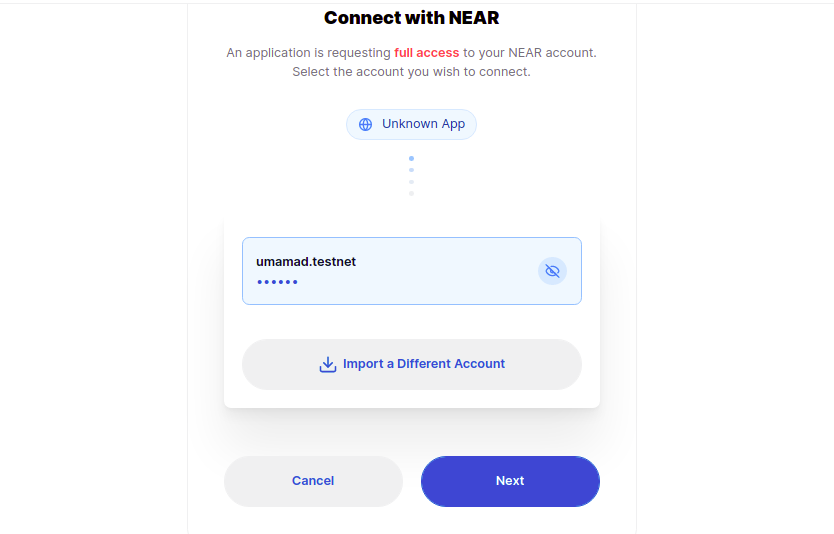
Then we click next. On the next page, we click on connect and we see a pop-up window prompting us to paste our accountId:
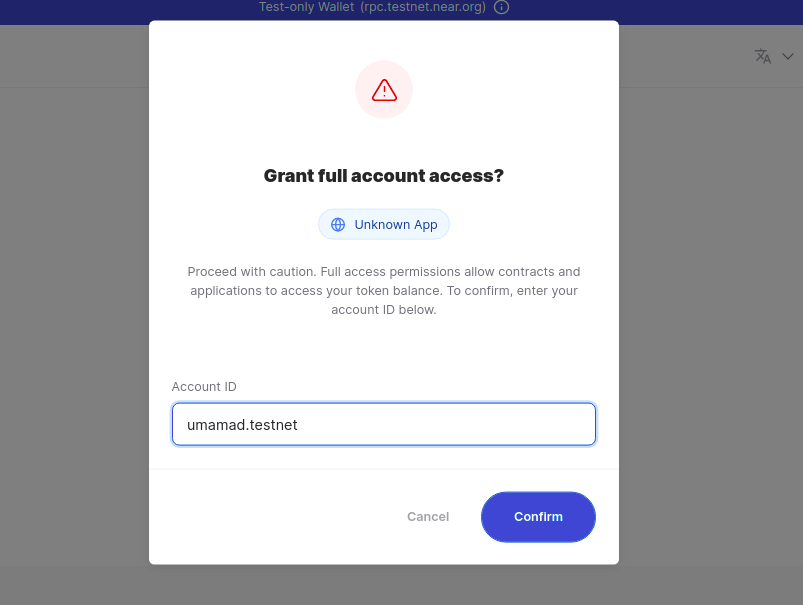
We click on confirm and we see a message on our screen telling us we are logged in successfully. In the terminal we can also see that we have logged in:
It is now time to deploy our contract. To deploy, run the command:
near dev-deploy build/release/<your contract name here>.wasm
Once the command is done running, we can see that a folder neardev appears in the root of our project folder, containing a text file and an env file, with the contract dev account it was deployed.
Deploying Our Contract In Production
In the last section, we looked at how to deploy our contract in development. Let us see how we can deploy to production in this section. To deploy we specify our contract name which is our accountId and the location of the contract wasm file we are to deploy. Look at the command below
near deploy --contractName=umamad.testnet --keyPath=./path-to/testnet/<accountId>.json --wasmFile=./build/release/<contractName>.wasm
When we run the command, our contract is deployed successfully. Now it’s time to interact with the contract by calling the methods we have.
Interacting With Our Deployed Contract
In the last section, we looked at how to compile and deploy our smart contract, and in this section, we will look at how we can interact with the smart contract. In the smart contract we wrote earlier, we have two methods we can interact with which are
- getGreeting -which fetches the greetings we have.
- setGreeting - which sets the greeting as an argument.
To set a greeting, you can run this command:
near call umamad.testnet setGreeting '{"message": "hello vicky"}' --accountId umamad.testnet
The code above calls the setGreeting function with the message argument. When we run the command we get this in our terminal

We have updated our state with the new greeting and we can view it on the near explorer by clicking on the link in the terminal. Now we want to get the greeting we just set to the state, so we call the getGreeting method. To get the greeting we set, we run:
near call umamad.testnet getGreeting --accountId umamad.testnet
And in our terminal, we see:

The command returns to the terminal the greeting that was set by the setGreeting method “hello vicky”.
umamad.testnet is the testnet account created for this tutorial, so make sure you use the accountId you created earlier and not umamad.testnet
In this section we interacted with the methods we created in our smart contract and returned the greeting we set.
Conclusion
We have finally come to the end of this tutorial. In the tutorial, we looked at how to setup a basic NEAR project from scratch, installing and configuring dependencies and running tests for the contract. Hope you enjoyed reading the tutorial and got a better understanding of how a NEAR project is set up. If you would like to learn more about NEAR you can read up on their documentation.
Subscribe to our newsletter for more articles and guides on Ethereum. If you have any feedback, feel free to reach out to us via Twitter. You can always chat with us on our Discord community server, featuring some of the coolest developers you’ll ever meet :)