10 min read
Overview
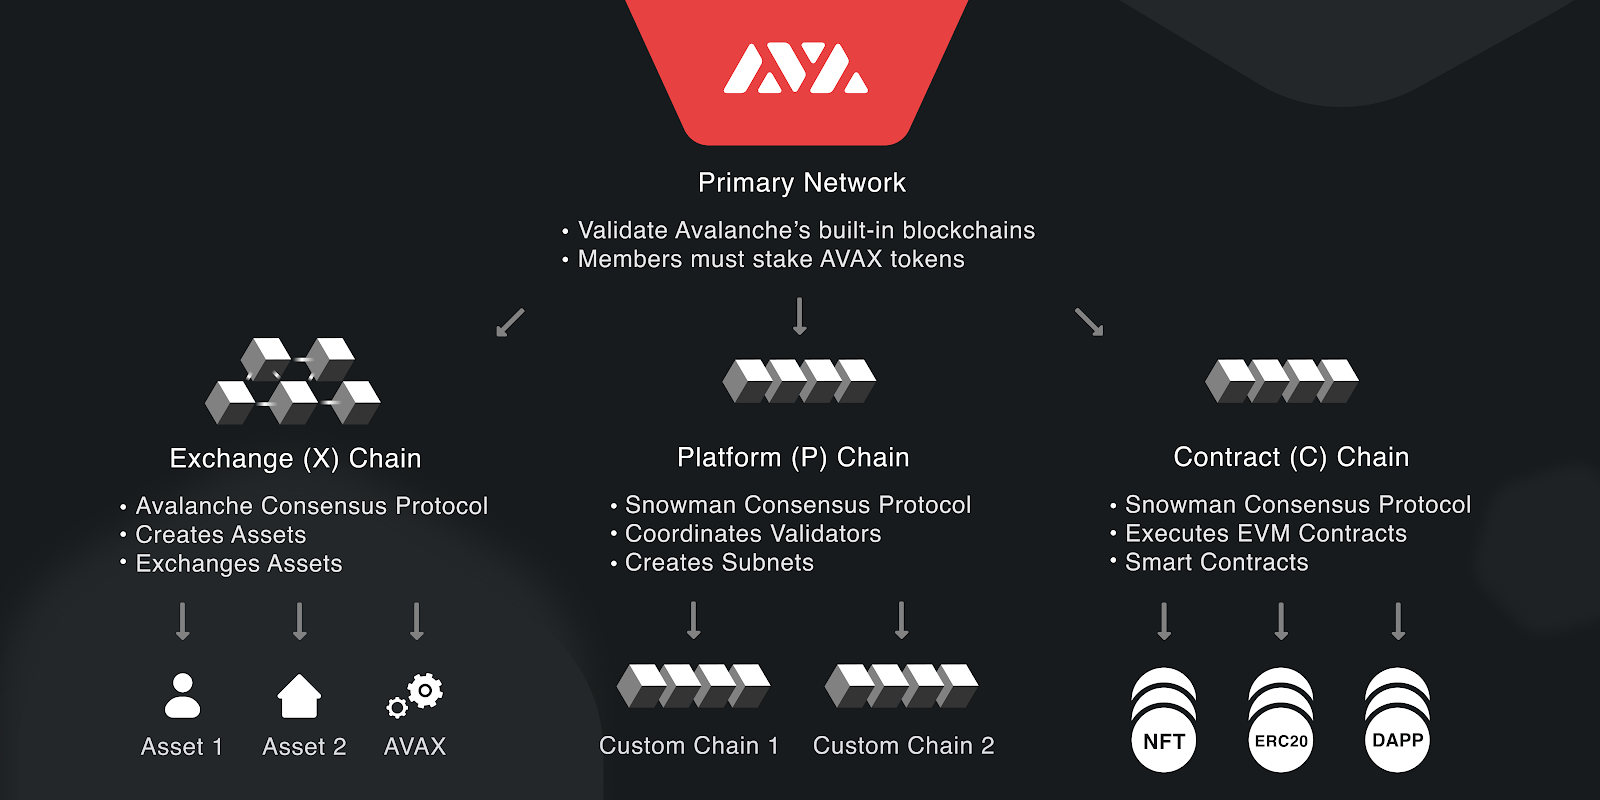
Avalanche is an open-source, proof-of-stake blockchain with smart contract functionality that uses the Snow family of consensus protocols. The Avalanche Primary Network consists of 3 built-in blockchains that are validated and secured by the Primary Network:
-
Exchange Chain (X-Chain) - Acts as a decentralized platform for creating and trading digital smart assets like AVAX. These assets represent of a real-world resource with a set of rules that govern its behavior. The X-Chain is an instance of the Avalanche Virtual Machine (AVM).
-
Platform Chain (P-Chain) - Coordinates validators, keeps track of active subnets, and enables the creation of new subnets as the metadata blockchain on Avalanche. The P-Chain implements the Snowman consensus protocol.
-
Contract Chain (C-Chain) - Allows for the creation of smart contracts using the C-Chain’s API.
Avalanche is one of several new Layer 1 blockchains that are competing to draw Ethereum developers. For a simpler onboarding experience for Ethereum developers, Avalanche's smart contracts can be written in Solidity. Avalanche's consensus mechanism aims to enable developing applications that are faster, cheaper, and more energy efficient than competing chains.
In this guide, we’ll walk through setting up a wallet for the Avalanche network, deploying a smart contract, and connecting a frontend application to that contract. By the end, you’ll have a dApp connected to the Avalanche Fuji testnet.
What You Will Do
- Configure your Coinbase Wallet for the Avalanche network
- Deploy a smart contract written in Solidity to the Fuji Testnet
- Create a React frontend application that reads and writes to the contract
What You Will Need
- Node v16 and Yarn
- Coinbase Wallet
- Knowledge of JavaScript, React, and Vite
- GitHub CLI
Set Up Avalanche API on QuickNode
To build on Avalanche, you'll need an API endpoint to talk to on their network. If you'd like to deploy, host, and manage your own infrastructure, you can skip this section. If you'd like to leave the heavy lifting to us, you can sign up for a free account on QuickNode by filling in the form on the homepage.
Create an Endpoint
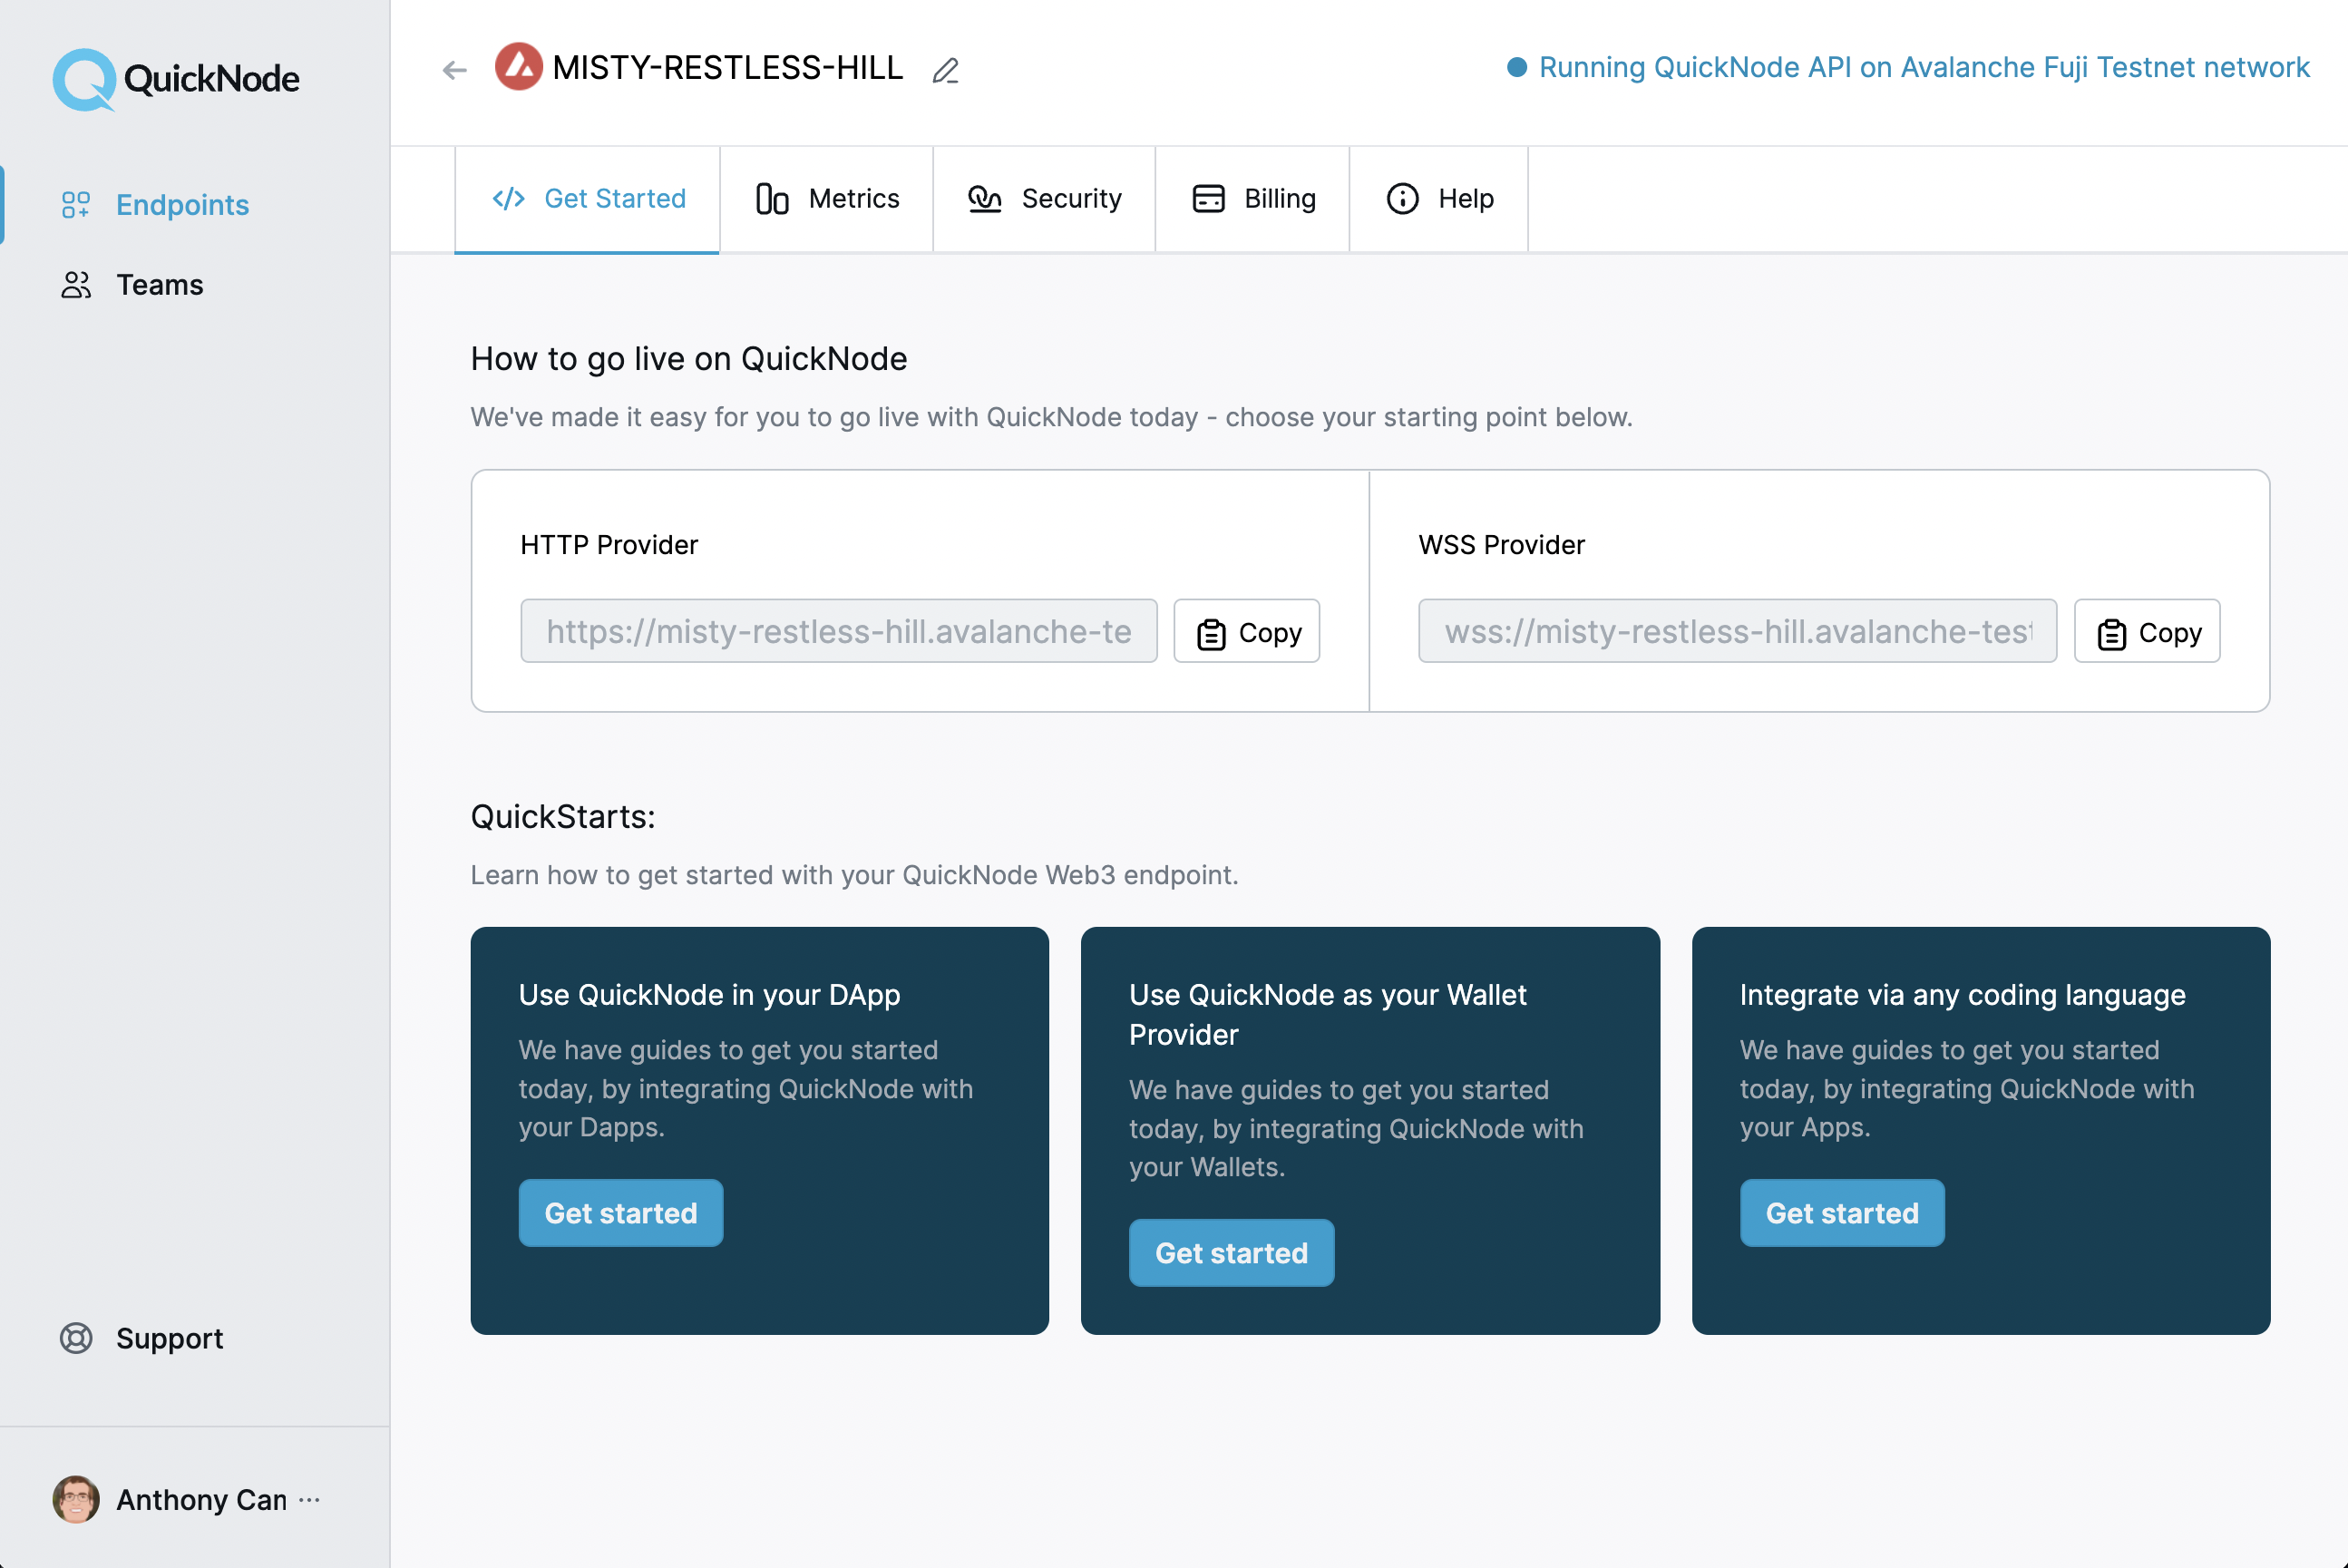
Once you’ve created an account, you should see the following screen.
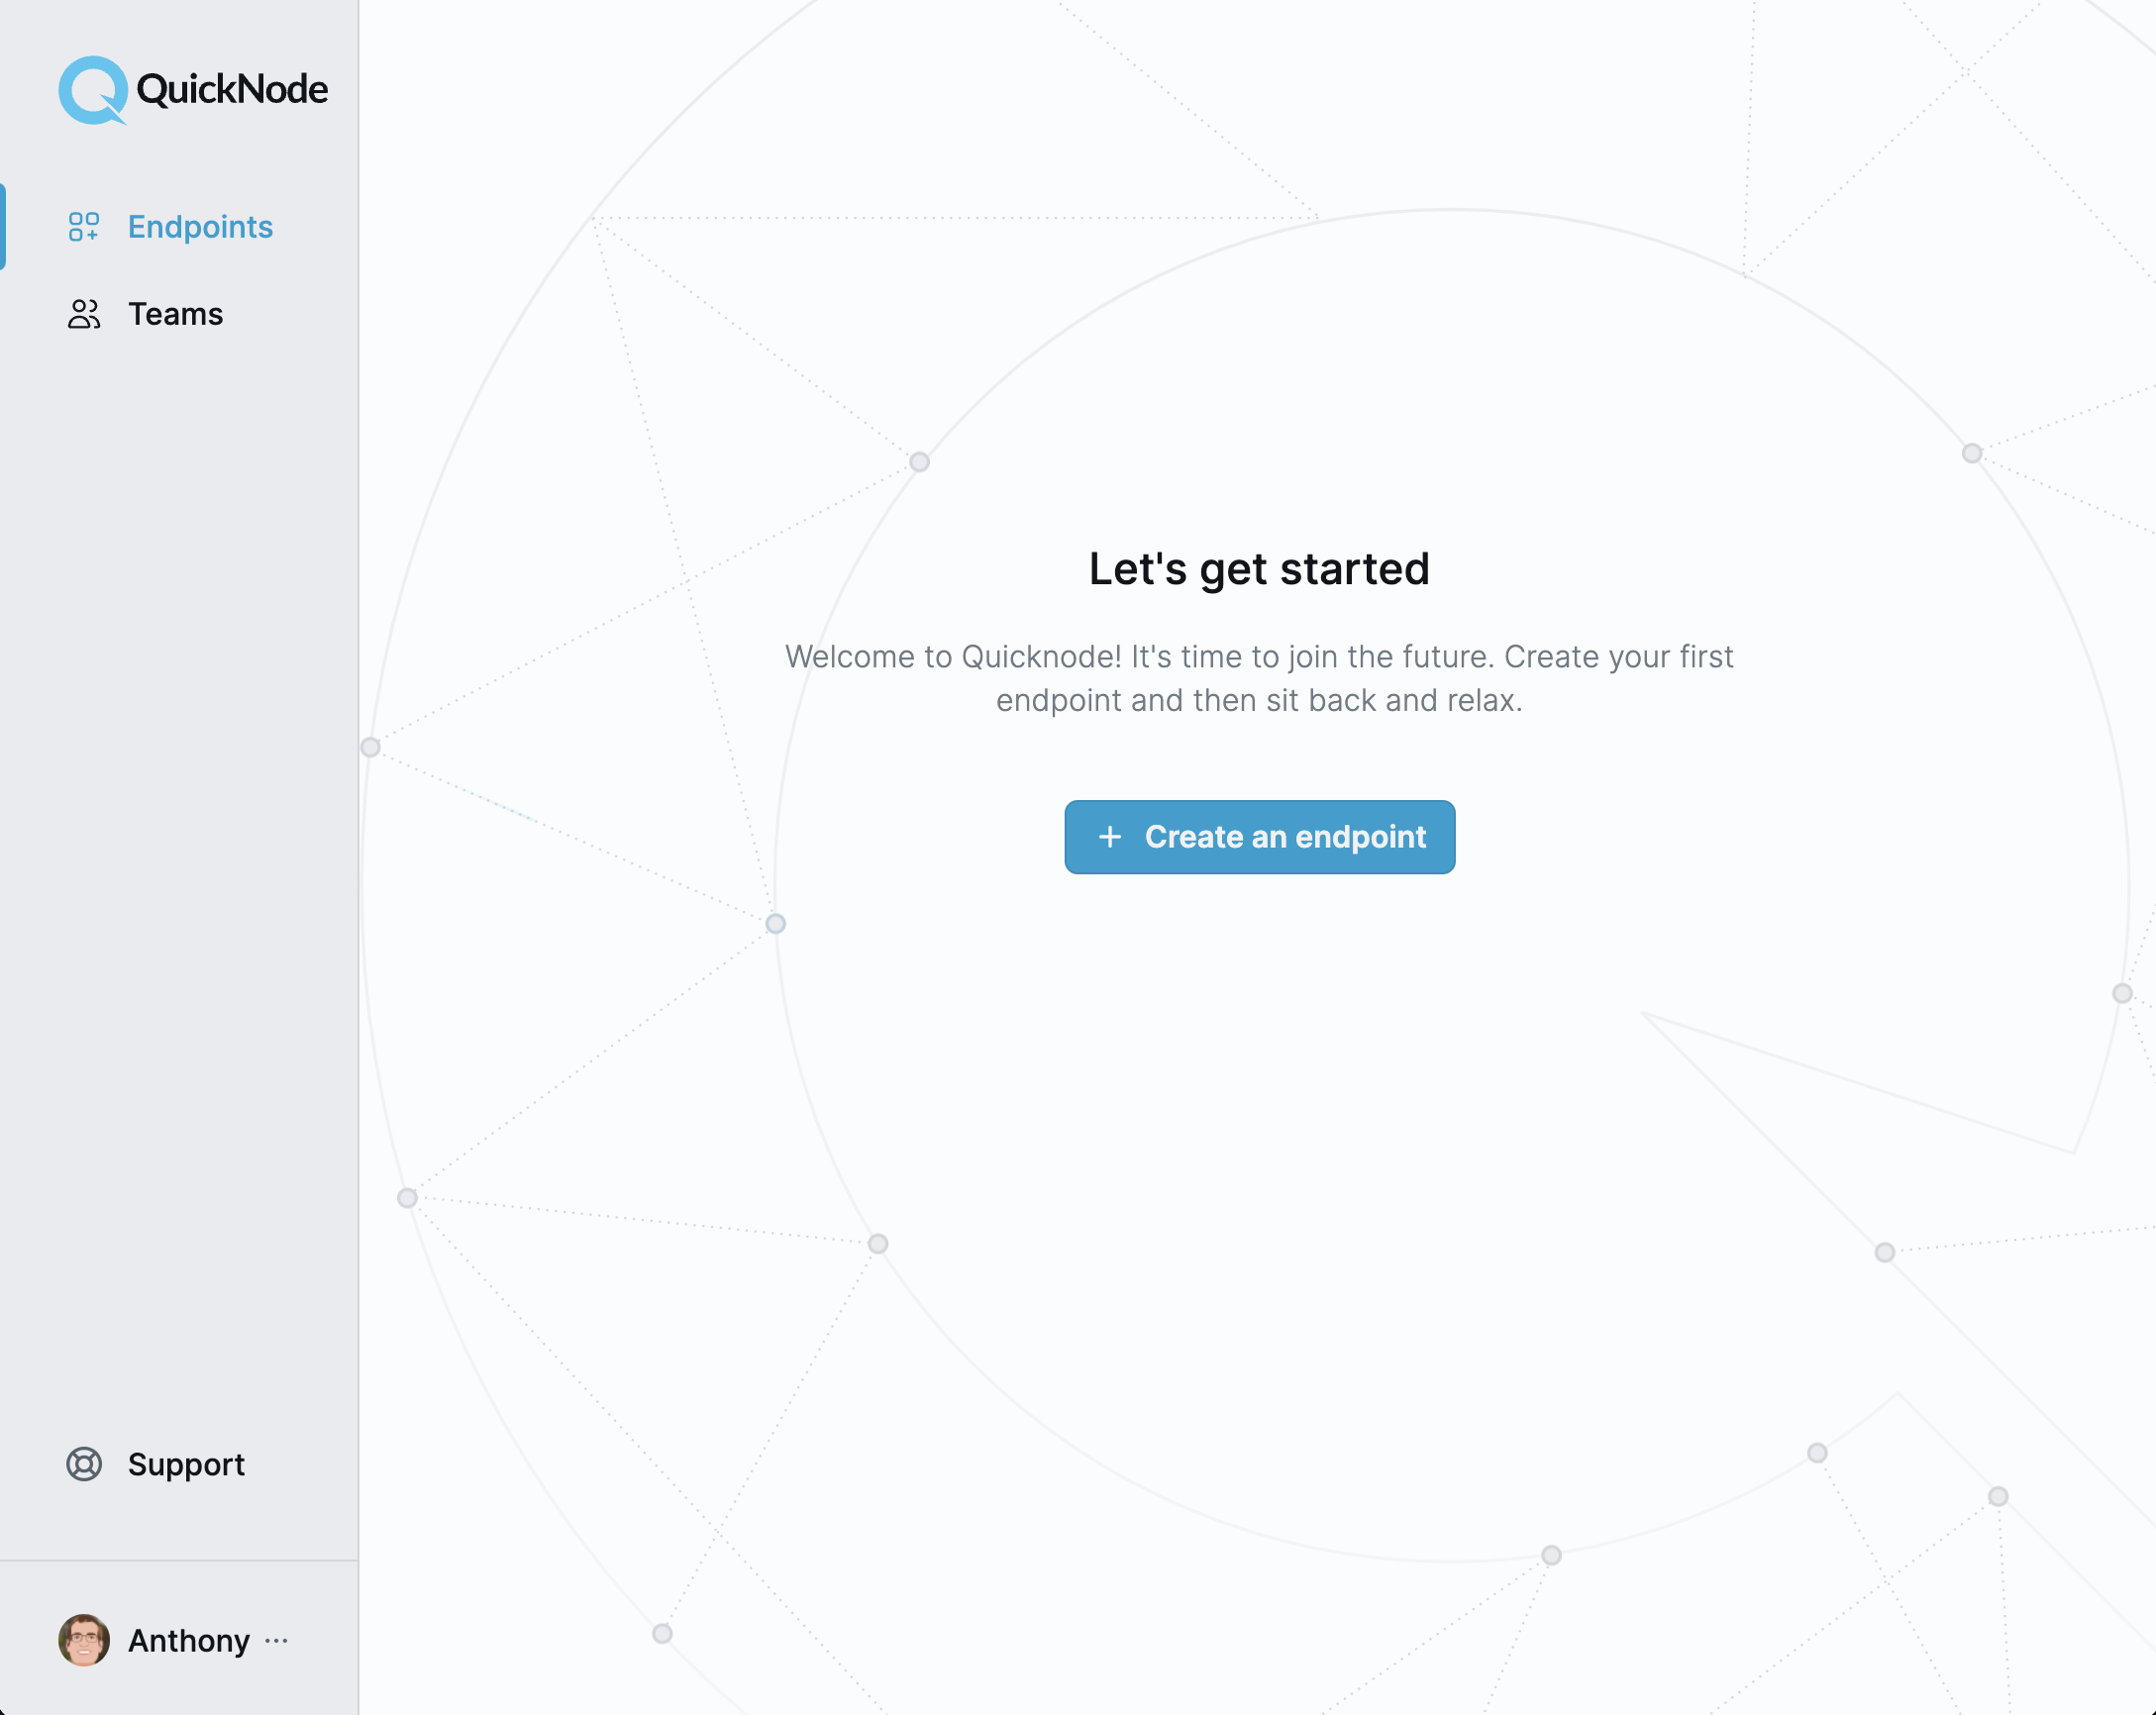
Click the "Create an endpoint" button and select the "Avalanche" chain.
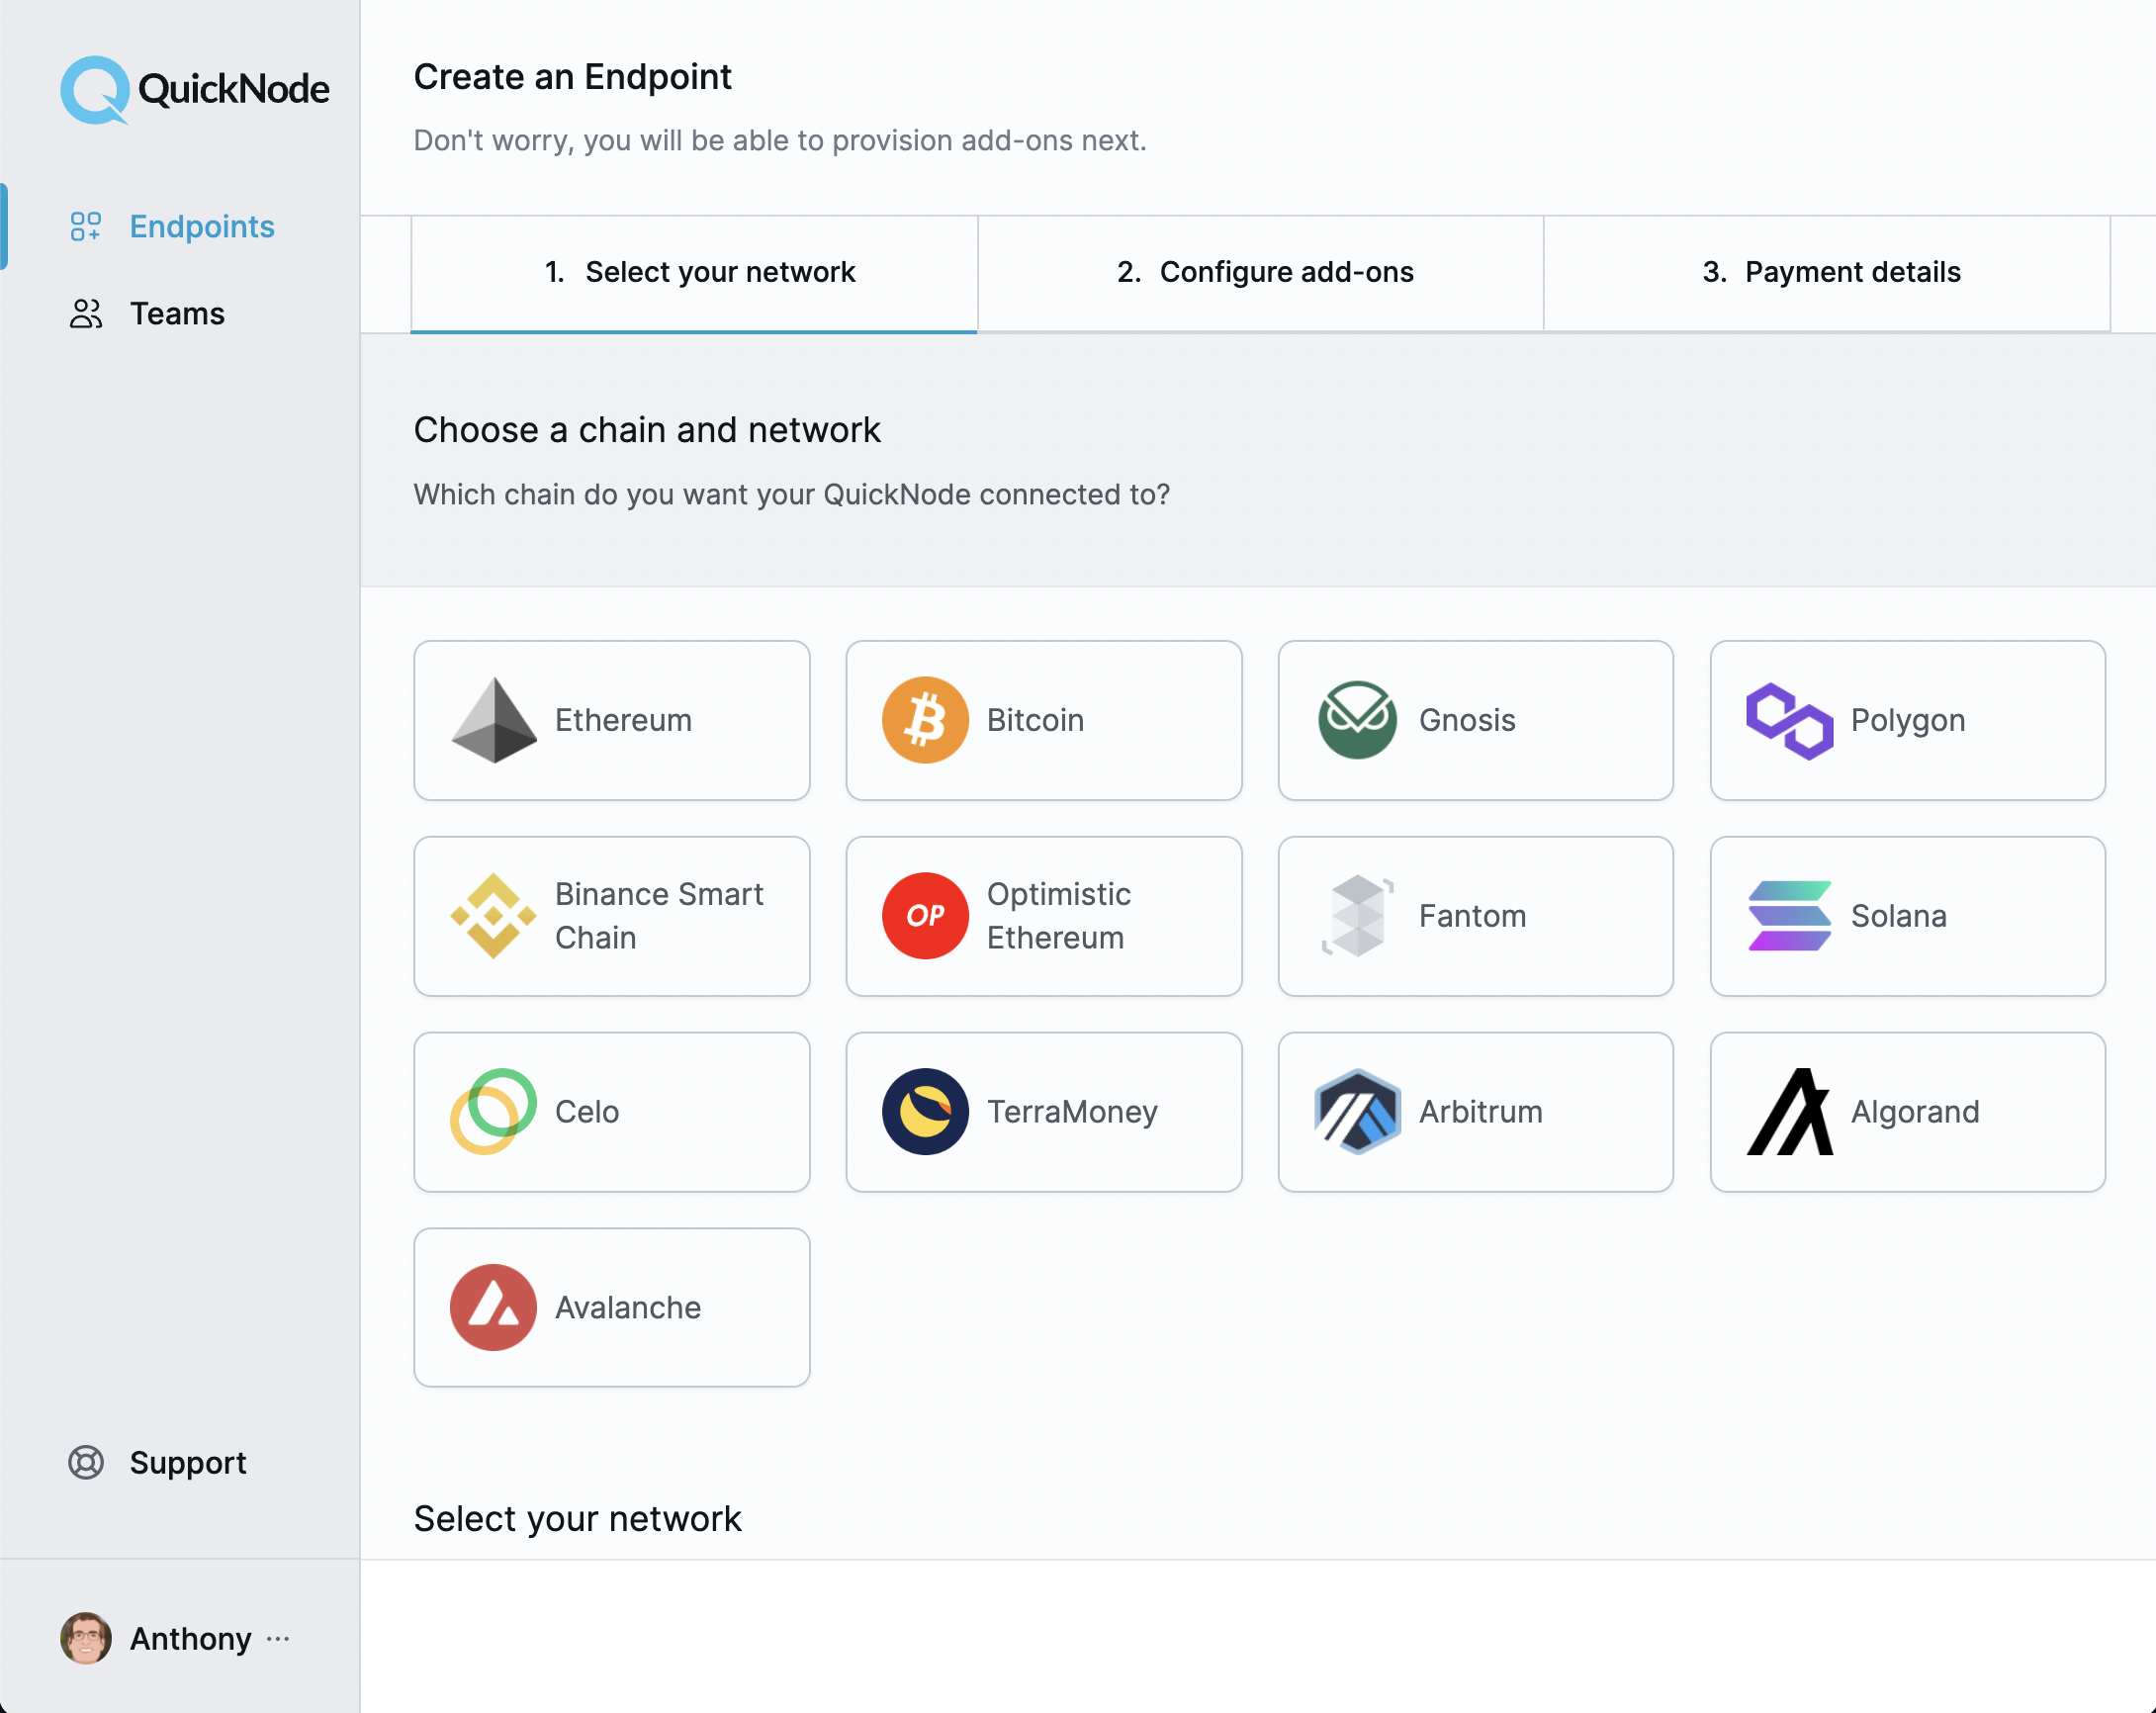
We’ll be working with the Fuji Testnet for this guide, so go ahead and select the "Fuji Testnet" for the network.
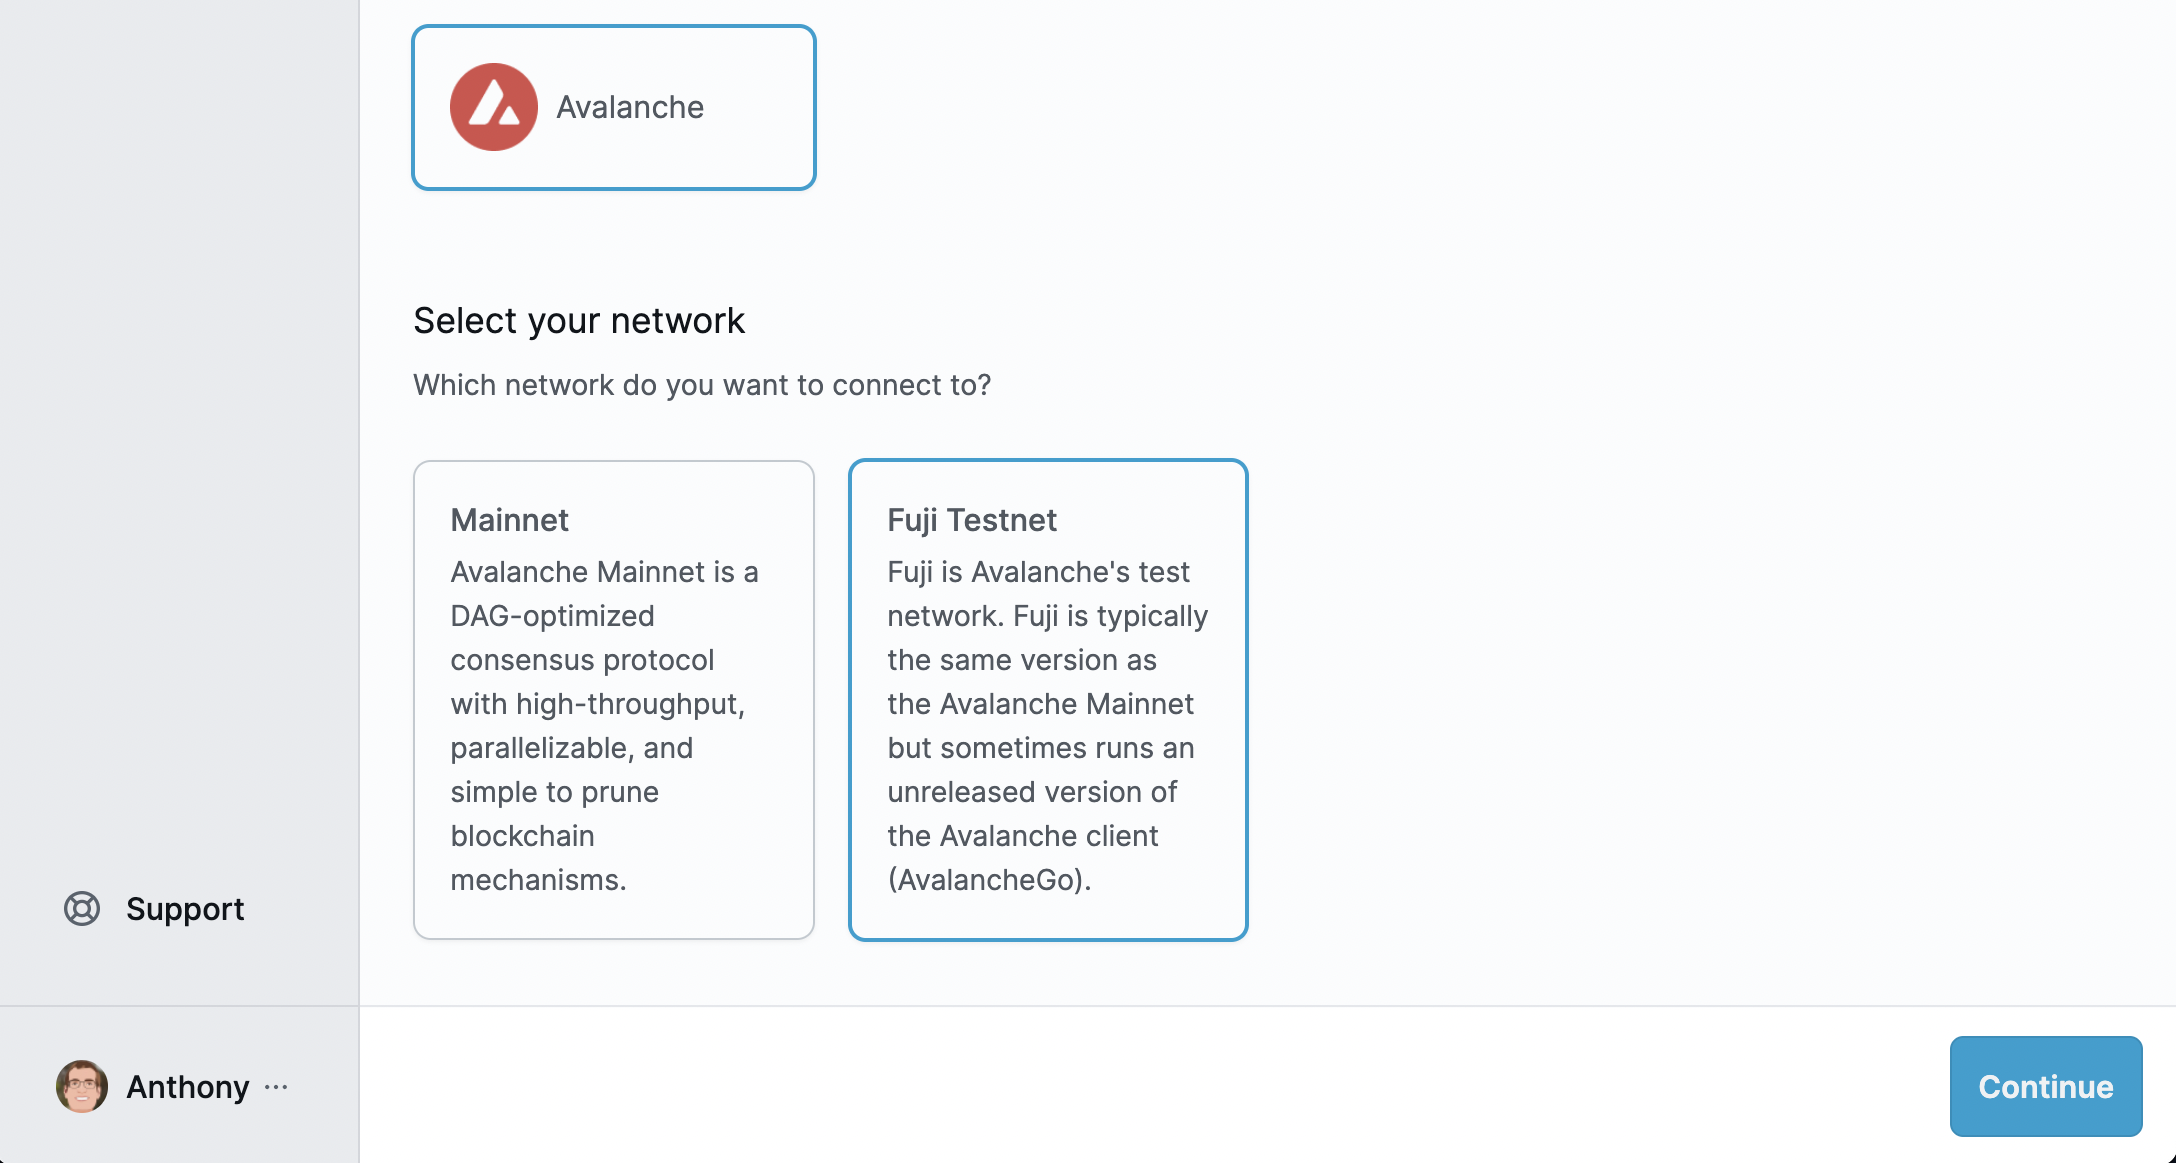
You will then have the option to set up any additional functionality, including Archive Mode or Trace Mode. You can skip those for this guide and complete the setup by submitting your payment information. Your card will not be charged for the first seven days.
Configure Coinbase Wallet for Avalanche
You can create an Avalanche Wallet online at wallet.avax.network or configure an existing wallet that allows connecting to RPC endpoints. We will be using Coinbase Wallet in this tutorial which you can download here.
Add Avalanche Network
Open your Coinbase Wallet and enable Developer Mode in the Settings tab. In the same tab, check the available networks by selecting "Default network" and selecting "Avalanche Fuji" under testnets.
Fuji Testnet Faucet
To interact with Fuji, we need to have AVAX in your wallet. Like the Ropsten faucet on Ethereum, Avalanche has the Fuji Testnet Faucet. Include your wallet address and click "Request 2 AVAX."
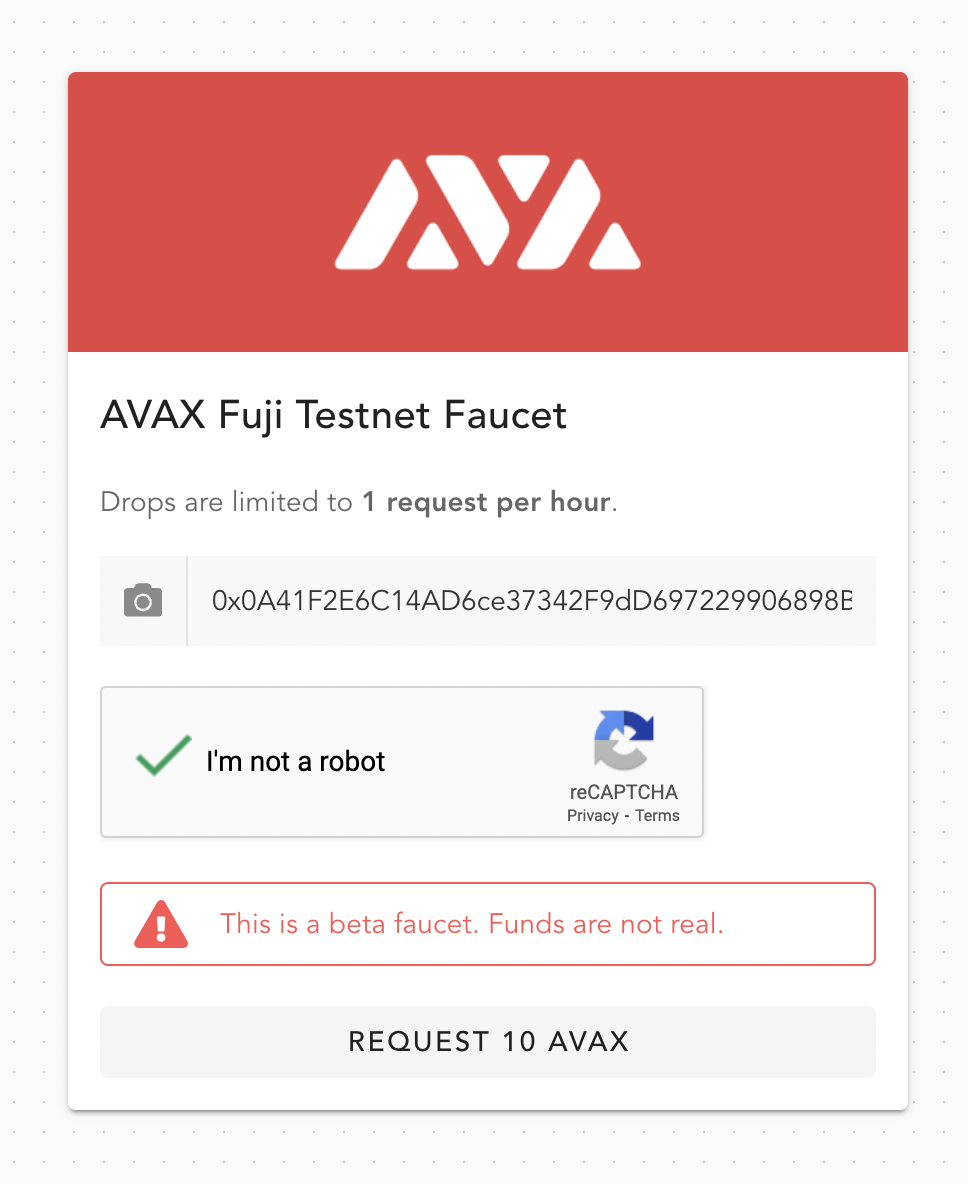
Return to your wallet. You should now have 2 AVAX.
Create a New Project
Vite is a modern, frontend build tool and open source project that offers an alternative to Webpack. You can use it to create a new project with the Vite React template that is very similar to the type of project created by create-react-app. We’ll use it to connect to the smart contract deployed later in the tutorial.
Open a Terminal window and run the following commands to set it up:
yarn create vite getting-started-with-avalanche --template react
cd getting-started-with-avalanche
After generating the boilerplate app, install dependencies for hardhat, ethers, @nomiclabs/hardhat-ethers, and dotenv to manage environment variables:
yarn add -D dotenv hardhat ethers @nomiclabs/hardhat-ethers
Create the directories and files for your smart contract, Hardhat deployment script, and Hardhat configuration:
mkdir contracts scripts
echo > contracts/HelloWorld.sol
echo > scripts/deploy.js
echo > hardhat.config.js
Create a .env file in the root directory of your project to hold environment variables for our endpoint URL, private key, and contract address.
echo 'QUICKNODE_URL=\nPRIVATE_KEY=\nVITE_CONTRACT_ADDRESS=' > .env
Add .env to .gitignore so you do not commit any private information.
echo '.env' >> .gitignore
Create a Hello World Solidity Contract
Next, we’ll add a boilerplate smart contract, HelloWorld, to deploy to Avalanche. Open a code editor of choice and paste this code into contracts/HelloWorld.sol:
// contracts/HelloWorld.sol

// SPDX-License-Identifier: GPL-3.0
pragma solidity ^0.8.6;

import "hardhat/console.sol";

contract HelloWorld {
  string private helloMessage;

  constructor(string memory _helloMessage) {
    console.log(_helloMessage);
    helloMessage = _helloMessage;
  }

  function hello() public view returns (string memory) {
    return helloMessage;
  }

  function setHello(string memory _helloMessage) public {
    console.log("Changing helloMessage from '%s' to '%s'", helloMessage, _helloMessage);
    helloMessage = _helloMessage;
  }
}
You can now access Logs for your RPC endpoints, helping you troubleshoot issues more effectively. If you encounter an issue with your RPC calls, simply check the logs in your QuickNode dashboard to identify and resolve problems quickly. Learn more about log history limits on our pricing page.
The contract has a string variable called helloMessage. It contains a hello function which returns the value set to helloMessage. Another function, setHello, changes the value of helloMessage to whatever argument is passed into the function.
Now that we have created our smart contract, let’s deploy it to Avalanche!
Write the Deployment Script
Add the following deployment script to scripts/deploy.js:
// scripts/deploy.js

async function main() {
  const HelloWorldFactory = await ethers.getContractFactory("HelloWorld")
  const helloMessage = await HelloWorldFactory.deploy("Hello from QuickNode")
  await helloMessage.deployed()

  console.log("Contract deployed to:", helloMessage.address)
  console.log("Contract deployed by " + JSON.stringify(helloMessage.signer) + " signer")
  process.exit(0)
}

main()
  .then(() => process.exit(0))
  .catch((error) => {
    console.error(error)
    process.exit(1)
  })
The main function calls the getContractFactory method on the ethers library and passes in HelloWorld as the name of the contract. HelloWorldFactory is deployed with the message "Hello from QuickNode" and set to helloMessage. This is then called on the next line with the deployed method. Lastly, the address and signer for the contract are logged to the console.
Hardhat Configuration
Now that we have our contract and a script to deploy it, the last step is to write our Hardhat configuration. The configuration specifies where the contract artifacts are placed in the project and what network the contract is deployed to.
The code for it looks like this:
// hardhat.config.js

require("dotenv").config()
require("@nomiclabs/hardhat-ethers")

module.exports = {
  solidity: "0.8.6",
  paths: {
    artifacts: './src/artifacts',
  },
  networks: {
    fuji: {
      url: process.env.QUICKNODE_URL,
      accounts: [`0x` + process.env.PRIVATE_KEY],
      chainId: 43113,
    },
  },
}
Here we specify the Solidity version, the path for the contract artifacts, and the network information for Fuji. Add this code to the hardhat.config.js file.
Before we can deploy this contract, we need to include two environment variables in .env . Navigate to the Coinbase Wallet extension and click on "Show Recovery Phrase". Copy your private key and set it to the PRIVATE_KEY variable.
Next, visit the QuickNode dashboard and copy the HTTP provider URL for your endpoint. Paste the URL into your .env file and include /ext/bc/C/rpc at the very end of the URL to specify that you want to connect to the C-Chain. This chain is an instance of the Ethereum Virtual Machine that allows for creating smart contracts with the C-Chain’s API.
Deploy Contract to Fuji
Before deploying the contract, we need to first compile the contract. Run the following command:
yarn hardhat compile
Then, deploy the contract and include a --network flag to specify the Fuji test network.
yarn hardhat run scripts/deploy.js --network fuji
If everything in your project is set up correctly, after running this script your terminal outputs the following message but with your own addresses:
Go to Snowtrace Testnet and search for your contract address.
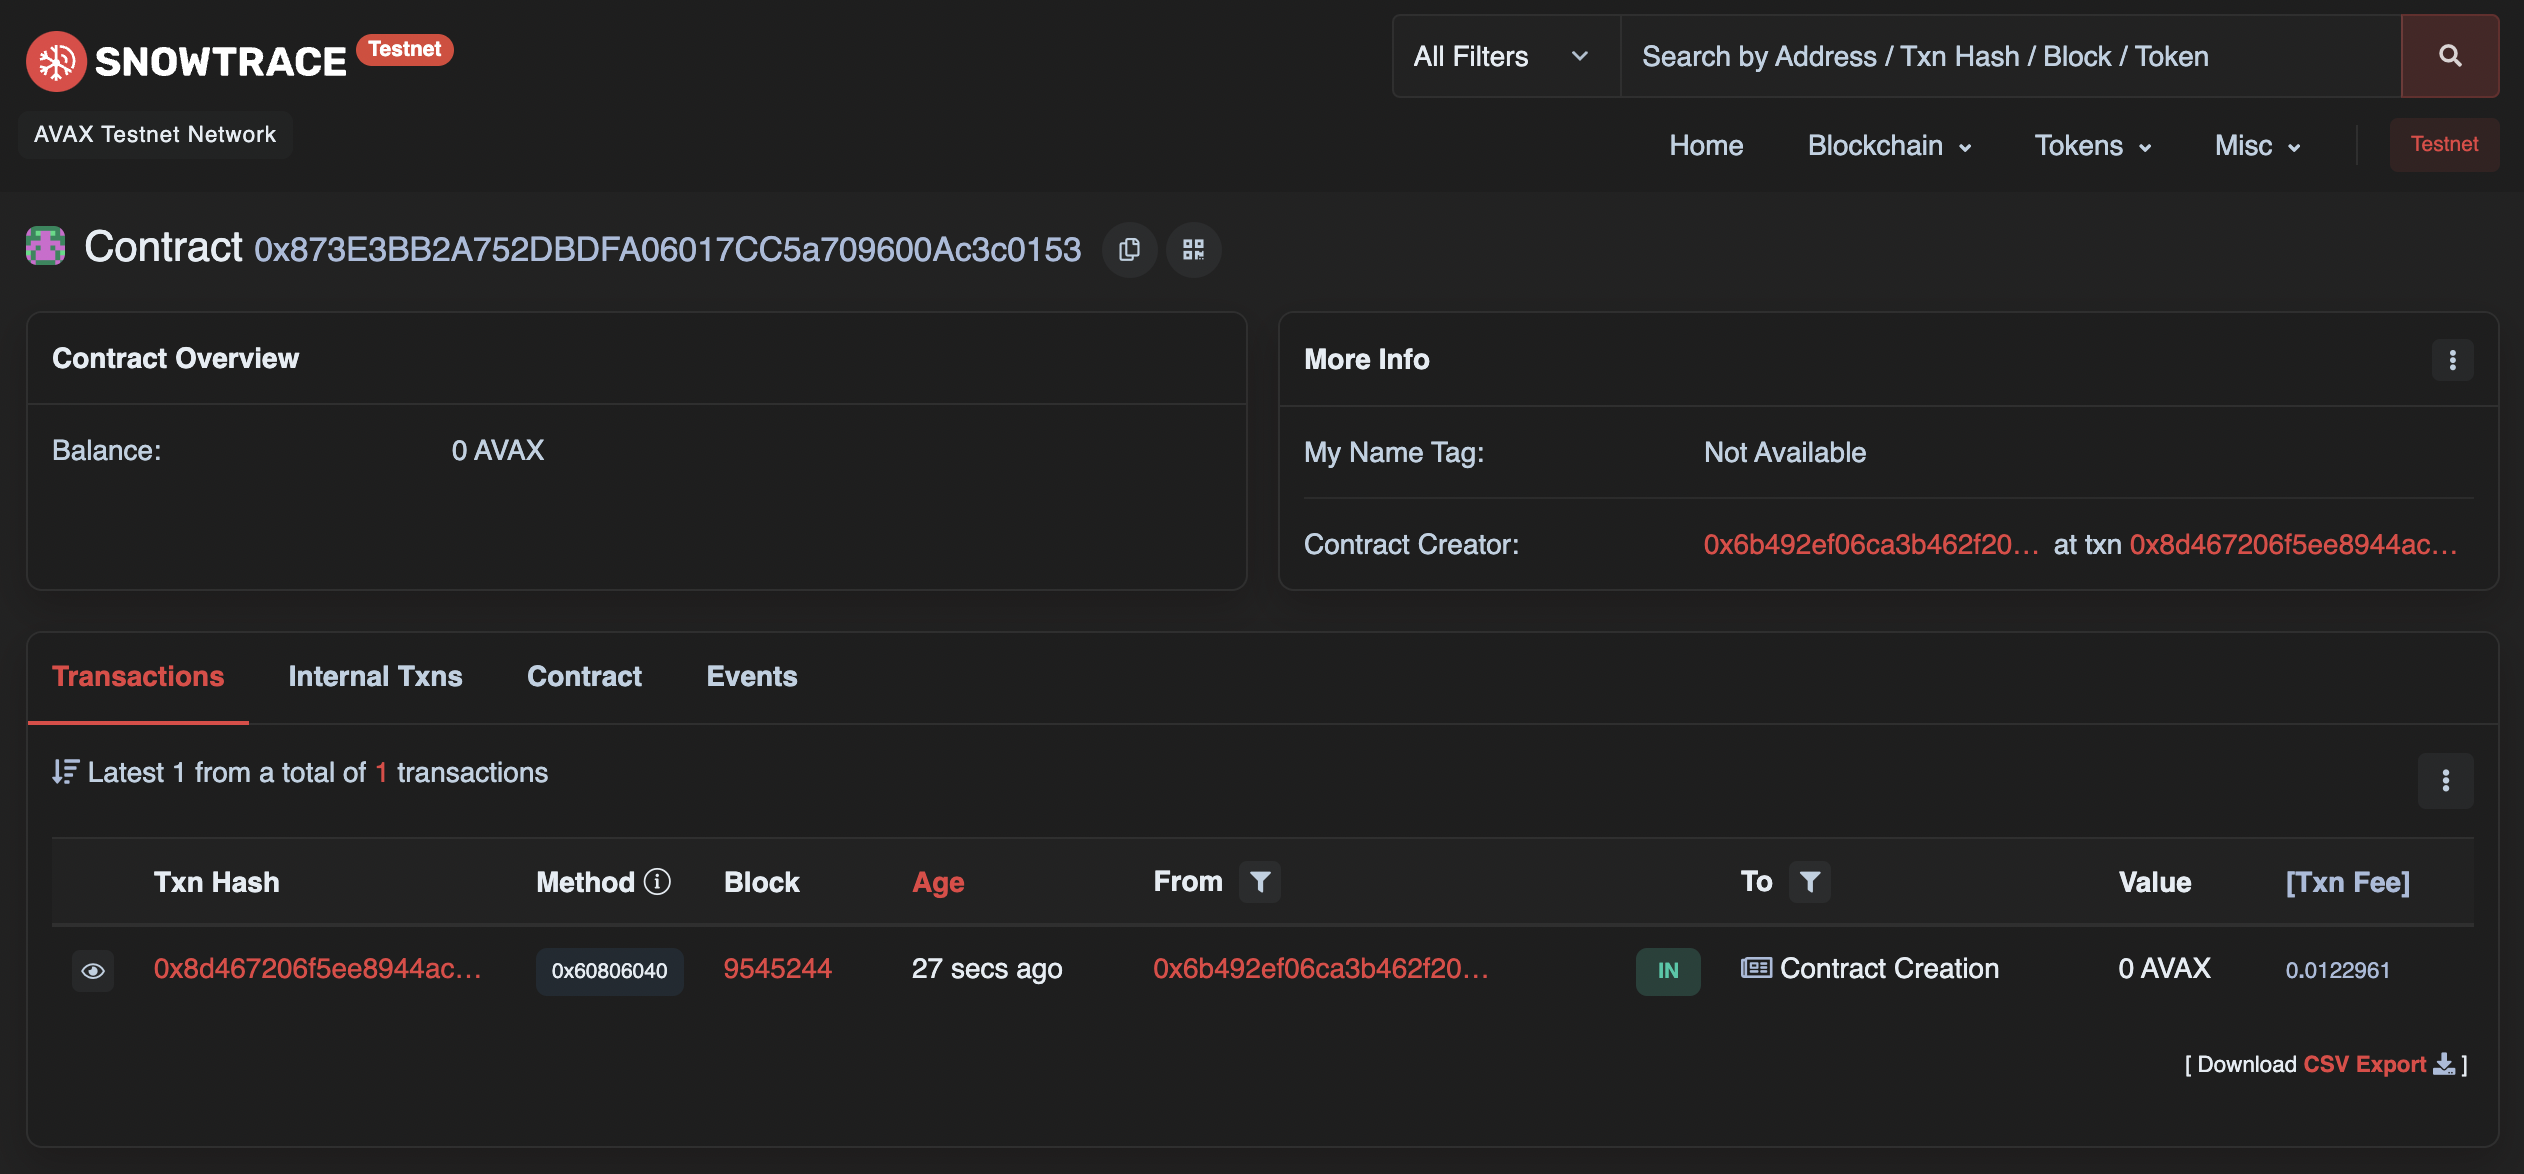
Include the contract address in .env, so it can be accessed from our frontend client in the next section.
Create a React App
Our contract address can now be used to create a frontend client with React that interacts with the contract's methods. Add the following React code to src/App.jsx to set up your app:
// src/App.jsx

import { useState } from 'react'
import { ethers } from 'ethers'
import HelloWorld from './artifacts/contracts/HelloWorld.sol/HelloWorld.json'

const contractAddress = import.meta.env.VITE_CONTRACT_ADDRESS

function App() {
  const [hello, setHelloValue] = useState()

  async function requestAccount() {
    await window.ethereum.request({ method: 'eth_requestAccounts' })
  }

  async function fetchHello() {
    if (typeof window.ethereum !== 'undefined') {
      await requestAccount()
      const provider = new ethers.providers.Web3Provider(window.ethereum)
      const contract = new ethers.Contract(contractAddress, HelloWorld.abi, provider)
      try {
        const data = await contract.hello()
        setHelloValue(data)
        console.log('Greeting: ', data)
        console.log('Contract Address: ', contract.address)
      } catch (err) {
        console.log("Error: ", err)
      }
    }
  }

  return (
    <div>
      <header>
        <h1>Avalanche</h1>
      </header>

      <main>
        <h3>Hello World</h3>

        <button onClick={fetchHello}>
          Click me, you know you want to
        </button>

        <div>{hello}</div>
      </main>
    </div>
  )
}

export default App
Next, navigate to the index.html and include the following stylesheet in the head of the html:
<link rel="stylesheet" href="https://cdn.jsdelivr.net/npm/water.css@2/out/water.css">
This provides default styles with Water.css.
Start Development Server
Run the following command to start the development server with Vite:
yarn dev
Enter localhost:3000 to see the application:
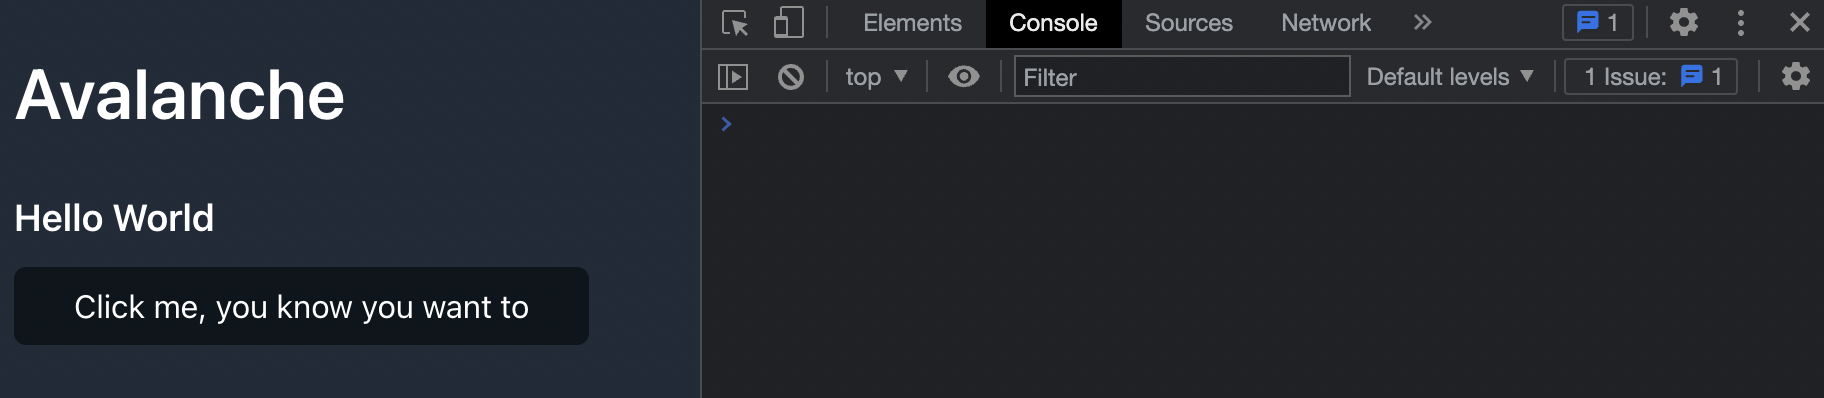
Let's test it! Connect your wallet and click the button below "Hello World".
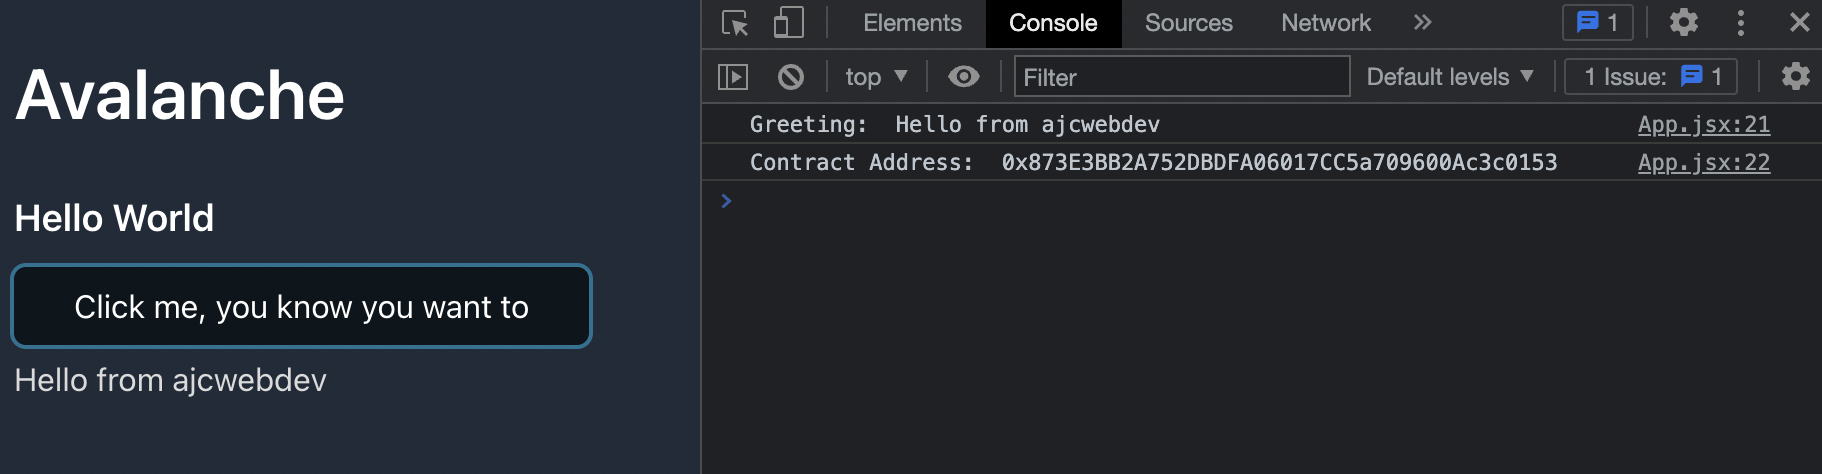
You should see a greeting message displayed below the button and logged to the console.
Now, let's update our code with one more feature. Return to src/App.jsx and add the following setHello function after fetchHello but before the return statement:
// src/App.jsx

async function setHello() {
  if (!hello) return
  if (typeof window.ethereum !== 'undefined') {
    await requestAccount()
    const provider = new ethers.providers.Web3Provider(window.ethereum)
    const signer = provider.getSigner()
    const contract = new ethers.Contract(contractAddress, HelloWorld.abi, signer)
    const transaction = await contract.setHello(hello)
    await transaction.wait()
    fetchHello()
  }
}
Include the following code in the return statement below the fetchHello button:
// src/App.jsx

<input
  onChange={e => setHelloValue(e.target.value)}
  placeholder="Set hello message"
/>
<button onClick={setHello}>
  Set hello message
</button>
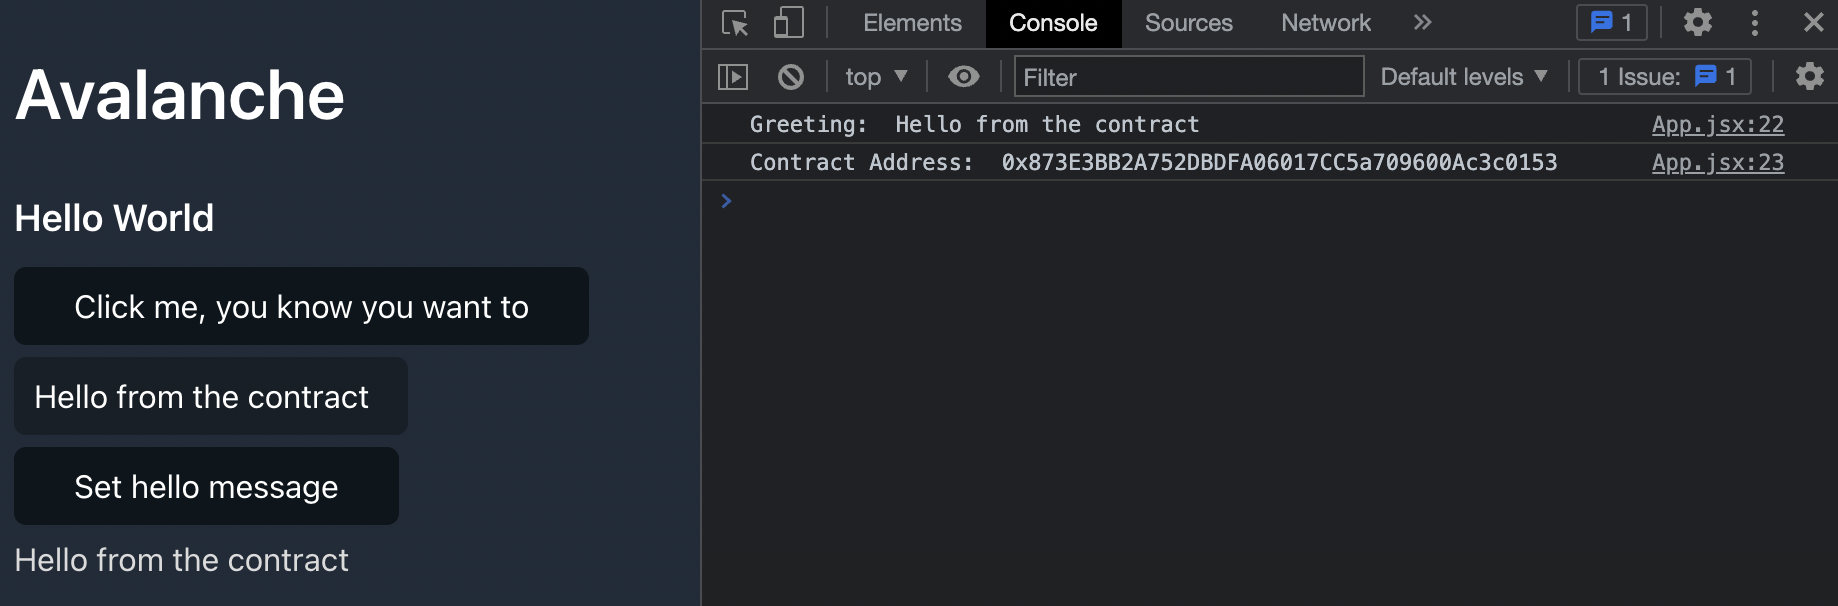
Now, when you enter a new hello message and click the "Set hello message" button, you are asked to confirm the transaction from your Coinbase Wallet. After confirming the transaction, it is pending for a few seconds. Once the transaction settles, the new message is logged to the console.
Configure Netlify Deployment
Our hello world application is complete and we can deploy it to the internet with a service like Netlify or Vercel. Create a netlify.toml file for our Netlify configuration.
echo > netlify.toml
Add the following instructions to the netlify.toml file:
# netlify.toml

[build]
  publish = "dist"
  command = "yarn build"
The build command is set to yarn build and the publish directory is set to dist.
Create GitHub Repository
Initialize a Git repository and push the project to a GitHub repo.
git init
git add .
git commit -m "add initial commit message here"
gh repo create getting-started-with-avalanche --public --pu \
  --source=. \
  --description="Deploy a smart contract to Avalanche's Fuji Testnet with Hardhat, Ethers, and QuickNode" \
  --remote=upstream
We used the GitHub CLI but you can also visit repo.new and follow the instructions provided there.
Deploy to Netlify
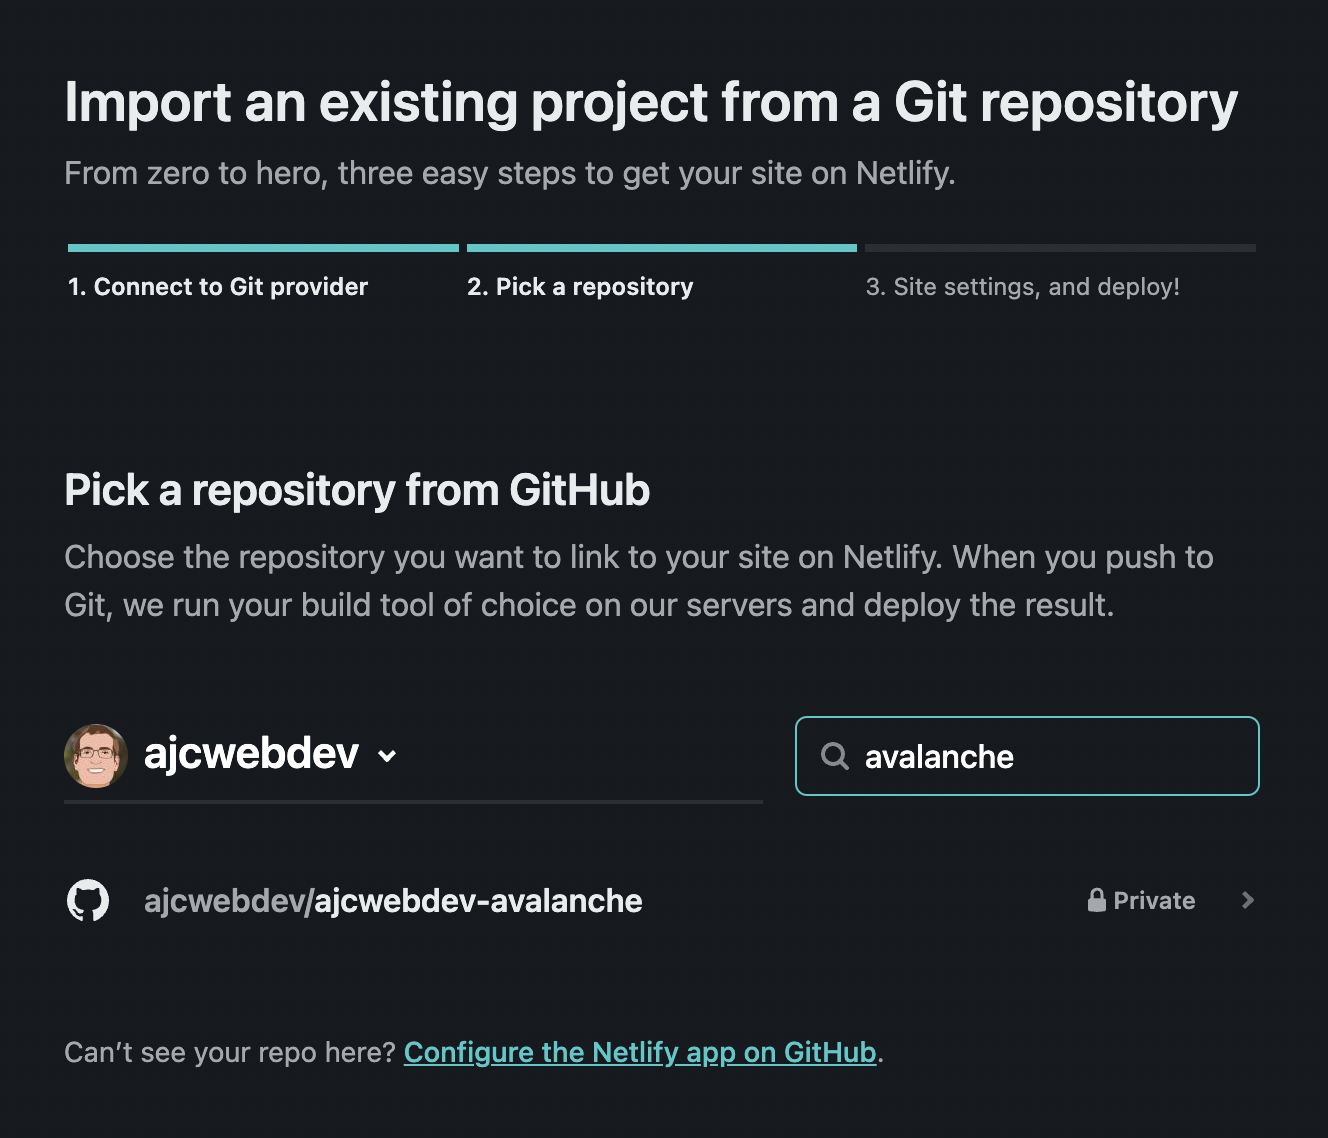
Go to your Netlify dashboard, click "Add new site", and select the newly created repo.
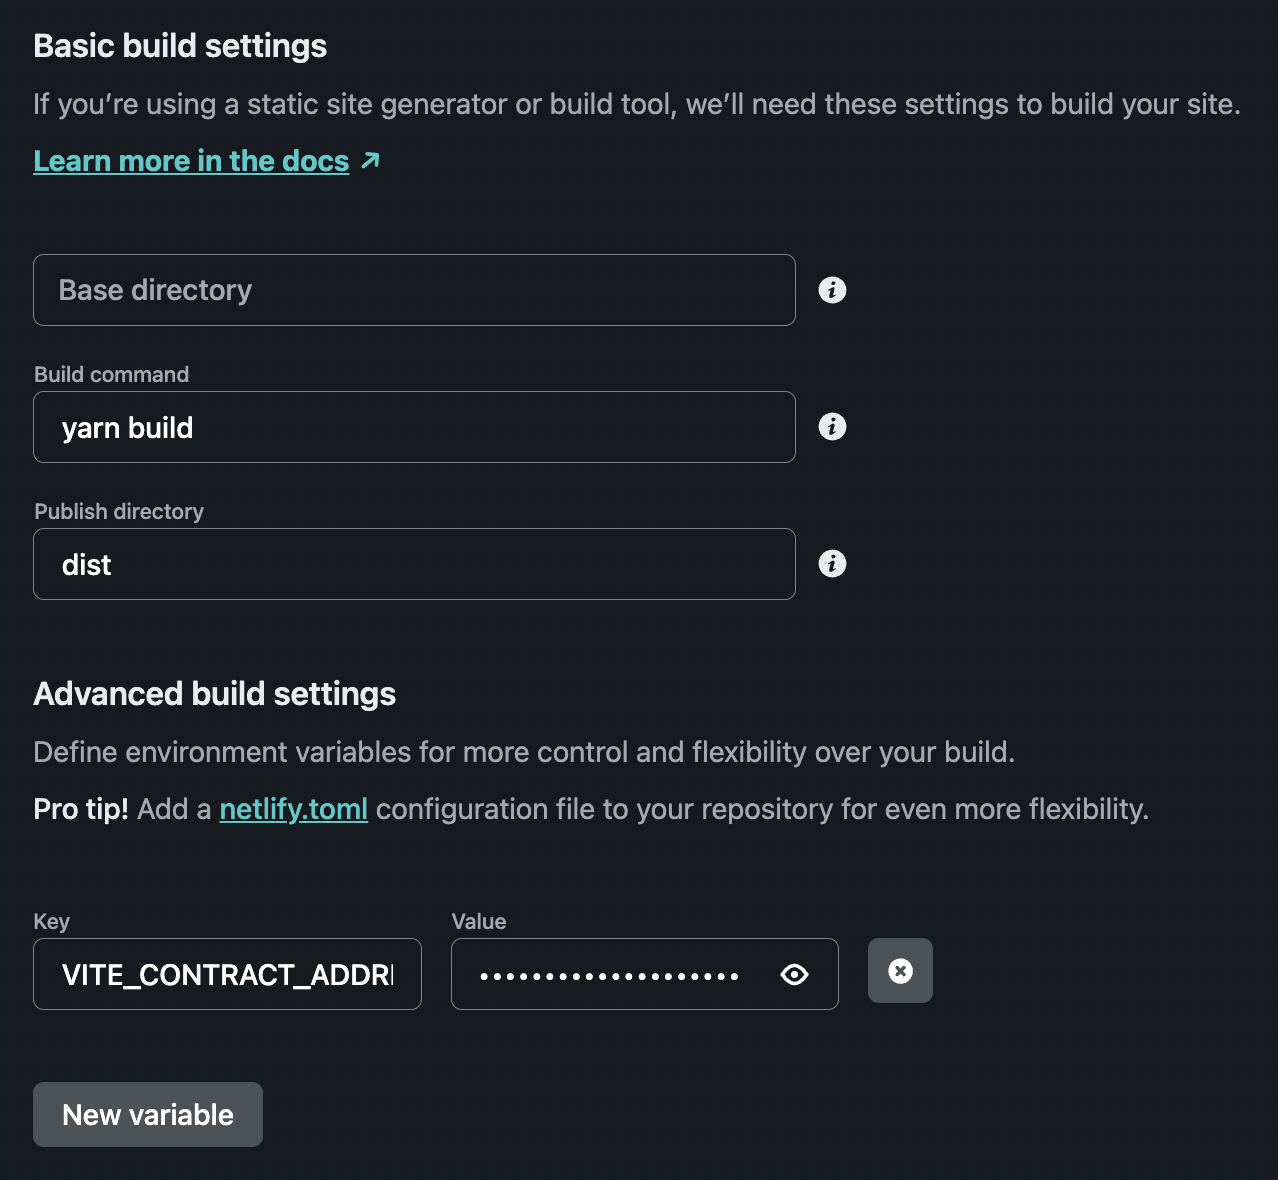
Your build settings are imported from the netlify.toml file. The only other information you need to include is your contract address under "Advanced build settings." Lastly, click "Deploy site."
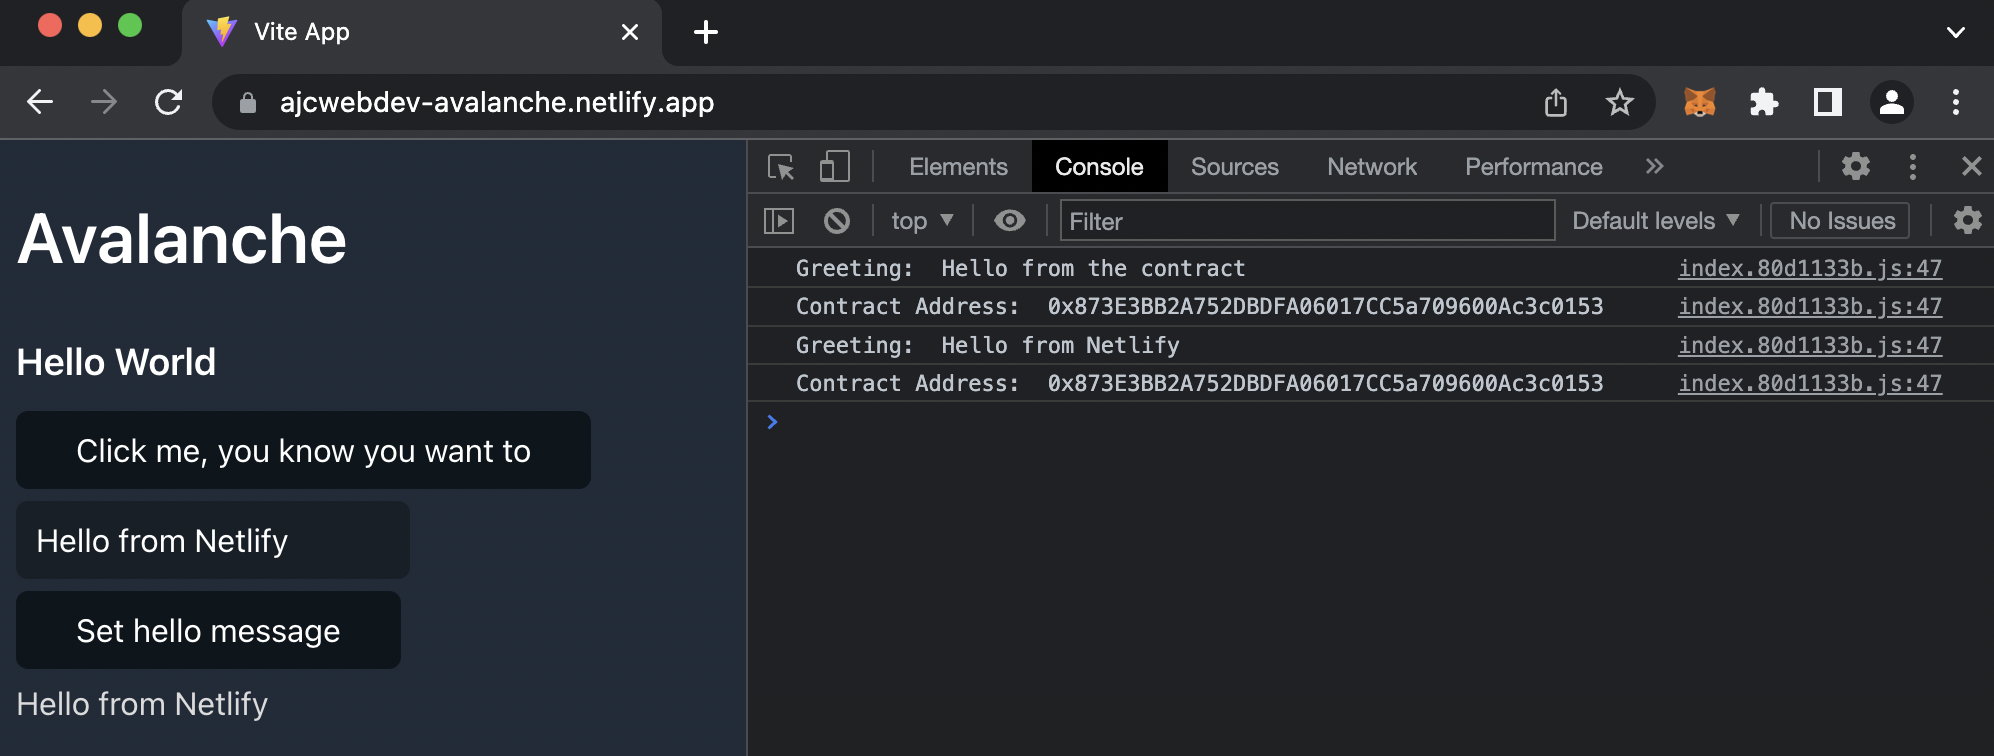
Go to "Domain settings" to give your site a custom domain. You can see this example at ajcwebdev-avalanche.netlify.app.
Congratulations! You should see your site live at your custom domain similar to this:
Conclusion
That is a wrap! In this guide, you have learned how to configure Coinbase Wallet for the Avalanche network, deploy a smart contract written in Solidity to Avalanche's Fuji Testnet, and create a React frontend application for reading and writing to the contract.
Subscribe to our newsletter for more articles and guides. Feel free to reach out to us via Twitter if you have any feedback. You can always chat with us on our Discord community server, featuring some of the coolest developers you'll ever meet :)