6 min read
Overview
Stacks is an open-source layer-1 blockchain that utilizes the Proof of Transfer (PoX) consensus mechanism. The Stacks blockchain leverages Bitcoin's security and allows direct read access to the Bitcoin chain. Stacks is also exciting because it supports smart contracts, so developers can build dApps such as decentralized exchanges, DAOs, NFT marketplaces, and more! This guide will demonstrate how to create and deploy a Clarity smart contract on the Stacks Testnet using Clarinet, a command line tool for developing, testing, and deploying smart contracts. Let us get started!
What You Will Need
-
Clarinet installed on your machine (follow the instructions in the link to install it)
-
IDE or Text Editor (we recommend VSCode)
-
Hiro Web Wallet (learn more about the installation here)
-
STX Testnet tokens (you can get some at this faucet)
What You Will Do
-
Learn about Clarity & Clarinet
-
Set up a Clarinet project
-
Create a Storage smart contract using Clarity
-
Test the smart contract in a local environment
-
Deploy the smart contract to the Stacks Testnet
Clarity 101
Clarity is a Lisp-styled smart contract language designed for the Stacks blockchain. It differs from other smart contract languages as it is not compiled and non-Turing complete. What does this exactly mean? Well, on most EVM-based chains, you need to compile your solidity contract code into bytecode so that the EVM can understand it. The Stacks blockchain is different as you don't need to compile your code. Instead, the executed code is human-readable, which makes it easily auditable. Another benefit this has for users is that when you deploy a smart contract on the Stacks blockchain, the source code for the contract is automatically available, which is not always the case on EVM-based chains.
Other properties of Clarity include:
-
No Reentrancy attack vulnerabilities
-
No arithmetic underflows or overflows
-
Precise gas estimation
-
Custom token support is built-in
-
Post conditions (i.e., prompts that help you verify what you're doing)
To learn about the language of Clarity, check out the following Clarity language book resource. In the next section, we will talk a bit about the smart contract development tool, Clarinet.
What is Clarinet?
Now that you have some familiarity with Stacks and Clarity, let us dive into the tool we will use to build our smart contract, Clarinet. Clarinet is a command-line tool useful for efficient smart contract development. It can be used for developing, testing, debugging, and deploying your contracts to local and production environments. It's similar to other popular web3 smart contract libraries such as Hardhat.
Hiro Web Wallet Set Up
In order to deploy our clarity smart contract to the Stacks Testnet network, we will need to have the Hiro Web Wallet installed. Once you have set up your wallet, you will also need to change the wallet's network configuration to Testnet. You can do this by clicking the ellipses ("...") button on your wallet's home page, then click Change Network.
Next, you'll want to ensure you have some STX Testnet tokens. You can request some tokens on the Stacks Explorer Faucet page. Just connect your wallet, then click the Request STX button.
Once you have your wallet and STX Testnet tokens, feel free to move on to the next section!
Set Up the Clarinet Project
Once the prerequisites are installed, open up your terminal and run the following command to create a new Clarinet project.
clarinet new storage-project && cd storage-project
The clarinet command above creates a boilerplate project directory called storage-project that we can use to develop smart contracts quickly.
Next, we will need to create the smart contract file that will hold our storage logic. We can run the following command in the same terminal window to create a .clar file for our smart contract and a .ts file for our tests (we will ignore the tests for now, but in production, its best practice to create unit tests).
clarinet contract new storage-contract
Create and Define the Clarity Smart Contract
In your code editor of choice, open the storage-contract.clar file located in the contracts folder, and then delete the boilerplate comments. We will be using our own comments for the purpose of this tutorial. Then, input the following code in the file.
;; define variables
(define-data-var storage (string-utf8 500) u"initial value")

;; define public get function
(define-read-only (get-storage)
    (var-get storage)
)

;; define public write function
;; #[allow(unchecked_data)]
(define-public (set-storage (message (string-utf8 500)))
    (ok (var-set storage message))
)
You can now access Logs for your RPC endpoints, helping you troubleshoot issues more effectively. If you encounter an issue with your RPC calls, simply check the logs in your QuickNode dashboard to identify and resolve problems quickly. Learn more about log history limits on our pricing page.
Explanation of the code above:
Lines 1-2: We define a comment starting with ";;", then define our public string variable storage (that has a max 500 character length).
Lines 4-7: We define comments and a public read only function that returns our storage variable's value.
Lines 9-13: A public write function that takes a string parameter and sets our storage variable's value.
Testing the Smart Contract in a Local Environment
To verify the syntax and completeness of our storage contract, run the command clarinet check in your terminal:
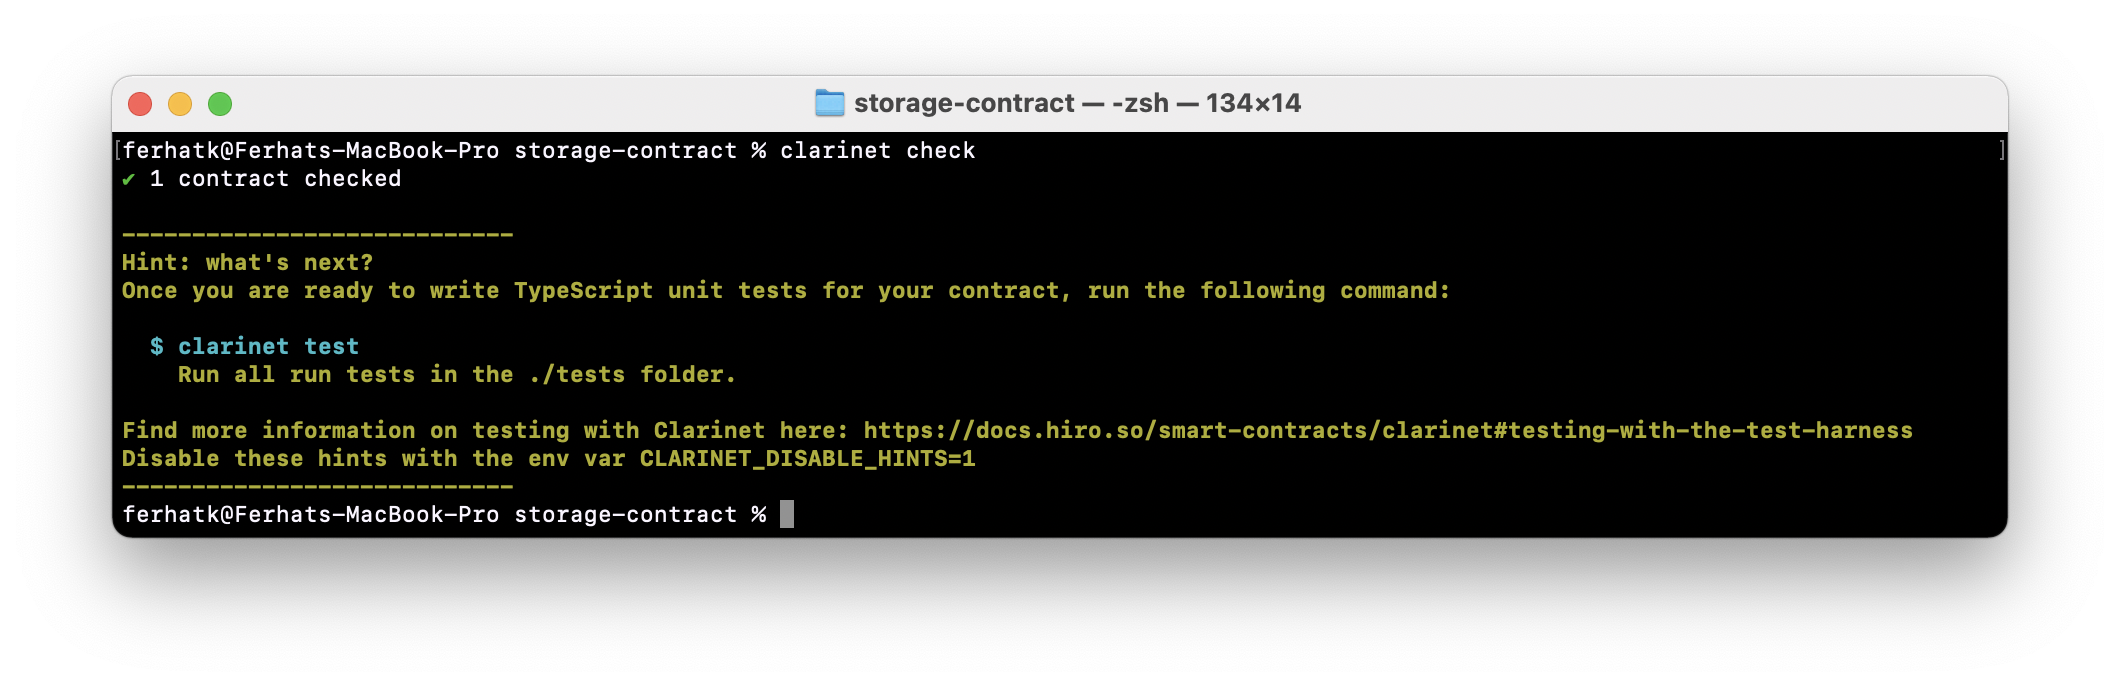
After your contract has been checked, run the command clarinet console to open up the Clarinet REPL console. The Clarinet REPL will help us test and execute our Clarity code. The Clarinet REPL will automatically list the available contracts and the simulated wallets in memory on startup. Here's how ours look:
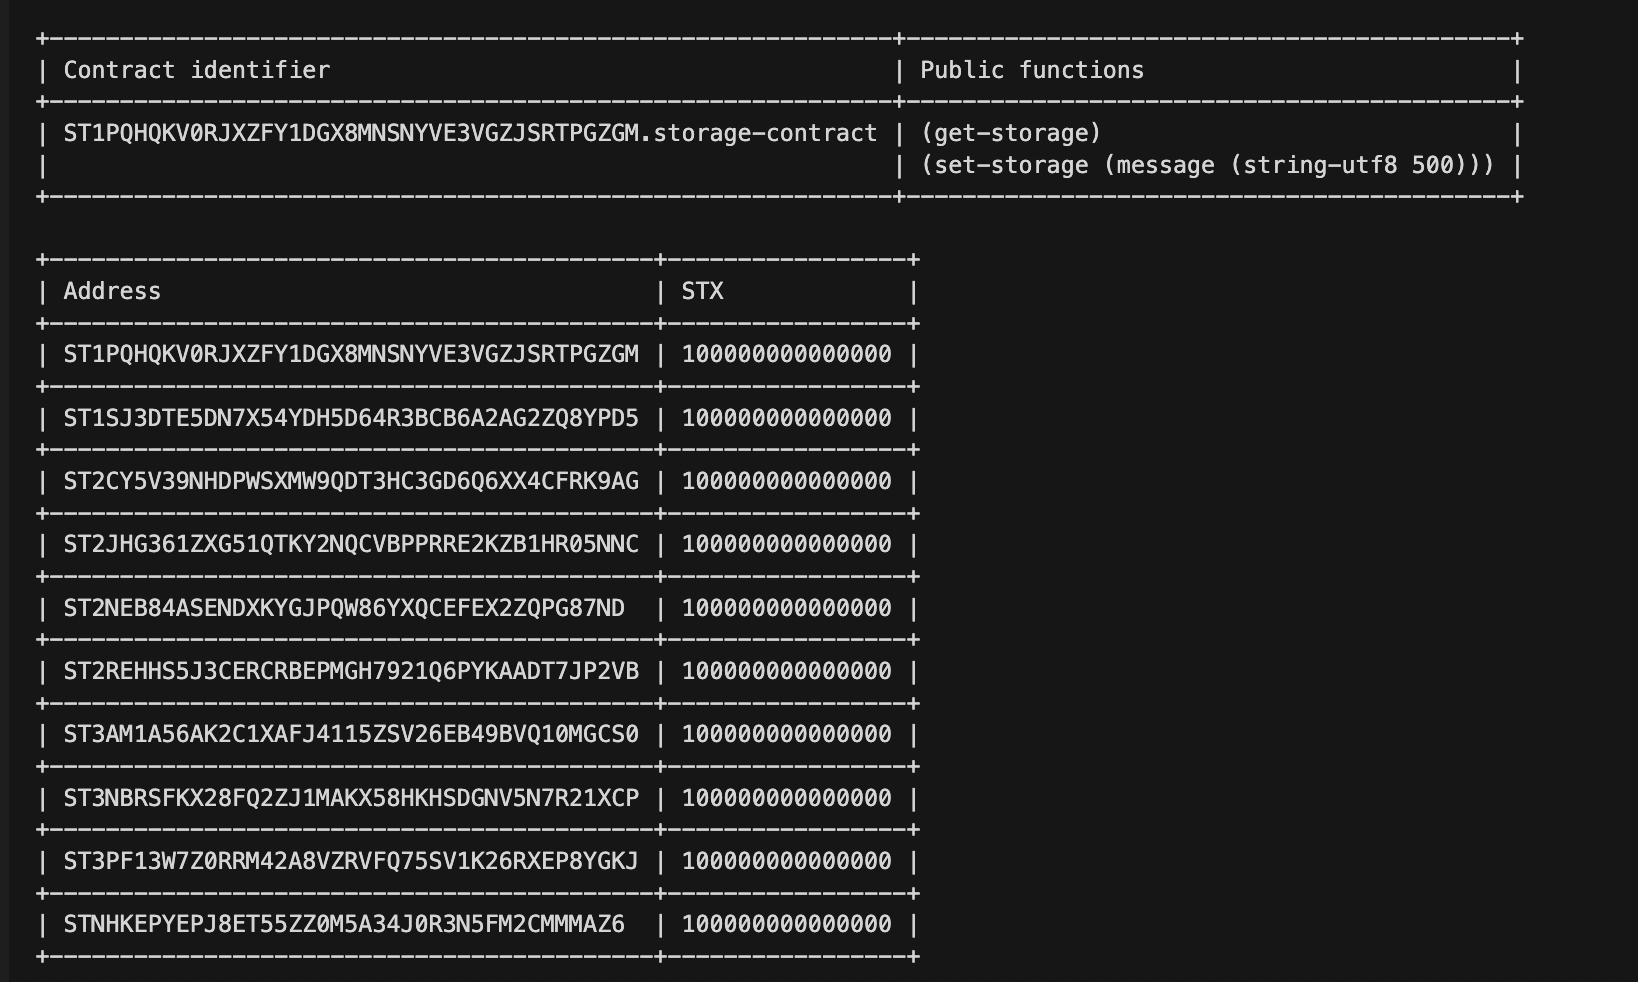
The identifier (also know as contract address) of our smart contract is ST1PQHQKV0RJXZFY1DGX8MNSNYVE3VGZJSRTPGZGM.storage-contract, and the public functions are get-storage and set-storage functions.
Now to interact with the get-storage function of our storage contract, we can use the following syntax:
(contract-call? .storage-contract get-storage)
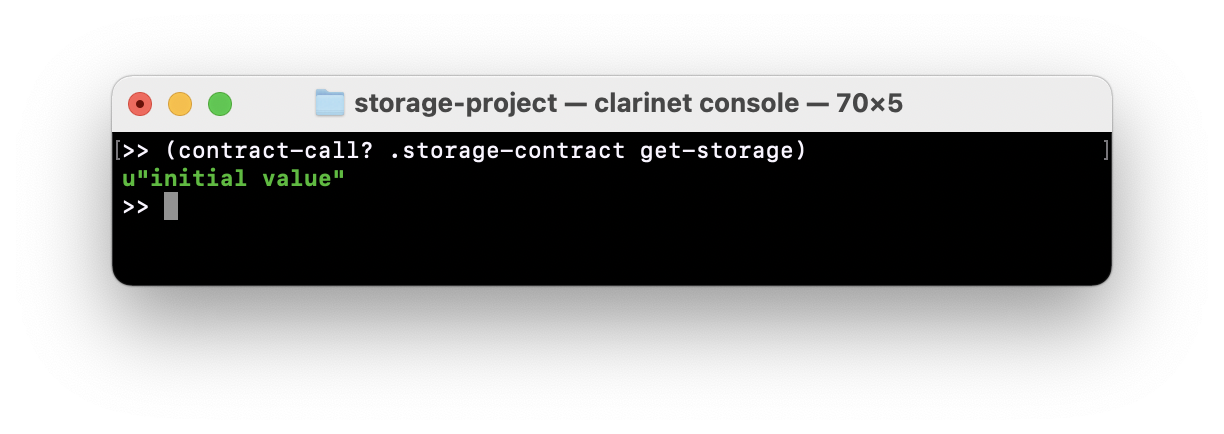
The response should be the default value which we set as "initial value". Let us set a new value in our storage contract via the set-storage function. The code should look like this:
(contract-call? .storage-contract set-storage u"new value")
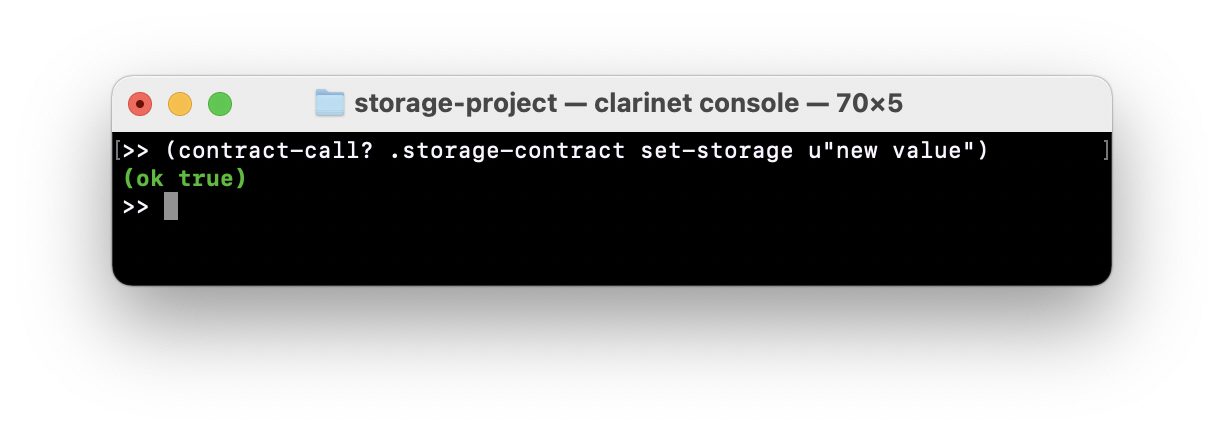
The response should be (ok true). We can re-run the first function (i.e., get-storage) to verify our storage variable has been updated.

Now that we confirmed our storage contract works as expected, we can move on to the Testnet deployment!
Deploy the Smart Contract to Testnet
Before moving forward, remember to complete the wallet setup instructions in the Hiro Web Wallet Set Up section of this guide.
Next, navigate to the Write and Deploy tab on the Stacks Explorer Sandbox and connect your wallet. Once your wallet is connected, click the Network tab at the top-right of the page and verify you have the Testnet option selected.
Then, paste the code from your storage-contract.clar file into the clarity code editor.
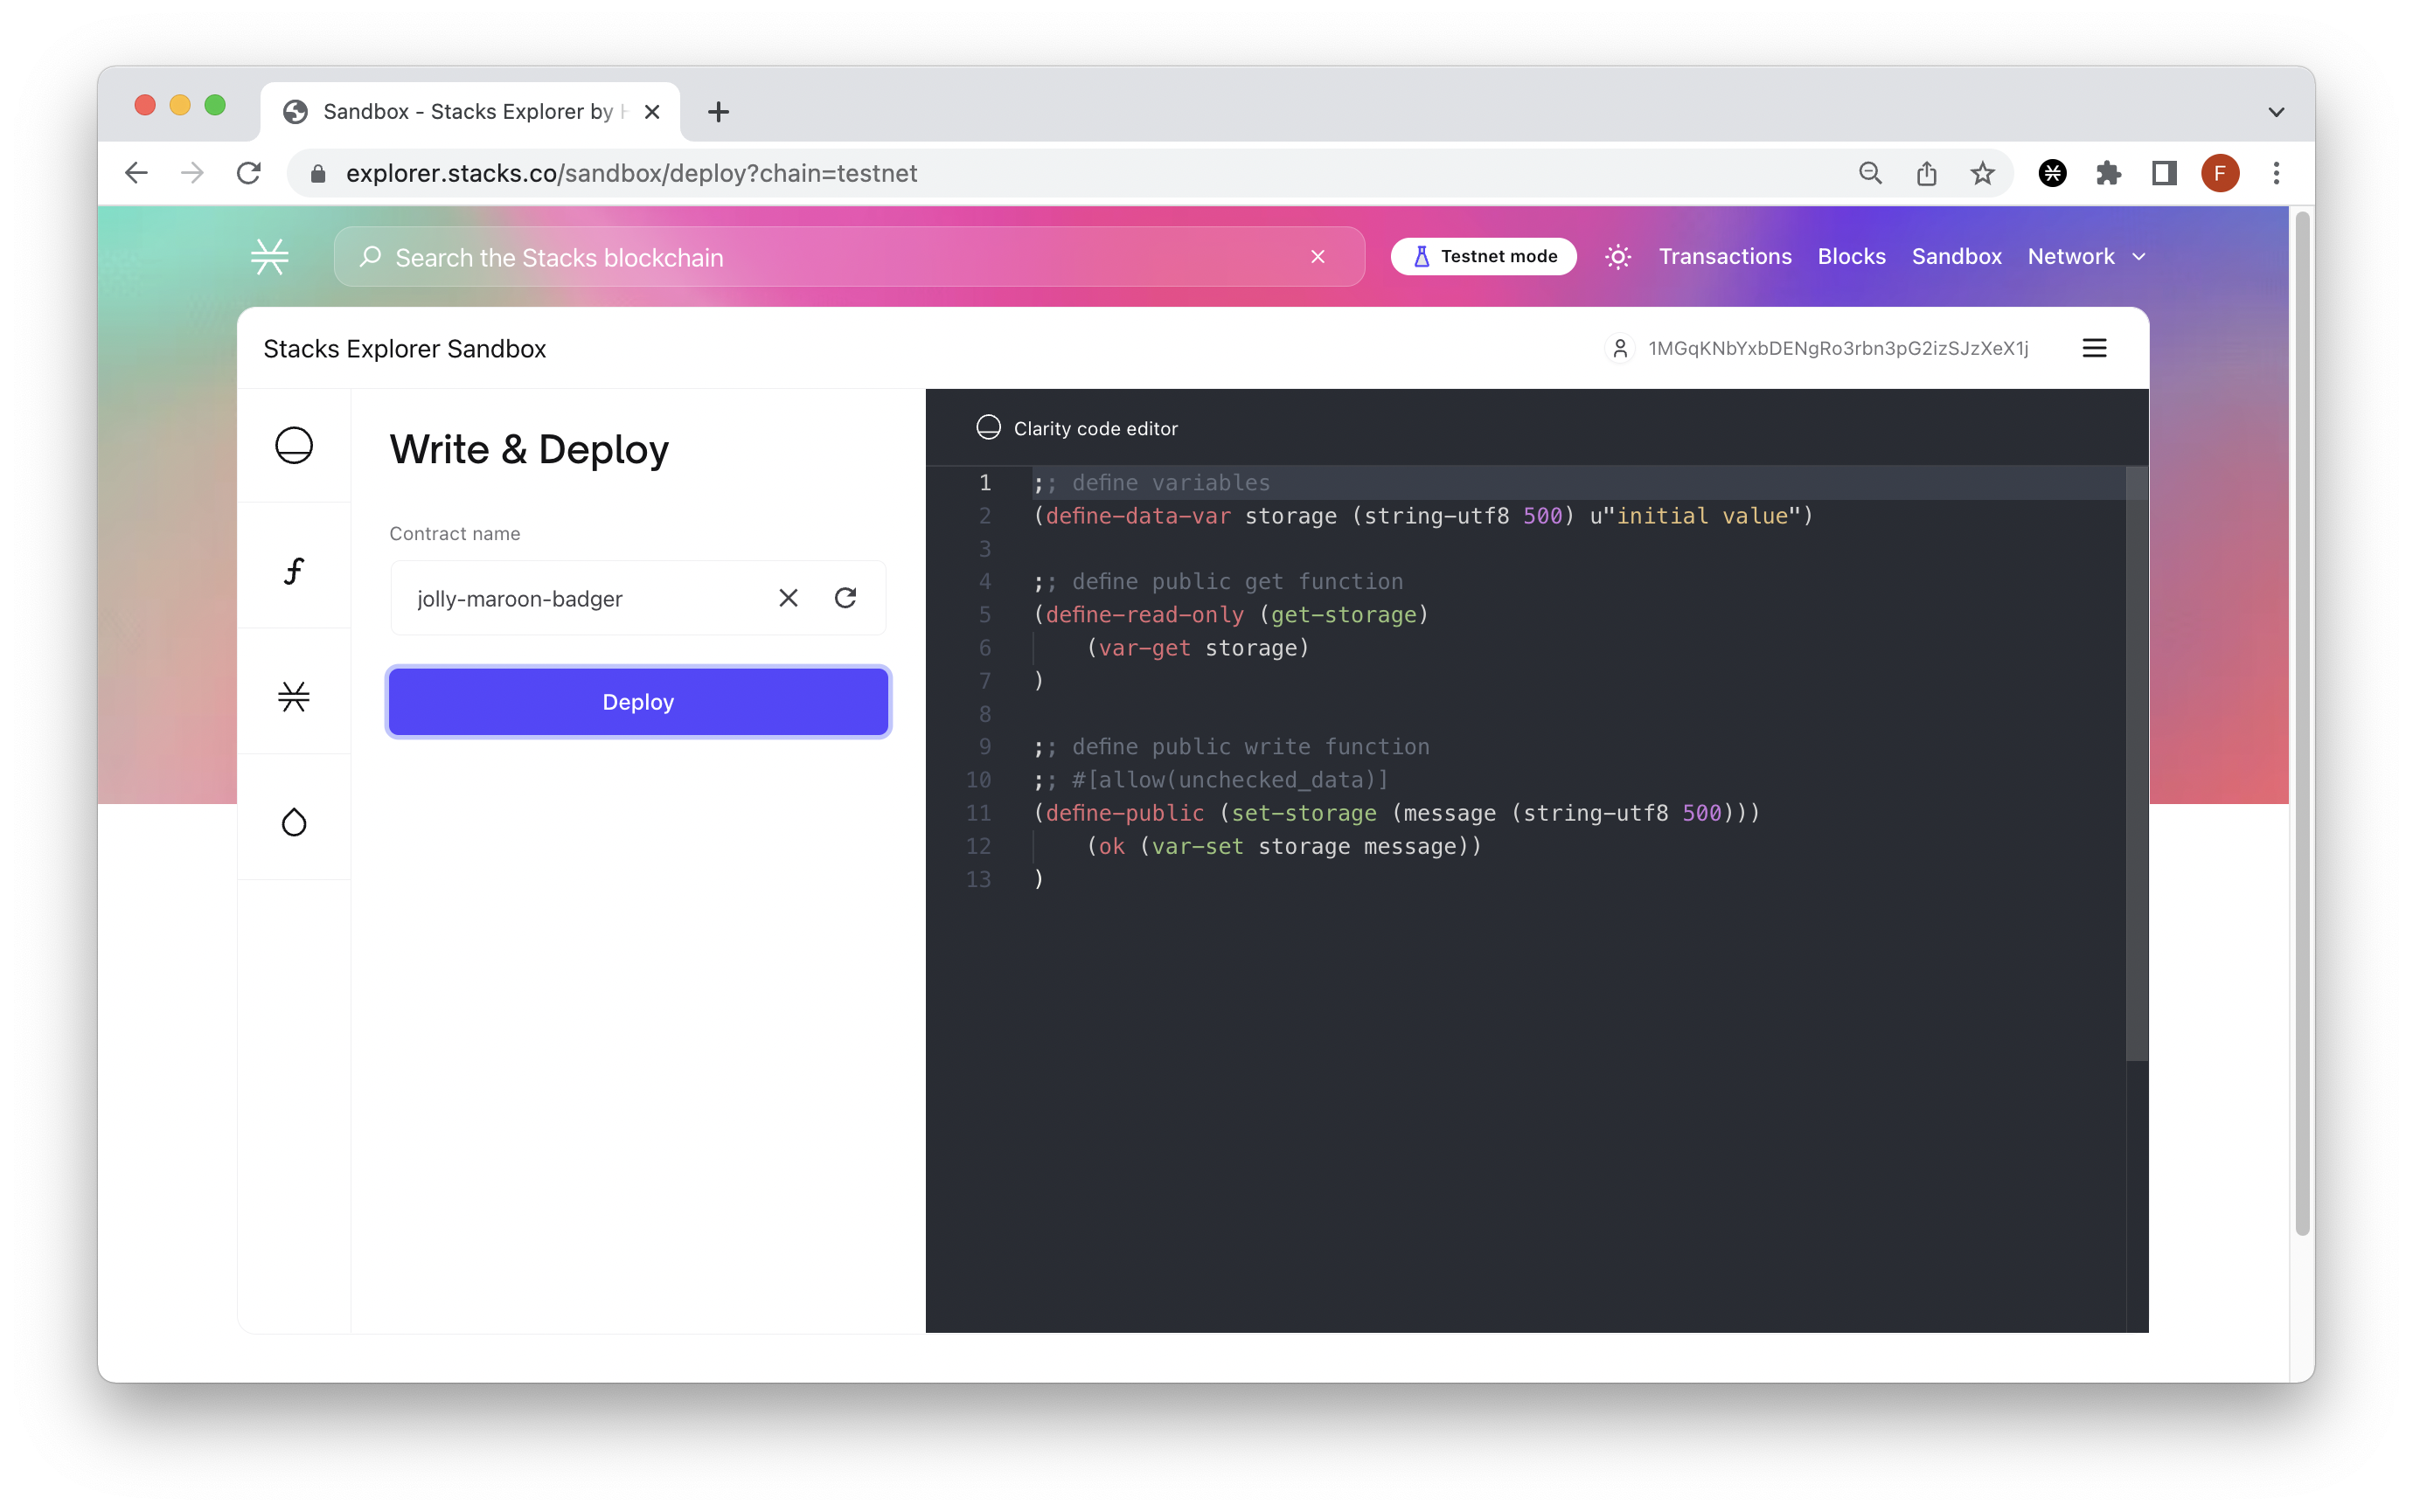
Note: By default, the Sandbox will create a random name for your contract. Feel free to adjust this if you wish.
Next, click the Deploy button and then confirm the transaction in your Hiro wallet. It may take a couple of minutes for the transaction to verify. You can watch the status of the transaction in the activity tab of your Hiro wallet or through the Stacks Explorer by searching the transaction details.
Once your transaction is mined, head over to the Call a Contract tab (the f in the left sidebar) on the Stacks Sandbox Explorer and input the full address of your storage smart contract (e.g., ST12KGMZCKXERR1VG1TFEQQZ3VQXSMVVC3J31S604.nft-factory). The contract name field should automatically populate the name of your contract. Now all that's left is clicking the Get Contract button.
Once your contract is loaded, it should look something like this:
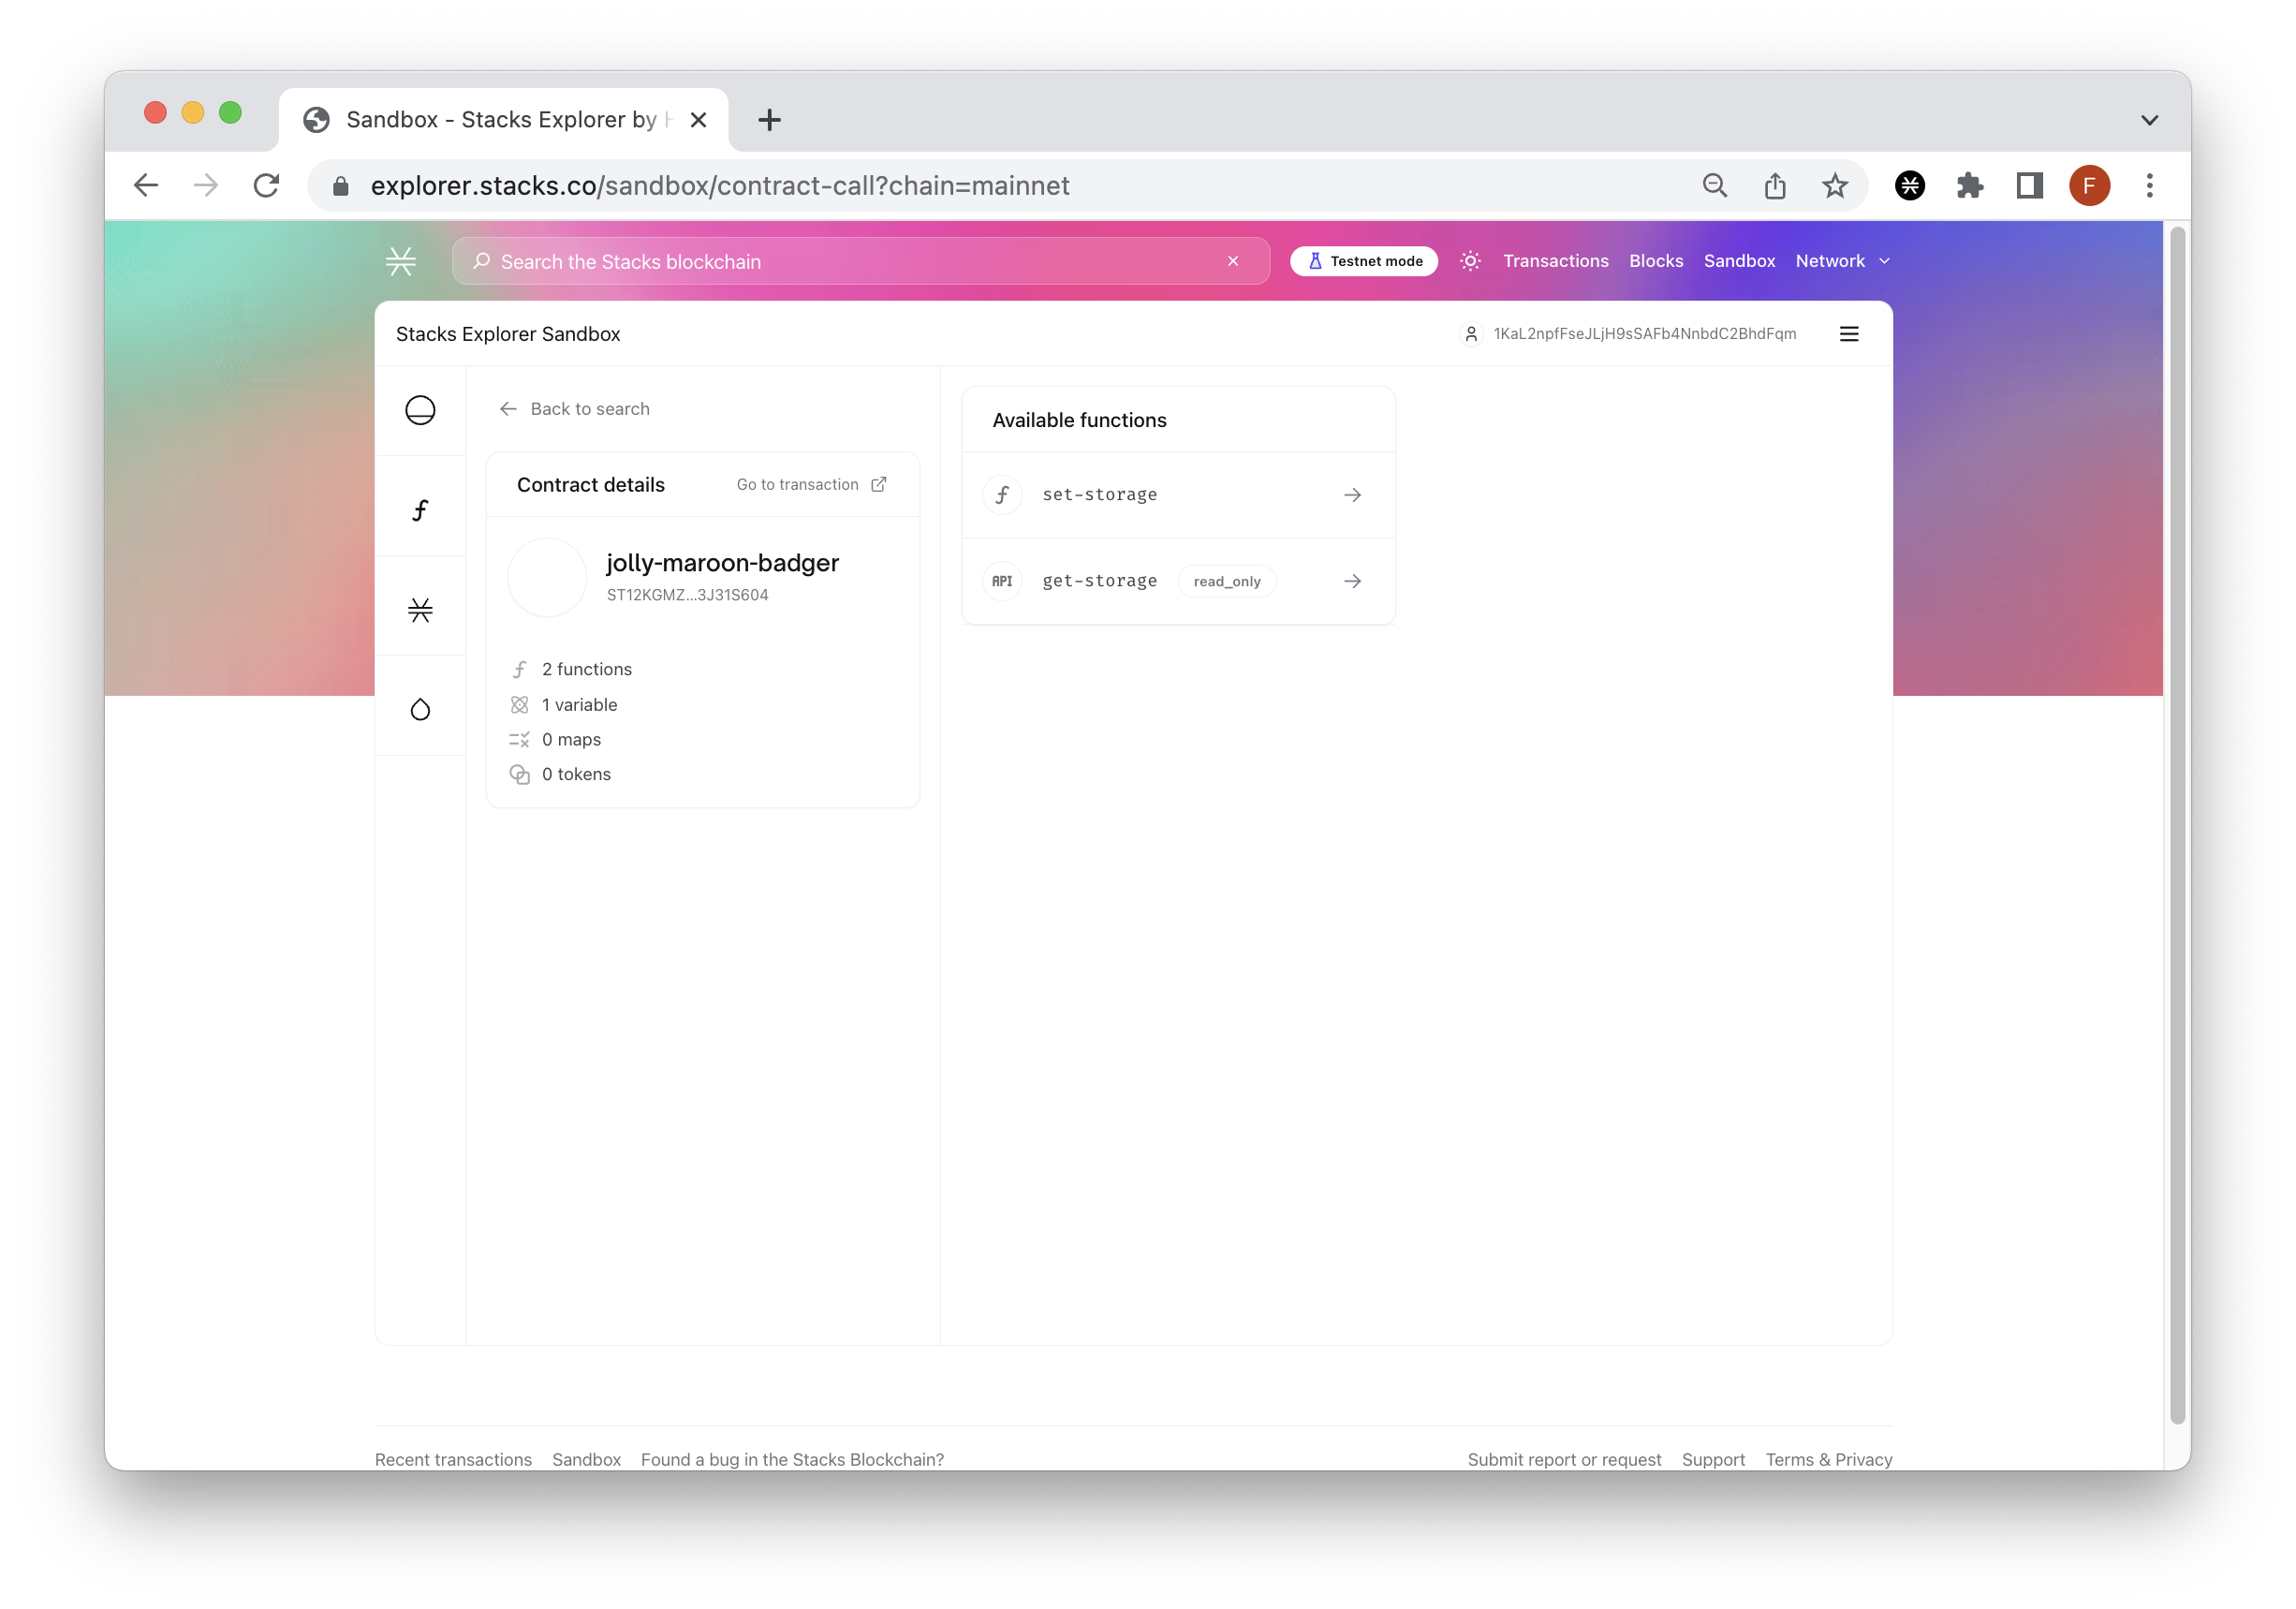
The Stacks Sandbox automatically loads all the public functions available to us. In order to test the contract, we can follow the same process as we did in the local environment. First, we'll check the value of the storage variable by clicking the function get-storage and then clicking the Call function button. The output value should be u"initial value".
Next, go back, click the set-storage function and input a string that you want stored in your storage variable. For this test, we will use the value Stacks is gmi. The sandbox will automatically format our string to make it in the format our contract accepts (i.e, u"Stacks is gmi"). Once you've inputted the string, click the call function button and sign the transaction in your Hiro wallet.
Once the transaction is mined, you can verify the value by calling the set-storage function again. The value should match your inputted string (i.e., Stacks is gmi).
Conclusion
Kudos for making it all the way! You now know how to create and test a Clarity smart contract using Clarinet. To learn more, check out our How to Mint NFTs on Stacks guide or some of our other tutorials here.
We ❤️ Feedback!
If you have any feedback or questions on this guide, let us know. We’d love to hear from you!