9 min read
Overview
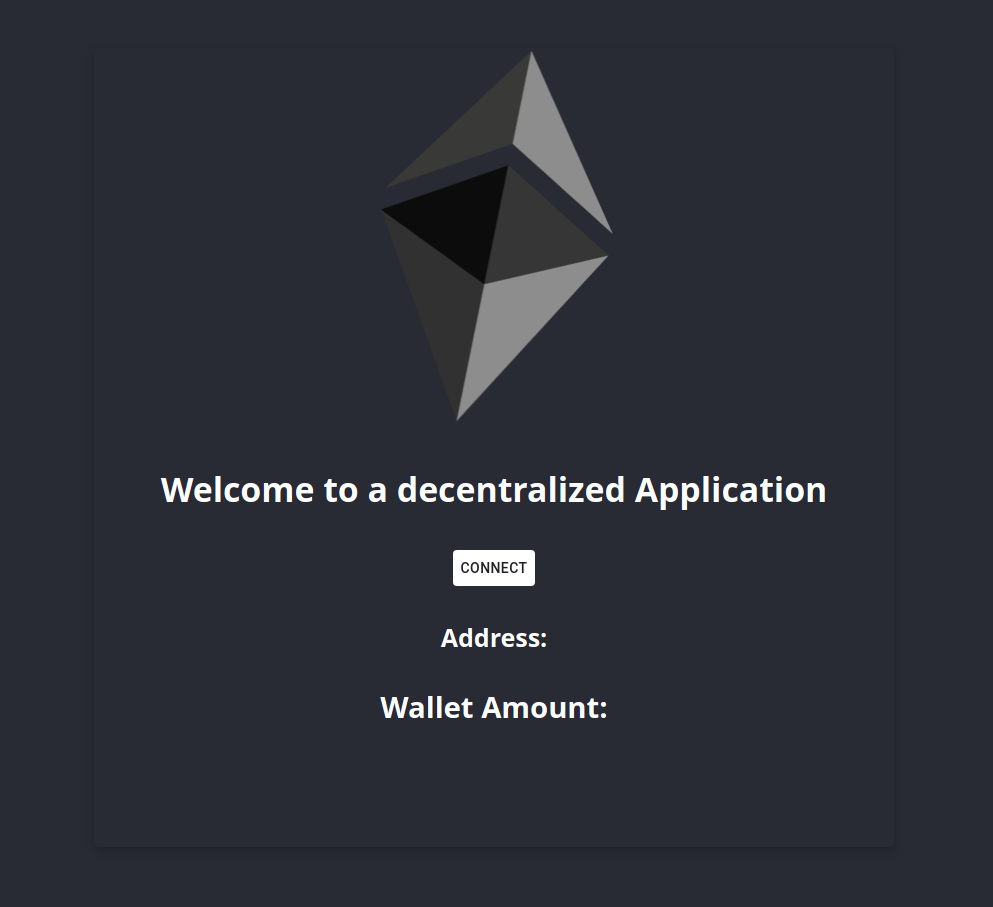
In our dApp, we will have a simple react user interface that has a material button asking the user to connect to MetaMask. And if they do not have an account, they can create one or log in to their account. They will then view their wallet balance and address displayed on the UI.
Prerequisites
- Basic knowledge of React.js
- Basic knowledge of Ethereum and Blockchain
- NPM
- Ethers.js library (version 5.7)
What are dApps
A dApp is an application that builds on a decentralized network. It has a user interface and a smart contract.
DApps run on blockchains that are open-source, decentralized environments free from the control of any single actor. For example, a developer can create a Facebook-like app and run it on the Ethereum blockchain, and when any user makes a post, no one can delete it. On decentralized apps, no one person is fully managing user data.
A dApp can have a frontend that is built using any language. It can run on decentralized servers like IPFS or Swarm.
What is MetaMask
MetaMask is a popular browser extension that serves as a cryptocurrency wallet that connects to the Ethereum blockchain. MetaMask is a secure wallet that enables users to interact with Ethereum's dApps. It allows users to store Ether and other ERC-20 tokens. Users can then spend these tokens on games, stake them on DeFi apps, and trade them on exchanges. MetaMask does not store only ERC-20 tokens but can also store ERC-721 tokens.
In this article, we will be connecting our dApp with MetaMask so users can connect to the Ethereum blockchain.
Install MetaMask
We will need to install the MetaMask extension in our browser to complete this tutorial.
To add MetaMask to your browser for Chrome, follow this link, but if you are using a different browser than Chrome, you can search for the extension for the browser you are using.
Why Ethers.js
Ethers.js is a lightweight JavaScript library that allows developers to connect and interact with the Ethereum blockchain. The library includes utility functions and has all the capabilities of an Ethereum wallet.
Ethers.js makes it easier to connect to the Ethereum blockchain with just a few lines of code.
With that bit of context, you are now armed with the knowledge of why we are using the technologies we are. You are now prepared with everything you need to start coding!
Build a dApp frontend using React
With this application, we will explore the basic concepts of the react framework and the blockchain. We will create paths to communicate with the Ethereum blockchain, query it and fetch data to render in our dApp.
At the end of this tutorial, we will have a working webpage that interacts with Ethereum.
Run the command npx create-react-app ethersjs_meta to create a new react app named ethersjs_meta.
Next, run the command:
npm install ethers@5.7
This will install the Ethers.js (version 5.7) library.
Next, delete the dummy code in the App.js file, and copy-paste the code below.
function App() {
  return (
    <div className="App-header">
      <div className="centerCard">
        <div className = "card">
          <div className="App">
            <WalletCard/>
          </div>
        </div>
      </div>
    </div>
  );
}
export default App;
Next, we want to create a new file called WalletCard.js in our src folder. WalletCard.js will contain all of the UI and logic for our project.
import React, { useState } from 'react';
import { Button } from '@material-ui/core';
import Ethereum from './Ethereum.png'
import { ethers } from 'ethers';
const provider = new ethers.providers.Web3Provider(window.Ethereum)
const WalletCard = () => {
    const [errorMessage, setErrorMessage] = useState(null);
    const [defaultAccount, setDefaultAccount] = useState(null);
    const [userBalance, setUserBalance] = useState(null);
    const connectwalletHandler = () => {
        if (window.Ethereum) {
            provider.send("eth_requestAccounts", []).then(async () => {
                await accountChangedHandler(provider.getSigner());
            })
        } else {
            setErrorMessage("Please Install Metamask!!!");
        }
    }
    const accountChangedHandler = async (newAccount) => {
        const address = await newAccount.getAddress();
        setDefaultAccount(address);
        const balance = await newAccount.getBalance()
        setUserBalance(ethers.utils.formatEther(balance));
        await getuserBalance(address)
    }
    const getuserBalance = async (address) => {
        const balance = await provider.getBalance(address, "latest")
    }
    return (
        <div className="WalletCard">
            <img src={Ethereum} className="App-logo" alt="logo" />
            <h3 className="h4">
                Welcome to a decentralized Application
            </h3>
            <Button
                style={{ background: defaultAccount ? "#A5CC82" : "white" }}
                onClick={connectwalletHandler}>
                {defaultAccount ? "Connected!!" : "Connect"}
            </Button>
            <div className="displayAccount">
                <h4 className="walletAddress">Address:{defaultAccount}</h4>
                <div className="balanceDisplay">
                    <h3>
                        Wallet Amount: {userBalance}
                    </h3>
                </div>
            </div>
            {errorMessage}
        </div>
    )
}
export default WalletCard;
In the code above, we created a constant variable called provider and assigned it to new ethers.providers.Web3Provider(window.ethereum), which is a read-only abstraction for accessing blockchain data.
We can access the whole Ethereum API using window.ethereum, which is why we passed it as a parameter to Ethers web3 provider.
Inside the WalletCard component, we created three states to mutate the app. We change the state when an error occurs, the account display changes, or the user balance changes.
const [errorMessage, setErrorMessage] = useState(null);
const [defaultAccount, setDefaultAccount] = useState(null);
const [userBalance, setUserBalance] = useState(null);
The variable errorMessage takes the state setter setErrorMessage as it is the only way to mutate the app state, there are other ways of doing it, but the code above is less complex to use.
This method is called state hooks in React. We are setting states for three(3) events to occur in our app.
Create a connection with MetaMask
Next, we will create a function called connectwalletHandler that will contain a request for permission to connect to MetaMask. The function includes the following.
const connectwalletHandler = () => {
    if (window.ethereum) {
        provider.send("eth_requestAccounts", [])
            .then(async () => {
                await accountChangedHandler(provider.getSigner());
            })
    } else {
        setErrorMessage("Please Install MetaMask!!!");
    }
}
In the code above, we did a little check to assert that the user has MetaMask installed; if the user does not have it installed, it should ask the user to install MetaMask. If it is installed, it should connect to MetaMask.
Build a connect Button
We will create a button that allows a user to connect to Ethereum. This button will call the function onClick. When this button is clicked, we will connect to MetaMask.
<Button
  style={{ background: defaultAccount ? "#A5CC82" : "white" }}
  onClick={connectwalletHandler}>
    {defaultAccount ? "Connected!!" : "Connect"}
</Button>
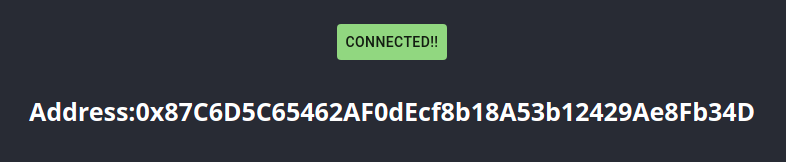
The defaultAccount displays the wallet address, and we use the wallet address to show connected when the address is available. Otherwise, it should just show connect.
It should look like this when connected.

While MetaMask has public nodes that it connects to by default, if you would like to use your Quicknode Provider instead, you can absolutely do that. You can follow along this guide to configure your MetaMask wallet appropriately.
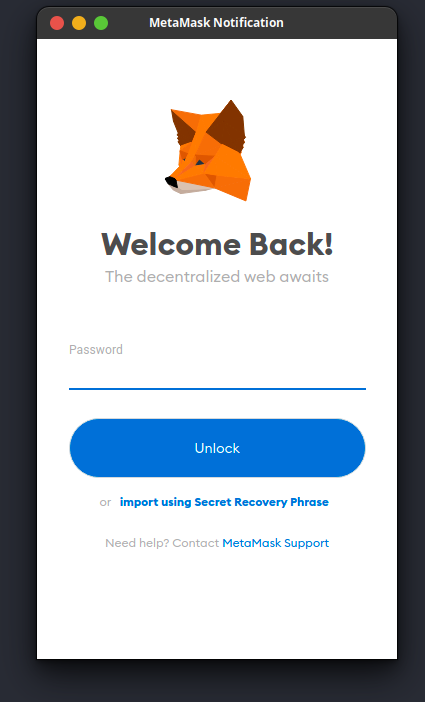
Login to MetaMask
After connecting to MetaMask, we are prompted to log in.
Display User Wallet Address
To handle the wallet address of the account and balance we signed up for, or any other newly created account, we created an async function that awaits the the provider.getSigner() function passed as a parameter to the accountChnagedHandler function. The accountChangedHandler contains the following:
const accountChangedHandler = async (newAccount) => {
        const address = await newAccount.getAddress();
        setDefaultAccount(address);
    }
Inside this function from the code above, we pass a new parameter newAccount which is assigned to provider.signer() , so we can access the getAddress() function and pass the address to our state variable using the account setter setDefaultAccount(address).
To display the Wallet Address, we will call the defaultAccount variable.
<h4 className="walletAddress">Address:{defaultAccount}</h4>
Display User Wallet Balance
This section will show us how to get the user balance from the blockchain.
const accountChangedHandler = async (newAccount) => {
        const address = await newAccount.getAddress();
        setDefaultAccount(address);
        const balance = await newAccount.getBalance()
        setUserBalance(ethers.utils.formatEther(balance));
        await getuserBalance(address)
    }
Based on the above code, we can access the balance of the wallet using the provider.signer() passed as newAccount , using the getBalance() function but this would return a hexadecimal value and that would be very large and unreadable, so we have to covert it from Wei to Ether ( Wei is the smallest denomination of Ether). To do this, we will do the following
setUserBalance(ethers.utils.formatEther(balance));
Next, we will pass the address into the getuserBalance() to be specific as to what wallet we will be needing its balance.
const getuserBalance = async (address) => {
        const balance = await provider.getBalance(address, "latest")
    }
Inside the getuserBalance() function, we will pass the address to the provider.getBalance() that takes the address and blockTag as parameters. To render it in our UI, use the code below
<div className="balanceDisplay">
  <h3>
    Wallet Amount: {userBalance}
  </h3>
</div>
Conclusion
In this tutorial, we demonstrated how to build a decentralized application using the Ethers.js library and react framework.
You can also extend the blockchain concept to build your own DeFi project where you can create a wallet that allows you to send and receive Ethereum or other tokens on the Ethereum blockchain.
You can take a look at the Ethers.js library to see how to use other functions of the library to build even more advanced projects on the blockchain.
We ❤️ Feedback!
Let us know if you have any feedback or requests for new topics. We'd love to hear from you.