
8 min read
Overview
Stacks is an emerging blockchain secured by Bitcoin and with native support for smart contracts. Our previous Stacks guide demonstrated how to create and deploy a smart contract on the Stacks blockchain. In this guide, we will take things a step further and learn how to create and deploy a SIP-009 compliant NFT contract to the Stacks Testnet. Once deployed, you will also learn how to mint the NFTs through the Stacks Sandbox. Let us get started!
What You Will Need
- Clarinet installed
- A text editor or IDE
- Hiro Wallet
- STX Testnet tokens (you can get some at this faucet)
What You Will Do
- Review specifications of the SIP-009 NFT Standard
- Create and configure a Clarinet project
- Create and configure an NFT smart contract
- Test the NFT contract in a local environment
- Deploy the NFT contract to Stacks Testnet
- Mint the NFT through the Stacks Sandbox
SIP-009 NFT Standard
The Stacks ecosystem has adopted a standard for fungible and non-fungible tokens. These standards make it easier for developers to get started, and help ensure the smart contracts they write remain composable. Some popular standards in the Stacks ecosystem currently are:
Since we are demonstrating the SIP-009 standard in this guide, let us cover the specifications and methods needed to make our NFT SIP-009 compliant.
- Last token ID - (get-last-token-id () (response uint uint)) - This function takes no arguments and returns the ID of the last generated NFT.
- Token URI - (get-token-uri (uint) (response (optional (string-ascii 256)) uint)) - This function returns a token URI for a given NFT ID.
- Owner - (get-owner (uint) (response (optional principal) uint)) - This function returns the owner of a given NFT ID.
- Transfer - (transfer (uint principal principal) (response bool uint)) - This function transfers the NFT to the specified recipient
- Trait - You will need to declare a trait file that will hold your NFTs metadata (in our example, its nft-trait.clar).
- Native asset functions: nft-burn, nft-get-owner, nft-mint, nft-transfer
Now that we know the outline of deploying a SIP-009 compliant smart contract, let us get to coding!
Create and configure a Clarinet project
Open up a terminal window and navigate into the directory you want this project to live in. Then, run the following command to create a new clarinet project and navigate inside it.
Note: You must have Clarinet installed in order to run the command below.
clarinet new nft-project && cd nft-project
Next, use the command below to create a set of smart contract files:
clarinet contract new nft-trait; clarinet contract new nft-factory
The above command creates a two .clar files (which is the file format for Clarity), one for our NFT contract logic (e.g., nft-factory.clar), and one for our NFTs metadata (e.g., nft-trait.clar). It will also create two test files (TypeScript format) in a test directory.
At this point, your project folder setup should look like this:
In the next section, we will start configuring and implementing the NFT smart contract.
Create and Configure an NFT Smart Contract
Implementing the SIP-009 Standard
Before we get into the smart contract code, we need to configure some dependencies to ensure the contract we are building is SIP-009 compliant. Open Clarinet.toml and edit the contracts.nft-factory section (around line 11-12) to match the following configuration:
[contracts.nft-factory]
path = "contracts/nft-factory.clar"
depends_on = ["nft-trait"]
The configuration above makes sure our smart contract conforms to the required traits in the SIP-009 standard. If we don’t implement the configured traits, our deployment to test and production environments will fail.
Next, open the nft-trait.clar file. Copy the following code and replace it with the content already in the file:
(define-trait nft-trait
  (
    ;; Last token ID, limited to uint range
    (get-last-token-id () (response uint uint))

    ;; URI for metadata associated with the token
    (get-token-uri (uint) (response (optional (string-ascii 256)) uint))

     ;; Owner of a given token identifier
    (get-owner (uint) (response (optional principal) uint))

    ;; Transfer from the sender to a new principal
    (transfer (uint principal principal) (response bool uint))
  )
)
Then, save the file. The Clarity code above sets the functions our contract should conform to. These functions should be familiar to you as we discussed them in the previous section.
Implementing the NFT Contract Logic
Now, we will add the NFT smart contract logic to the nft-factory.clar file. The contract will enable us to mint NFTs on the Stacks blockchain. Open the file and replace the existing content with the following code:
;; using the SIP009 interface (testnet)
;; trait configured and deployed from ./settings/Devnet.toml
(impl-trait 'ST1PQHQKV0RJXZFY1DGX8MNSNYVE3VGZJSRTPGZGM.nft-trait.nft-trait)

;; declare a new NFT
(define-non-fungible-token NFT-FACTORY uint)

;; store the last issued token ID
(define-data-var last-id uint u0)

;; mint a new NFT
(define-public (claim)
  (mint tx-sender))

;; SIP009: Transfer token to a specified principal
(define-public (transfer (token-id uint) (sender principal) (recipient principal))
  (begin
     (asserts! (is-eq tx-sender sender) (err u403))
     ;; Make sure to replace NFT-FACTORY
     (nft-transfer? NFT-FACTORY token-id sender recipient)))

(define-public (transfer-memo (token-id uint) (sender principal) (recipient principal) (memo (buff 34)))
  (begin
    (try! (transfer token-id sender recipient))
    (print memo)
    (ok true)))

;; SIP009: Get the owner of the specified token ID
(define-read-only (get-owner (token-id uint))
  ;; Make sure to replace NFT-NAME
  (ok (nft-get-owner? NFT-FACTORY token-id)))

;; SIP009: Get the last token ID
(define-read-only (get-last-token-id)
  (ok (var-get last-id)))

;; SIP009: Get the token URI. You can set it to any other URI
(define-read-only (get-token-uri (token-id uint))
  (ok (some "https://token.stacks.co/{id}.json")))

;; Internal - Mint new NFT
(define-private (mint (new-owner principal))
    (let ((next-id (+ u1 (var-get last-id))))
      (var-set last-id next-id)
      ;; You can replace NFT-FACTORY with another name if you'd like
      (nft-mint? NFT-FACTORY next-id new-owner)))
Note: you may want to adjust the URL in the get-token-uri function as it currently points to no metadata. This guide won't be setting any metadata in the NFT we mint; however, you can follow the "Creating Metadata URI" section in this ERC-1155 NFT guide to easily create metadata using NFT.storage and IPFS.
In the next section, we'll demonstrate how to verify your contracts to make sure they are deployable.
Test the NFT Contract in a Local Environment
Clarity is an interpreted language, which means it doesn't compile code down to a lower level before execution; instead, the code gets executed in the same format at runtime. This makes the code slower but more transparent. To check that our clarity code is syntactically correct, we can run the command clarinet check from the nft-project directory.
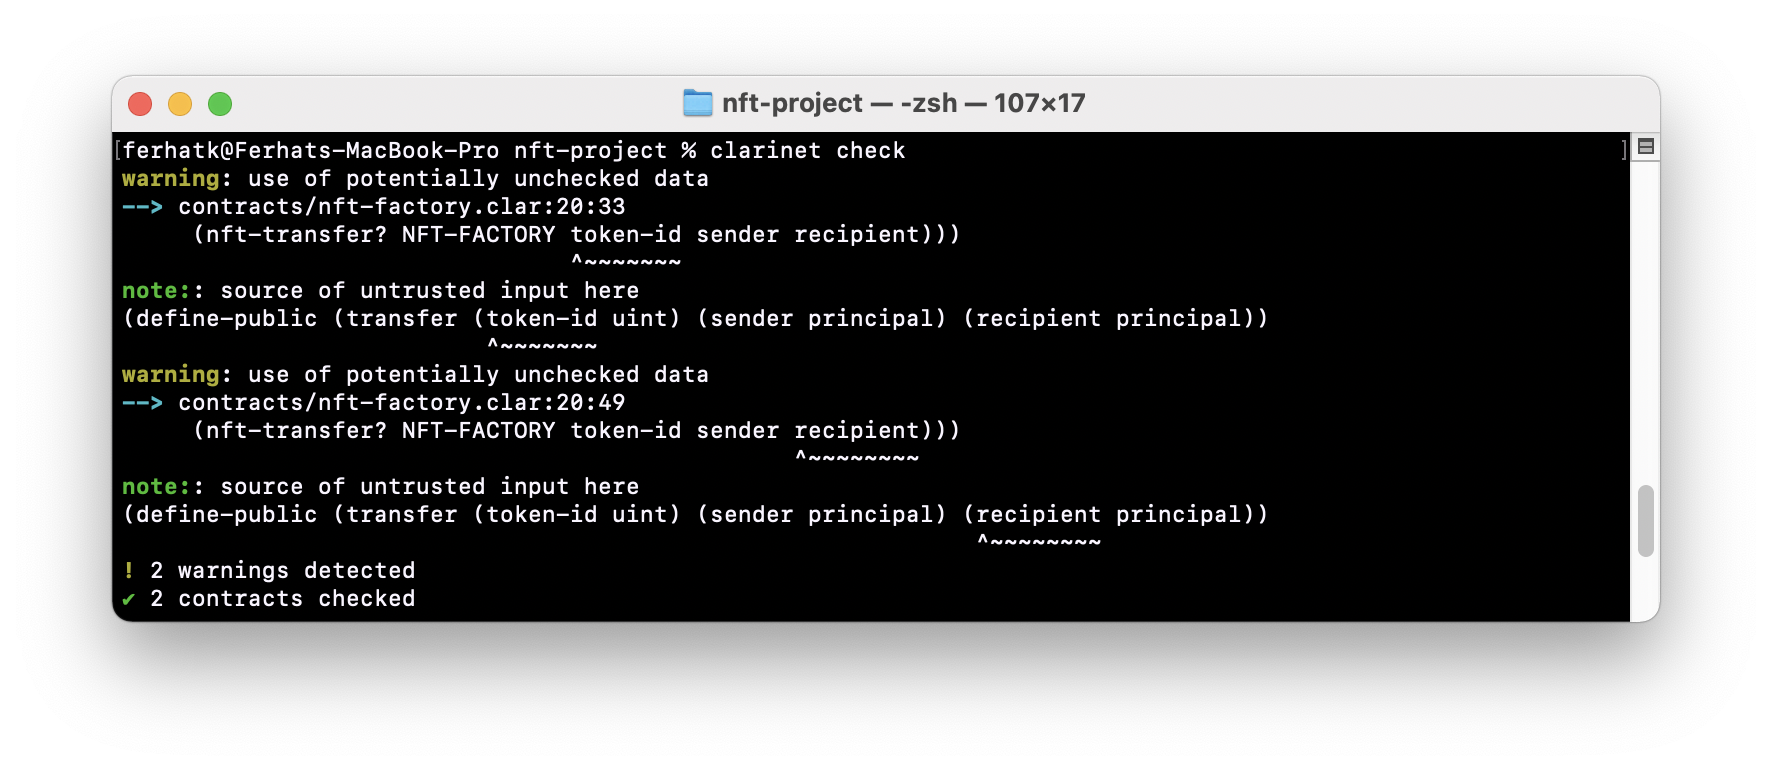
You may get some warnings; however, don't worry about those for the purpose of this guide. We'll go over warnings and unchecked data in a future guide.
Before deploying to Stacks Testnet, it is good practice to check a few functions to make sure the responses are what we expect. We can initiate the clarinet console to do this:
clarinet console
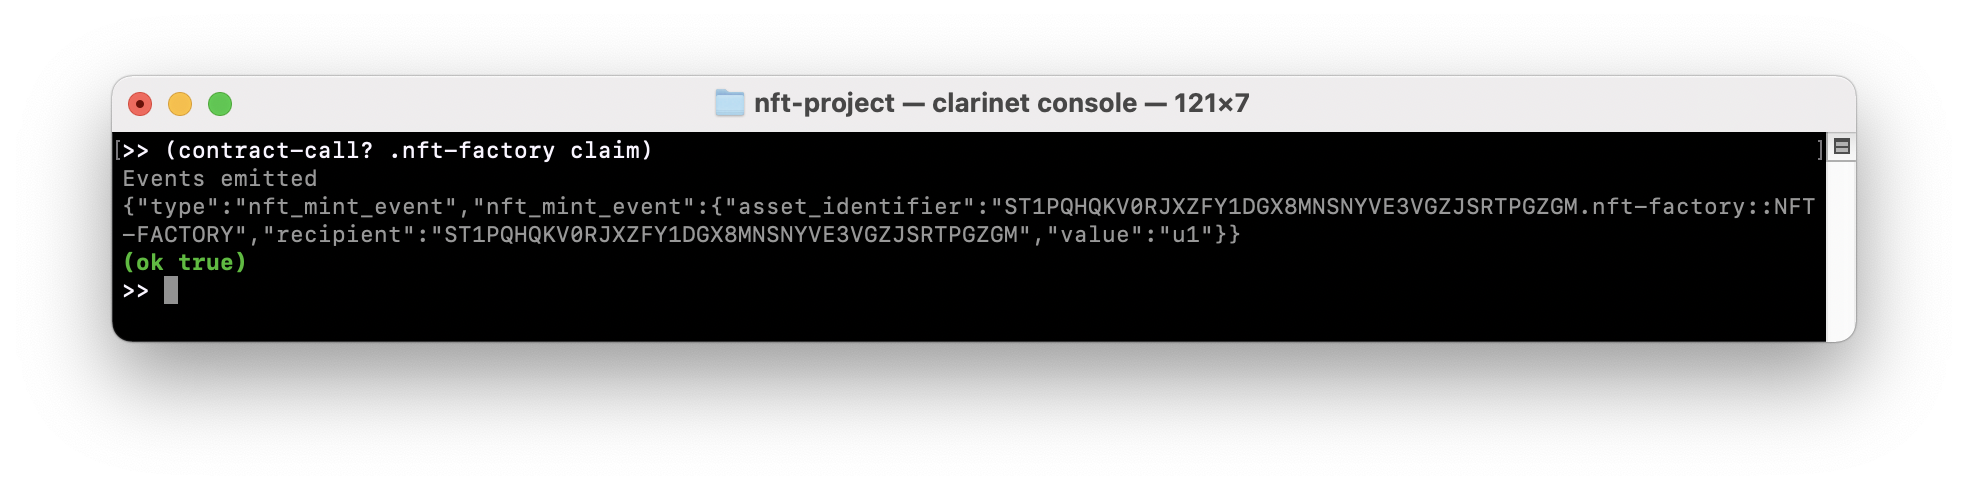
Once the console is initiated, you'll see your contract address and public functions available in your contract. There will also be a list of test accounts that are associated with your local clarinet console. Run the command below to call the claim function of our smart contract, which will mint an NFT in our local environment.
(contract-call? .nft-factory claim)
You should see a response similar to this:
If all goes well, move on to the next section where we will deploy our NFT contract to Stacks Testnet 👀
Deploy the NFT Contract to Stacks Testnet
This section will demonstrate how to deploy your NFT contract to Stacks Testnet using the Stacks Explorer Sandbox. Before we get started, make sure you have the Hiro Wallet already installed and set up. Moreover, make sure to have some test STX tokens for gas fees (you can get some at this faucet).
Remember to switch the network on your Hiro wallet to Testnet. This can be done by clicking the ellipsis button ("...") and clicking Change Network.
Once your wallet is set up, connect your wallet to the Stacks Explorer Sandbox and navigate to the Write & Deploy page. Copy and paste the code from your nft-factory.clar file, and then fill in the contract name (in our example, it's "nft-factory") if you don't want the randomly generated name provided to you.
Next, click the deploy button. You should get a prompt from the Hiro wallet window with information about the transaction. Verify that the transaction looks correct, then click **Confirm
**
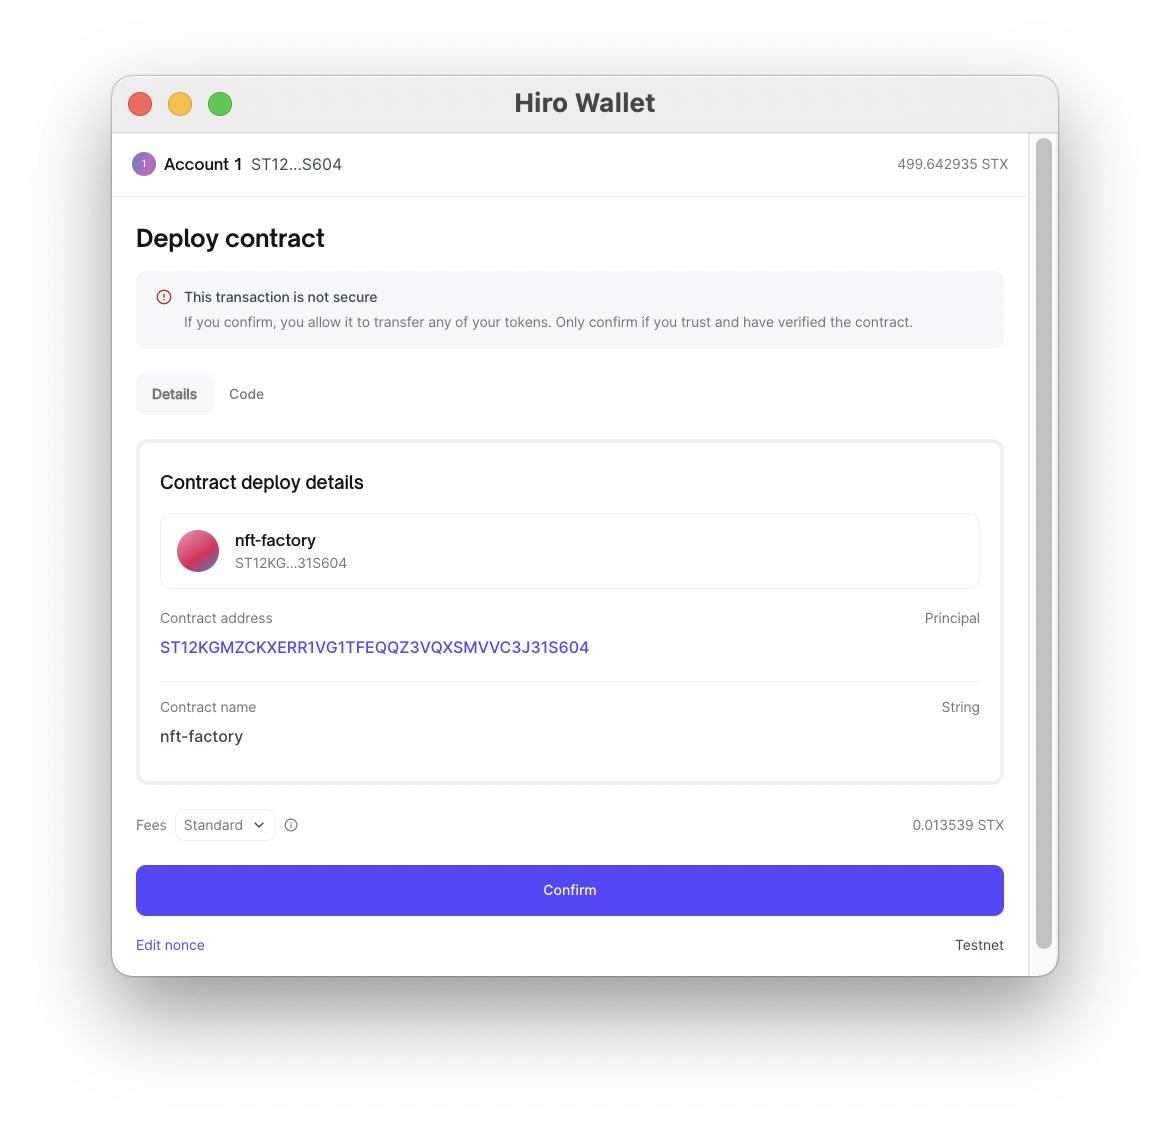
The mining (transaction / process) can take a few minutes. You can monitor the transaction on the transactions page of the Stacks explorer, or via the activity section of your Hiro wallet. Once we have confirmed that the contract is mined, we can navigate to our contract's homepage by searching the contract address or clicking the transaction in our wallet. The contract page will display your contract's name, deployer address, fees to deploy the contract, the source code, and what block number it was mined in.
You may be wondering, where is the NFT you just minted? Well, it technically hasn't been minted yet. So far, we have just created and deployed the NFT contract. In the next section, we will demonstrate the minting process where you'll claim your NFT and view it in your Hiro wallet. However, feel free to spend a bit more time exploring the explorer page and move on to the next section when you're ready.
Mint the NFT through the Stacks Sandbox
The moment you've been waiting for! It's time to mint it up!
To mint the NFT, we will need to call the claim function of our NFT contract. For this demo, we will do this in the Stacks Explorer Sandbox, and we'll demonstrate it via the code in another guide.
Navigate to the Call a contract page (the f in the left sidebar), then input your contract's address (i.e., ST12KGMZCKXERR1VG1TFEQQZ3VQXSMVVC3J31S604.nft-factory) and the sandbox should detect the address and name. Click the Get contract button and should see the callable functions listed in the table like so:

Click the Claim function then click Call function. You'll get a prompt in your Hiro wallet. Verify the claim function is being called, then confirm the transaction. Your transaction may take a couple of minutes to confirm. Feel free to take a quick break; it should be confirmed once you return. If it still takes a while, you can click the Increase fee* icon on your transaction within your Hiro wallets activity tab.
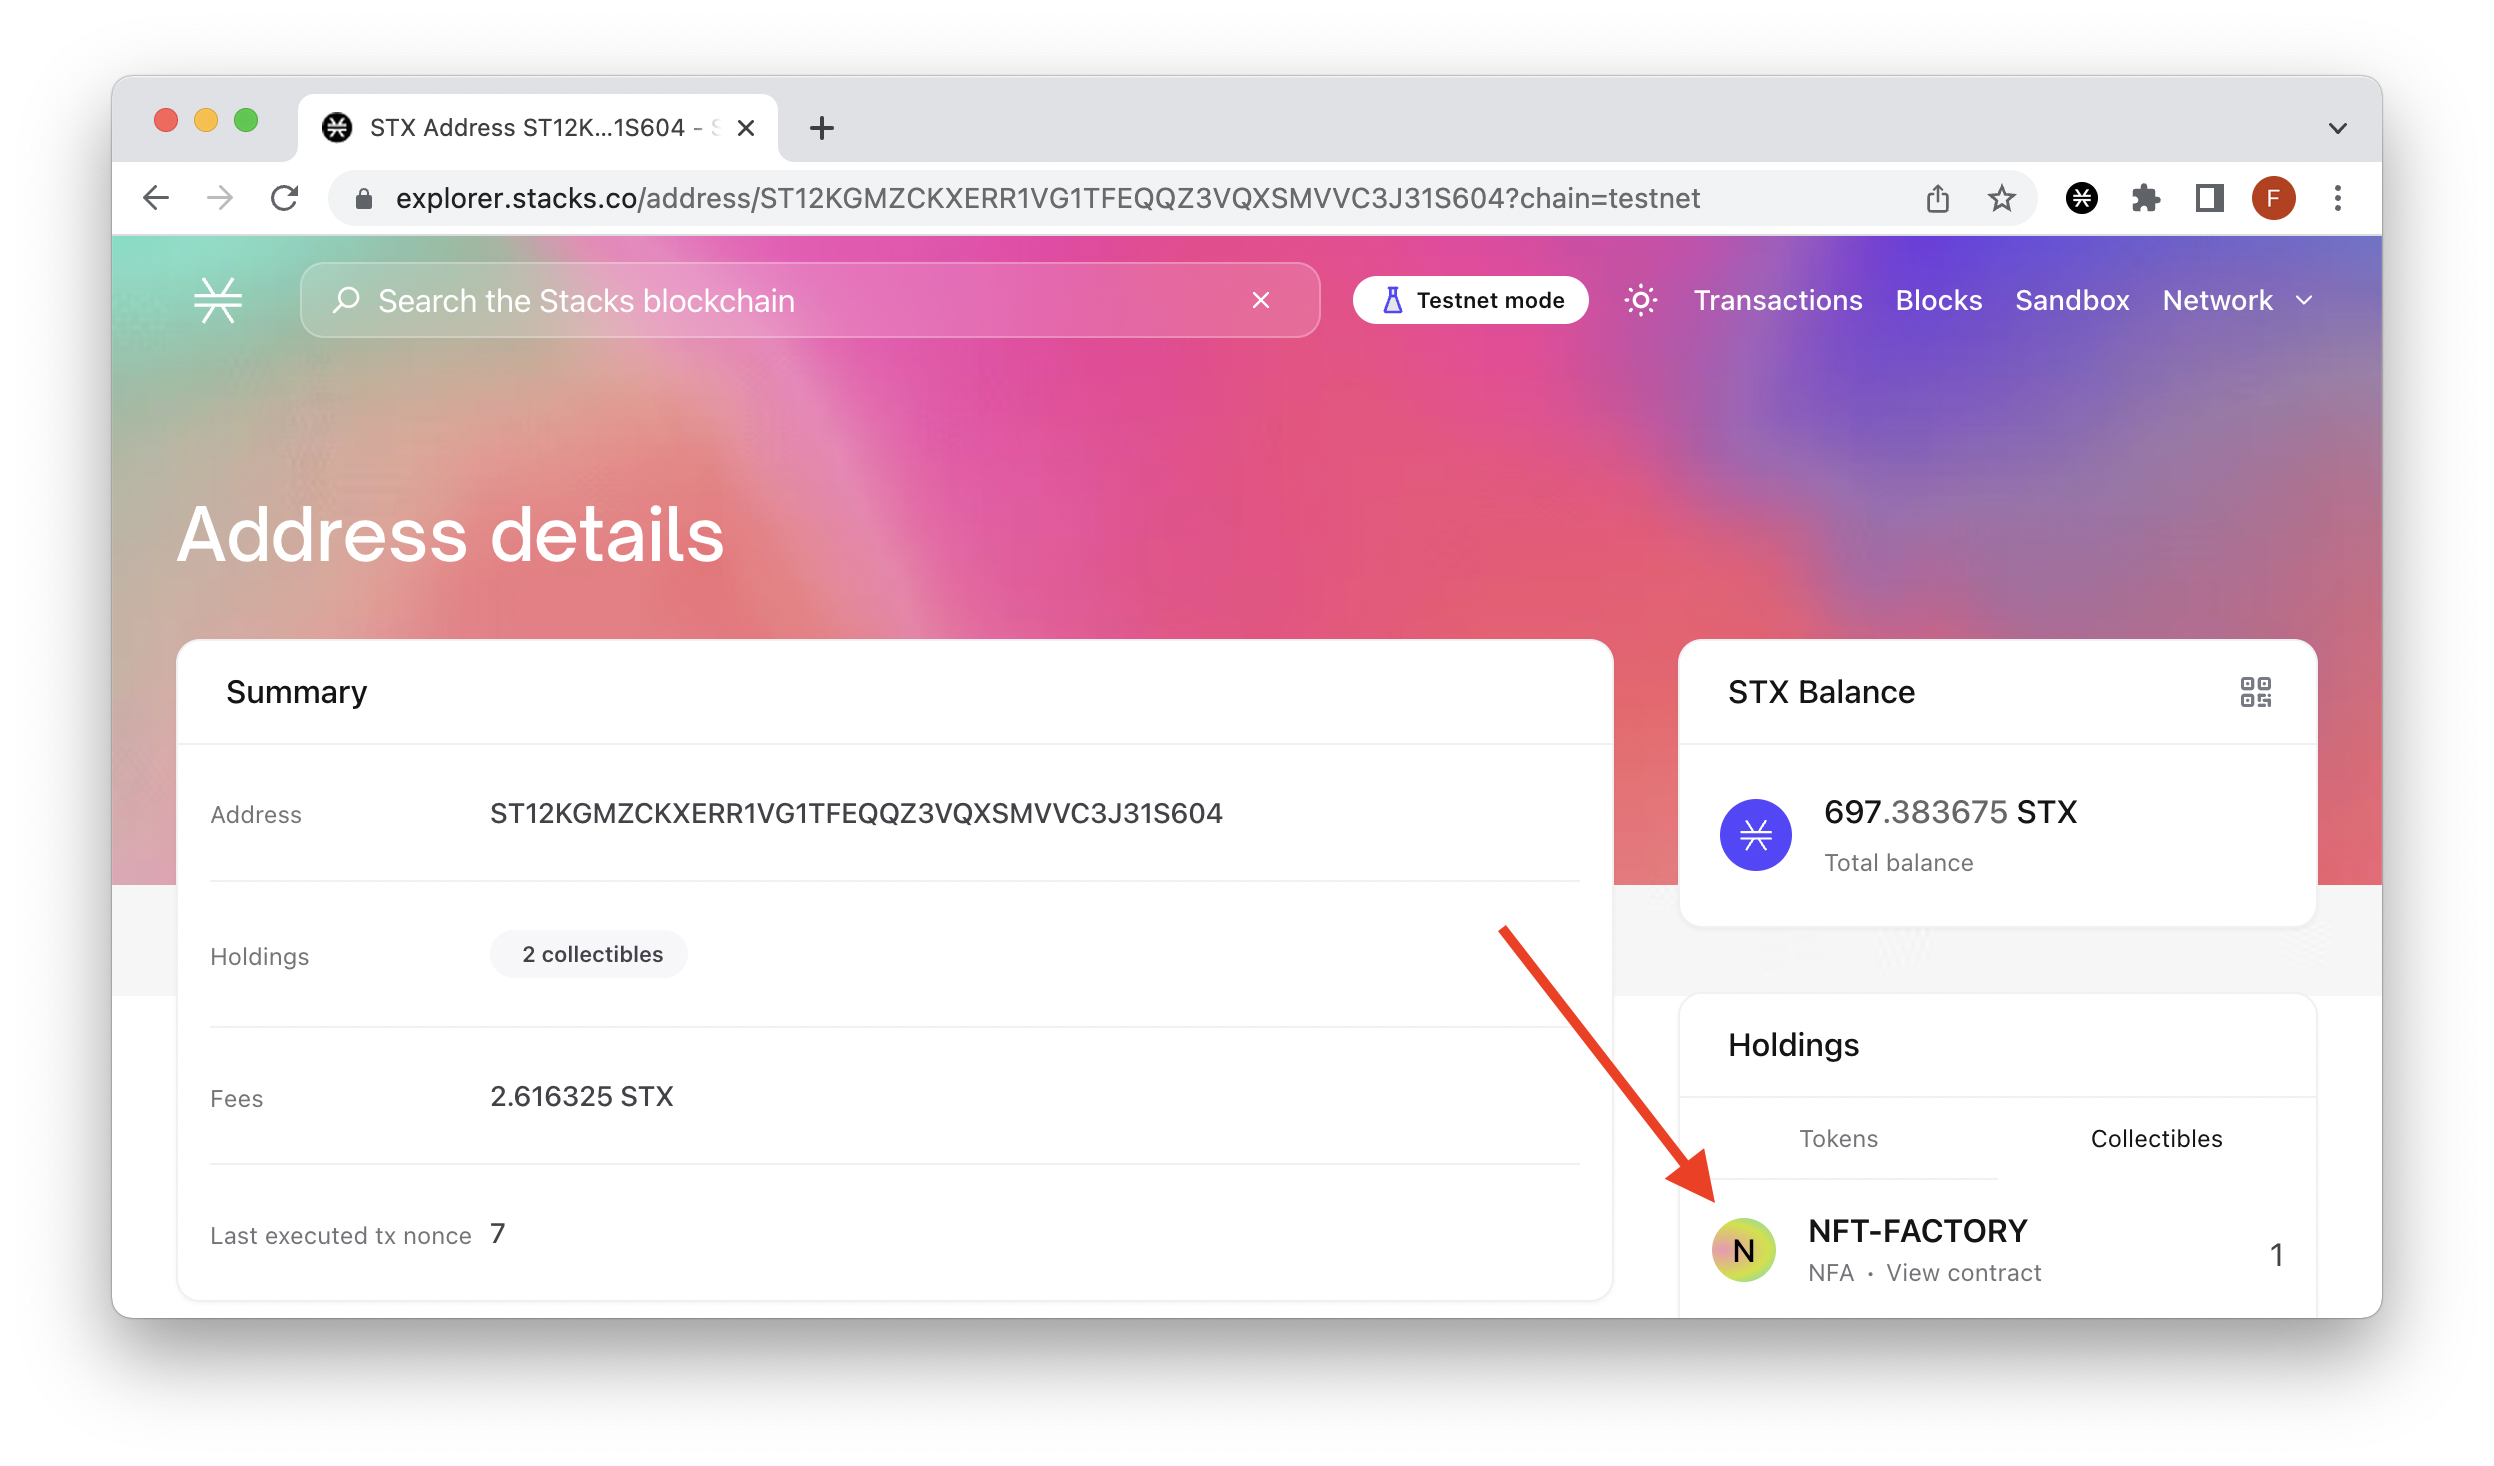
Once the transaction is mined, you can see your NFT within the Balances tab on your Hiro wallet or the Stacks explorer by going to your personal wallet address page and looking at the Collectibles tab.
Final Thoughts
Awesome Work! You’ve learned how to create and deploy, and execute an NFT contract to the Stacks Testnet blockchain. To continue building on your new skills and knowledge, you may want to try adding in metadata for your NFT or try minting it programmatically. You can also check out some of our other guides here.
Want to show off your new NFT, or want to ask a question? Share with us on Discord or reach out to us via Twitter.
We ❤️ Feedback!
If you have any feedback or questions on this guide, let us know. We’d love to hear from you!