17 min read
Overview
Want to create a 10,000 NFT collection? This guide will take you on a journey to bring your 10,000-piece NFT collection to life on Arbitrum Nova. You will learn how to create metadata, deploy an NFT smart contract with Hardhat, and mint unique tokens to showcase on a prominent NFT marketplace like TofuNFT.
What You Will Need
- Basic understanding of Solidity and Javascript
- Node.js Installed
- Non-custodial wallet (e.g. Torus, MetaMask, Coinbase Wallet)
- ETH on Arbitrum Nova chain (you can use the Arbitrum Nova bridge)
- A code editor (e.g., VSCode)
What You Will Do
- Create an NFT contract with Hardhat
- Create Images & Metadata for your NFT Collection
- Test your NFT contract and deploy onto Arbitrum Nova
- Mint an NFT and view it on an NFT Marketplace
Overview of Arbitrum Nova
Arbitrum Nova is a layer 2 scaling solution for Ethereum that aims to provide ultra-fast and cheap transactions for decentralized applications. It uses a combination of AnyTrust technology and Data Availability Committees (DACs) to achieve its goals and is significantly cheaper than Arbitrum One.
AnyTrust is a variation of the Arbitrum Nitro technology that reduces costs by assuming a minor degree of trust. AnyTrust utilizes a third-party Data Availability Committee (DAC) to store data and make it available as requested. QuickNode, being a leading blockchain service provider, was selected as a DAC committee member for Arbitrum Nova (along with Google Cloud, Reddit, and Consensys). As a DAC member, QuickNode runs Data Availability Servers, which lets transaction batch data be available on demand via a REST API. For more information about DACs, check out this QuickNode blog post.
Arbitrum Nova has a variety of use cases, such as Web3 Gaming and Social Infrastructure, but in this guide, we will specifically cover NFTs (Non-Fungible Tokens). These unique digital assets have become increasingly popular in recent years, and there are several reasons why one may want to develop NFTs on Arbitrum Nova:
- Ultra-low transaction costs
- Fast transactions with rapid block times
- Interoperability between other EVM-chains
These benefits are also advantageous for projects with large transaction volumes, such as game development, social projects, and decentralized finance (DeFi).
If you want to learn more about the benefits of Arbitrum Nova compared to Arbitrum One and other blockchains, check out this QuickNode guide
Setting up the Development Environment
Step 1: Accessing Arbitrum Nova with QuickNode
You'll need an API endpoint to communicate with the Arbitrum Nova chain. You're welcome to use public nodes or deploy and manage your own infrastructure; however, if you'd like 8x faster response times, you can leave the heavy lifting to us. Sign up for a free account here.
Once signed in, click Create Endpoint and then select the Arbitrum Nova Mainnet chain.
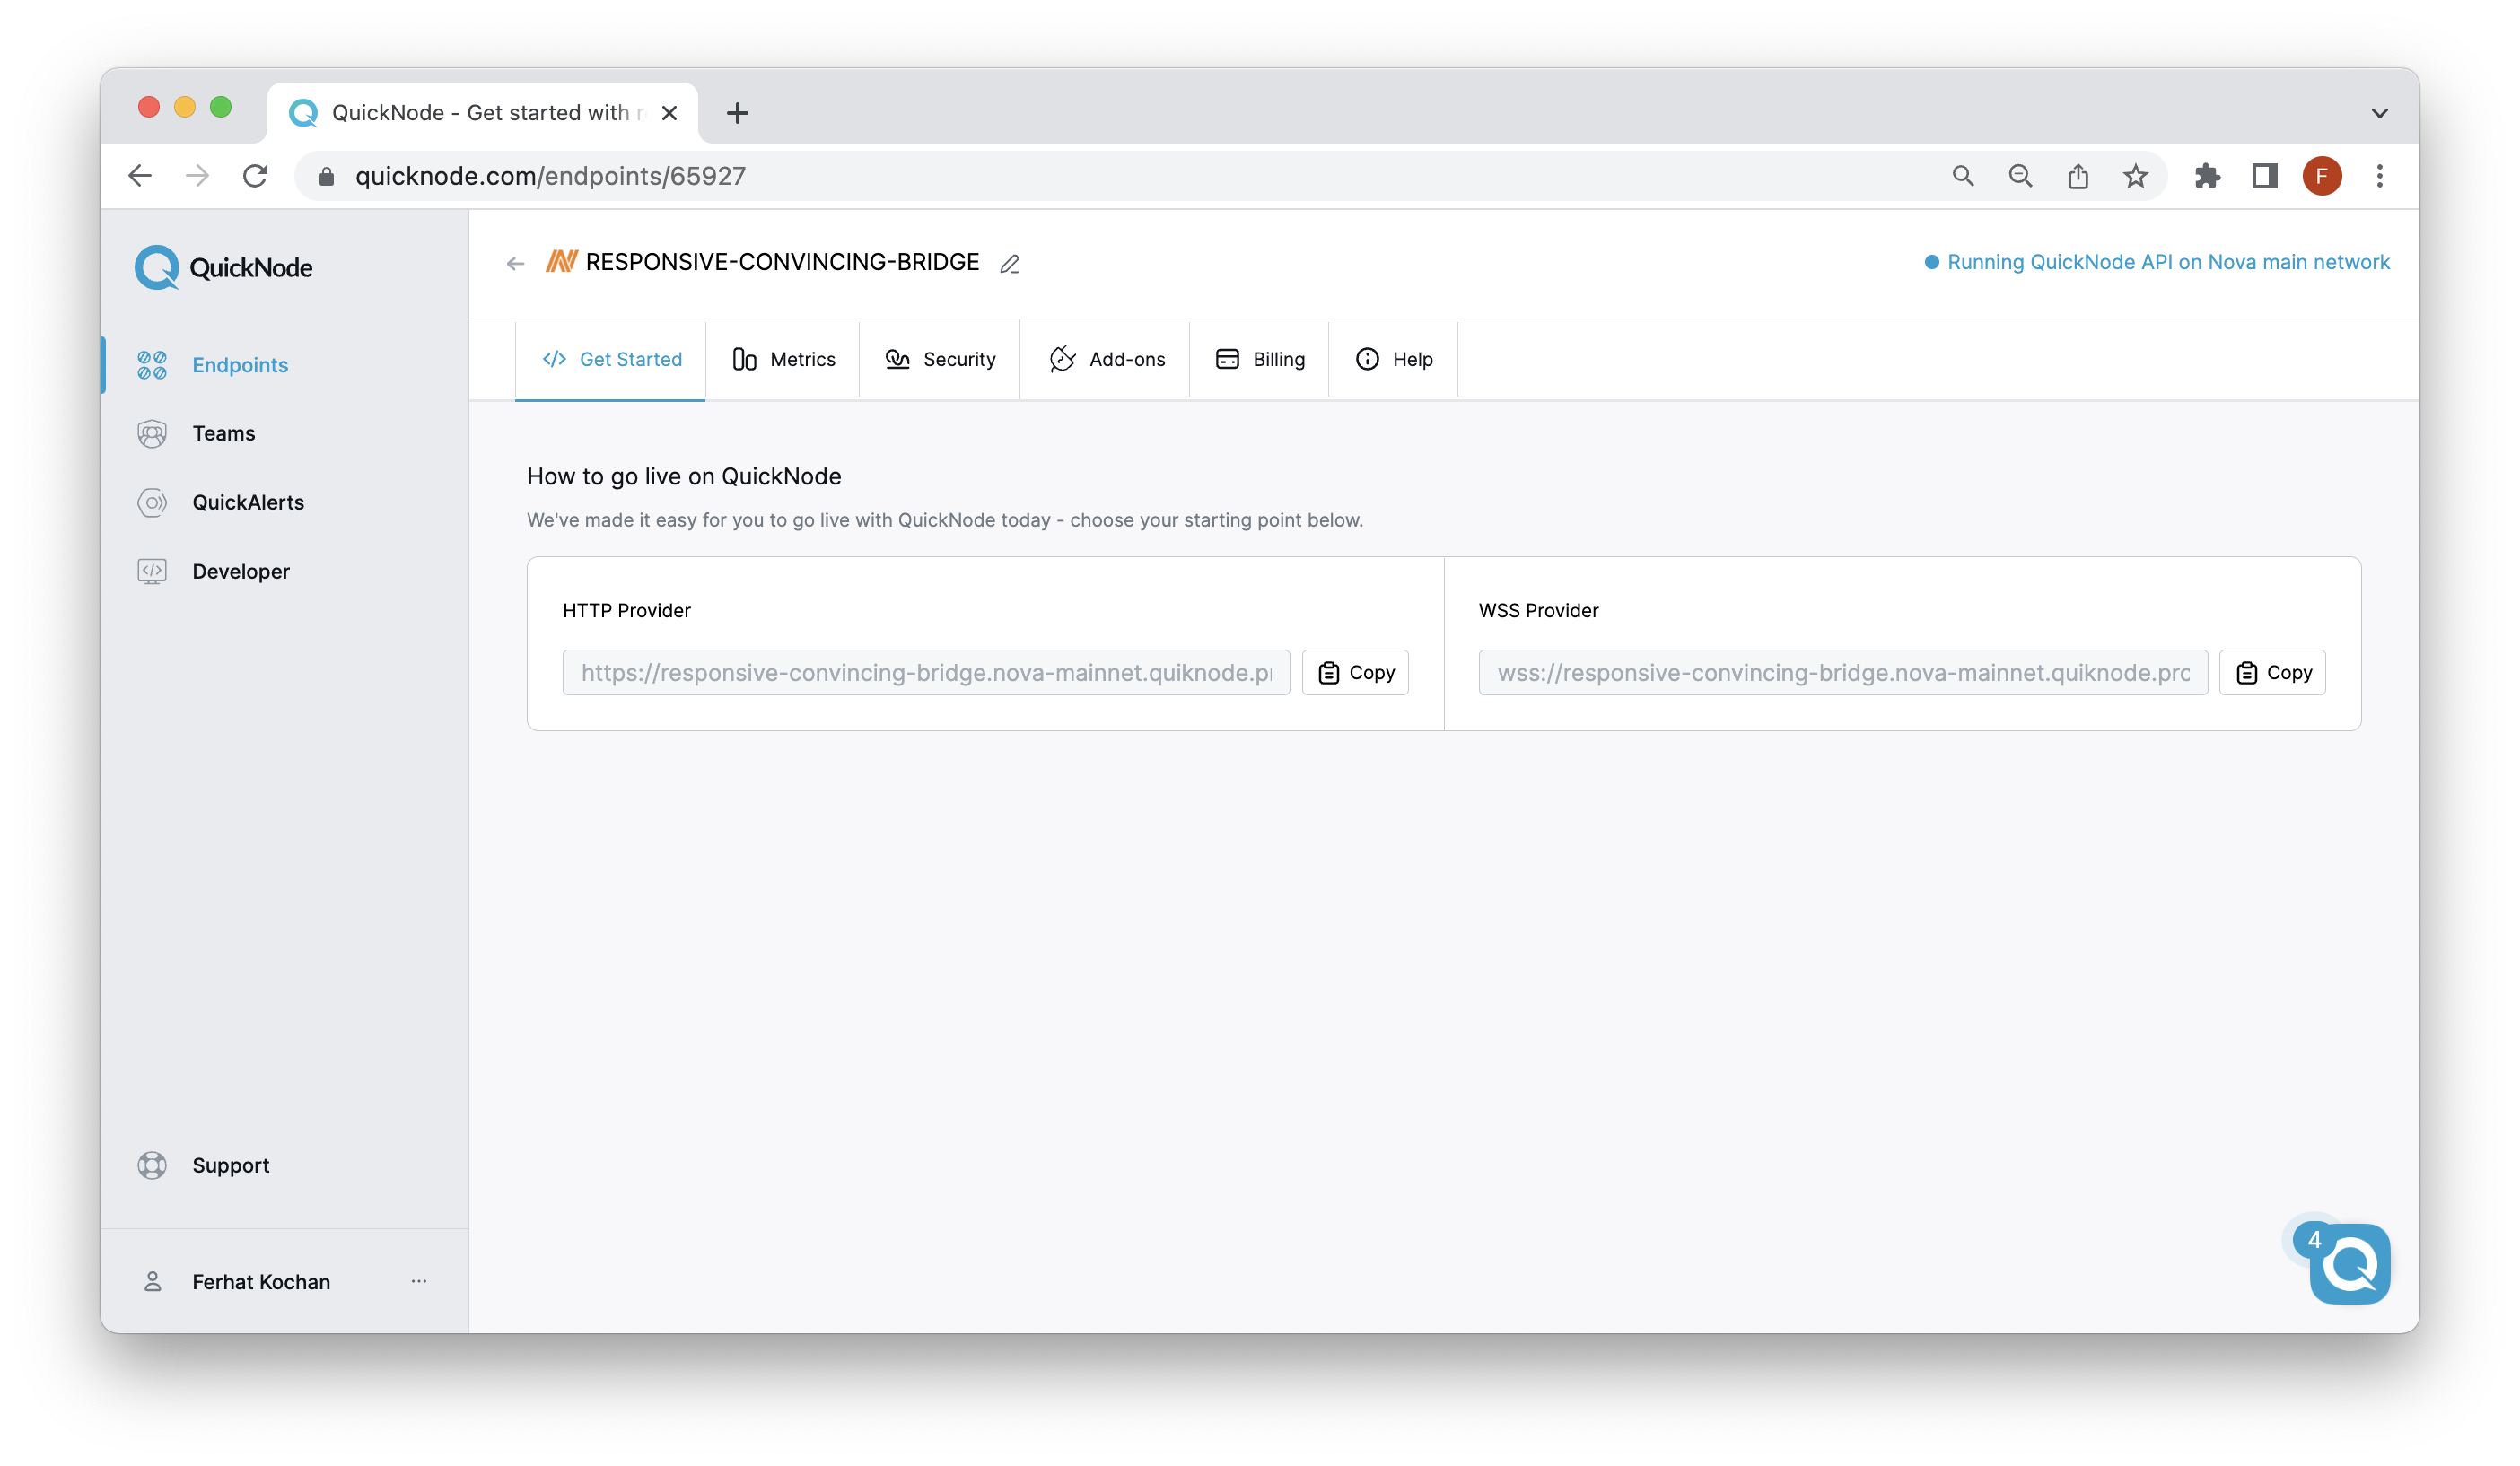
Once your endpoint is created, keep the HTTP Provider URL handy, as you'll need it when configuring your .env later in the guide.
Step 2: Create a Wallet and Fund with ETH
For this guide, we will be using Torus Wallet, a non-custodial wallet that supports multiple chains and networks, including Ethereum, Arbitrum One, Arbitrum Nova and other EVM-related chains. Keep in mind that in order to deploy on Arbitrum Nova Mainnet, you will need to have actual funds (ETH) to cover the transaction fees. These fees should be minimal and should not exceed $0.25. You can acquire ETH on decentralized exchanges like Uniswap or on traditional exchanges like Coinbase. You can use the Arbitrum Nova Bridge to move funds onto Arbitrum Nova.
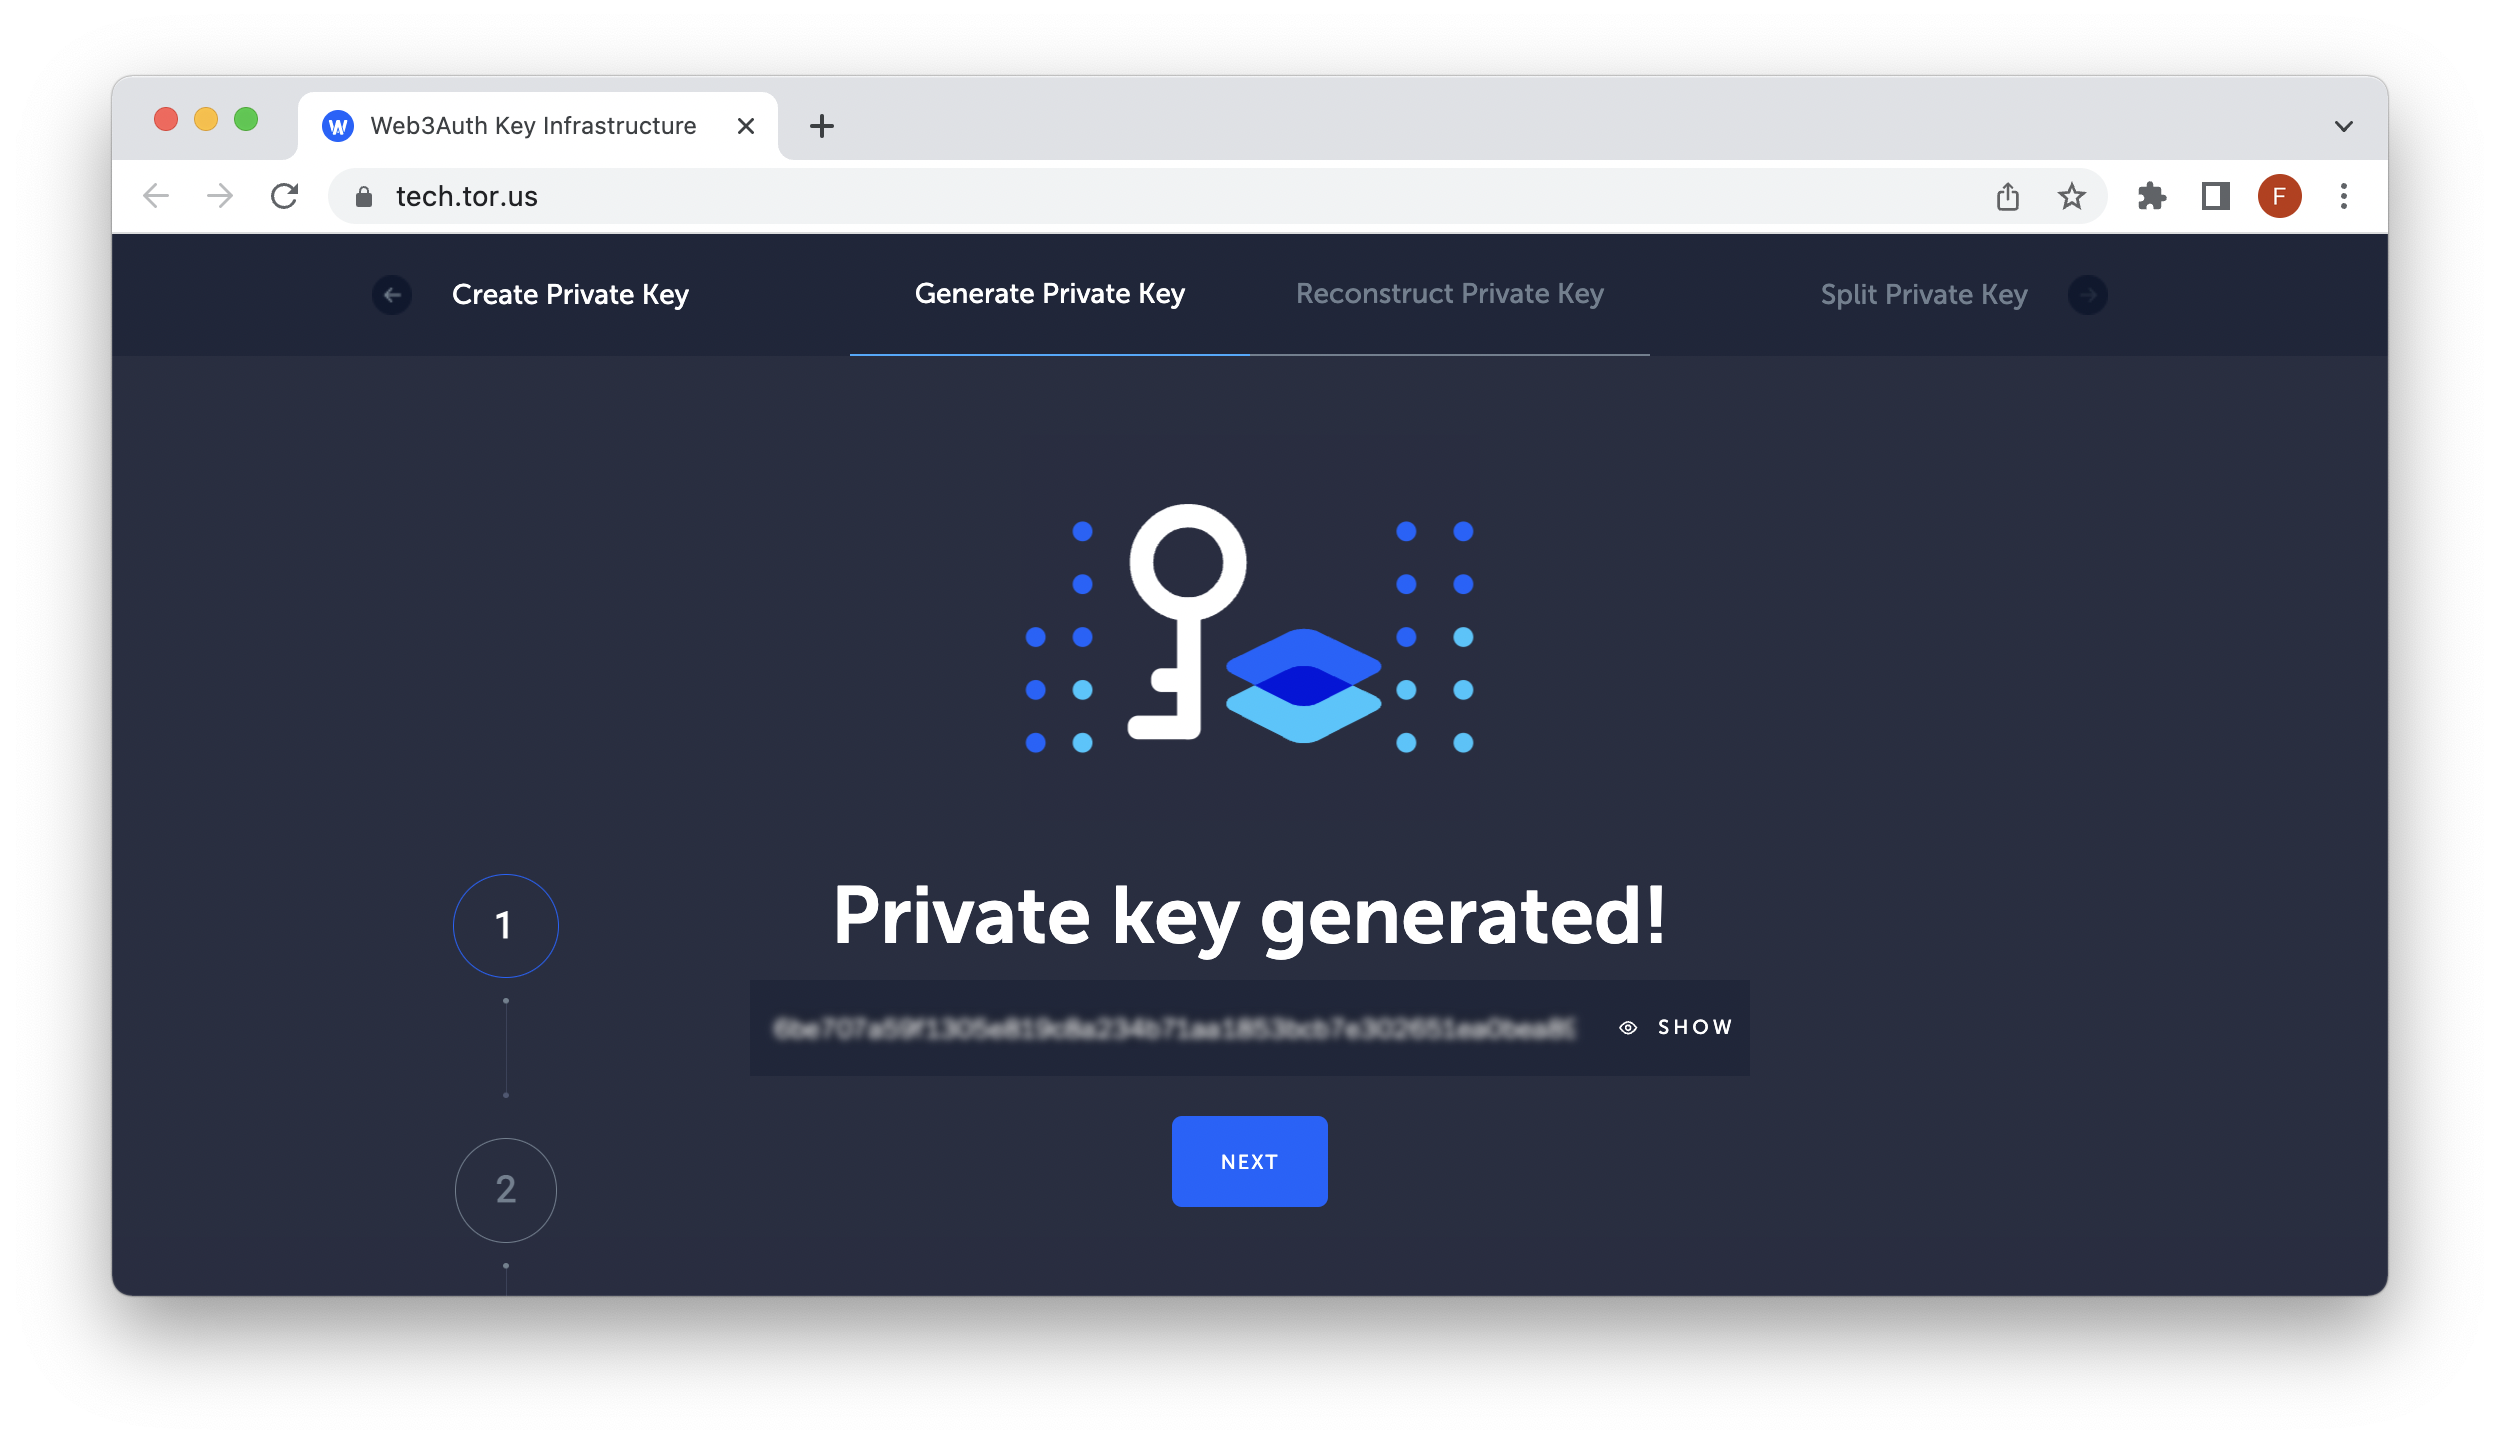
To get started, go to Torus and follow the instructions to generate a private key.
Before proceeding with the technical aspects of this guide, make sure you have enough funds on your Arbitrum Nova mainnet address to pay for the contract deployment and interactions. If you need to bridge funds, you can use the Arbitrum Nova bridge.
Step 3: Create a new project
To use Hardhat, you will first need to install Node.js on your computer. You can download it from the official website nodejs.org.
Open a terminal and check that Node.js is installed and the version is 18>:
node -v
Navigate to the directory where you want to create your project. For this guide, we'll create a folder called 10k-collection:
mkdir 10k-collection
Navigate into the folder you just created, then use the following command to initialize a new npm project:
npm init -y
Then, install Hardhat by running the following command:
npm install --save-dev hardhat
--save-dev adds this to the devDependencies list in package.json
Now, we'll initialize a Hardhat project by running the following command:
npx hardhat create
When prompted about the type of project to create, choose the third option (i.e., Create an empty hardhat config file).
This will create a new directory with the default Hardhat project structure. Next, we will need to create the required folders for our 10k-collection.
mkdir contracts
mkdir test
mkdir scripts
Step 5: Install the necessary libraries
In the project directory, run the following commands to install the projects required dependencies:
npm install dotenv @openzeppelin/contracts @nomicfoundation/hardhat-toolbox
Step 6: Setup your config file for deployment
To protect your private key and RPC URL (in the event you publish your code on Github), we will create a .env file to store the credentials. This file should not be included when pushing to Github.
In your main projects directory, run the following terminal command to create the .env file:
echo > .env
Open the file and input the following variables. Then, update the placeholder values with your actual credentials. Remember to save the file!
RPC_URL=<YOUR_RPC_URL>
PRIVATE_KEY=<YOUR_PRIVATE_KEY>
Next, we will set up the hardhat.config.js file. Open the file and input the following code.
require("@nomicfoundation/hardhat-toolbox");
require("dotenv").config();

module.exports = {
  solidity: "0.8.17",
  networks: {
    nova: {
      url: process.env.RPC_URL,
      accounts: [process.env.PRIVATE_KEY]
    }
  }
};
You can now access Logs for your RPC endpoints, helping you troubleshoot issues more effectively. If you encounter an issue with your RPC calls, simply check the logs in your QuickNode dashboard to identify and resolve problems quickly. Learn more about log history limits on our pricing page.
Remember to save the file! In the next section, we will create images and metadata for our 10K NFT collection.
Creating Metadata & Uploading to IPFS
In this section, we'll be creating the metadata for the 10K NFT collection.
Specifically, we'll be using Figma and this Github repository for generating image assets and metadata (thanks to whoever wrote it!). Note that you can use other tools for metadata, and this is not the only method.
In order to create 10,000 NFTs with different images, you'll need at least seven layers with four different options. Check out this Figma file to see an example. Note that this Figma file only contains three layers, and the remaining four are already created in the repository we're using. Alternatively, you can also skip this step and use only the example assets found in the Github repository.
Once you have exported your image assets to your PC, clone the following repository and open it up in your code editor of choice.
git clone https://github.com/manuelpires/nft-collection-generator/
Then, install the required dependencies with the following command:
npm install
If you are running Mac OSX and the install command above threw an error, you may need to first install the following libraries:
brew install pkg-config cairo pango libpng jpeg giflib librsvg pixman
& then install canvas:
npm i canvas
Now, create two folders metadata and images:
mkdir metadata && mkdir images
Then, navigate into the traits directory and create folders for each layer. In our example, we created a folder for arrows, circles, and stars.
NOTE: Disregard this step and skip to running the node index.js command if you are only using the example images already in the traits folder.
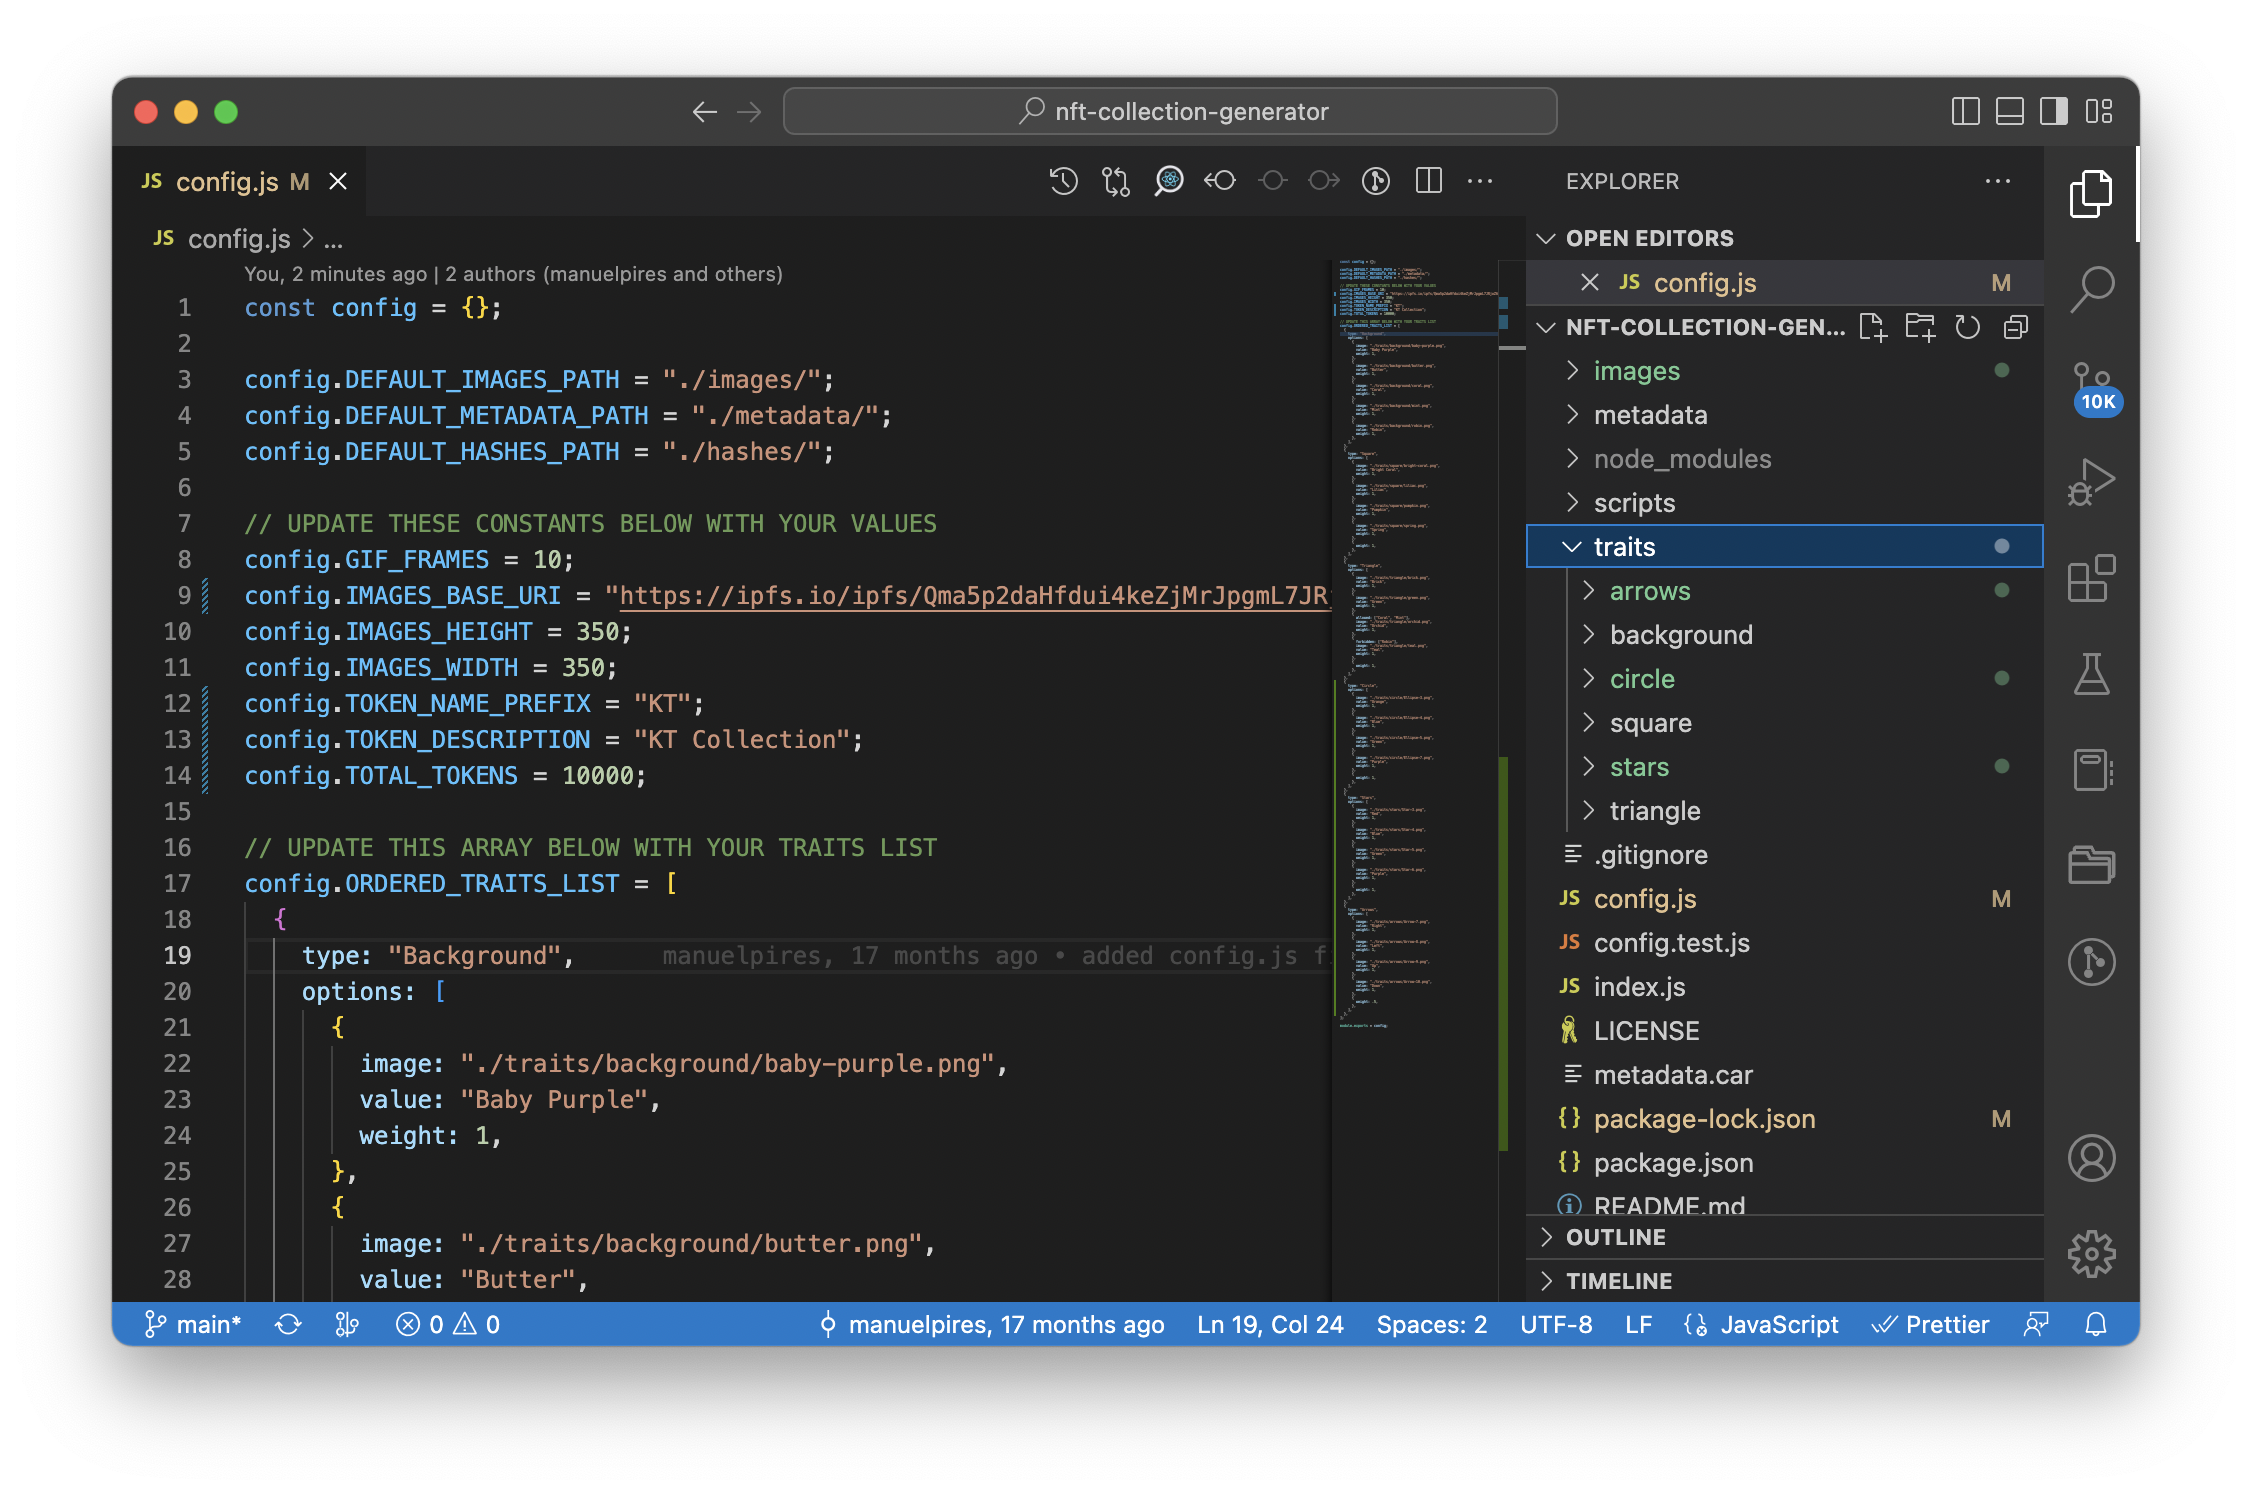
After, open the config.js file and add each layer to the ORDERED_TRAITS_LIST object. An example would look like this:
  {
    type: "Square",
    options: [
      {
        image: "./traits/square/bright-coral.png",
        value: "Bright Coral",
        weight: 1,
      },
      {
        image: "./traits/square/liliac.png",
        value: "Liliac",
        weight: 1,
      },
      {
        image: "./traits/square/pumpkin.png",
        value: "Pumpkin",
        weight: 1,
      },
      {
        image: "./traits/square/spring.png",
        value: "Spring",
        weight: 1,
      },
      {
        weight: 1,
      },
    ],
  },
Note that the layers are added in order, so be mindful of the order you use. The weight option is relative to the weights of the other items in the same options array, and it should be an integer of at least 1. If you put a weight of 10 in an option, it should have ten times more chances to be selected than an option in the same array with a weight equal to 1.
Once you setup config.js with all of your metadata and image references and the required dependencies are installed, generate the metadata and images by running the command:
node index.js
Once the images and metadata are created, please take a few minutes to review them to make sure they were generated as expected. Once we upload the images and metadata data to IPFS, we will need to replace the base URL with our actual metadata link, so keep this folder handy.
Publishing Metadata & Images to IPFS
Now that our metadata and images are created, we will need to upload them to IPFS, a protocol, hypermedia, and file-sharing peer-to-peer network for storing and sharing data in a distributed file system. We will use IPFS instead of a centralized storage solution (like Amazon) because of its decentralized properties we want our NFT collection to align with. However, note that IPFS is free to use, but at times it can be slow, and you'll need to actively pin your content (i.e., keep your IPFS node running) in order to keep your metadata retrievable.
Alternatively, you can also use services such as Pinata (free and paid versions) or NFT.Storage (free but storage limited) to easily upload data to IPFS and keep your content pinned and faster to retrieve, but they have storage limits and can be paid.
In any case, you need to upload your metadata in a folder so that it has the same root path for all files within that directory.
For example:
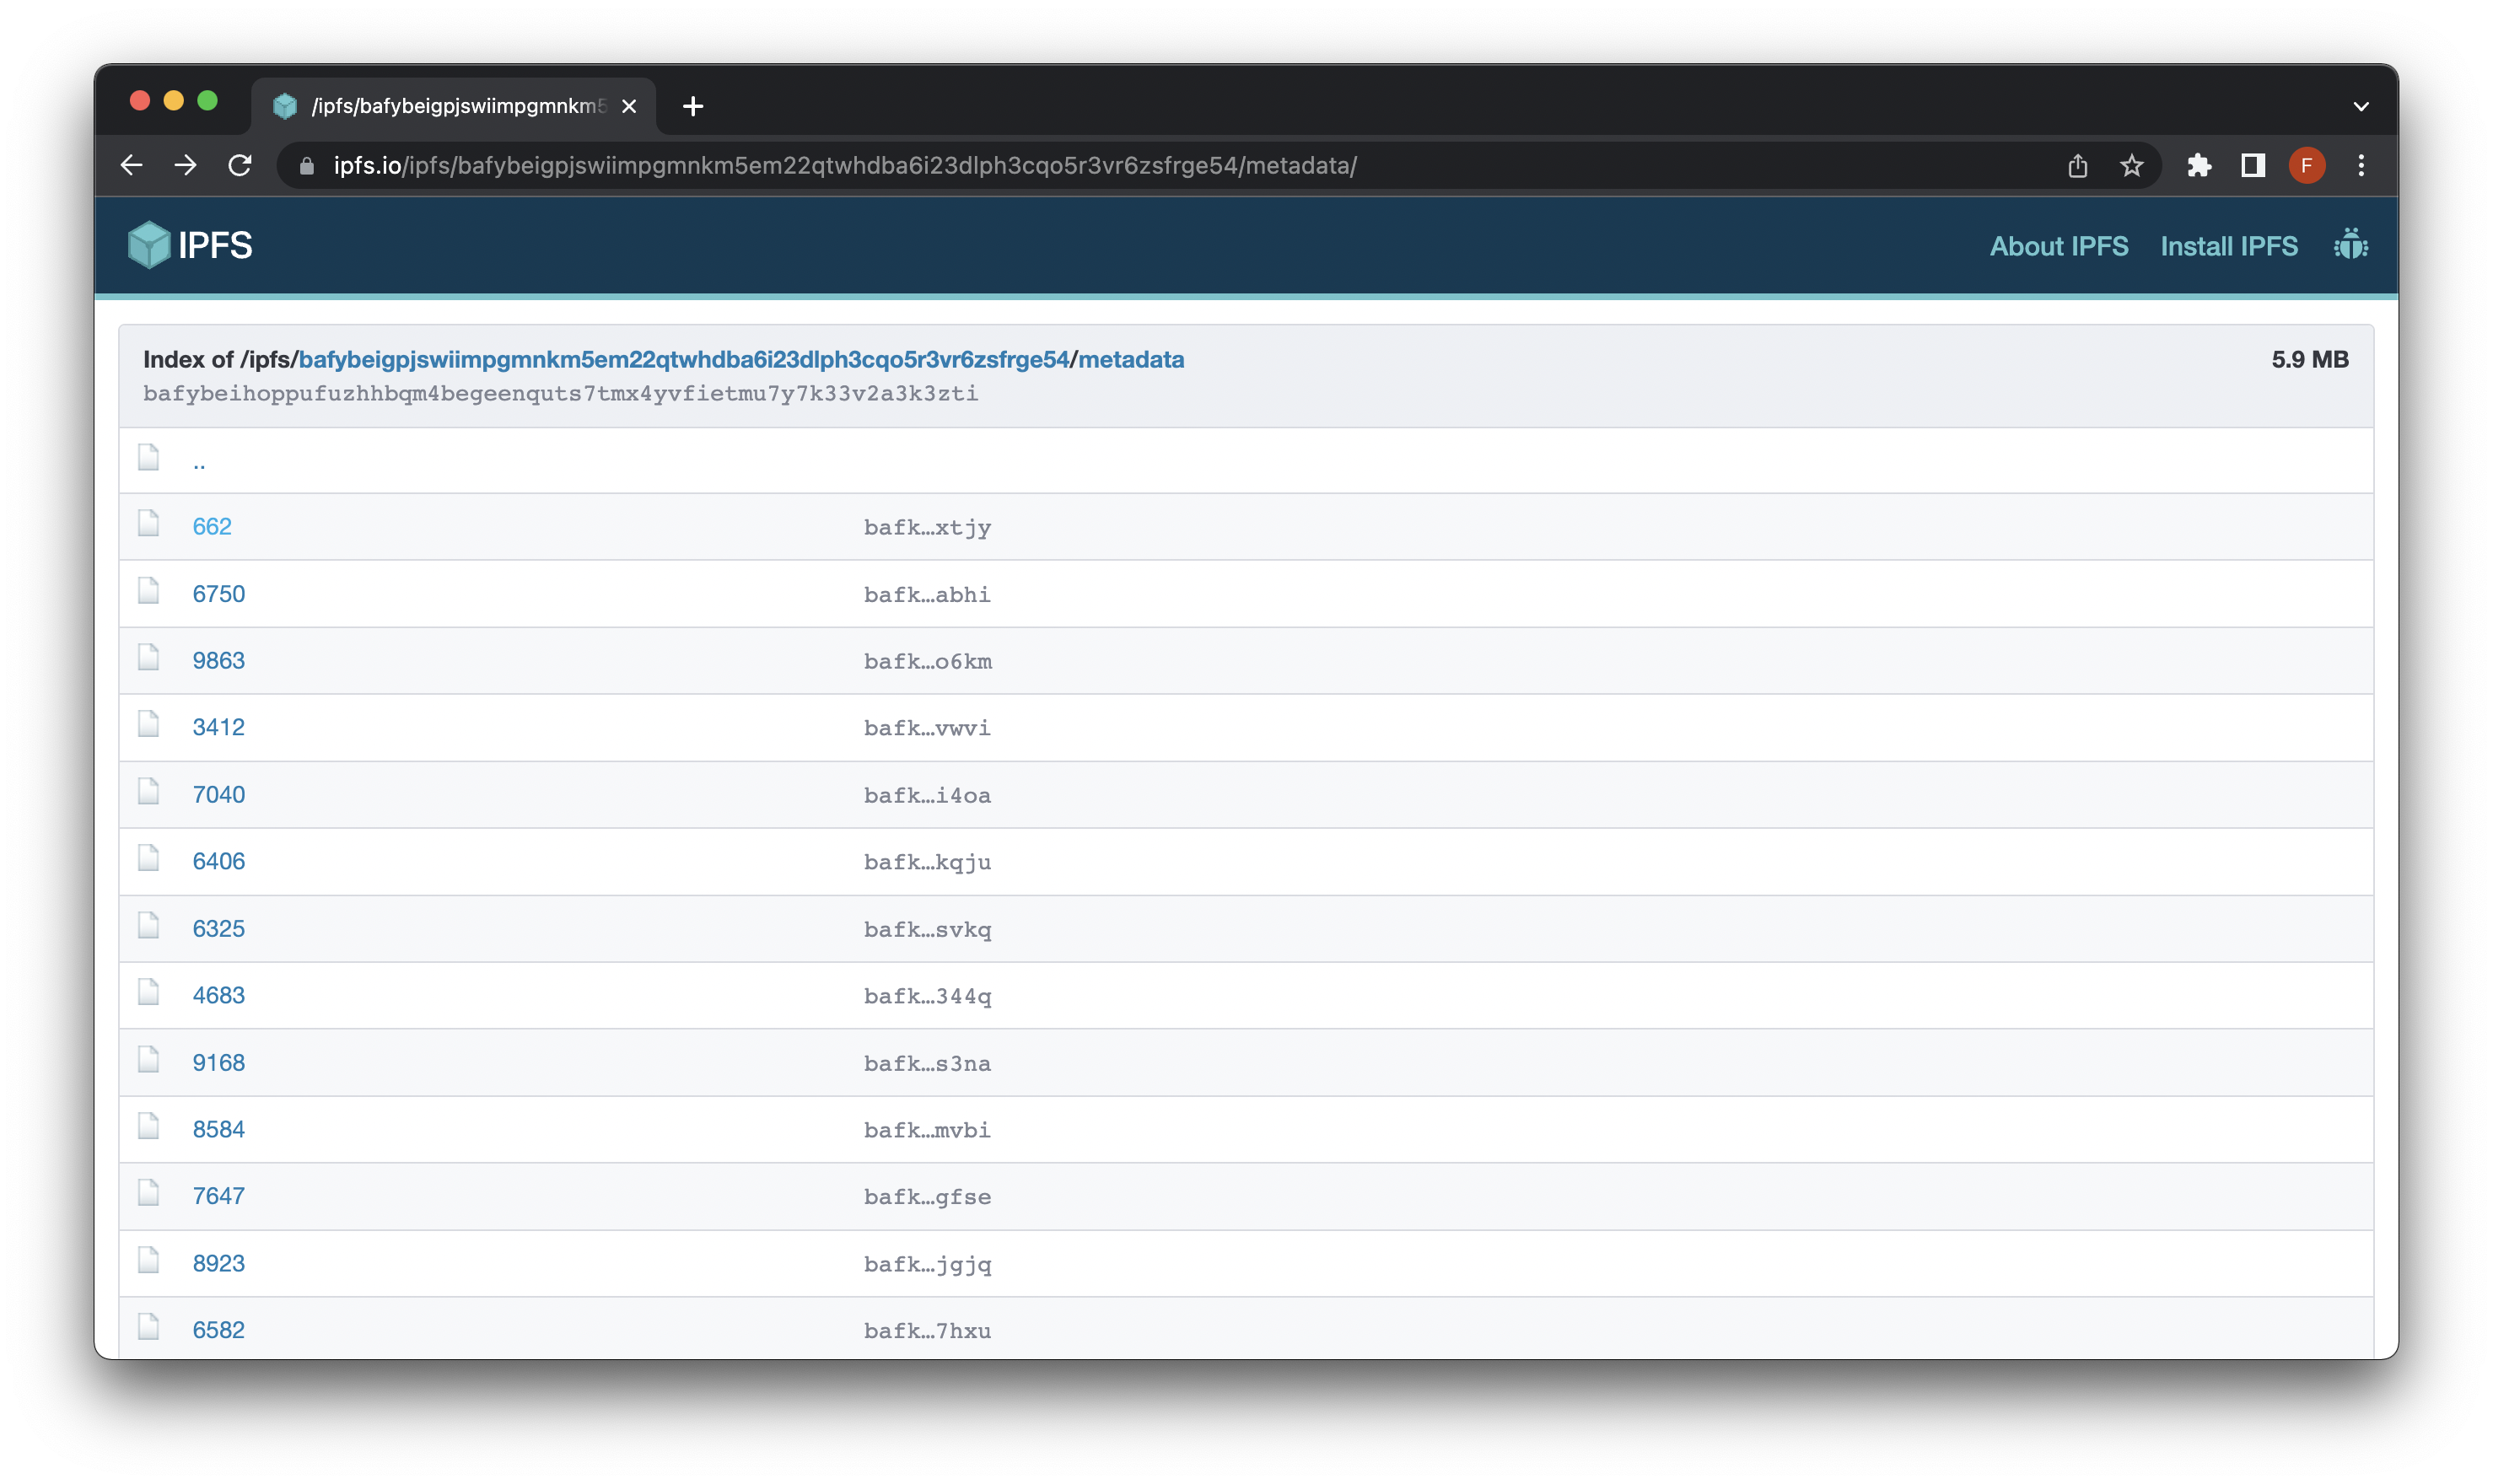
https://ipfs.io/ipfs/bafybeidhtkrvmboa4pel3i3asl57rgmrtai4zelpoeccfulw7qxqbhwyw4/metadata/
The above URL points to a folder on IPFS that contains files of the NFT metadata. You can also add a number to the end of the path (e.g.,/metadata/1) to see each individual NFT's metadata. It's important that this data is standardized so that it's easier for applications to display and interact with your NFTs.
First, we'll install IPFS using the following link. You can access IPFS multiple ways; however, we will install via the Kubo binary.
Then, open up a new terminal window (CMD + T on Mac) and check if IPFS is installed:
ipfs --version
Next, we'll fire up the IPFS node that we'll use to pin to the IPFS network and keep it persistent.
ipfs init
You should see something like this:
initializing ipfs node at /Users/user/.ipfs
> generating 2048-bit RSA keypair...done
> peer identity: Qmcpo2iLBikrdf1d6QU6vXuNb6P7hwrbNPW9kLAH8eG67z
> to get started, enter:
>
>   ipfs cat /ipfs/QmYwAPJzv5CZsnA625s3Xf2nemtYgPpHdWEz79ojWnPbdG/readme
To take our IPFS node online, run the following command:
ipfs daemon
Make a note of the TCP ports that the daemon is listening on
Then, open another terminal window. If you’re connected to the network, you should be able to see the IPFS addresses of your peers when you run the following command:
ipfs swarm peers
You can test that your IPFS can request data from the network by running the following command:
ipfs cat /ipfs/QmSgvgwxZGaBLqkGyWemEDqikCqU52XxsYLKtdy3vGZ8uq > ~/Desktop/spaceship-launch.jpg
If you were able to download the image, great! We can now upload our images and metadata to IPFS.
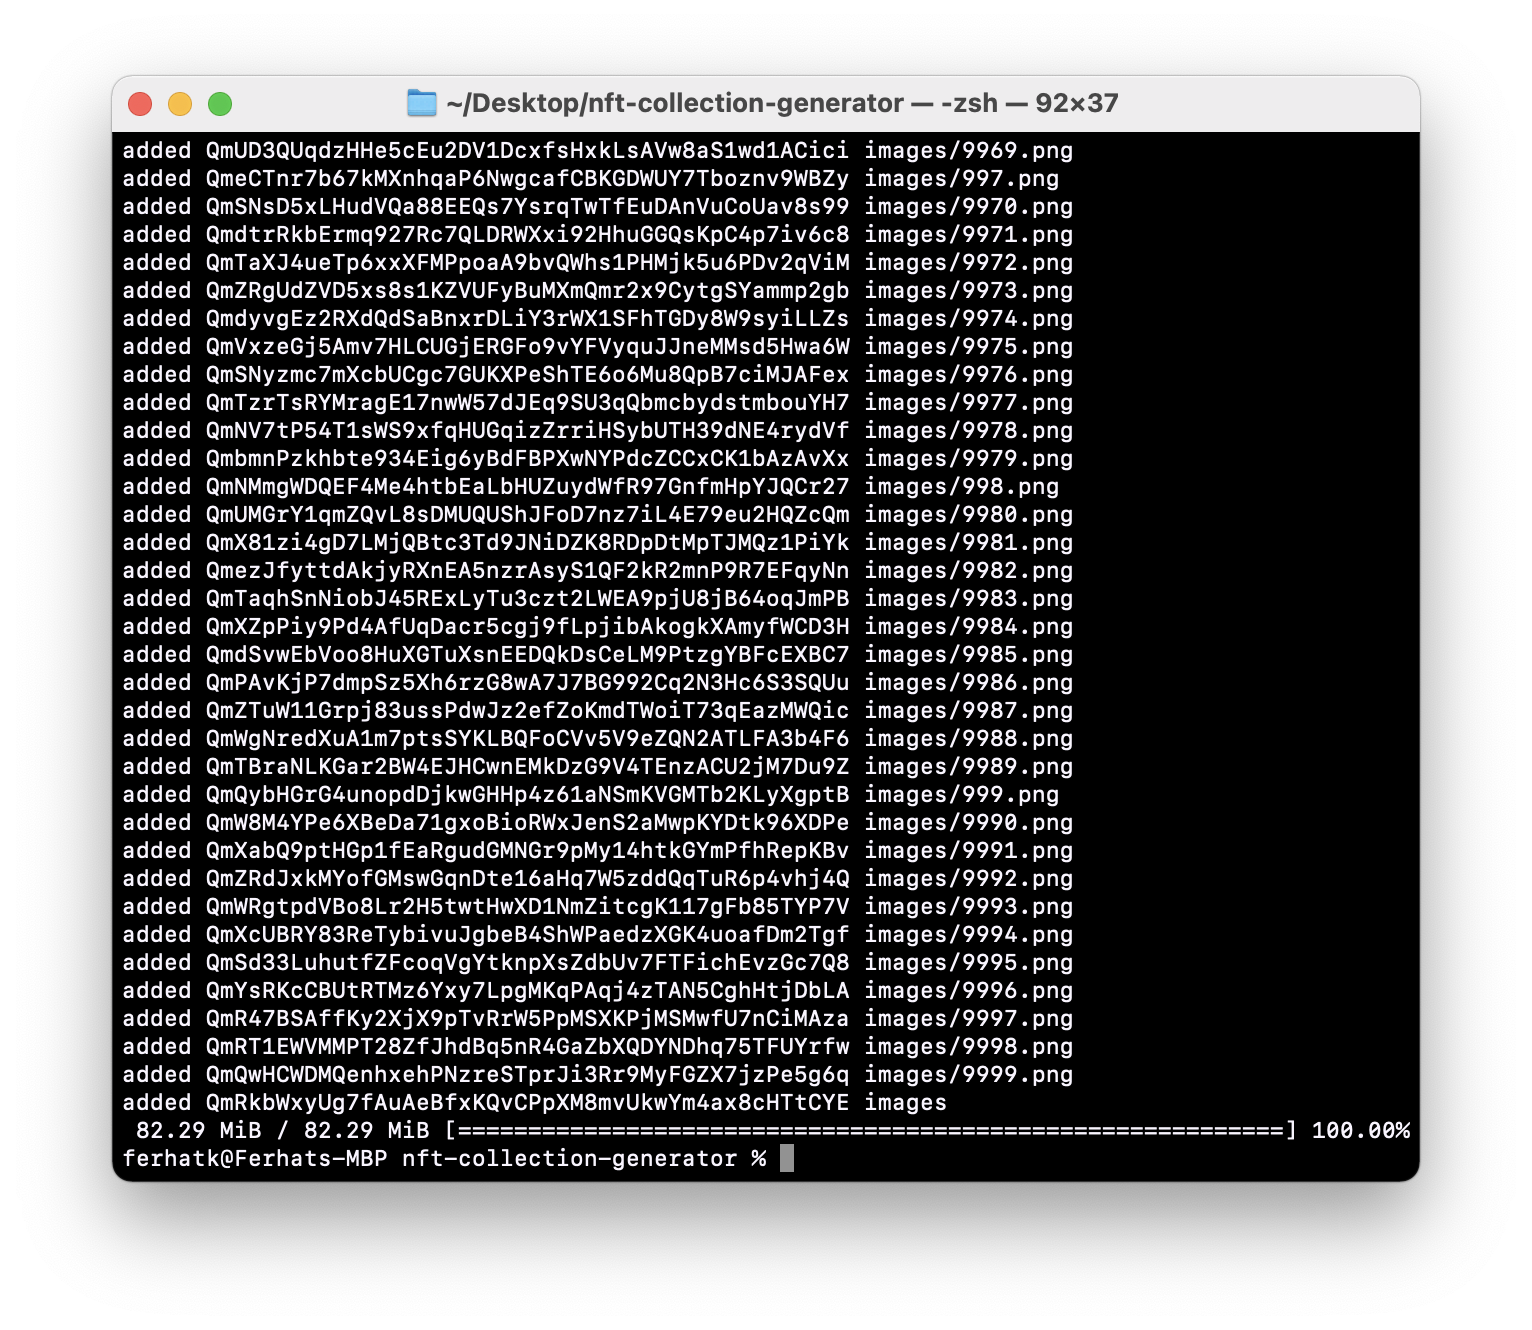
In your projects root directory, run the following IPFS command to pin the images folder:
ipfs add -r images/
The last line of the output will show the CID of the root directory, which is the top-level directory of the folder that you uploaded. You can access the folder at this IPFS address by adding the CID to the end of the IPFS gateway URL "https://ipfs.io/ipfs/"
Now that our images are uploaded, grab the CID hash from your root images/ folder and go back to the nft-collection-generator repository. Use the following terminal command to replace all the placeholder URLs with your actual image URL at once:
find metadata -type f -exec perl -pi -e 's#https://base-uri-to-my-nft-images.com/#https://ipfs.io/ipfs/{CID}/#g' {} +
Remember to replace the {CID} in the command above with the IPFS CID hash from your uploaded images/ folder!
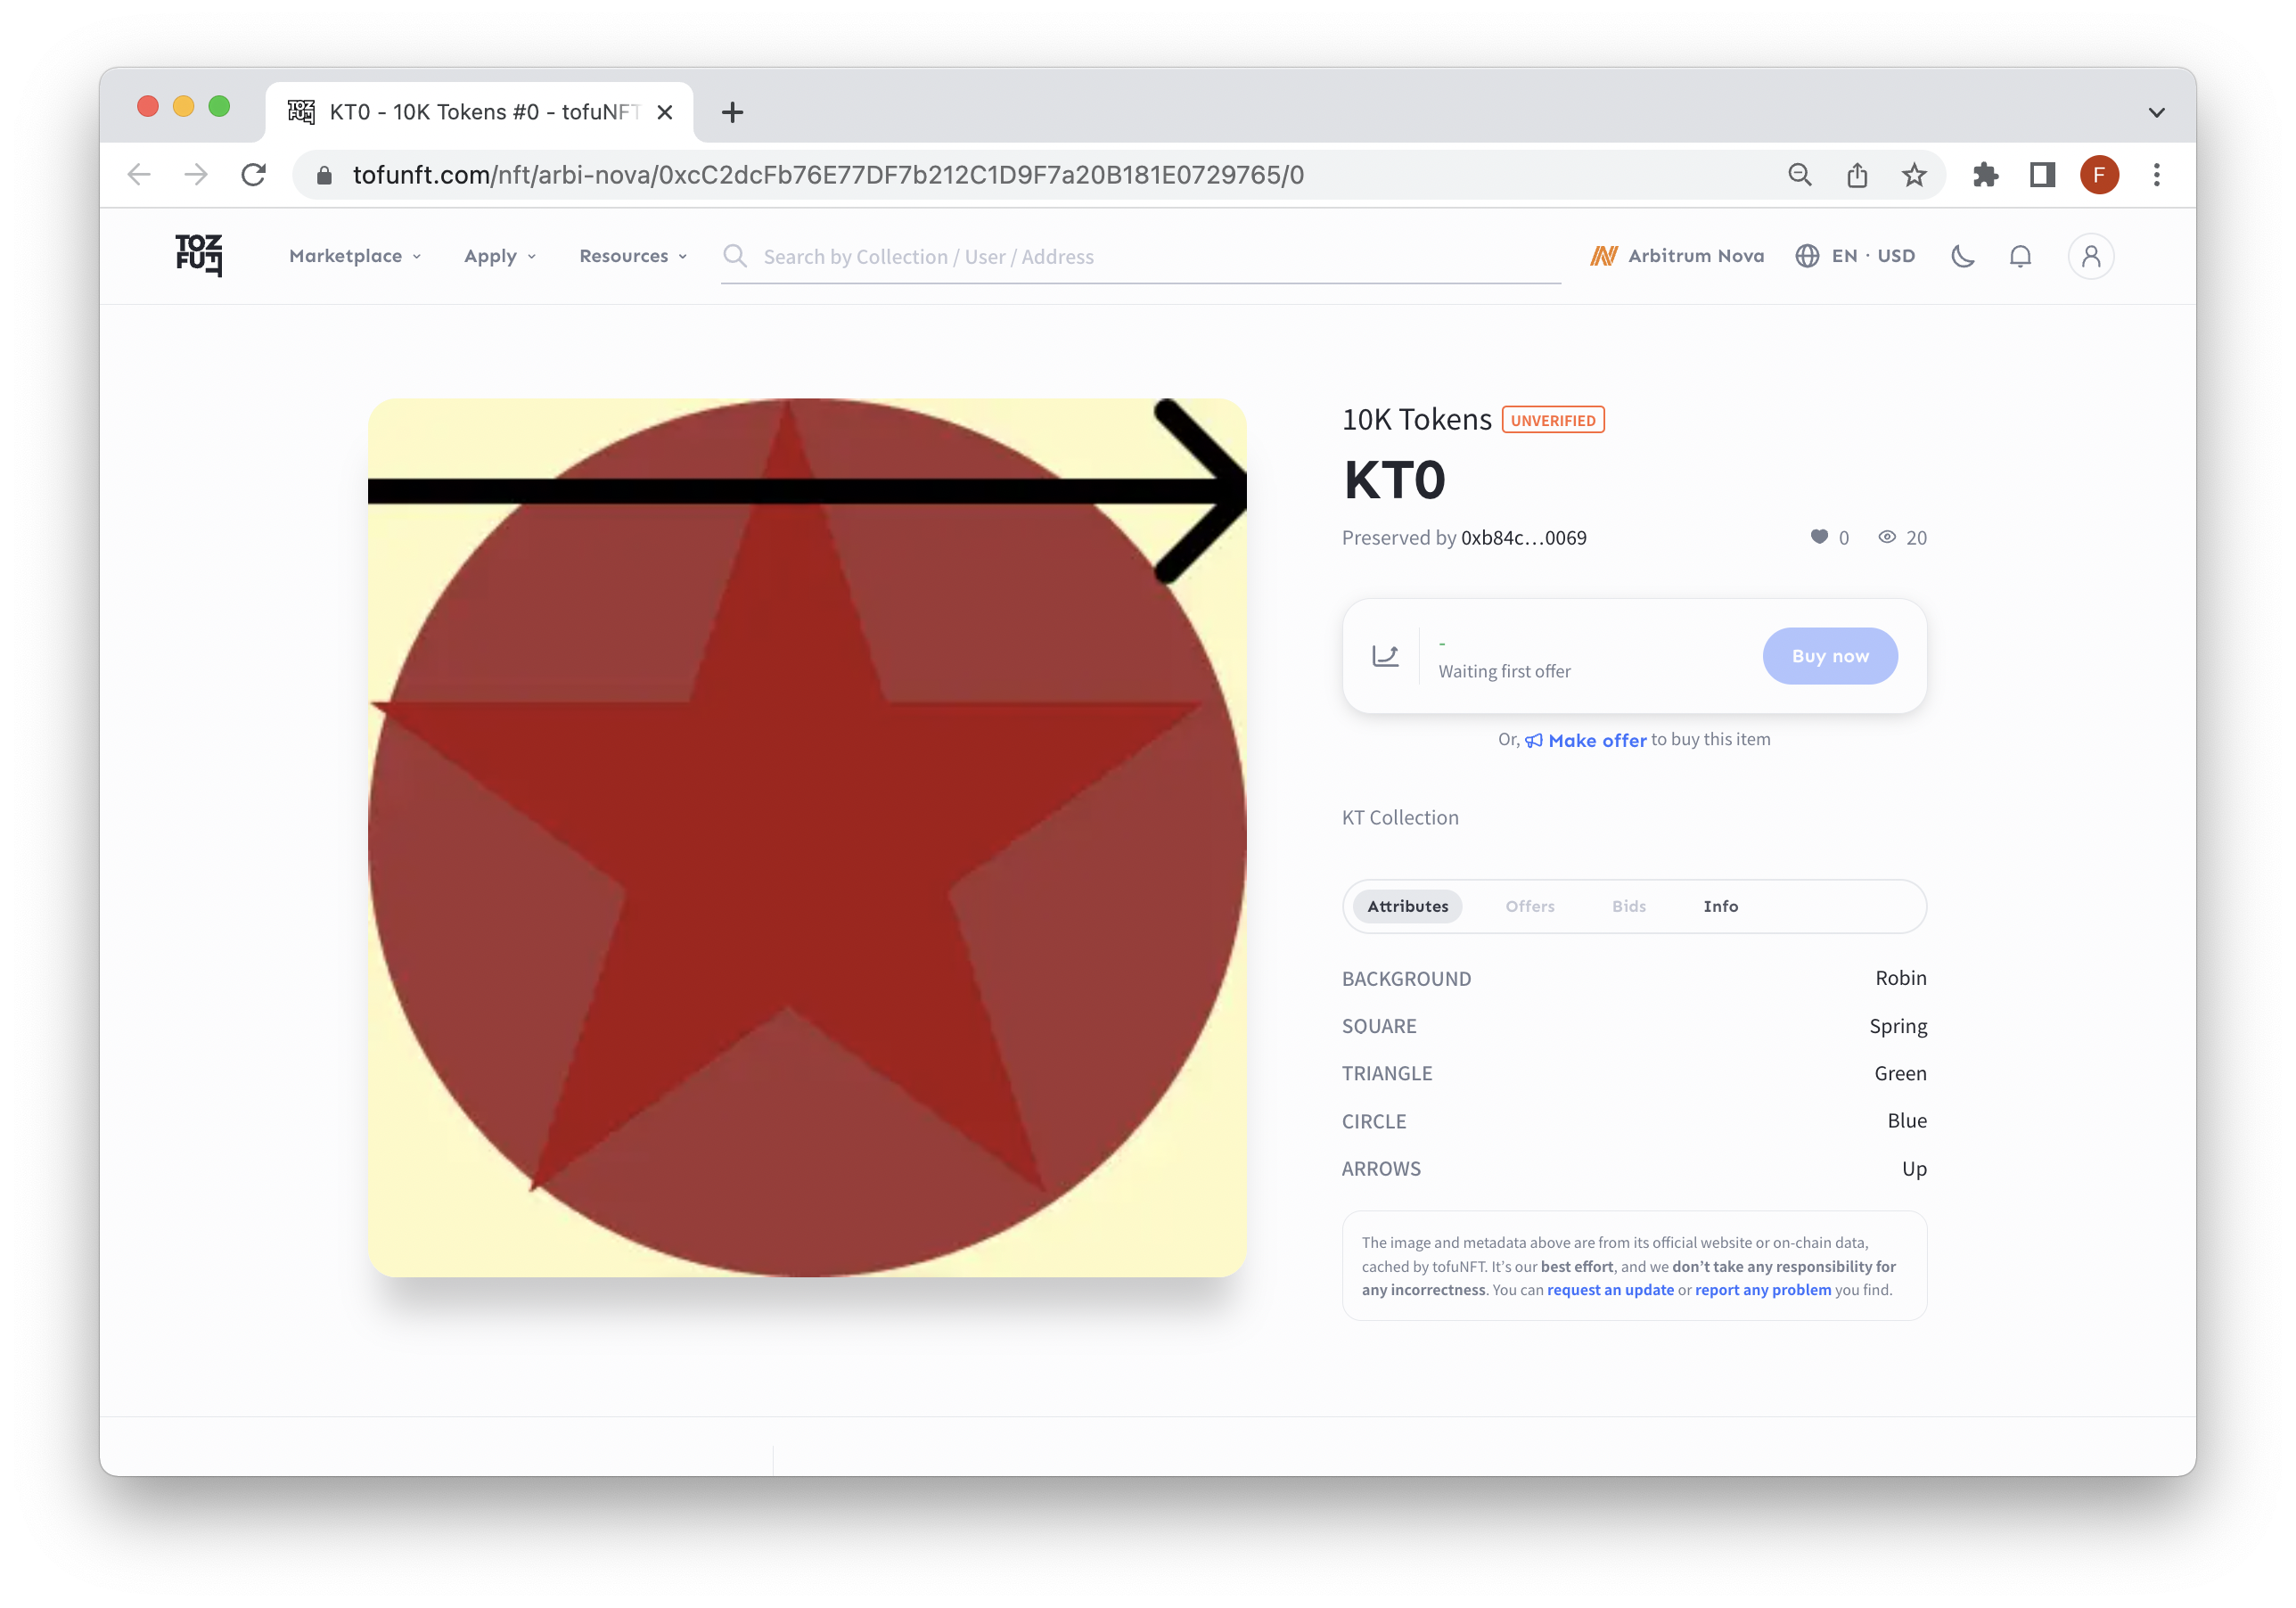
In the end, the content in your metadata files should look like this:
{
  "tokenId": 0,
  "name": "KT0",
  "description": "KT Collection",
  "image": "https://ipfs.io/ipfs/Qma5p2daHfdui4keZjMrJpgmL7JRjoZ6J5GcyLPUcmTTuT/0.png",
  "attributes": [
    {
      "trait_type": "Background",
      "value": "Robin"
    },
    {
      "trait_type": "Square",
      "value": "Spring"
    },
    {
      "trait_type": "Triangle",
      "value": "Green"
    },
    {
      "trait_type": "Circle",
      "value": "Blue"
    },
    {
      "trait_type": "Arrows",
      "value": "Up"
    }
  ]
}
Next, we'll need to bundle our metadata (JSON files) to a .CAR (Content-Addressed Archive) file. You can use the ipfs car command to do this.
Run the following command to create a CAR file containing the JSON files:
npx ipfs-car --pack metadata/
You may be asked to install the external library
Now that our JSON is bundled into a .CAR file, we'll pin it to IPFS using the following command:
ipfs dag import metadata.car
You should see a similiar response to:
Pinned root bafybeihzssbfdo6cmprolorfimhda4yapkzkyukffsteta6exwcr4nipzi success
You can check that your metadata is accessible by going to CID referenced in your upload. Remember to add the /metadata/ path to the end of your URL:
https://ipfs.io/ipfs/{CID}/metadata/
You can also access the IPFS URL through your local IPFS node (daemon). Depending on the state of the network, curl may take a while due to public gateways being overloaded or having a hard time reaching you. To view the objects on your local gateway, try "http://127.0.0.1:8080/ipfs/{CID}". For the public gateway, use https://ipfs.io/ipfs/{CID}.
Note, use the IPFS Gateway checker to see the current fastest gateways.
In the next section, you'll develop your NFT contract!
Create the NFT contract
Create a new file called NFT.sol in the contracts directory.
Open the file and input the following code:
// SPDX-License-Identifier: MIT
pragma solidity ^0.8.9;

import "@openzeppelin/contracts/token/ERC721/ERC721.sol";
import "@openzeppelin/contracts/access/Ownable.sol";
import "@openzeppelin/contracts/utils/Counters.sol";

// Contract for creating 10k tokens, inherits from ERC721 and Ownable
contract KTokens is ERC721, Ownable {
    // Max supply
    uint256 public constant MAX_SUPPLY = 10000;

    // Current supply
    uint256 public totalSupply = 0;

    // Use Counters library for token ID counter
    using Counters for Counters.Counter;

    // Private variable to keep track of token ID
    Counters.Counter private _tokenIdCounter;

    // Constructor to initialize the contract with the name "10K Tokens" and symbol "10KT"
    constructor() ERC721("10K Tokens", "10KT") {}

    // Internal function to return the base URI for the contract
    function _baseURI() internal pure override returns (string memory) {
        return "https://ipfs.io/ipfs/{CID}/metadata/";
    }

    // Function to mint a new token, only callable by the contract owner
    function safeMint(address to) public onlyOwner {
        //Require that the current supply is less than max supply
        require(totalSupply <= MAX_SUPPLY, "Maximum supply reached");
        //Increment total supply variable
        totalSupply++;
        // Get the current token ID
        uint256 tokenId = _tokenIdCounter.current();
        // Increment the token ID counter
        _tokenIdCounter.increment();
        // Mint the token to the specified address
        _safeMint(to, tokenId);
    }
}
Take a few minutes to review the code comments to understand the logic better
Not displayed here but inherited from the ERC721.sol contract we import from OpenZeppelin is the tokenURI function. This read-only function takes a tokenId and returns the URL that should point to that specific token's metadata.
You'll need to edit the placeholder (https://ipfs.io/ipfs/{CID}) in the _baseURI() function with the CID you obtained when uploading your metadata directory. This CID or URL, if you are not using IPFS, should point to the directory your metadata lives in. Remember to save the file before moving to the next step!
Next, you'll need to compile the NFT contract. This entails compiling the Solidity code into bytecode, which is deployed onto the blockchain.
To compile the contract, run the following Hardhat command:
npx hardhat compile
You should see a similar message as:
Compiled 13 Solidity files successfully
In the next section, we'll create tests for the NFT contract to ensure everything goes smoothly when deploying to Arbitrum Nova mainnet.
Test the NFT contract
In this section, we will create tests to check the behavior of our NFT contract. Testing our NFT is important because it allows developers to ensure that their smart contracts function as intended and are free of bugs before deployment to the blockchain. This is crucial because once a contract is deployed, it cannot be modified or deleted, so any errors or issues will be permanent. Additionally, testing can help to prevent potential security vulnerabilities in the contract, which malicious actors could exploit.
In the tests directory, create a file called NFT.js and input the following code:
const { expect } = require("chai");

describe("KTokens", () => {
    let kTokens;
    let owner;

    beforeEach(async function () {
        // Retrieve the default account from ethers
        [owner] = await ethers.getSigners();

        // A helper to get the contracts instance and deploy it locally
        const KTokens = await ethers.getContractFactory("KTokens");
        kTokens = await KTokens.deploy();
    });

    it("should have the correct name and symbol", async () => {
        expect(await kTokens.name()).to.equal("10K Tokens");
        expect(await kTokens.symbol()).to.equal("10KT");
    });

    it("should be able to mint new tokens", async () => {
        // Mint a new token
        await kTokens.safeMint(owner.address);
        expect(await kTokens.ownerOf(0)).to.equal(owner.address);
    });
});
Take a few minutes to review the code comments to better understand the logic
To execute the test file, run the following command:
npx hardhat test
You should see the following output:
KTokens
    ✔ should have the correct name and symbol
    ✔ should be able to mint new tokens


  2 passing (1s)
In the next section, we will deploy the 10K NFT collection to Arbitrum Nova!
Deploy the NFT contract
In your scripts folder, create a file called deploy.js:
echo > scripts/deploy.js
Then, open the file and input the following code:
const hre = require("hardhat");

async function deploy() {
    // Deploy the contract
    const NFT = await hre.ethers.getContractFactory("KTokens");
    const nft = await NFT.deploy();

    // Print the deployed contracts address
    console.log("NFT contract deployed at:", nft.address);
}

deploy()
    .then(() => console.log("Deployment complete"))
    .catch((error) => console.error("Error deploying contract:", error));
This file will contain the logic needed to deploy our contract to Arbitrum Nova Mainnet.
To deploy the contract, run the following hardhat command in your terminal:
npx hardhat run --network nova scripts/deploy.js
The
novaobject is the one we created in hardhat.config.js
You should see an output that contains your deployed contract address.
NFT contract deployed at: 0xf18802cb61EF336E30c5B93a7c9C961b1e80BeDE
Deployment complete
Mint the NFT & view it on an NFT Marketplace
Now that our NFT contract is deployed, let's mint an NFT and view it on an NFT marketplace. For the purpose of this guide, we will only mint 1 NFT, but you can use the same process to mint multiple NFTs.
Create a mint.js file in your scripts folder:
echo > scripts/mint.js
Then, open the file and input the following code:
const hre = require("hardhat");

async function main() {
    let owner;

    // Retrieve the default account from ethers
    [owner] = await ethers.getSigners();

    // Get contract factory for the NFT contract
    const NFT = await ethers.getContractFactory("KTokens");

    // Attach to deployed contract at the specified address
    const nft = await NFT.attach(
      "DEPLOYED_CONTRACT_ADDRESS" // Your deployed contract address
    );

    // Call the safeMint function to update the value
    let safeMintTx = await nft.safeMint(owner.address)
    console.log("safeMint function call. Waiting for confirmation...")

    // Wait 3 blocks for the transaction to be confirmed
    await safeMintTx.wait(confirm=3);

    // Get the latest total Supply
    let tokenSupply = (await nft.totalSupply()).toString()

    //Decrease by one since tokenID starts at zero
    let tokenIdInt = parseInt(tokenSupply) - 1

    //Get owner of minted tokenID
    let tokenOwner = await nft.ownerOf(tokenIdInt);

    console.log(`Token ID ${tokenId} - tokenOwner ${tokenOwner}`)
}

// Start the script and handle any errors
main()
    .then(() => console.log("Script complete"))
    .catch((error) => console.error("Error running script:", error));
Once minted, you can go to an NFT marketplace such as tofuNFT.com, a multi-chain NFT marketplace that has support for Arbitrum Nova, and put in your wallet address to see the NFT.
If you're curious on minting 10,000 tokens at once, check out this guide on How to Mint NFTs Using the ERC721A Implementation.
Arbitrum Ecosystem
Now that you have deployed your first smart contract on Arbitrum Nova, you could explore some of the resources the Arbitrum Nova chain offers:
Additional Resources
If you want to continue learning about Arbitrum Nova and smart contracts, check out these resources:
- QuickNode Arbitrum Nova Developer Documentation
- Smart Contract Development Guides
- QuickNode & Arbitrum Nova
Conclusion
Congrats! You now have the skills to deploy a 10K NFT collection!
What are you using Arbitrum Nova for? We'd love to see what you're creating! Share your app with us on Discord or Twitter. If you have any feedback or questions on this guide, we’d love to hear from you!