
6 min read
Overview
Users and developers in Bitcoin may find themselves needing more than one keypair address to develop and test code. In this guide, we'll talk about the different Bitcoin addresses available today, show you how to create a Bitcoin address using bitcoinjs-lib, and demonstrate the process of fetching a Bitcoin address's balance using Quicknode.
What You Will Do
- Learn about the types of Bitcoin addresses
- Create a Bitcoin node endpoint on Quicknode
- Generate a new Bitcoin address using bitcoinjs-lib
- (Optional) Fetch the balance of a Bitcoin address using the BTC Blockbook JSON-RPC add-on
What You Will Need
- Basic understanding of Bitcoin and programming concepts
- Node.js installed
| Dependency | Version |
|---|---|
| bitcoinjs-lib | ^6.1.5 |
| ecpair | ^2.1.0 |
| tiny-secp256k1 | ^2.2.3 |
What is bitcoinjs-lib?
bitcoinjs-lib is a JavaScript library for interacting with the Bitcoin blockchain via Node.js and your browser. The library provides a wide variety of features like creating Bitcoin wallets (i.e., addresses) and multisigs, as well as creating, fetching, and broadcasting transactions.
Now that we know more about the library we'll be using to create Bitcoin addresses, let's continue to see the types available and how they differ.
Types of Bitcoin Addresses
In this section, we will dive into the different types of Bitcoin wallets and how they differ.
If you came across the bitcoinjs-lib docs, you'll notice a list of different address types like SegWit address, SegWit P2SH address, SegWit P2PKH, SegWit 3-of-4 multisig address, and more. These are all custodial wallets (i.e., the user custodies the asset with a private key, not a 3rd party like a centralized exchange), which you can create with this library. Now, let's cover each:
SegWit (Segregated Witness) was an implemented soft-fork proposal (BIP141) that adjusted the transaction format used on Bitcoin
- SegWit Address: Beginning with
bc1, SegWit addresses are generated through a process that separates signature data from transaction data. They are ideal for frequent, small transactions due to lower fees and are less prone to transaction malleability. - SegWit P2SH: These addresses start with
3and combine SegWit with Pay-to-Script-Hash. They are created by wrapping a SegWit address in a P2SH format, making them suitable for users who require backward compatibility with systems that don't support native SegWit addresses, while still benefiting from SegWit features. - SegWit P2PKH (Legacy): Starting with
1, these addresses merge the traditional Pay-to-Public-Key-Hash format with the efficiencies of SegWit. They are generated in a manner similar to traditional Bitcoin addresses but are enhanced with SegWit's lower fees and reduced transaction size. This type is ideal for users seeking a balance between the familiarity of traditional Bitcoin addresses and the advantages of SegWit. - SegWit 3-of-4 Multi-Sig: Characterized by an address that is generated through a process involving multiple keys and a script defining multisig parameters, this wallet type is designed for high security and redundancy. It requires three out of four possible private keys to authorize a transaction, making it ideal for businesses or groups that need multiple approvals for transactions, such as corporations and DAOs.
Each wallet type addresses specific needs in the Bitcoin ecosystem, ranging from individual users seeking efficiency to organizations prioritizing security through multi-sig protocols.
Create a Bitcoin node endpoint on Quicknode
You're welcome to use public nodes or deploy and manage your own infrastructure; however, if you'd like 8x faster response times, you can leave the heavy lifting to us. Sign up for an account here. Once logged in, click the Create endpoint button, then select the blockchain and network you want to deploy on. For the purpose of this guide, we'll choose the Bitcoin Testnet blockchain. After creating your endpoint, keep the HTTP Provider URL handy, as we'll need it in the programming portion of this guide.
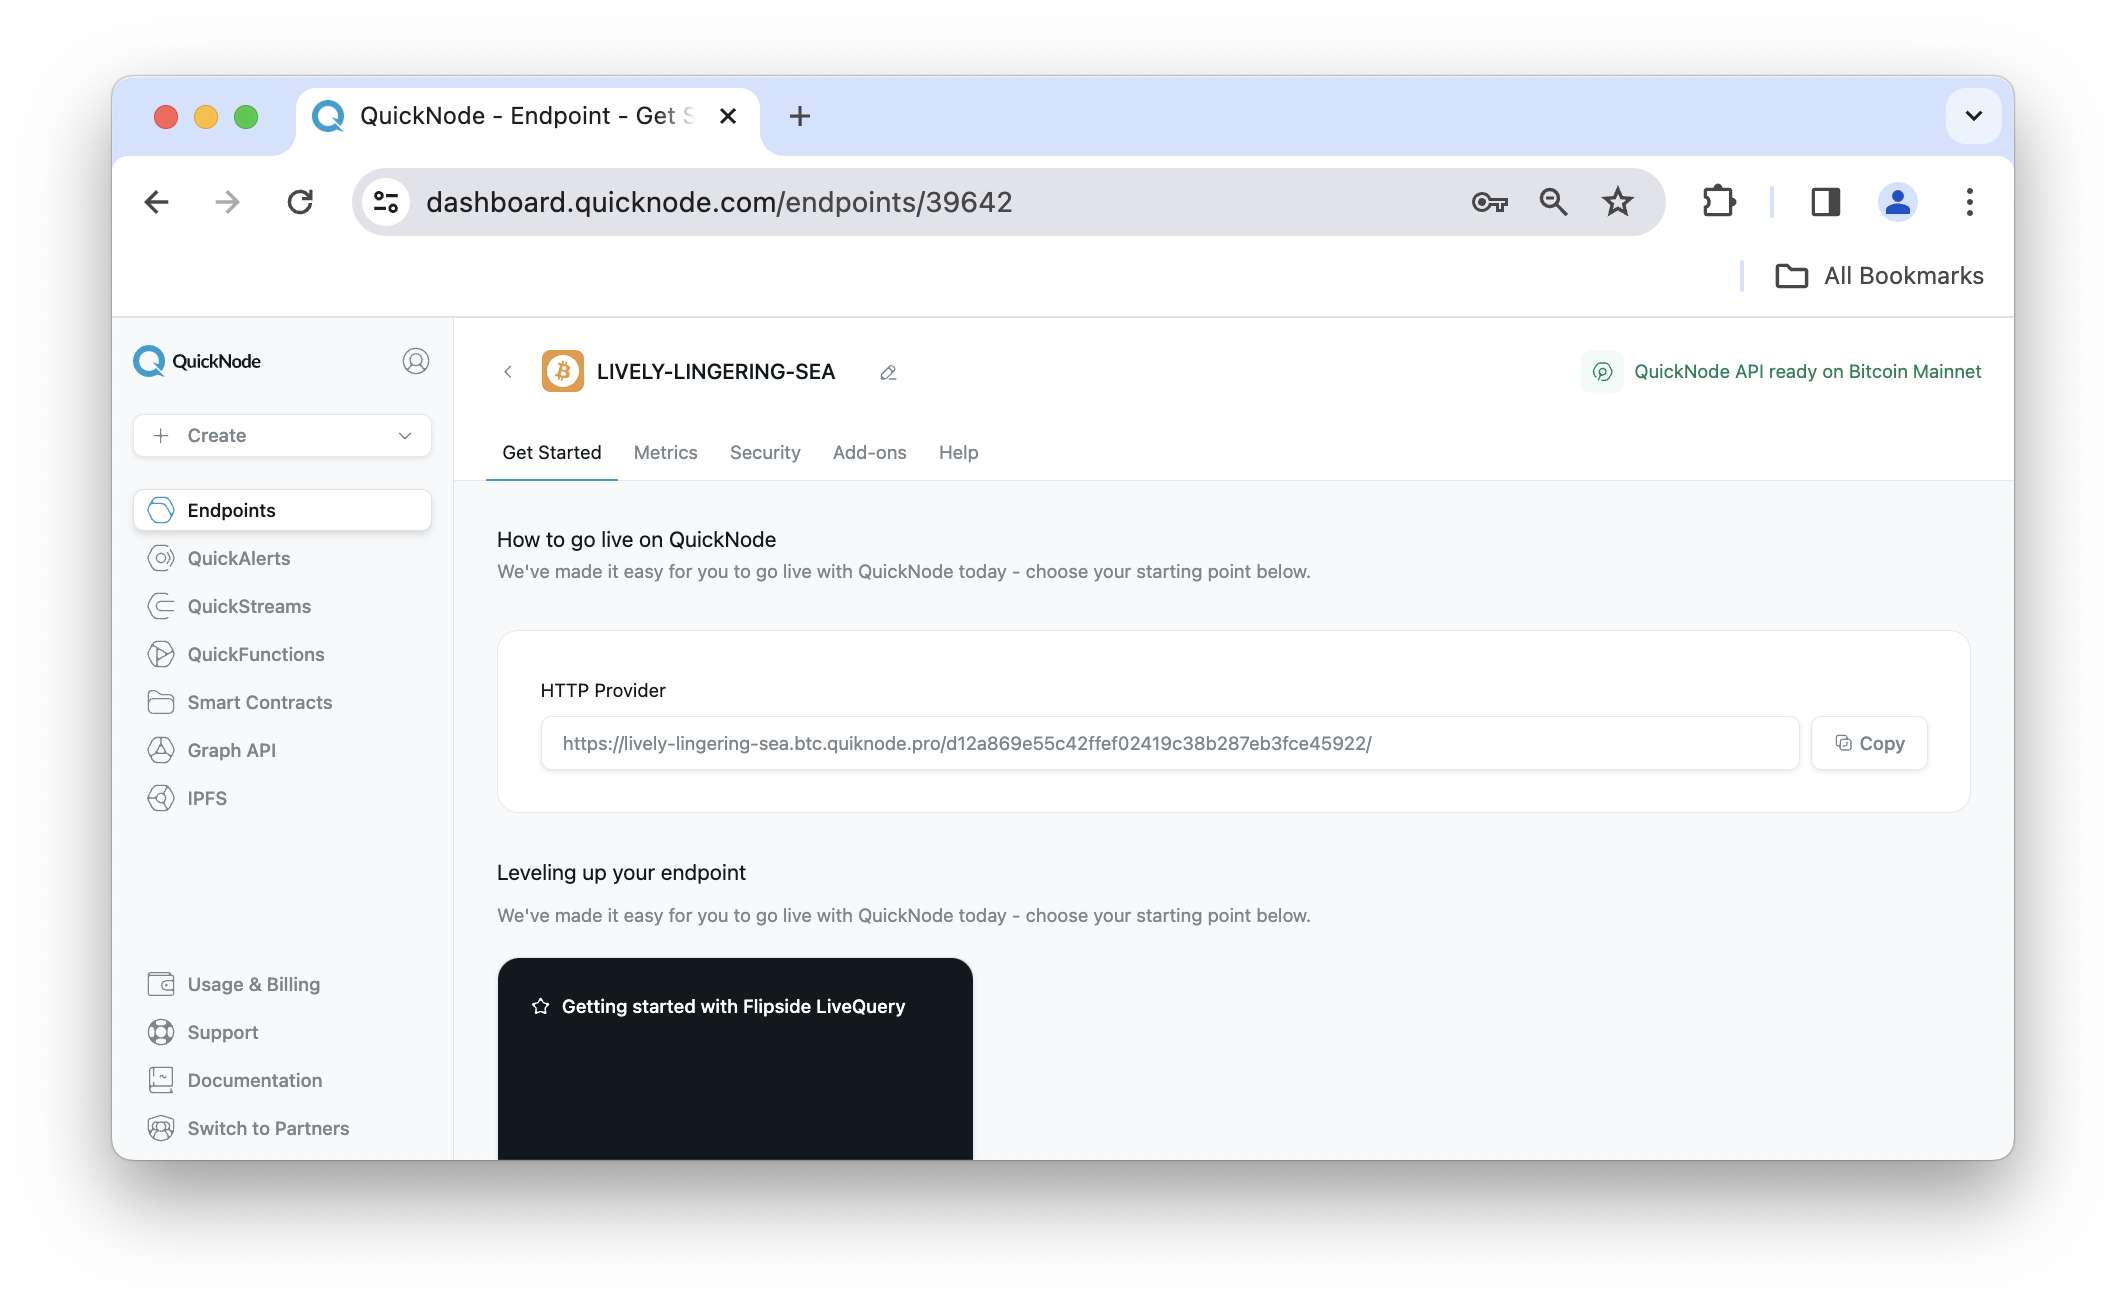
With our Bitcoin node endpoint created, let's now move on to creating a new Bitcoin wallet address.
Create a new Bitcoin address using bitcoinjs-lib
With our Bitcoin node endpoint created, let's move on to creating our new Bitcoin address. For this guide, we will be demonstrating how to create a Bitcoin address using the
Step 1. First, open a terminal or command prompt window and run the command below to initiate a new project folder and npm project.
mkdir BitcoinAddress && cd BitcoinAddress
npm init -y
Step 2. Your code requires the bitcoinjs-lib library. Install it by running:
npm install bitcoinjs-lib ecpair tiny-secp256k1
Step 3. Create a new JavaScript file in your project directory, for example, index.js. After, copy the provided code below into this file:
const bitcoin = require('bitcoinjs-lib');
const ECPairFactory = require('ecpair').default;
const ecc = require('tiny-secp256k1');
const fs = require('fs');

const ECPair = ECPairFactory(ecc);
const network = bitcoin.networks.testnet; // Otherwise, bitcoin = mainnet and regnet = local

async function createP2PKHwallet() {
    try {
        const keyPair = ECPair.makeRandom({ network: network });
        const { address } = bitcoin.payments.p2pkh({
          pubkey: keyPair.publicKey,
          network: network,
        });
        const privateKey = keyPair.toWIF()

        console.log(`| Public Address | ${address} |`)
        console.log(`| Private Key | ${privateKey} |`)

        const wallet = {
            address: address,
            privateKey: privateKey
        };

        const walletJSON = JSON.stringify(wallet, null, 4);

        fs.writeFileSync('wallet.json', walletJSON);

        console.log(`Wallet created and saved to wallet.json`);
    } catch (error) {
        console.log(error)
    }
}

createP2PKHwallet();
Now, let's recap the code.
First off, we start by importing the required libraries, bitcoinjs-lib for configuring networks and ecpair + tiny-secp256k1 to assist with keypair creation. We also import fs to access to our file system with read/write privledges. Next, we declare an instance of ECPair to help assist with keypair creation and define a network constant to toggle which network we'll configure our address for. Later, we define a createP2PKHwallet async function, which will try to do the following:
- Create a random key pair by calling
makeRandommethod in the ECPair library - Generate a public address in P2PKH format (e.g.,
bitcoin.payments.p2pkh) given the keyPair created in the last step and the defined network (e.g., bitcoin, testnet, regtest) - Translate the private key into WIF (Wallet Import Format)
- Log the public and private keys in the console (or catch any errors that arise)
- Create a object containing the keypair, translate it to JSON format and save it in a file called
wallet.json
Step 4. Execute the script by running the command below:
node index.js
You'll see an output similar to the one below:
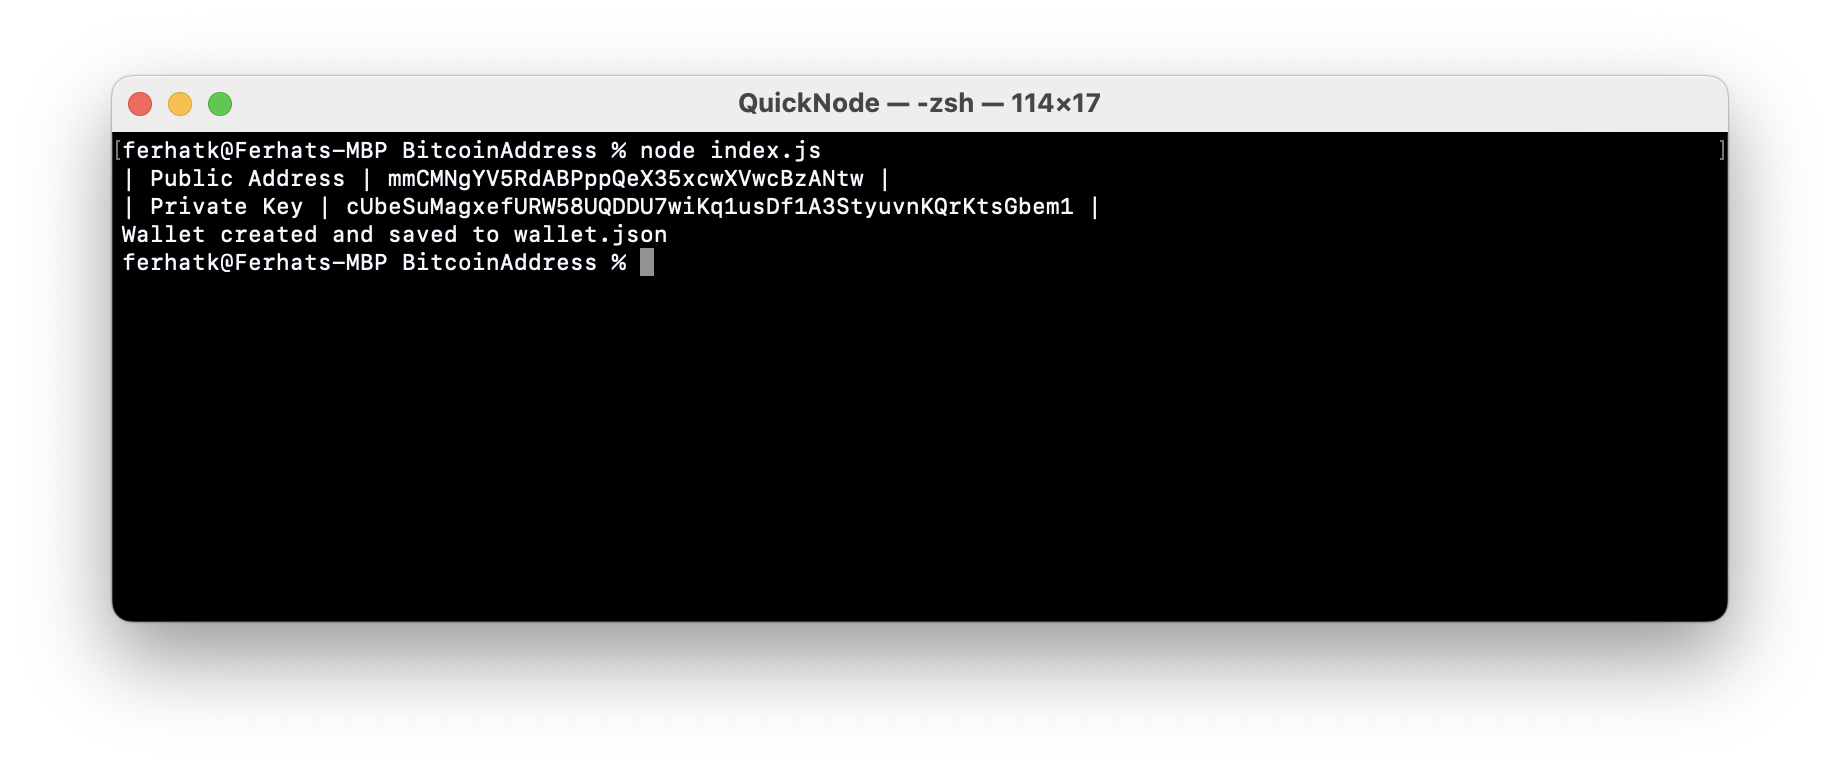
You should see your newly created address printed in the terminal window as well as saved in a wallet.json file. Remember that these keys should not be shared and are recommended to be used during testing (not production). In the next section, we'll use our Quicknode Bitcoin node endpoint to fetch the balance of our newly created address.
(Optional) Fetch the Balance of a Bitcoin Address
Now that we have a newly created Bitcoin address, we can read from the Bitcoin blockchain to fetch details like our balance. Currently, the Bitcoin JSON-RPC client does not make it easy to fetch data like balances so we'll use a handy tool like the Blockbook add-on from the Quicknode Marketplace. The Blockbook add-on provides access to balances, transactions, and UTXOs for addresses or xpubs via JSON-RPC. You can check out the full list of support methods and pricing here.
To learn how to use the add-on, check out the full guide here: How to Build a Real-Time Bitcoin Wallet Analytics App. If you followed along with the guide, you should be able to see the balance and transaction history for an address as well as chart visualizations.
Additional Resources
If you want to learn more about Bitcoin and bitcoinjs-lib, check out the following:
Final Thoughts
That's it! I hope this guide has taught you something new! If you want to learn more about Bitcoin or a specific topic in general, please leave some feedback below!
If you have questions, check out our Discord server or provide feedback using the form below for help. Stay up to date with the latest by following us on Twitter (@Quicknode) and Telegram announcement channel.
We ❤️ Feedback!
Let us know if you have any feedback or requests for new topics. We'd love to hear from you.