
19 min read
Overview
In an era where digital currencies are reshaping financial transactions, the ability to track and analyze Bitcoin transactions has become essential. This comprehensive guide is tailored for developers and enthusiasts who frequently ask how to check the Bitcoin balance history or find the balance of a Bitcoin address. It provides a detailed walkthrough for building a real-time Bitcoin Wallet Analytics App using the Blockbook RPC Add-On from the Quicknode Marketplace.
Our application addresses a common need in the cryptocurrency community: the ability to not only view the current balance of a Bitcoin wallet but also to explore its historical transactions and balance changes. This real-time analytical tool is invaluable for users and developers who want to understand wallet activity over time, offering insights into trends, transaction patterns, and the overall financial journey of a Bitcoin address.
Whether you're looking to enhance your personal project, provide more value in professional applications, or are simply curious about the intricate workings of Bitcoin wallets, this guide serves as your starting point. Let's embark on this journey to unlock the potential of real-time Bitcoin wallet analytics.
What You Will Do
- Learn about the BTC Blockbook JSON-RPC Add-On and how to use it
- Create a Bitcoin endpoint on Quicknode
- Create a React app to fetch transaction data for a Bitcoin address, including real-time and historical balances
What You Will Need
- A Quicknode account (sign up for free here)
- Node.js installed
- Experience with JavaScript and React
- A code editor (i.e., VScode)
| Dependency | Version |
|---|---|
| node.js | latest |
Overview of Blockbook's Capabilities
BTC Blockbook JSON-RPC Add-On serves as a powerful backend tool designed to index blockchain transactions and provide a comprehensive RPC interface to interact with UTXO chains like Bitcoin. It stands out for its:
- High Performance: Quickly processes large volumes of data to deliver accurate information in real-time.
- Rich Data Sets: Offers detailed information on transactions, addresses, and balances.
- Ease of Use: Simplifies the integration process with clear documentation and community support.
By leveraging Blockbook's capabilities, developers can overcome common data retrieval challenges and create applications that provide users with up-to-date wallet information and market data.
The Value of Blockbook for Developers
Without Blockbook, developers would have to engage directly with the Bitcoin blockchain to obtain this information. This process involves setting up and maintaining a full node, parsing raw blockchain data, and continuously synchronizing with the latest network transactions. Such tasks are not only resource-intensive but also require a deep understanding of blockchain protocols and data structures.
Blockbook simplifies these challenges by providing a user-friendly API that abstracts the complexities of direct blockchain interactions. It allows developers to query wallet balances, transaction histories, and currency rates without the overhead of managing blockchain data directly. This streamlined approach empowers developers to focus more on creating feature-rich applications and less on the intricacies of blockchain data management, significantly accelerating development cycles and reducing technical overhead.
The Blockbook add-on includes 10 powerful RPC methods as of the time of this writing. We will be leveraging three of them in this guide:
bb_getAddress: Returns balances and transactions of an address.bb_getTickers: Returns currency rate for the specified currency and date. If the currency is not available for that specific timestamp, the next closest rate will be returned.bb_getBalanceHistoryReturns a balance history for the address.
Setting Up a Bitcoin Endpoint
Setting up your Bitcoin endpoint with the Blockbook RPC is quite easy. If you haven't signed up already, you can create an account here.
Once you have logged in, navigate to the quicknode.com/endpoints page and click Create an endpoint. Select Bitcoin mainnet, then click Next. Then, you'll be prompted to configure the add-on. Activate Blockbook RPC. Afterward, simply click Create Endpoint.
If you already have a Bitcoin endpoint without the add-on, go to the Add-ons page within your Bitcoin endpoint, select the Blockbook RPC, and activate it.
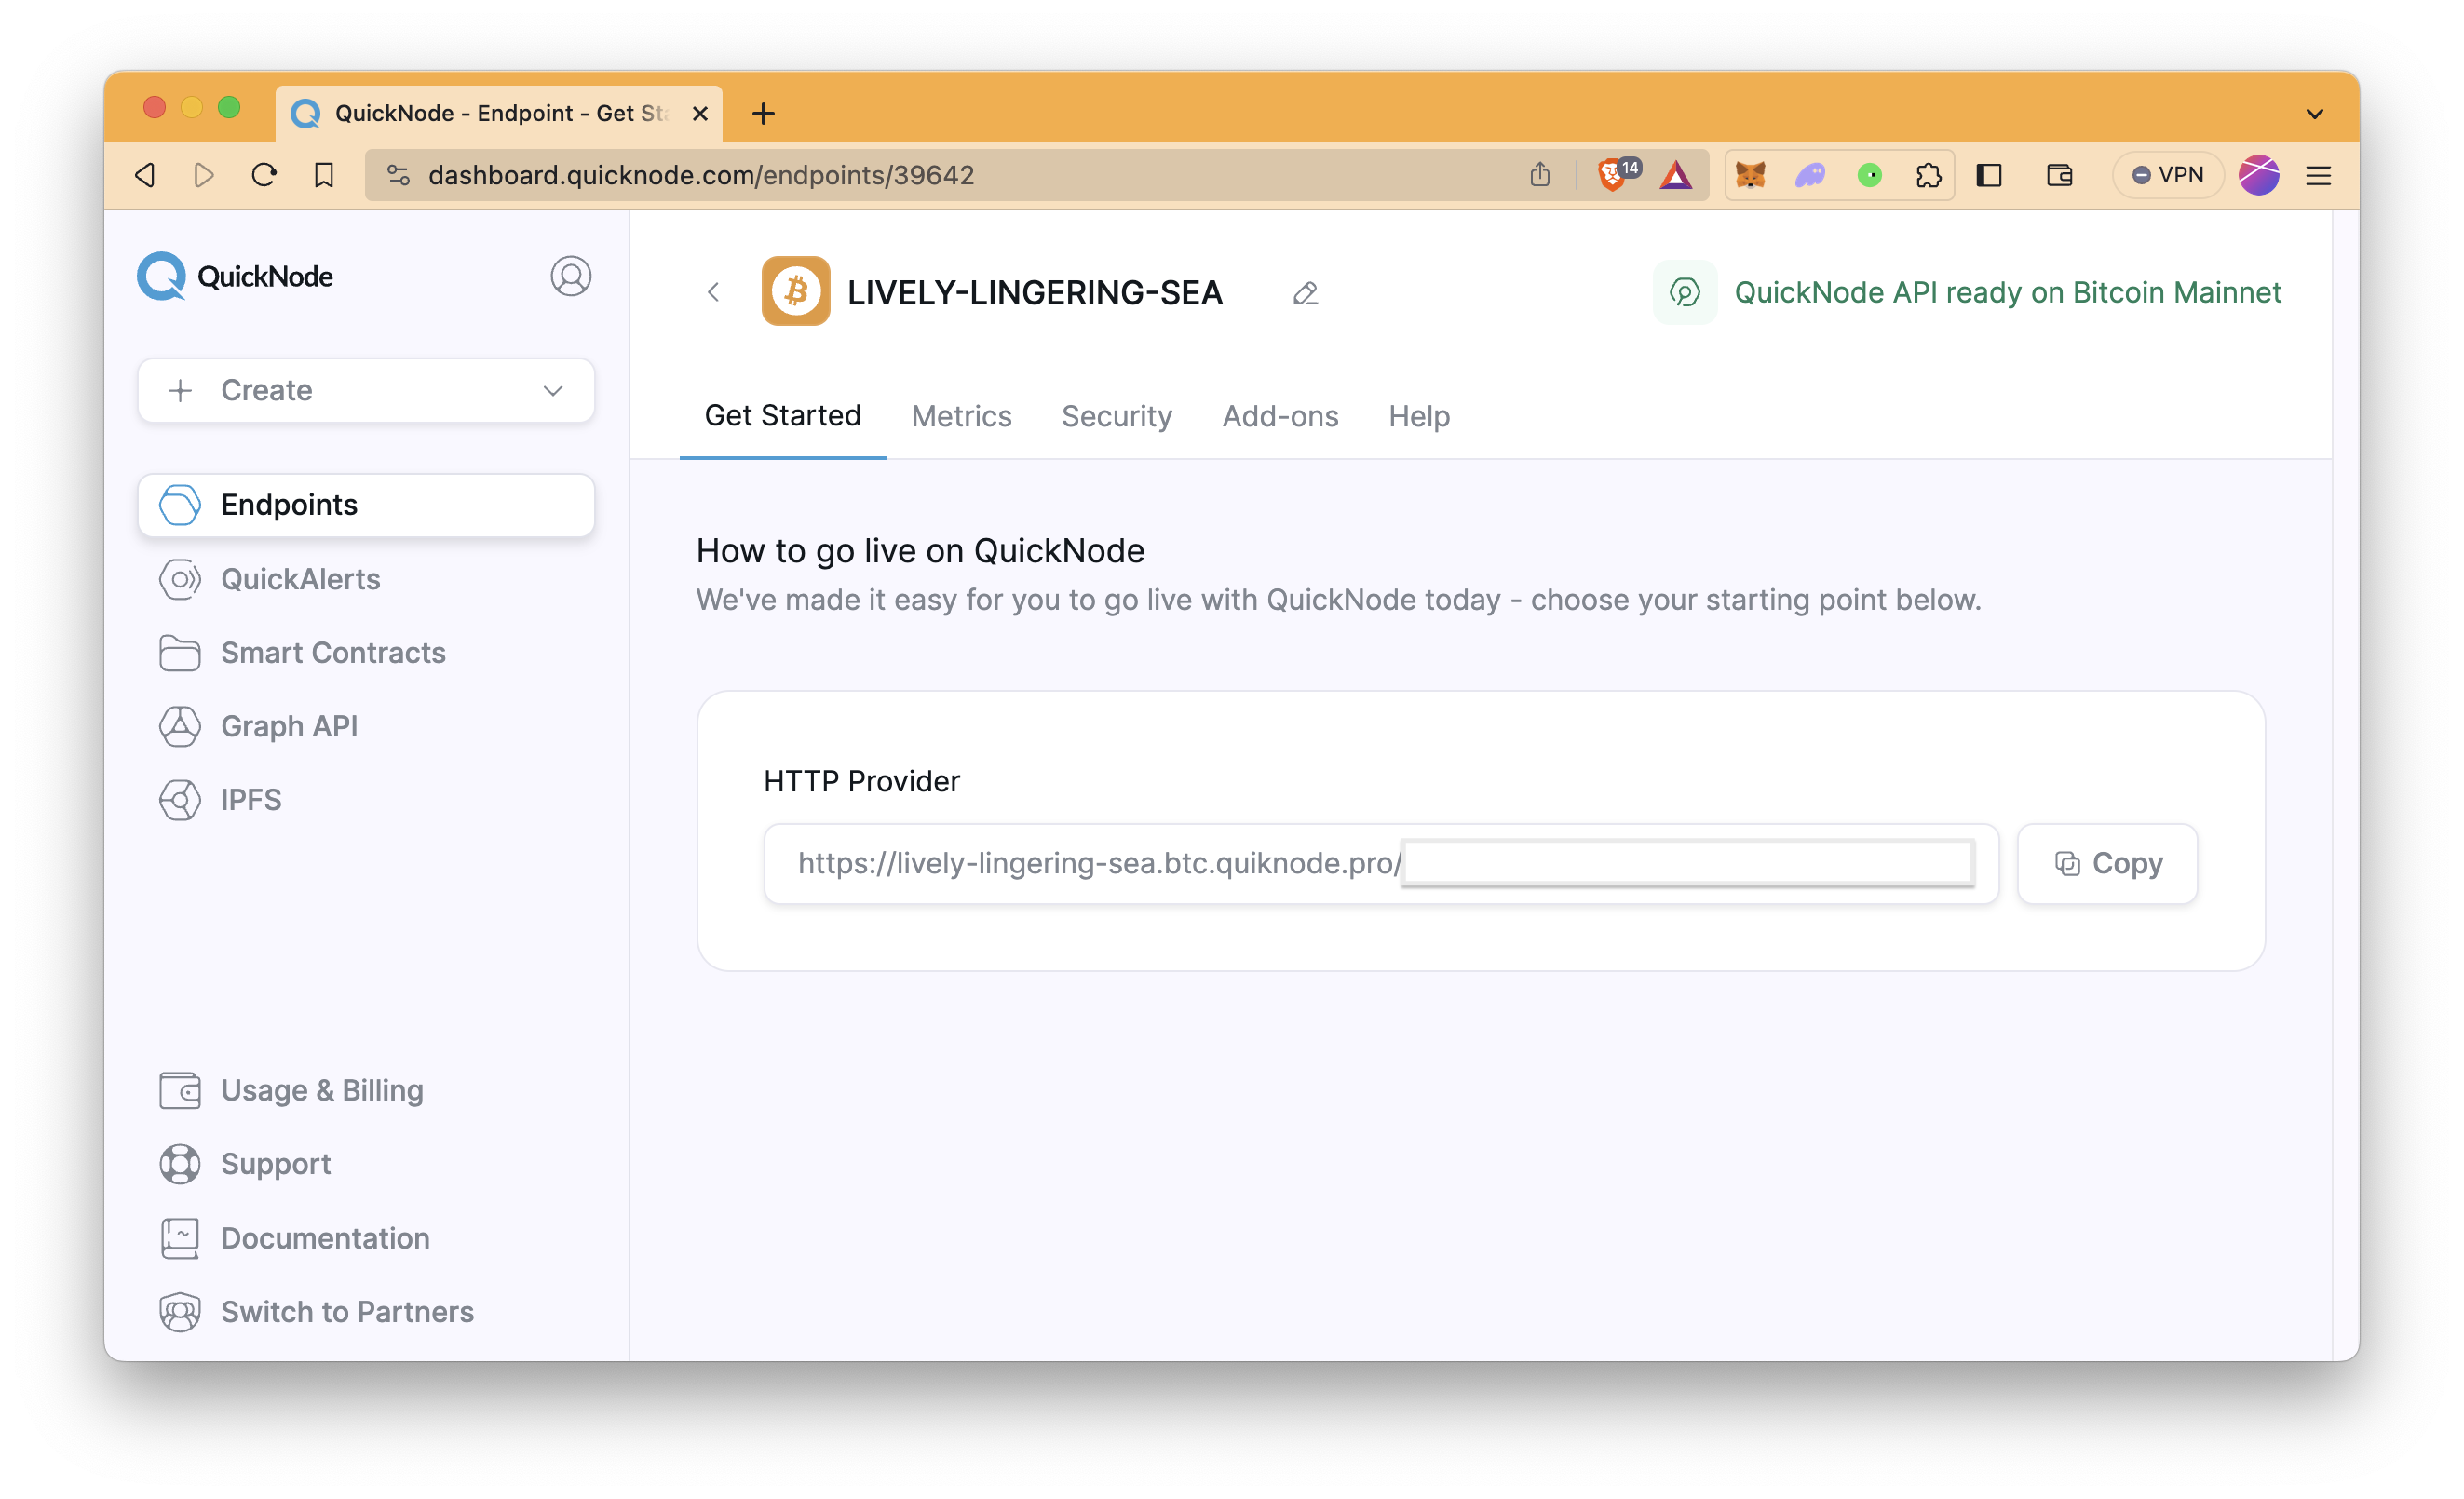
Once your endpoint is ready, copy the HTTP Provider link and keep it handy, as you'll need it in the next section.
Building the Application
To start building our Bitcoin wallet analytics app, you'll first need to set up your development environment. If you haven't already, install Node.js and npm on your computer. Node.js will run your development server, and npm will manage your project's dependencies.
Setting Up the Project
Step 1: Set Up the React Application
Use the npx create-react-app to scaffold a new React project:
npx create-react-app bitcoin-analytics
cd bitcoin-analytics
Step 2: Install Required Dependencies
Install Axios for making HTTP requests, Chart.js with React wrapper for charts, Tailwind CSS for styling, and DatePicker for calendar to select dates for historical balances.
npm install axios react-chartjs-2 chart.js tailwindcss chartjs-adapter-moment
npm install react-datepicker --save
Step 3: Configure Tailwind CSS
Run the following command to install and configure Tailwind CSS, which will help us style our app:
npm install -D tailwindcss
npx tailwindcss init
Configure template files in your tailwind.config.js file.
/** @type {import('tailwindcss').Config} */
module.exports = {
	content: ['./src/**/*.{js,jsx,ts,tsx}'],
	theme: {
		extend: {},
	},
	plugins: [],
}
Add the @tailwind directives to the top of your .src/index.css file.
@tailwind base;
@tailwind components;
@tailwind utilities;
Building the Project
Designing the Application Structure
Before beginning coding, planning out the structure of the application is always a good practice. For a Bitcoin wallet analytics app that will be built in this guide, you will need components such as AddressInput, BalanceChart, and WalletStats.
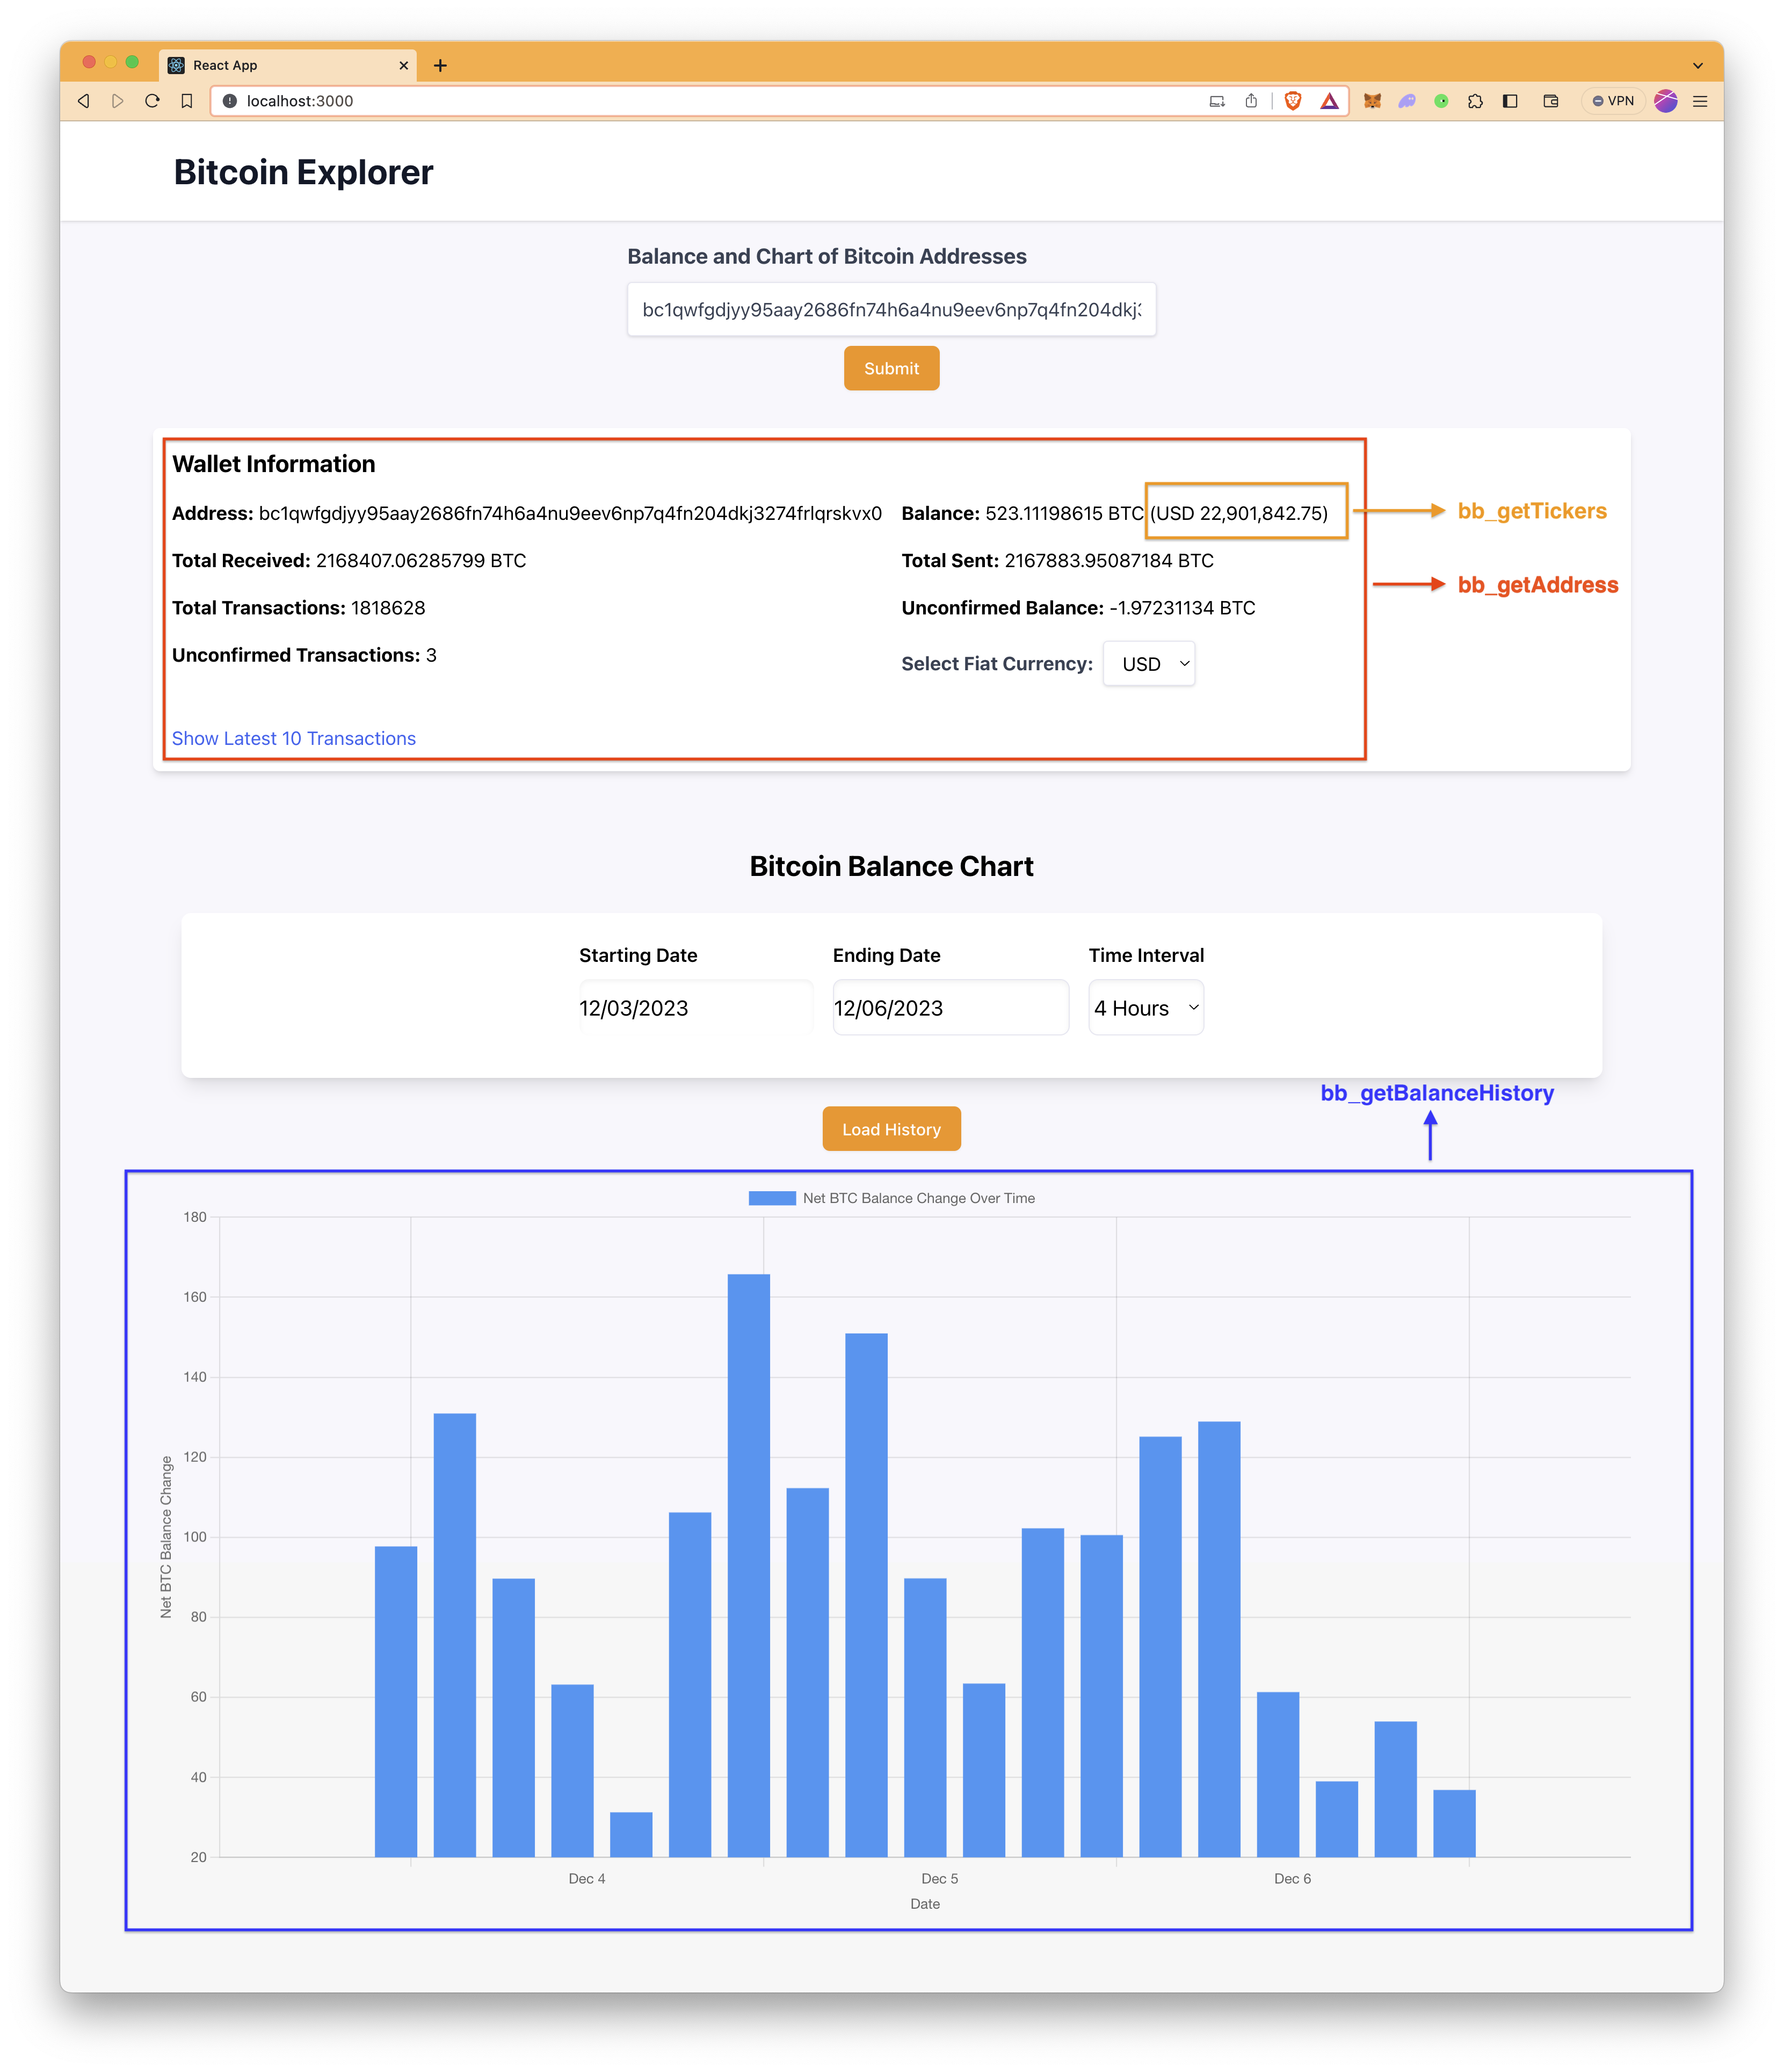
As seen in the image below, you will use bb_getAddress, bb_getTickers, and bb_getBalanceHistory methods in this app.
The possible action flow of the application is like the below:
- The user inputs a Bitcoin address and hits Enter/Return on their keyboard.
- Data of balances and transactions of the address are fetched with the bb_getAddress method. The real-time price of Bitcoin with different fiat currencies is fetched with the bb_getTickers method.
- Address data and real-time Bitcoin price data are passed into the
WalletStatscomponent. - The user selects the starting date, ending date, and time interval to get the historical BTC balance change of the address.
- Historical BTC balance data is fetched with the bb_getBalanceHistory method.
- The data is passed into the
BalanceChartcomponent.
Now, let's start coding.
Step 0: Creating Necessary Files and Folders
Create components and api folders in the src folder. Then, create the fetchData.js file in the api folder, and create AddressInput.js, BalanceChart.js, and WalletStats.js files in the components folder. You can do all of them once by running the commands below in your terminal in your project directory.
mkdir src/api && mkdir src/components
echo > src/api/fetchData.js && echo > src/components/AddressInput.js && echo > src/components/BalanceChart.js && echo > src/components/WalletStats.js
Step 1: Bitcoin Address Input Component
The AddressInput component includes a form for inputting a Bitcoin address. When the form is submitted, it triggers the onAddressSubmit function passed as a prop with the current address state.
This component is a self-contained form designed for users to input a Bitcoin address, which can then be used to retrieve balance and transaction data.
Open the src/components/AddressInput.js file with your code editor and modify the file as follows.
// src/components/AddressInput.js

import React, { useState } from 'react'

// Component for inputting a Bitcoin address, which calls the onAddressSubmit prop on form submission.
const AddressInput = ({ onAddressSubmit }) => {
	// State hook to store and set the Bitcoin address
	const [address, setAddress] = useState('')

	// Function to handle form submission
	const handleSubmit = e => {
		e.preventDefault()
		onAddressSubmit(address)
	}

	return (
		// Form container with styling for center alignment and padding
		<div className="flex flex-col items-center justify-center p-4">
			<form onSubmit={handleSubmit} className="w-full max-w-md">
				<div className="mb-2">
					<label
						htmlFor="address"
						className="block text-gray-700 text-lg font-bold mb-2"
					>
						Balance and Chart of Bitcoin Addresses
					</label>
					<div className="mt-1">
						<input
							type="text"
							id="address"
							value={address}
							onChange={e => setAddress(e.target.value)}
							className="shadow appearance-none border rounded w-full py-3 px-3 text-gray-700 leading-tight focus:outline-none focus:shadow-outline"
							placeholder="Enter Bitcoin address"
						/>
					</div>
				</div>
				<div className="flex justify-center">
					<button
						type="submit"
						className="inline-flex justify-center py-2 px-4 border border-transparent shadow-sm text-sm font-medium rounded-md text-white bg-orange-400 hover:bg-orange-600 focus:outline-none focus:ring-2 focus:ring-offset-2 focus:ring-primary"
					>
						Submit
					</button>
				</div>
			</form>
		</div>
	)
}

export default AddressInput
Step 2: WalletStats Component
The WalletStats component displays various Bitcoin wallet statistics, including its balance with the selected fiat currency equivalent, total received and sent BTC amount, total transaction amount, and unconfirmed balance. Also, it allows for the toggling display of the latest 10 transaction IDs.
Open the src/components/WalletStats.js file with your code editor and modify the file as follows.
// src/components/WalletStats.js

import React, { useState } from 'react'

// Converts satoshi unit to Bitcoin, fixing to 8 decimal places
const satoshiToBitcoin = satoshi => (satoshi / 100000000).toFixed(8)

// WalletStats component takes walletData and fiatRate as props
const WalletStats = ({ walletData, fiatRate }) => {
	// State for toggling the display of transaction IDs
	const [showTxids, setShowTxids] = useState(false)
	// State for selecting the fiat currency for displaying Bitcoin's equivalent value
	const [fiatCurrency, setFiatCurrency] = useState('USD')

	if (!walletData) {
		return <p>No data available.</p>
	}

	// Calculate the fiat equivalent of the wallet's balance using the selected fiat currency rate
	const fiatBalance = (
		satoshiToBitcoin(walletData.balance) * fiatRate[fiatCurrency]
	).toLocaleString(undefined, {
		minimumFractionDigits: 2,
		maximumFractionDigits: 2,
	})

	// The return statement contains the JSX for rendering the wallet information
	return (
		<div className="p-4 rounded-md shadow-md bg-white my-4">
			<h2 className="text-xl font-bold mb-4">Wallet Information</h2>
			<div className="grid grid-cols-1 md:grid-cols-2 gap-4">
				<div>
					<strong>Address:</strong> {walletData.address}
				</div>
				<div>
					<strong>Balance:</strong> {satoshiToBitcoin(walletData.balance)} BTC (
					{fiatCurrency} {fiatBalance})
				</div>
				<div>
					<strong>Total Received:</strong>{' '}
					{satoshiToBitcoin(walletData.totalReceived)} BTC
				</div>
				<div>
					<strong>Total Sent:</strong> {satoshiToBitcoin(walletData.totalSent)}{' '}
					BTC
				</div>
				<div>
					<strong>Total Transactions:</strong> {walletData.txs}
				</div>
				<div>
					<strong>Unconfirmed Balance:</strong>{' '}
					{satoshiToBitcoin(walletData.unconfirmedBalance)} BTC
				</div>
				<div>
					<strong>Unconfirmed Transactions:</strong> {walletData.unconfirmedTxs}
				</div>
				<div className="flex flex-col md:flex-row items-center mb-4">
					<label
						htmlFor="fiat-currency"
						className="block text-gray-700 font-bold mr-2"
					>
						Select Fiat Currency:
					</label>
					<select
						id="fiat-currency"
						value={fiatCurrency}
						onChange={e => setFiatCurrency(e.target.value)}
						className="block shadow border rounded py-2 px-3 leading-tight focus:outline-none focus:shadow-outline"
					>
						<option value="USD">USD</option>
						<option value="EUR">EUR</option>
						<option value="GBP">GBP</option>
					</select>
				</div>
				{walletData.txids && walletData.txids.length > 0 && (
					<div>
						<button
							onClick={() => setShowTxids(!showTxids)}
							className="text-blue-600 hover:underline"
						>
							{showTxids ? 'Hide' : 'Show'} Latest 10 Transactions
						</button>
						{showTxids && (
							<ul className="mt-4">
								{walletData.txids.slice(0, 10).map((txid, index) => (
									<li key={index} className="truncate">
										{txid}
									</li>
								))}
							</ul>
						)}
					</div>
				)}
			</div>
		</div>
	)
}

export default WalletStats
Step 3: BalanceChart Component
The BalanceChart component renders a bar chart to visualize the net Bitcoin balance changes over time based on a set of historical data.
Open the src/components/BalanceChart.js file with your code editor and modify the file as follows.
// src/components/BalanceChart.js

import React from 'react'
import { Bar } from 'react-chartjs-2'
// Chart.js and its components are imported to create the chart
import {
	Chart as ChartJS,
	CategoryScale,
	LinearScale,
	BarElement,
	PointElement,
	Title,
	Tooltip,
	Legend,
	TimeSeriesScale,
} from 'chart.js'
import 'chartjs-adapter-moment' // Needed for time scale

// Registration of Chart.js components necessary to create a bar chart with a time series
ChartJS.register(
	CategoryScale,
	LinearScale,
	BarElement,
	PointElement,
	Title,
	Tooltip,
	Legend,
	TimeSeriesScale
)

const BalanceChart = ({ historyData }) => {
	// Data processing to convert Satoshi values into Bitcoin and create data points
	const dataPoints = historyData.map(entry => ({
		t: new Date(entry.time * 1000),
		y:
			(parseInt(entry.received, 10) + // Parse the string for received Satoshis and convert to Bitcoin
				parseInt(entry.sentToSelf, 10) - // Parse and add Satoshis sent to self, as they don't change the balance
				parseInt(entry.sent, 10)) / // Parse and subtract Satoshis sent from the wallet
			100000000, // Satoshi to Bitcoin conversion factor
	}))

	// Sort the data points by timestamp
	dataPoints.sort((a, b) => a.t - b.t)

	// Creating labels and data arrays for the chart dataset
	const labels = dataPoints.map(dp => dp.t)
	const data = dataPoints.map(dp => dp.y)

	// Configuring the data and appearance of the bar chart
	const chartData = {
		labels: labels,
		datasets: [
			{
				label: 'Net BTC Balance Change Over Time',
				data: data,
				fill: false,
				backgroundColor: 'rgb(33, 150, 243)',
				borderColor: 'rgba(33, 150, 243, 0.2)',
			},
		],
	}

	const chartOptions = {
		scales: {
			x: {
				type: 'time',
				time: {
					unit: 'day',
				},
				title: {
					display: true,
					text: 'Date',
				},
			},
			y: {
				beginAtZero: false,
				title: {
					display: true,
					text: 'Net BTC Balance Change',
				},
			},
		},
		interaction: {
			intersect: false,
			mode: 'index',
		},
		responsive: true,
		maintainAspectRatio: true,
	}

	return <Bar data={chartData} options={chartOptions} />
}

export default BalanceChart
Step 4: fetchData File
The fetchData file provides a set of functions to fetch data from a Bitcoin RPC API using Axios for different purposes: getting address data, retrieving Bitcoin fiat rates, and obtaining balance history.
Open the src/api/fetchData.js file with your code editor and modify the file as follows. Do not forget to replace the YOUR_QUICKNODE_ENDPOINT placeholder with your Quicknode Bitcoin endpoint.
// src/api/fetchData.js

import axios from 'axios'

// Base URL for the Quicknode endpoint, should be replaced with the actual endpoint URL.
const BASE_URL = 'YOUR_QUICKNODE_ENDPOINT'

// Function to get data for a specific Bitcoin address
export const getAddressData = async address => {
	const postData = {
		method: 'bb_getaddress', // The RPC method for getting address data
		params: [address], // The parameters for the method, in this case, the Bitcoin address
		id: 1,
		jsonrpc: '2.0',
	}

	try {
		const response = await axios.post(BASE_URL, postData, {
			headers: {
				'Content-Type': 'application/json',
			},
			maxBodyLength: Infinity,
		})
		return response.data.result
	} catch (error) {
		console.error(error)
	}
}

// Function to get Bitcoin fiat rates for a specific timestamp
export const getBitcoinFiatRates = async timestampUnix => {
	const postData = {
		method: 'bb_gettickers', // The RPC method for getting Bitcoin fiat rates
		params: [{ timestamp: timestampUnix }], // The parameters with the timestamp
		id: 1,
		jsonrpc: '2.0',
	}

	try {
		const response = await axios.post(BASE_URL, postData, {
			headers: {
				'Content-Type': 'application/json',
			},
			maxBodyLength: Infinity,
		})
		return response.data.result.rates
	} catch (error) {
		console.error(error)
	}
}

// Function to get the balance history for a Bitcoin address
export const getBalanceHistory = async (address, from, to, groupBy) => {
	const postData = {
		method: 'bb_getbalancehistory', // The RPC method for getting balance history
		params: [
			address, // The Bitcoin address
			{
				from: from.toString(), // Start of the time range as a string
				to: to.toString(), // End of the time range as a string
				fiatcurrency: 'usd', // The fiat currency to get the balance in
				groupBy: groupBy, // The grouping interval for balance history
			},
		],
		id: 1,
		jsonrpc: '2.0',
	}

	try {
		const response = await axios.post(BASE_URL, postData, {
			headers: {
				'Content-Type': 'application/json',
			},
			maxBodyLength: Infinity,
		})
		return response.data.result
	} catch (error) {
		console.error(error)
	}
}
Step 5: Main React Component - App.js
The App.js file is the main React component (App) for an application. It imports necessary sub-components and API functions, manages state for address data, balance history, date selection, interval, and fiat rates, and provides a structured layout with a header and main content area for user interactions.
Open the src/App.js file with your code editor and modify the file as follows.
// src/App.js

import React, { useState, useEffect } from 'react'
// Importing sub-components and styles

import AddressInput from './components/AddressInput'
import WalletStats from './components/WalletStats'
import BalanceChart from './components/BalanceChart'
import DatePicker from 'react-datepicker'
import 'react-datepicker/dist/react-datepicker.css'
// API functions to fetch various data
import {
	getAddressData,
	getBalanceHistory,
	getBitcoinFiatRates,
} from './api/fetchData'

const App = () => {
	// State hooks for various pieces of data and UI control
	const [addressData, setAddressData] = useState(null)
	const [balanceHistory, setBalanceHistory] = useState(null)
	const [startDate, setStartDate] = useState(new Date())
	const [endDate, setEndDate] = useState(new Date())
	// Default interval for balance history in seconds
	const [interval, setInterval] = useState('3600') // Default to 3600 seconds (1 hour)
	// Default fiat rates set to 0, will be updated via API call
	const [fiatRate, setFiatRate] = useState({ USD: 0, EUR: 0, GBP: 0 })

	// useEffect hook to fetch fiat rates on component mount
	useEffect(() => {
		fetchBitcoinFiatRates()
	}, [])

	// Function to handle address form submission
	const handleAddressSubmit = async address => {
		const data = await getAddressData(address)
		setAddressData(data)
	}

	// Function to fetch balance history based on selected dates and interval
	const fetchBalanceHistory = async () => {
		// Convert dates to timestamps
		const startTimestamp = Math.floor(startDate.getTime() / 1000)
		const endTimestamp = Math.floor(endDate.getTime() / 1000)

		const history = await getBalanceHistory(
			addressData.address,
			startTimestamp,
			endTimestamp,
			interval
		)
		setBalanceHistory(history)
	}

	// Function to fetch current Bitcoin fiat rates
	const fetchBitcoinFiatRates = async () => {
		// Assuming the API response structure matches what you provided
		const timestampNow = Math.floor(Date.now() / 1000)

		const fiatRates = await getBitcoinFiatRates(timestampNow)
		setFiatRate({ USD: fiatRates.usd, EUR: fiatRates.eur, GBP: fiatRates.gbp })
	}

	return (
		<div className="App bg-background min-h-screen flex flex-col items-center">
			<header className="bg-white shadow w-full">
				<div className="max-w-7xl mx-auto py-6 px-4 sm:px-6 lg:px-8">
					<h1 className="text-3xl font-bold text-gray-900">Bitcoin Explorer</h1>
				</div>
			</header>
			<main className="flex-grow">
				<AddressInput onAddressSubmit={handleAddressSubmit} />
				{addressData && (
					<div>
						<WalletStats walletData={addressData} fiatRate={fiatRate} />
						<div className="container mx-auto p-6">
							<h2 className="text-2xl font-bold text-center my-6">
								Bitcoin Balance Chart
							</h2>

							<div className="flex flex-wrap items-center justify-center gap-4 mb-6 shadow-lg p-6 rounded-lg bg-white">
								<div className="flex flex-col mb-3">
									<label htmlFor="start-date" className="font-semibold mb-2">
										Starting Date
									</label>
									<DatePicker
										id="start-date"
										selected={startDate}
										onChange={date => setStartDate(date)}
										className="w-full max-w-xs h-12 rounded-lg text-lg shadow-inner"
									/>
								</div>
								<div className="flex flex-col mb-3">
									<label htmlFor="end-date" className="font-semibold mb-2">
										Ending Date
									</label>
									<DatePicker
										id="end-date"
										selected={endDate}
										onChange={date => setEndDate(date)}
										className="w-full max-w-xs h-12 rounded-lg text-lg shadow-inner border"
									/>
								</div>
								<div className="flex flex-col mb-3">
									<label htmlFor="time-interval" className="font-semibold mb-2">
										Time Interval
									</label>
									<select
										id="time-interval"
										value={interval}
										onChange={e => setInterval(e.target.value)}
										className="w-full max-w-xs h-12 rounded-lg text-lg shadow-inner border"
									>
										<option value="3600">1 Hour</option>
										<option value="14400">4 Hours</option>
										<option value="86400">Daily</option>
										<option value="604800">Weekly</option>
									</select>
								</div>
							</div>
							<div className="flex justify-center">
								<button
									onClick={fetchBalanceHistory}
									className="inline-flex justify-center py-2 px-4 border border-transparent shadow-sm text-sm font-medium rounded-md text-white bg-orange-400 hover:bg-orange-600 focus:outline-none focus:ring-2 focus:ring-offset-2 focus:ring-primary"
								>
									Load History
								</button>
							</div>
						</div>
					</div>
				)}

				{/* Display address data and Chart in a styled manner */}
				{/* ... */}
				{balanceHistory && <BalanceChart historyData={balanceHistory} />}
			</main>
		</div>
	)
}

export default App
Step 6: Run the App
Now, you can run the app by running the command below.
npm start
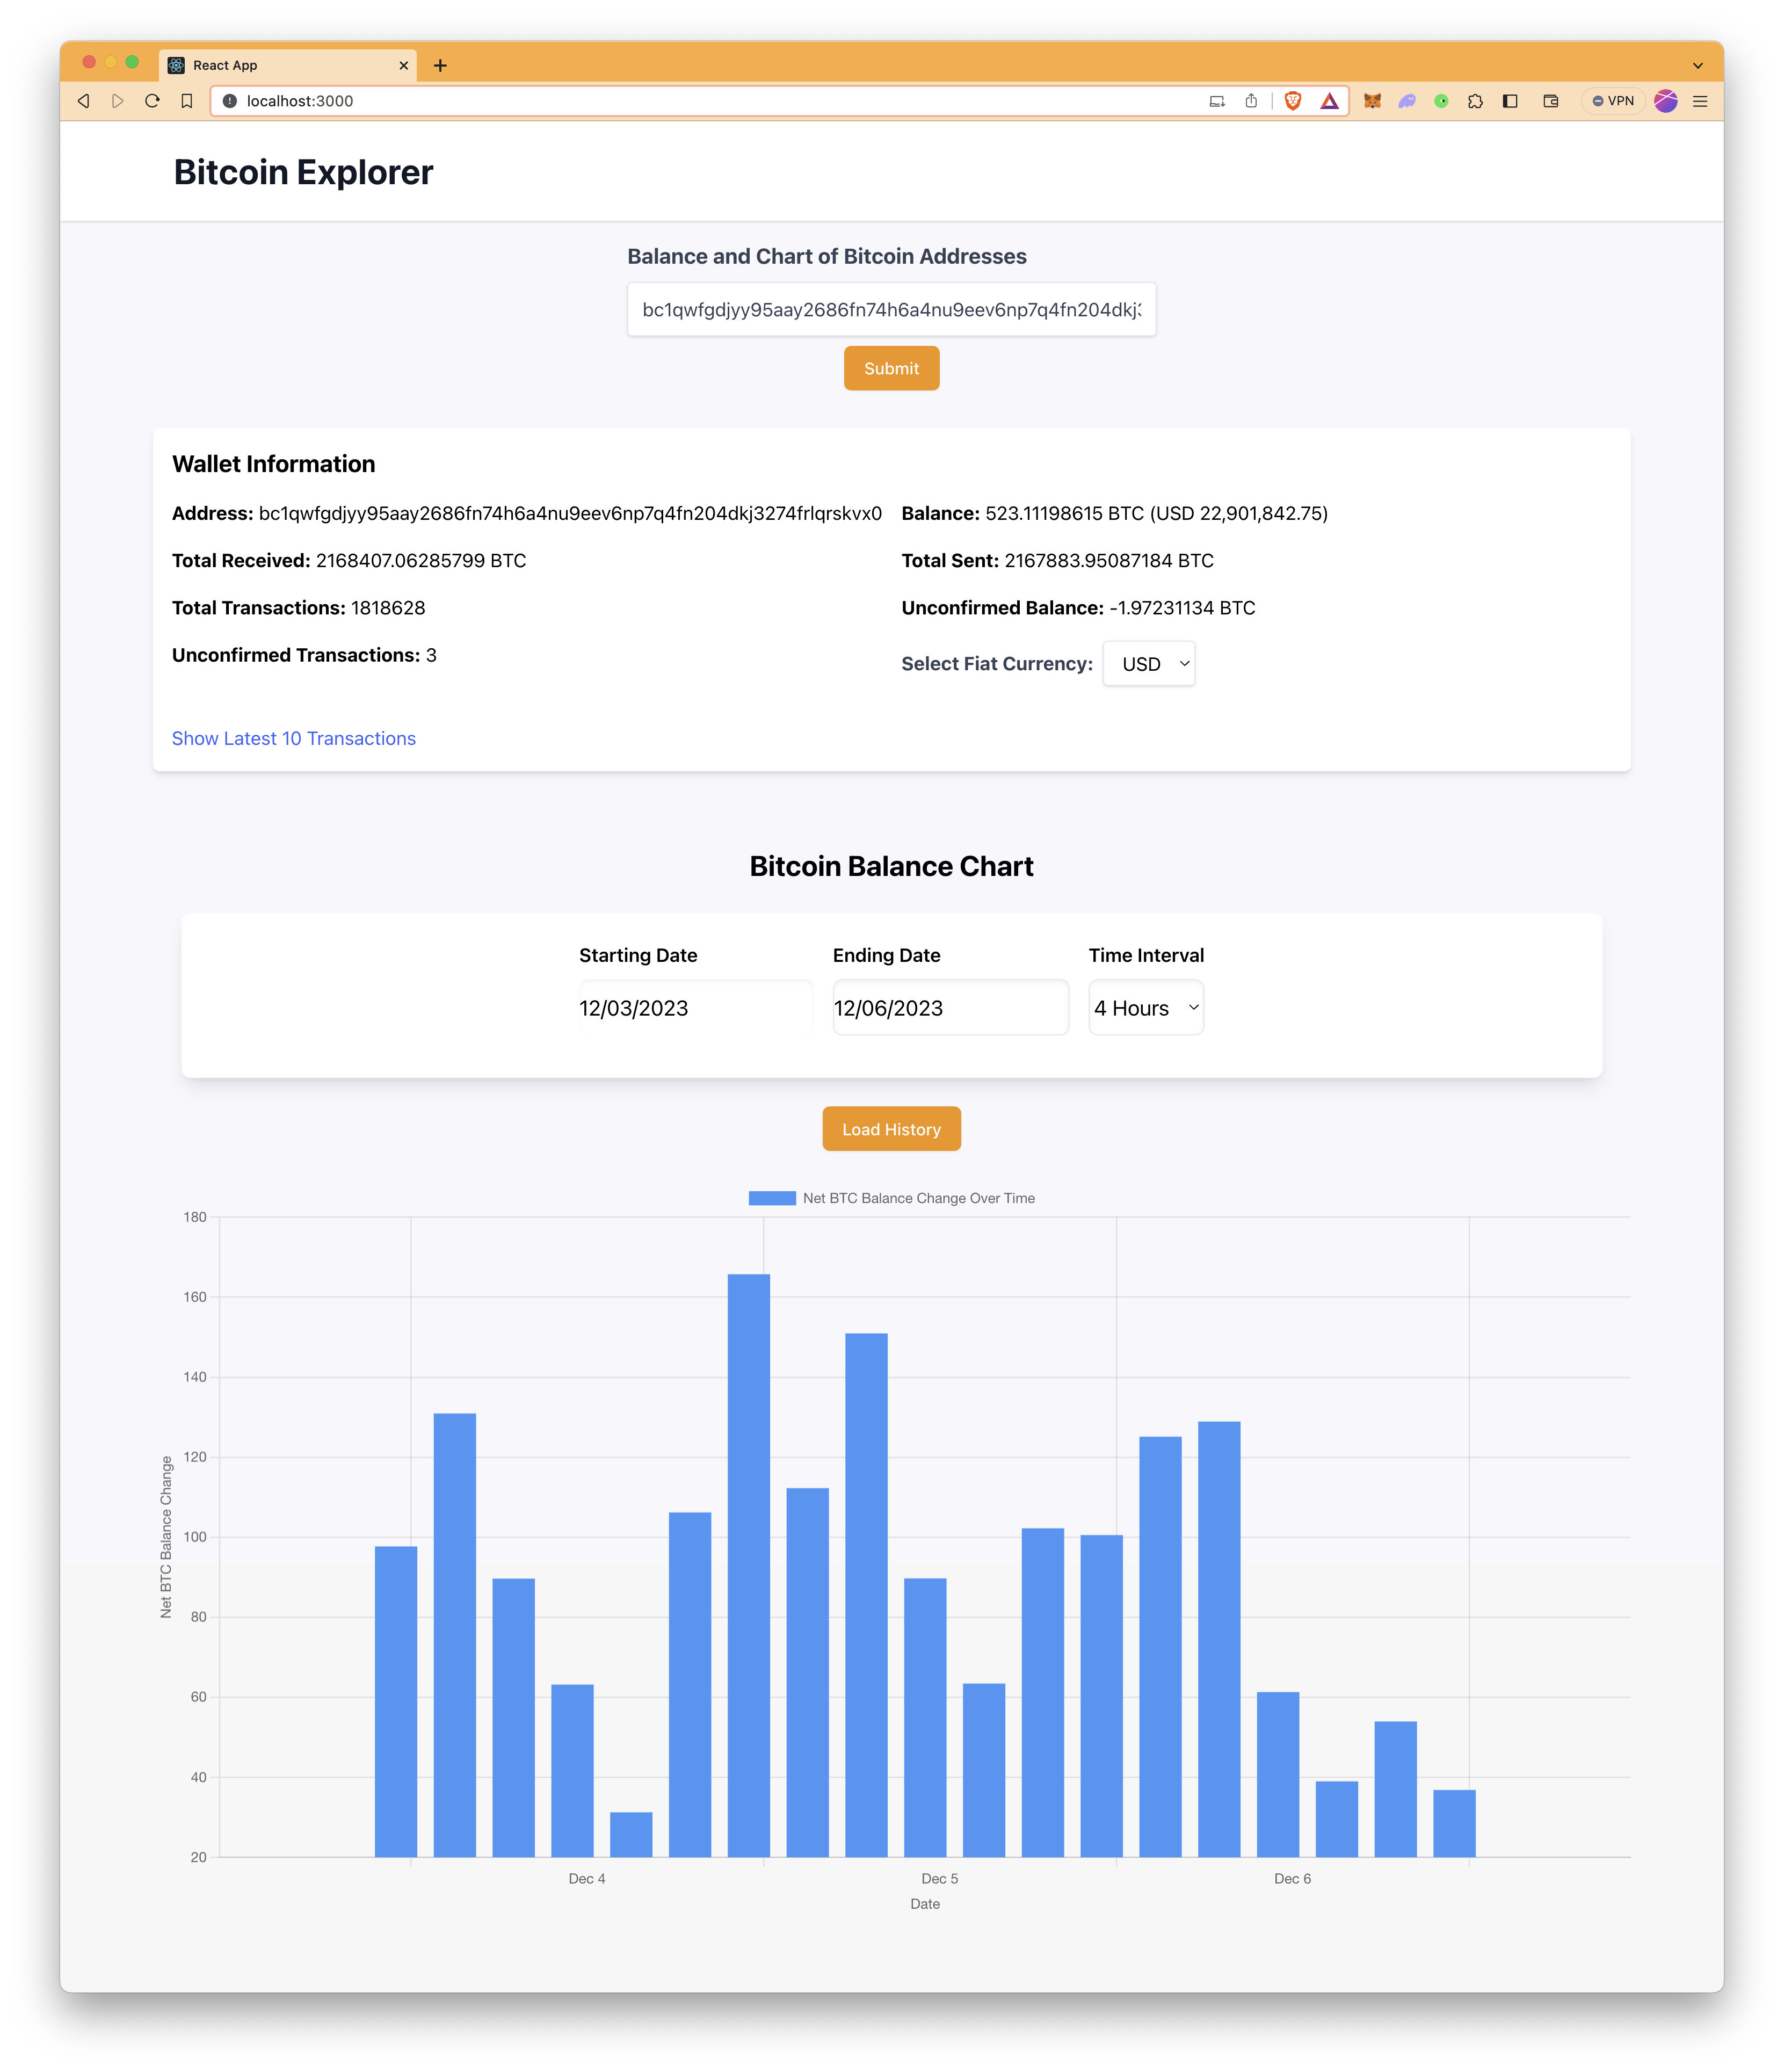
The app should now be running on http://localhost:3000. Now, it's time to interact with the app.
You can use any Bitcoin address you want or the Bitcoin address used in the example (bc1qwfgdjyy95aay2686fn74h6a4nu9eev6np7q4fn204dkj3274frlqrskvx0) to test the app.
Conclusion
In conclusion, the journey through building a real-time Bitcoin wallet analytics app has equipped you with the knowledge and tools to create a powerful application that provides valuable insights into Bitcoin wallet transactions and market dynamics. However, the potential of your application does not end here. With the foundational structure in place, you are well-positioned to expand its capabilities further.
Consider leveraging other methods available in the Blockbook add-on to introduce additional features such as tracking multiple addresses, aggregating wallet data, supporting more fiat currencies, or even building a full blockchain explorer. The flexibility of Blockbook allows for the integration of more complex queries and the ability to present deeper analytical data.
Subscribe to our newsletter for more articles and guides on Web3 and blockchain. If you have any questions or need further assistance, feel free to join our Discord server or provide feedback using the form below. Stay up to date with the latest by following us on Twitter (@Quicknode) and our Telegram announcement channel.
We ❤️ Feedback!
Let us know if you have any feedback or requests for new topics. We'd love to hear from you.