
17 min read
Overview
As a perpetual trader on Hyperliquid, having a comprehensive portfolio tracker is essential for monitoring your positions, PnL, and margin utilization in real-time. This guide shows you how to build a powerful portfolio tracker that monitors any Hyperliquid wallet using Quicknode's Hyperliquid info endpoint. Beyond creating a useful trading tool, this tutorial will also demystify how HyperCore data is fetched, structured, and utilized for building the application. The application showcases:
- Live Position Tracking - Real-time updates on perpetual positions with PnL
- Portfolio Analytics - Account value, margin usage, and risk metrics
- Vault Management - Track vault value and lock-up schedules
- Spot Holdings - Monitor token balances and USD values
- Search For Any Wallet - Switch between different trading accounts


What You Will Do
Build a complete portfolio tracker in 4 phases:
- Setting up a Quicknode endpoint and a Supabase account
- Setting up your database schema
- Creating an indexer that fetches HyperCore data every 500ms
- Building a dashboard with modern UI libraries that displays real-time trading data
What You Will Need
- Quicknode Hyperliquid Endpoint
- Supabase account
- Node.js v20+, npm, and a code editor
- Basic React/TypeScript and REST API concepts
- Basic SQL concepts
- Optional: Hyperliquid perpetual trading experience
Quicknode provides dedicated Hyperliquid API endpoints that eliminate the need to run your own node:
- Pre-configured endpoints with no setup required
- Handles connection management and failover
- Direct access to HyperCore data without additional infrastructure
Architecture Overview
The portfolio tracker consists of three components that communicate through a PostgreSQL database. The indexer fetches data from Hyperliquid, stores it in the database, and the frontend queries the database for display.
Tech Stack Components
-
Frontend: React + TypeScript + Tailwind CSS + shadcn/ui & Radix UI
- Displays trading data in a responsive interface
- Polls database every 1000ms for updates
- Handles wallet switching through database requests
-
Backend: Node.js indexer with 500ms polling interval
- Fetches data from 5 different Hyperliquid endpoints
- Stores data in PostgreSQL with proper precision handling
- Manages wallet switching requests from the frontend
This guide uses aggressive polling intervals (500ms for indexer, 1000ms for frontend) to demonstrate real-time updates. You can adjust these intervals if needed:
- Frontend:
src/Dashboard.tsxlines 260-264 - Change the1000value in:const interval = setInterval(async () => {
await fetchData(currentWallet);
}, 1000); - Indexer:
src/indexer/indexer.tslines 623-630 - Change the500value in:setInterval(async () => {
await indexer.checkForWalletSwitch();
await indexer.indexData();
}, 500);
Monitor your Quicknode and Supabase usage to optimize costs.
-
Database: Supabase PostgreSQL
- Stores trading data in 6 tables with financial precision (
DECIMALtypes) - Handles communication between frontend and indexer via
wallet_switch_requeststable - Uses unique constraints to prevent duplicate entries
- Stores trading data in 6 tables with financial precision (
-
Data Source: Hyperliquid
infoendpoint via Quicknode- Provides account data, positions, vault holdings, spot balances, and delegations
- Returns data in JSON format with string numbers for precision
- Accessed via HTTP POST requests with wallet address parameter
┌─────────────────┐
│ Perp Trader │
└─────────┬───────┘
│ 1. Enter wallet address
▼
┌─────────────────┐
│ React Dashboard │◄─────────────────┐
└─────────┬───────┘ │
│ 2. Store request │ 6. Read & display data
▼ │
┌─────────────────┐ │
│ Supabase │◄─────────────────┤
│ PostgreSQL │ │
└─────────┬───────┘ │
│ 3. Detect request │ 5. Store data
▼ │
┌─────────────────┐ │
│ Indexer │──────────────────┘
│ (500ms poll) │
└─────────┬───────┘
│ 4. Fetch HyperCore data
▼
┌─────────────────┐
│ Quicknode │
│ Hyperliquid │
│ Endpoint │
└─────────────────┘
Flow of the Application
1st Wallet Search:
- User enters wallet → Frontend validates and stores request in database
- Indexer detects request (polls every 500ms) → Switches to the new wallet
- Data collection begins → Fetches from 5 given endpoints independently and stores it to the database
- Frontend polls database (every 1000ms) → UI updates with fresh data fetched from the indexer
2nd Wallet Search and Beyond:
- User enters new wallet → Frontend calls to clears any previous wallet's data and orders indexer to switch to the new wallet
- Indexer detects new request → Switches to the new wallet immediately and starts fetching data using the new wallet address
- Data updates in real-time → Dashboard starts fetching new wallet's positions and metrics
Project Structure
The project follows a clean, modular architecture that separates concerns between data collection, UI components, and business logic. This structure makes the codebase maintainable and allows for easy extension of features.
Directory Breakdown
├── src/
│ ├── indexer/
│ │ ├── indexer.ts # Main indexer orchestration & wallet management
│ │ └── apicalls.ts # Hyperliquid info endpoint queries
│ ├── components/
│ │ ├── ui/ # shadcn/ui components (Button, Input, Card, etc.)
│ │ └── dashboard/ # Dashboard components (WalletHeader, PortfolioMetrics, etc.)
│ ├── shared/
│ │ ├── types.ts # TypeScript interfaces & types
│ │ ├── utils.ts # Formatting, calculations & utility functions
│ │ ├── constants.ts # UI constants for the dashboard
│ │ └── supabase.ts # Supabase client instance for frontend access
│ ├── Dashboard.tsx # Main Dashboard logic
│ └── main.tsx
├── supabase/
│ └── schema.sql # Complete database schema
├── package.json
└── .env
Running the Project
Step 1: Clone the Repository
First, clone the project repository and navigate to the project directory:
git clone https://github.com/quiknode-labs/qn-guide-examples.git
cd qn-guide-examples/sample-dapps/hyperliquid-portfolio-tracker
Step 2: Setup Environment File
Create your .env file by running the command:
cp .env.example .env
Step 3: Supabase Database Setup
Create a new Supabase account or login to your existing Supabase account at the Supabase website.
Create a new project, then click the Connect button.

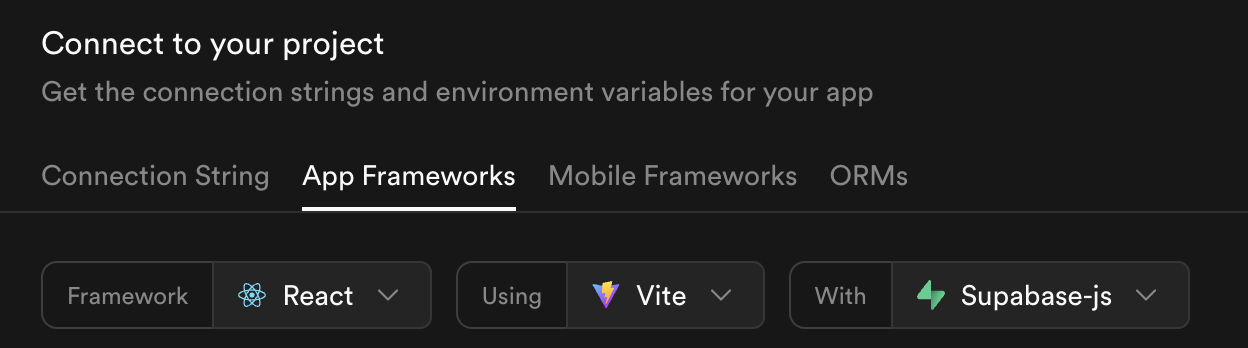
In the App Frameworks section, select React and change the using field to Vite. Copy the VITE_SUPABASE_URL and VITE_SUPABASE_ANON_KEY values and add them to your .env file.
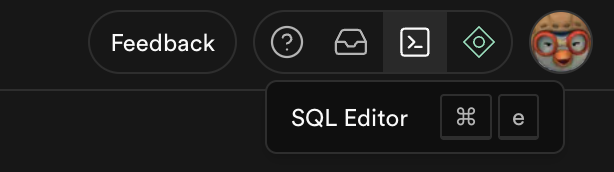
Lastly, navigate to the SQL Editor in the top right corner, paste the content of the schema.sql file, then click run. This will create all the necessary tables and functions we need to store & fetch the data for the frontend.
Step 4: Quicknode Setup
Create your free trial Quicknode account, then create your first Hyperliquid RPC endpoint and paste it to your .env file.
Make sure you remove the existing /evm and add /info at the end of your Quicknode endpoint URL to gain access to the Hyperliquid info endpoints.
Step 5: Start the Application
Once the tables are created and your environment is configured, you can start the project by running the following commands in the root directory:
npm install && npm run dev:both
This will run both the frontend application and the indexer.
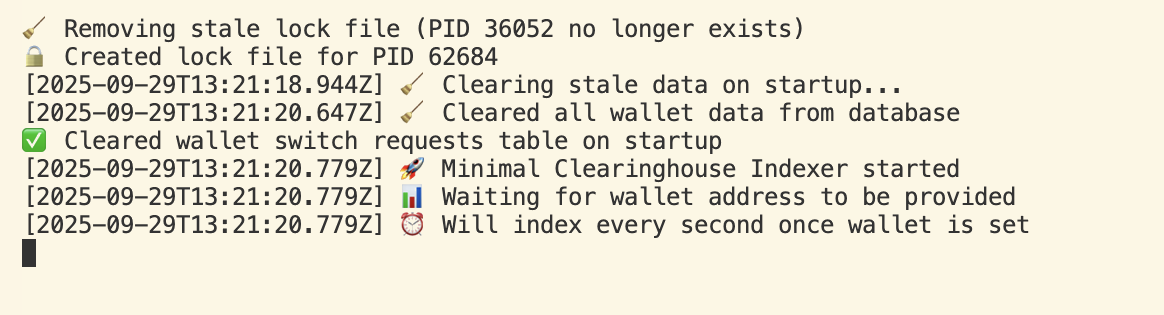
When the indexer starts running, it will wait for you to search a valid wallet address:
Open your frontend page at the localhost URL and click the demo wallet button to get an example wallet address:

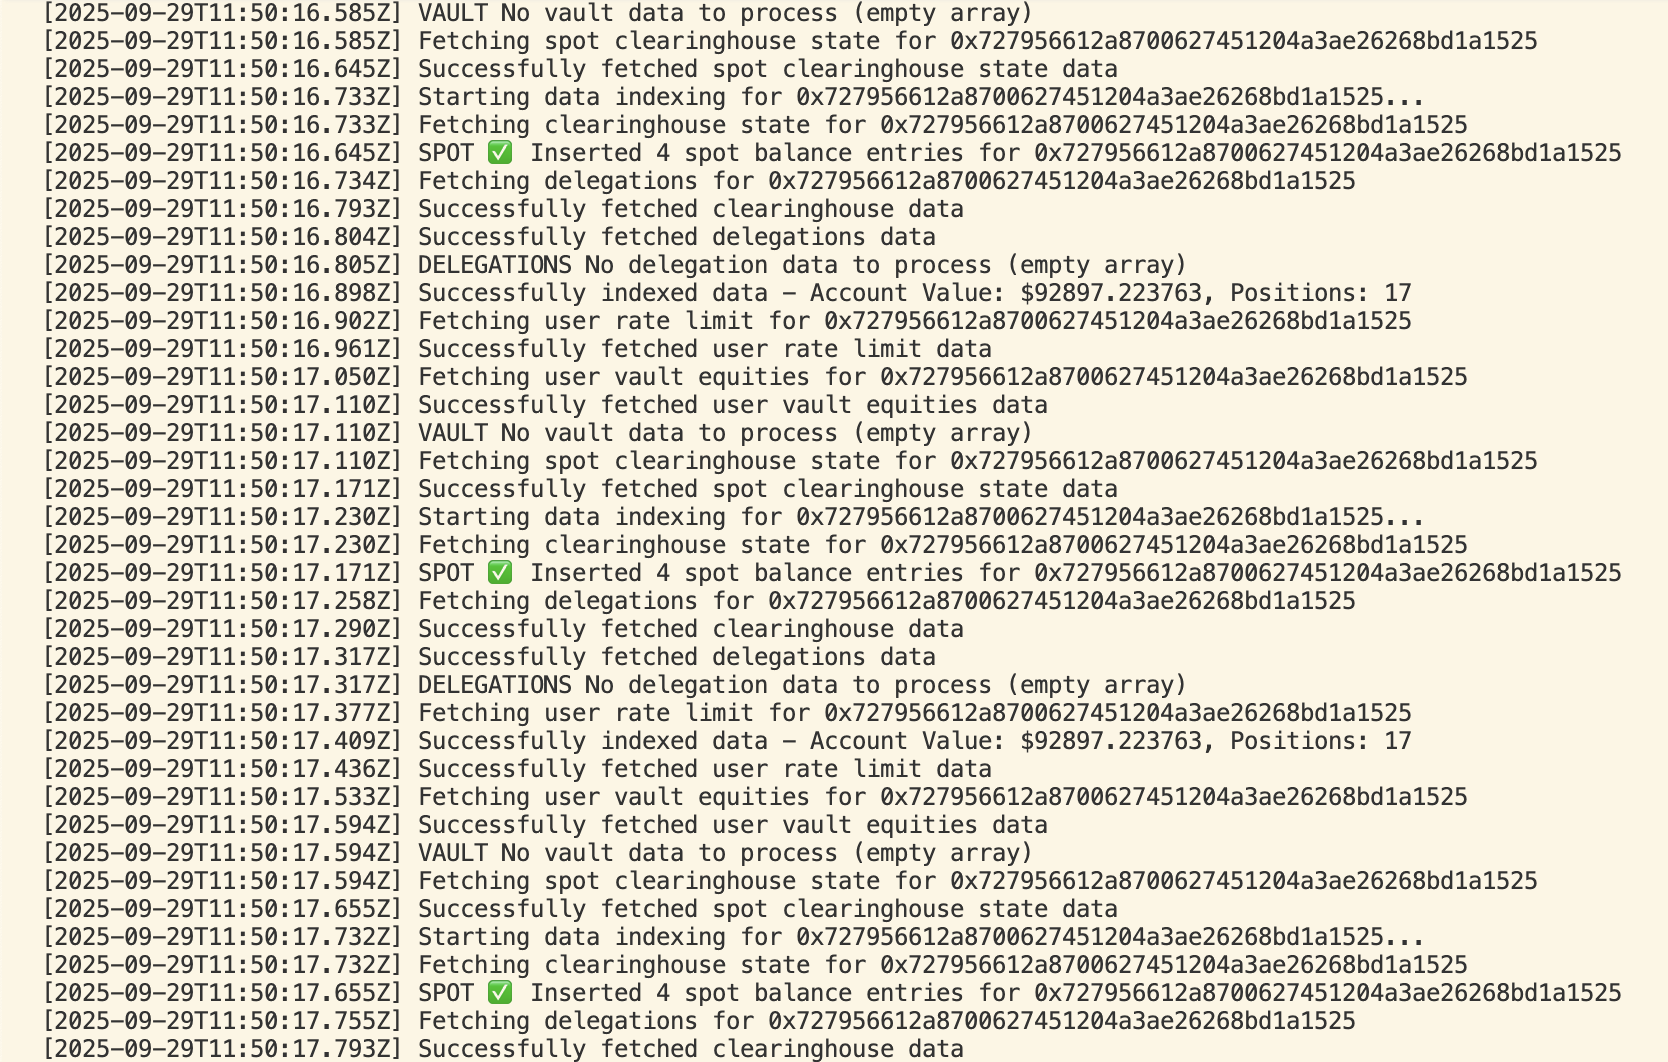
After searching for a wallet, the indexer will start fetching data for that address every 500ms:
The dashboard will display real-time stats for the wallet:
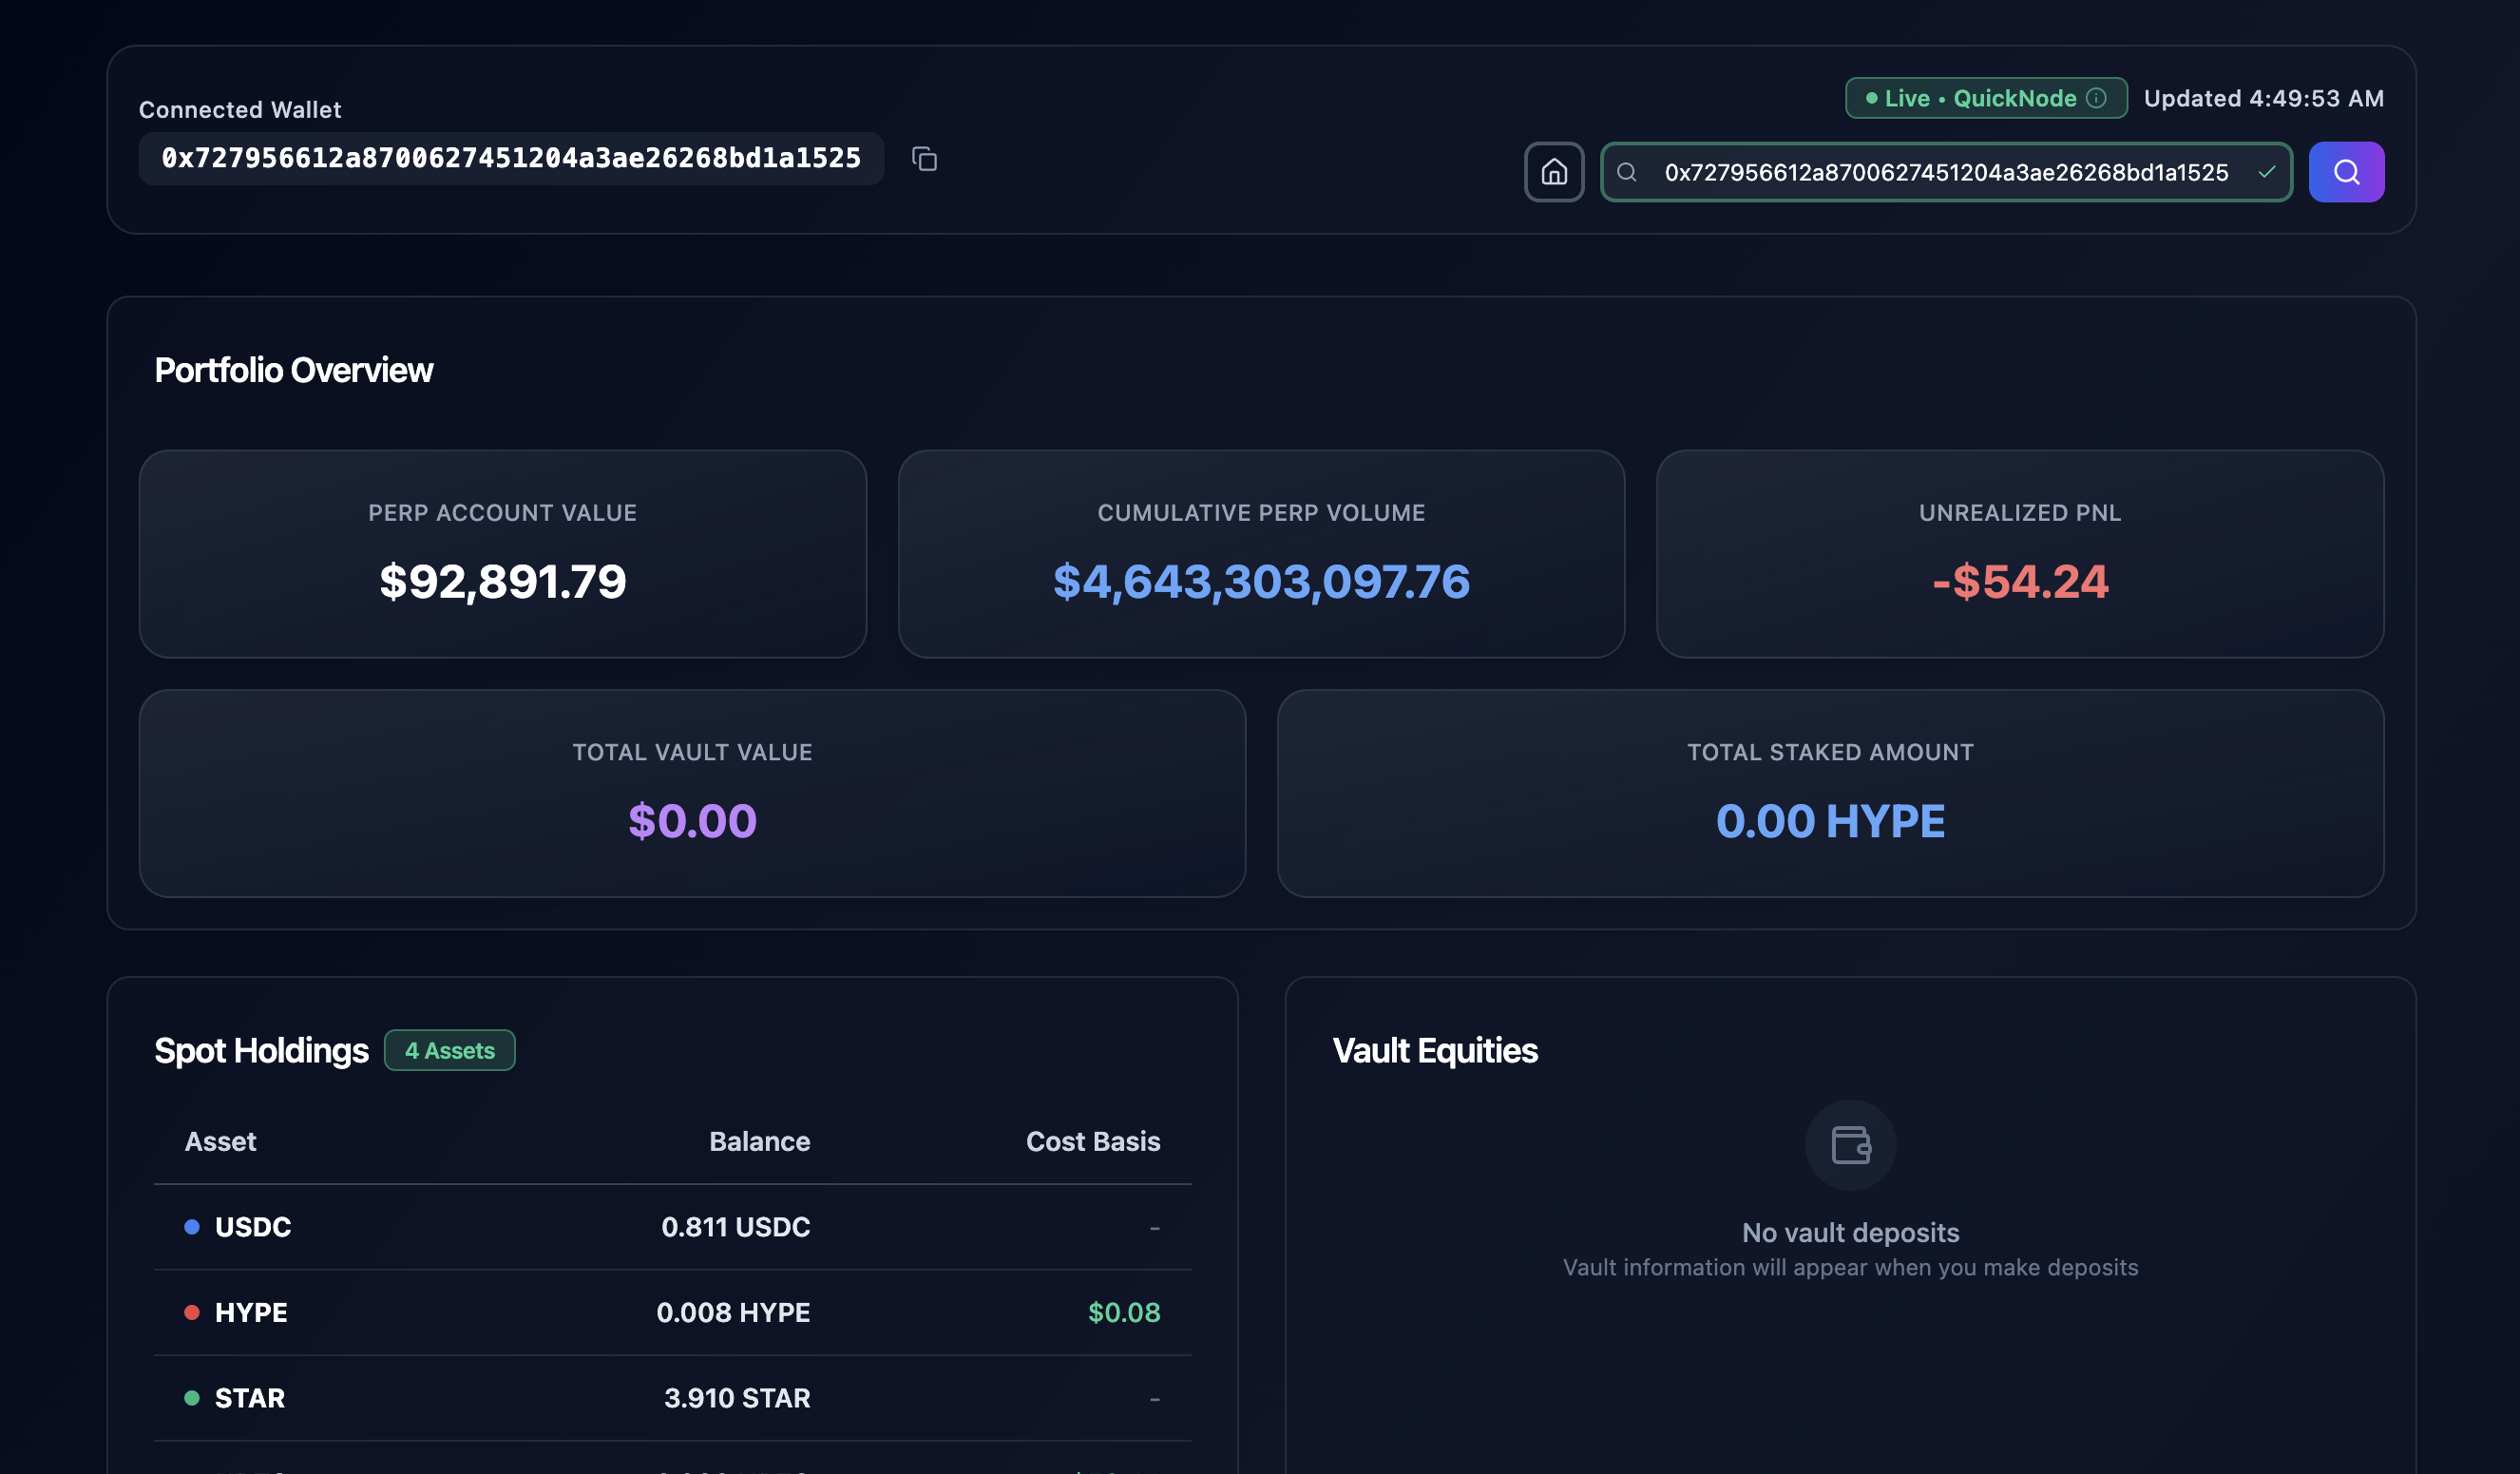
You now have access to account value, active positions, and other trading data in real-time.
Troubleshooting
While working with the indexer, you might encounter the following issues during setup or runtime:
- Indexer stops responding
- No data appears after wallet search
- Accidentally stopped the indexer
Solution:
Restart the indexer by running:
npm run dev:indexer
Then try searching again by inputting a valid wallet address.
Codebase in Depth
Now that you have the portfolio tracker up and running, let's explore how it works under the hood. This section dives into the three core components that make real-time portfolio tracking possible:
The Indexer - Handles Hyperliquid's info endpoint through apicalls.ts, detects wallet switching requests, and orchestrates data collection from 5 different Hyperliquid endpoints every 500ms.
The Schema & DB - Demonstrates the PostgreSQL table structures that store trading data with financial precision, including the coordination mechanism for frontend-indexer communication.
The Dashboard (Frontend) - Covers React state management, real-time database polling, wallet address validation, and the user interface that displays live trading data.
The Indexer
The indexer runs as a separate Node.js process that polls the Quicknode endpoint every 500ms. It fetches trading data for the current wallet address and stores it in the database. The indexer waits for wallet switch requests from the frontend and handles process isolation using a lock file.
Wallet Change Detection
The indexer polls the wallet_switch_requests table every 500ms to detect frontend wallet switches, using status fields to prevent race conditions during the switch process.
Hyperliquid info Endpoint Integration
The indexer uses the HyperliquidAPI class in apicalls.ts to communicate with Quicknode's Hyperliquid endpoint. Each API method follows a consistent pattern for fetching different types of trading data:
// From apicalls.ts - Main account data fetching
async getClearinghouseState(walletAddress: string): Promise<ClearinghouseStateResponse> {
const payload = {
type: 'clearinghouseState',
user: walletAddress
};
const response = await fetch(QUICKNODE_ENDPOINT, {
method: 'POST',
headers: { 'Content-Type': 'application/json' },
body: JSON.stringify(payload)
});
return await response.json();
}
The getUserVaultEquities() method follows the same structure but with type: 'userVaultEquities', demonstrating how each endpoint requires only the wallet address and endpoint type. All methods include comprehensive error handling and logging for debugging trading data issues.
Explaining the Indexer In Depth
The main indexing loop calls 5 different info endpoints and stores the results in separate database tables:
// From indexer.ts - Core data fetching and storage
const data = await hyperliquidAPI.getClearinghouseState(CURRENT_WALLET_ADDRESS);
const stateId = await this.storeClearinghouseState(data);
// Store positions with atomic replacement to prevent UI flickering
await this.storeAssetPositions(data.assetPositions, data.time);
// Fetch additional data types with error handling
try {
const rateLimitData = await hyperliquidAPI.getUserRateLimit(CURRENT_WALLET_ADDRESS);
await this.storeUserRateLimit(rateLimitData, timestamp);
} catch (error) {
console.log(`No rate limit data available for ${CURRENT_WALLET_ADDRESS}`);
}
The indexer handles individual endpoint failures gracefully - if one data source fails, the others continue working normally.
The indexer uses a file-based lock to prevent multiple instances from running simultaneously:
// From indexer.ts - Lock file creation and process checking
function createLock(): boolean {
if (fs.existsSync(LOCK_FILE)) {
const { pid } = JSON.parse(fs.readFileSync(LOCK_FILE, 'utf8'));
try {
process.kill(pid, 0);
console.error(`❌ Another indexer is already running (PID: ${pid})`);
return false;
} catch (e) {
fs.unlinkSync(LOCK_FILE); // Remove stale lock
}
}
fs.writeFileSync(LOCK_FILE, JSON.stringify({ pid: process.pid }));
return true;
}
The indexer uses a lock file to prevent multiple instances from running simultaneously, ensuring data consistency.
The Schema & DB (Supabase)
Now that we've seen how the indexer collects data, let's examine how that data is stored and structured. The PostgreSQL database stores trading data in 6 tables and handles communication between the frontend and indexer. Each table uses DECIMAL types for financial precision and unique constraints to prevent duplicate entries.
Table Structure Examples
Asset Positions Table - Stores perpetual trading positions with financial precision:
-- From schema.sql - Core trading data storage
CREATE TABLE asset_positions (
id UUID DEFAULT gen_random_uuid() PRIMARY KEY,
wallet_address TEXT NOT NULL,
coin TEXT NOT NULL, -- Asset symbol (e.g., 'BTC', 'ETH', 'SOL')
size DECIMAL(20, 5) NOT NULL, -- Position size: 20 digits total, 5 after decimal
leverage_type TEXT NOT NULL, -- 'cross' or 'isolated' margin mode
leverage_value INTEGER NOT NULL, -- Leverage multiplier (1x, 5x, 10x, etc.)
entry_price DECIMAL(20, 5), -- Average entry price with 5 decimal precision
position_value DECIMAL(20, 5), -- Current USD value of the position
unrealized_pnl DECIMAL(20, 5), -- Profit/loss before closing position
liquidation_price DECIMAL(20, 5), -- Price at which position gets liquidated
margin_used DECIMAL(20, 5), -- Amount of margin allocated to this position
timestamp BIGINT NOT NULL, -- Unix timestamp in milliseconds from HyperCore
created_at TIMESTAMP WITH TIME ZONE DEFAULT NOW() -- Database insertion time
);
-- Unique constraint prevents duplicate positions per wallet-coin pair
ALTER TABLE asset_positions ADD CONSTRAINT unique_position_per_wallet
UNIQUE (wallet_address, coin);
The DECIMAL(20, 5) type provides 20 total digits with 5 decimal places.
Wallet Switch Requests Table - Coordinates communication between frontend and indexer:
-- From schema.sql - Frontend-indexer coordination
CREATE TABLE wallet_switch_requests (
id UUID DEFAULT gen_random_uuid() PRIMARY KEY,
requested_wallet_address TEXT NOT NULL, -- Ethereum address (0x format)
status TEXT NOT NULL DEFAULT 'pending', -- State machine: pending → processing → completed
created_at TIMESTAMP WITH TIME ZONE DEFAULT NOW()
);
-- Index for efficient status-based queries by indexer
CREATE INDEX idx_wallet_switch_requests_status ON wallet_switch_requests(status);
This table acts as a message queue between the React frontend and Node.js indexer. When a user enters a new wallet address, the frontend inserts a 'pending' request. The indexer polls for 'pending' requests every 500ms, updates the status to 'processing' to prevent race conditions, then performs the wallet switch. The status progression ensures only one wallet switch happens at a time, even if users rapidly search different addresses.
The Dashboard (Frontend)
With the indexer collecting data and the database storing it, the final piece is the user interface. The React frontend polls the database every 1000ms to get updated trading data and displays it using modular components. It manages wallet switching by inserting requests into the database and clearing local state immediately.
Overview
The dashboard architecture centers around centralized state management with modular component composition:
// From Dashboard.tsx - Centralized state management
const [latestState, setLatestState] = useState<ClearinghouseState | null>(null);
const [positions, setPositions] = useState<AssetPosition[]>([]);
const [vaultEquities, setVaultEquities] = useState<UserVaultEquity[]>([]);
const [spotBalances, setSpotBalances] = useState<SpotBalance[]>([]);
const [isLoading, setIsLoading] = useState(true);
const [hasInitialData, setHasInitialData] = useState(false);
The Dashboard component holds all trading data in React state and passes it down to child components as props. This pattern keeps state management simple and makes it easy to track data flow during debugging.
Auto-refresh Polling
The frontend polls the database every 1000ms using a setInterval loop with proper cleanup:
// From Dashboard.tsx - Auto-refresh with cleanup
useEffect(() => {
if (currentWallet && hasStarted && hasInitialData) {
const interval = setInterval(async () => {
  await fetchData(currentWallet);
}, 1000);
return () => clearInterval(interval);
}
}, [currentWallet, hasStarted, hasInitialData, fetchData]);
// Data freshness detection provides visual feedback
const isDataStale = latestState && (Date.now() - latestState.timestamp > 3000);
The polling automatically starts and stops based on user actions, only running when needed to save resources. The interface shows when data is stale (older than 3 seconds) to keep users informed about data freshness.
Database Query Patterns
The frontend uses optimized query patterns to fetch trading data from Supabase in real-time:
// From Dashboard.tsx - Real-time data queries
const { data: latestData, error: latestError } = await supabase
  .from('clearinghouse_states')
  .select('*')
  .eq('wallet_address', walletAddress)
  .order('timestamp', { ascending: false })
  .limit(1)
  .maybeSingle();

// Get all positions for this wallet
const { data: positionsData, error: positionsError } = await supabase
  .from('asset_positions')
  .select('*')
  .eq('wallet_address', walletAddress)
  .order('timestamp', { ascending: false });

if (positionsError && positionsError.code !== 'PGRST116') throw positionsError;
The queries handle cases where wallets have no trading data gracefully, showing empty results instead of errors.
Managing Wallet Switching
The frontend validates wallet addresses and clears state immediately when switching:
// From Dashboard.tsx - Wallet validation and switching
const isValidWalletAddress = (address: string): boolean => {
  return /^0x[a-fA-F0-9]{40}$/.test(address);
};

const handleWalletSearch = async () => {
  if (!isValidWalletAddress(address)) {
    setError('Invalid wallet address format');
    return;
  }

  // Clear ALL old data immediately when switching wallets
  setLatestState(null);
  setPositions([]);
  setVaultEquities([]);
  setSpotBalances([]);
  setIsSearching(true);

  // Signal indexer to switch
  await switchIndexerWallet(address);
  setCurrentWallet(address);
};
The interface validates wallet addresses and clears old data immediately when switching, showing a loading state until new data loads.
Data Display
Trading data flows from React state to specialized UI components that format and present the information:
// From PortfolioMetrics.tsx - Portfolio overview card component
interface PortfolioMetricsProps {
  totalAccountValue: number;
  totalUnrealizedPnl: number;
  userRateLimit: UserRateLimit | null;
  vaultEquities: UserVaultEquity[];
  delegations: Delegation[];
  formatCurrency: (value: number) => string;
}

export const PortfolioMetrics: React.FC<PortfolioMetricsProps> = ({
  totalAccountValue,
  totalUnrealizedPnl,
  formatCurrency
}) => {
  return (
    <Card className="bg-slate-900/50 border-slate-700/50 backdrop-blur-sm mb-6">
      <CardContent className="p-4">
        <div className="text-xs text-slate-400 mb-3 font-medium tracking-wide uppercase">
          Perp Account Value
        </div>
        <div className="text-2xl font-bold text-white">
          {formatCurrency(totalAccountValue)}
        </div>
      </CardContent>
    </Card>
  );
};
The Dashboard component passes calculated values and formatting functions to child components, which handle the visual presentation and styling of trading data.
Conclusion
Congratulations! You've successfully built a real-time Hyperliquid portfolio tracker using Quicknode's Hyperliquid info endpoint. You've learned how to fetch perpetual trading data, structure a PostgreSQL database for financial precision, and build a responsive dashboard that updates in real-time. This foundation unlocks possibilities for advanced trading tools like automated risk monitoring and multi-wallet comparison.
You can extend this project further by integrating charting libraries like Recharts or building trading alerts using your favorite notification service. Check out our other Hyperliquid guides to explore more ways to build on Hyperliquid.
Next Steps
Now that you have a working portfolio tracker, here are several ways to extend and improve the application:
- Liquidation warnings when positions approach dangerous margin levels
- Portfolio performance tracking over time with charts
- Shorter loading times between wallet searches
Further Resources
If you are stuck or have questions, drop them in our Discord. Stay up to date with the latest by following us on Twitter (@Quicknode) or our Telegram announcement channel.
We ❤️ Feedback!
Let us know if you have any feedback or requests for new topics. We'd love to hear from you.