11 min read
Overview
Ever wanted to verify the owner of an NFT? Or wanted to fetch all the NFTs in a given collection? From experience, compiling all this NFT data can be quite complex as you would need to gather and transpose the data from multiple sources while keeping it up to date in your database. Fortunately, QuickNode's NFT API helps us streamline the process of retrieving NFT data. In this guide, we will show you how to retrieve all the NFTs from a particular collection and demonstrate how to display them on our frontend using React, Ethers.js, and TailwindCSS.
What You Will Need
- Node v14 or later
- Knowledge of HTML, CSS, JavaScript & React
- ethers.js v5 & TailwindCSS libraries
- A code editor (i.e., VScode)
| Dependency | Version |
|---|---|
| Node.js | 18.18.0 |
| ethers.js | 5.7 |
What You Will Do
- Dive into the different methods available on the QuickNode NFT API
- Boot up a QuickNode Ethereum node with the NFT API add-on
- Create a React application that displays data retrieved from the NFT API using Ethers.js and TailwindCSS
Diving into the QuickNode NFT API
Before we dive into building our gallery, let us learn more about the different methods QuickNode offers for retrieving NFT data.
qn_fetchNFTCollectionDetails - This method is used to return high-level information about a collection. Collection details include:
- Collection name
- Collection description
- Block number the collection was created in
- The hash of the transaction in which this contract was deployed
- The total supply of the collection
- The circulating supply of the collection
- The type of NFT (i.e., at the time of this writing, this method supports ERC-721 and ERC-1155 standards)
qn_fetchNFTs - This method returns aggregated data on NFTs for a given wallet address. Response fields include:
- The name of this specific NFT
- The token ID of an NFT in its collection
- The name of an NFT's collection
- The different attributes of an NFT
- The specific value associated with each trait of the NFT which can be present in the form of text, numbers, or even images, depending on the type of NFT
- The type of trait associated with each NFT. It includes attributes like the color, rarity, or any other defining characteristic that sets the NFT apart from others in its collection
- The URL where the image for an NFT can be seen
- The contract address that an NFT lives in
- It states on which chain this aggregation happened on
- It states on which network this aggregation happened on
- The description of the contract
qn_fetchNFTsByCollection - This method returns aggregated data on NFTs within a given collection. The response data includes an array of token objects, which we will find useful when building our NFT gallery. We will need the following fields for our frontend:
- The token ID for each NFT in the collection
- The name of the NFT collection
- The image URL associated with the NFT in the collection
- The traits of an NFT in the collection
All this data is aggregated by the NFT API; without it, we'd have to use multiple sources of data to compile what we need, which can be quite complex and cumbersome. Note that at the time of this writing, this method only supports ERC-721 contracts.
qn_getTransfersByNFT - This method returns transfers by a given NFTs token ID and collection address. Fields from this method include:
- The contract address we checked for NFTs
- An array of transfers representing NFTs with the following shape:
- The date when this transaction was mined
- The address for the sender of this transaction
- The address for the receiver of this transactionblockNumber
- The block number this transaction was included in
- The token transfer transaction hash
qn_verifyNFTsOwner - Last but not least, the qn_verifyNFTsOwner method allows one to verify if an address holds a particular NFT. How does it work? Well, you pass in a wallet address and an array of NFT addresses along with their token IDs. If the owner is verified, it will return an array of owned NFTs for the provided wallet. Even Twitter uses this feature to verify NFTs on their platform 🤯
To see the complete documentation, view our docs here.
Note - The NFT API is only supported on Ethereum mainnet and Solana at the time of this writing but will likely expand to more chains in the future.
Setting Up the React Project
Now that we are more familiar with QuickNode's NFT API, we can start building! In this section, we will create our React app and install the required dependencies.
First, let us create a project directory by running the following command:
npx create-react-app nft-gallery
Once our project directory is created, let us navigate inside it and install the required dependencies. We will be installing Ethers.js to make requests to our Ethereum node and will also use React and TailwindCSS to make our frontend look beautiful!
cd nft-gallery
npm install ethers@5.7.2
npx tailwindcss init -p
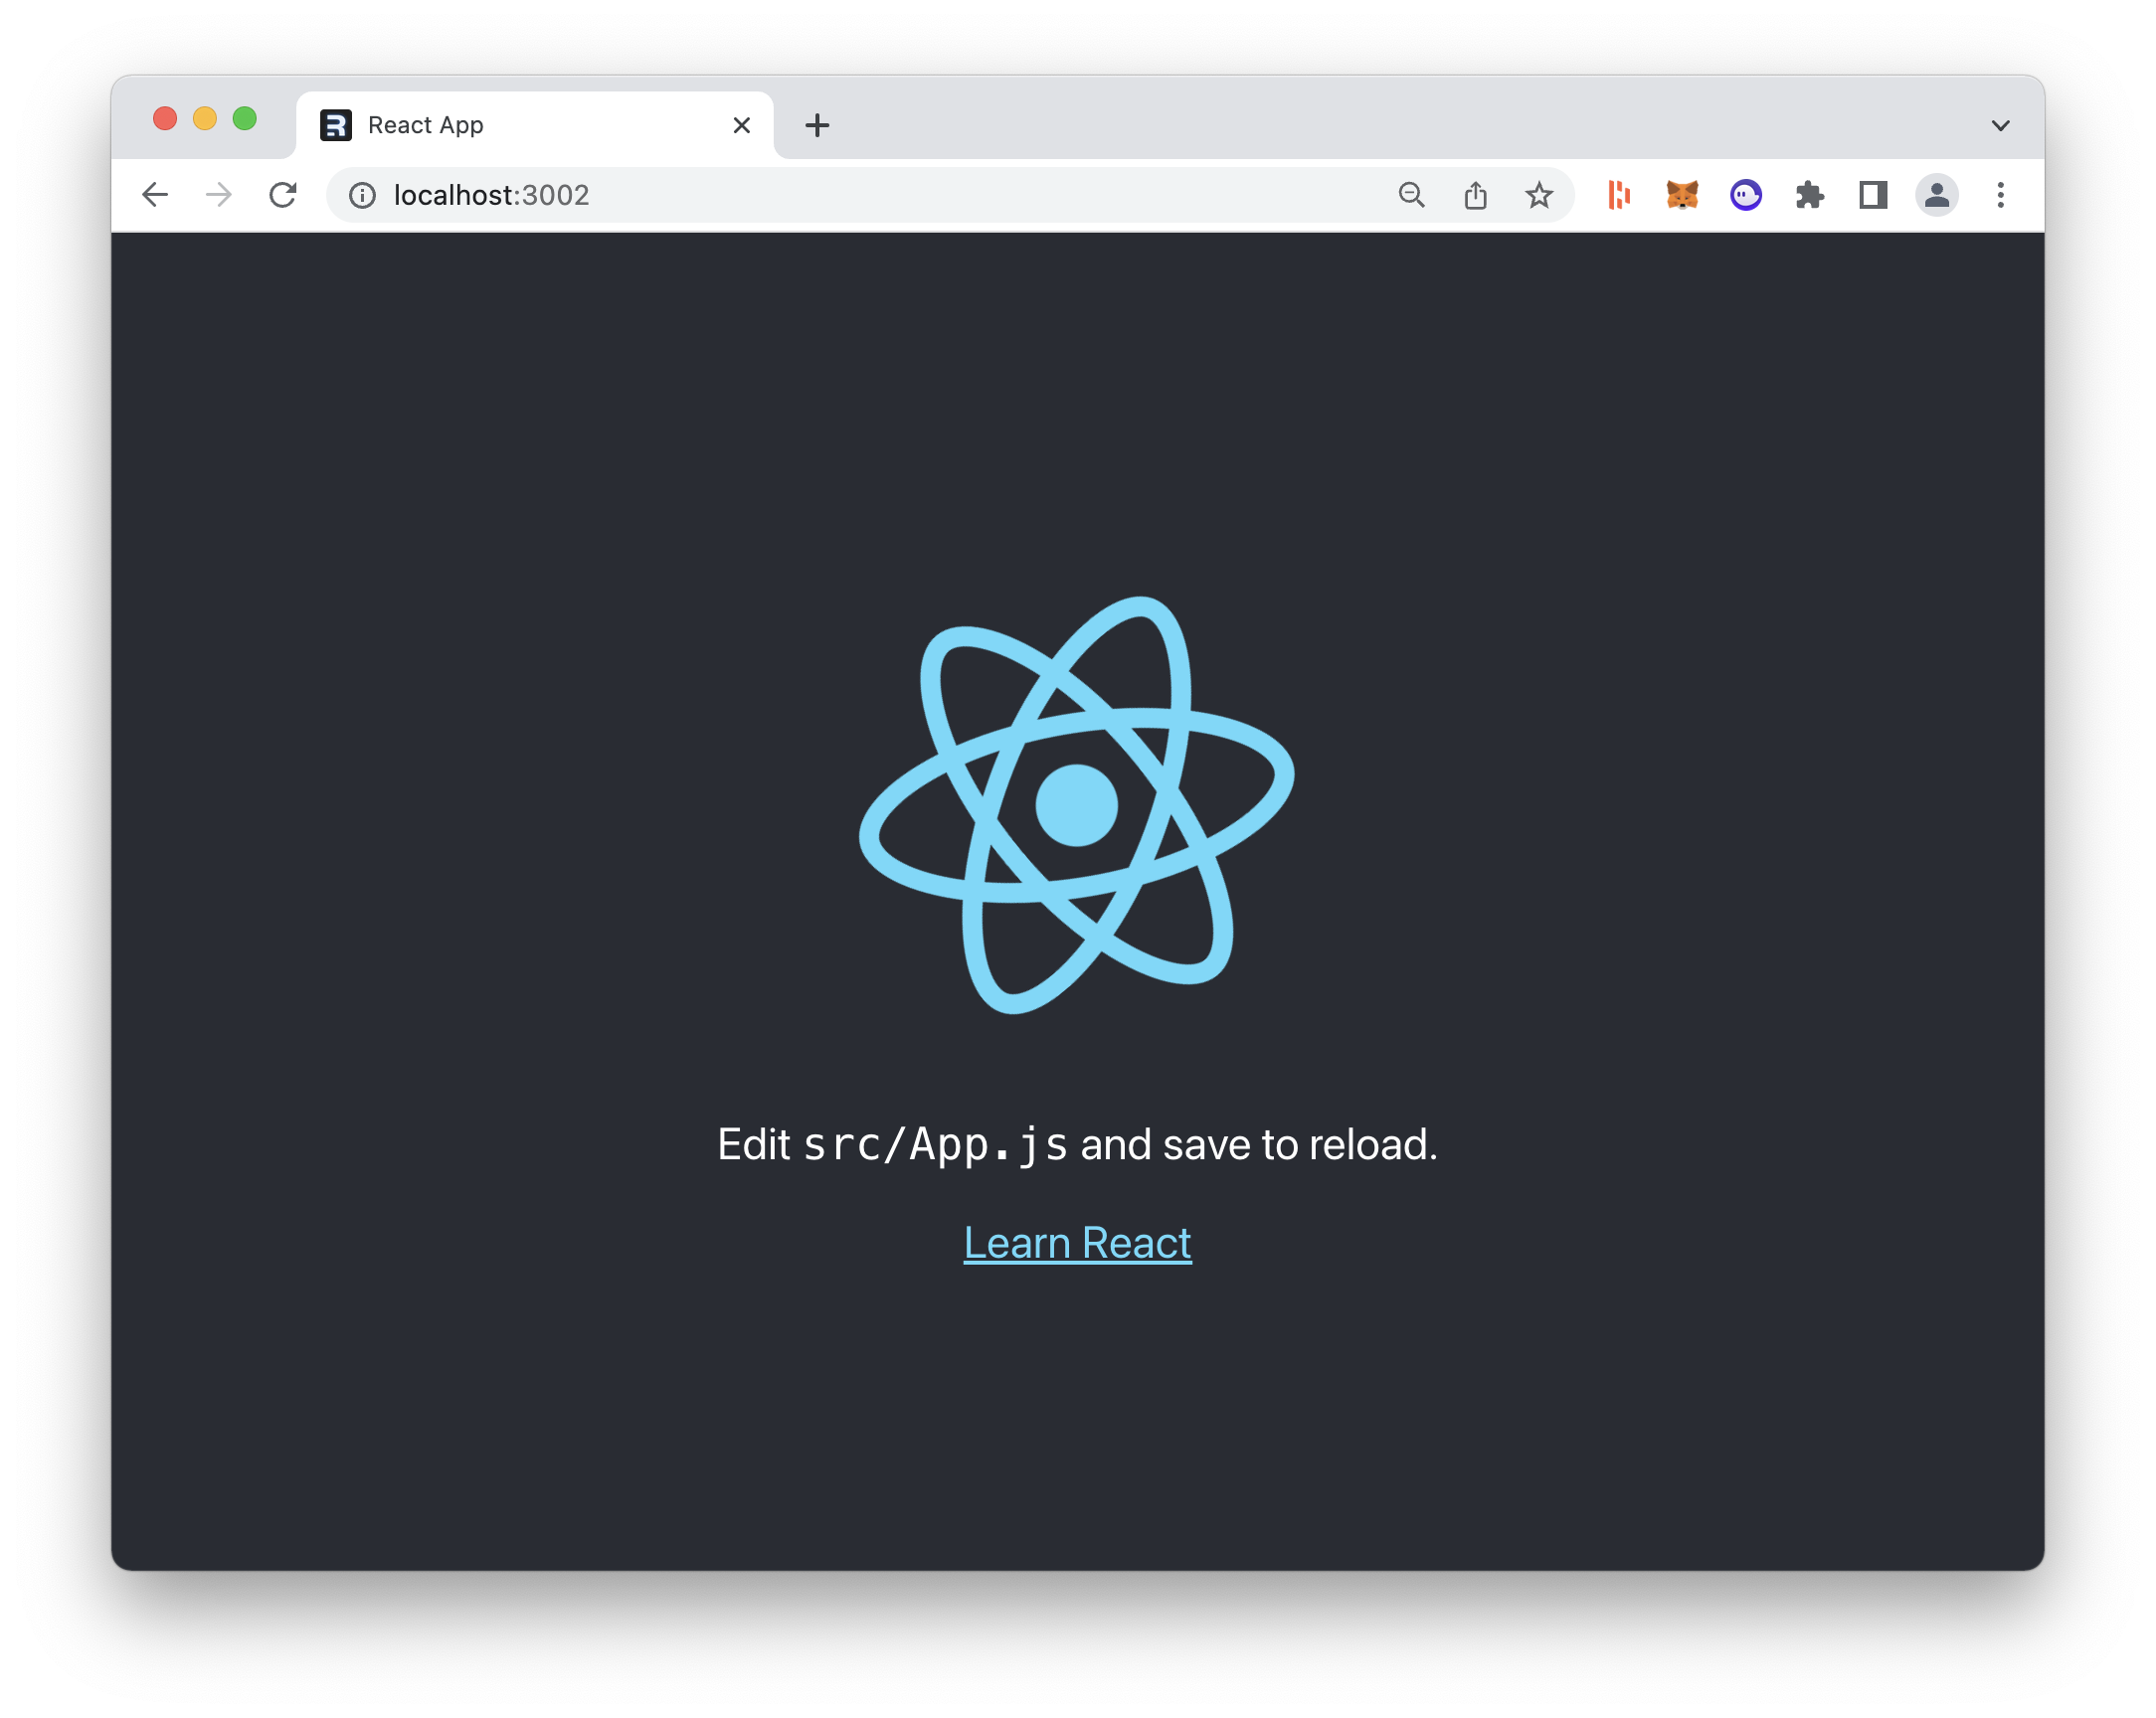
To test that everything is working up until this point, you can start the development server by running the command below:
npm start
When you navigate to the URL your server is running on, you should see the following:
Before moving onto booting our Ethereum node, let's open a code editor and replace the content in tailwind.config.js with the following code:
module.exports = {
  content: ["./src/**/*.{html,js}"],
  theme: {
    extend: {},
  },
  plugins: [],
}
You can now access Logs for your RPC endpoints, helping you troubleshoot issues more effectively. If you encounter an issue with your RPC calls, simply check the logs in your QuickNode dashboard to identify and resolve problems quickly. Learn more about log history limits on our pricing page.
Remember to save the file!
Setting Up an Ethereum Endpoint
Setting up your Ethereum node with the NFT API is quite easy. If you haven't signed up already, you can create an account here.
Once you have logged in, navigate to the Quicknode.com/endpoints page page and click Create an endpoint. Select Ethereum mainnet, then click Next. Then, you'll be prompted to configure add-on's. Note that the Token and NFT API v2 bundle is enabled on all plans by default. You can verify this by scrolling down and locating the add-on, ensuring it is activated. After, simply click Create Endpoint.
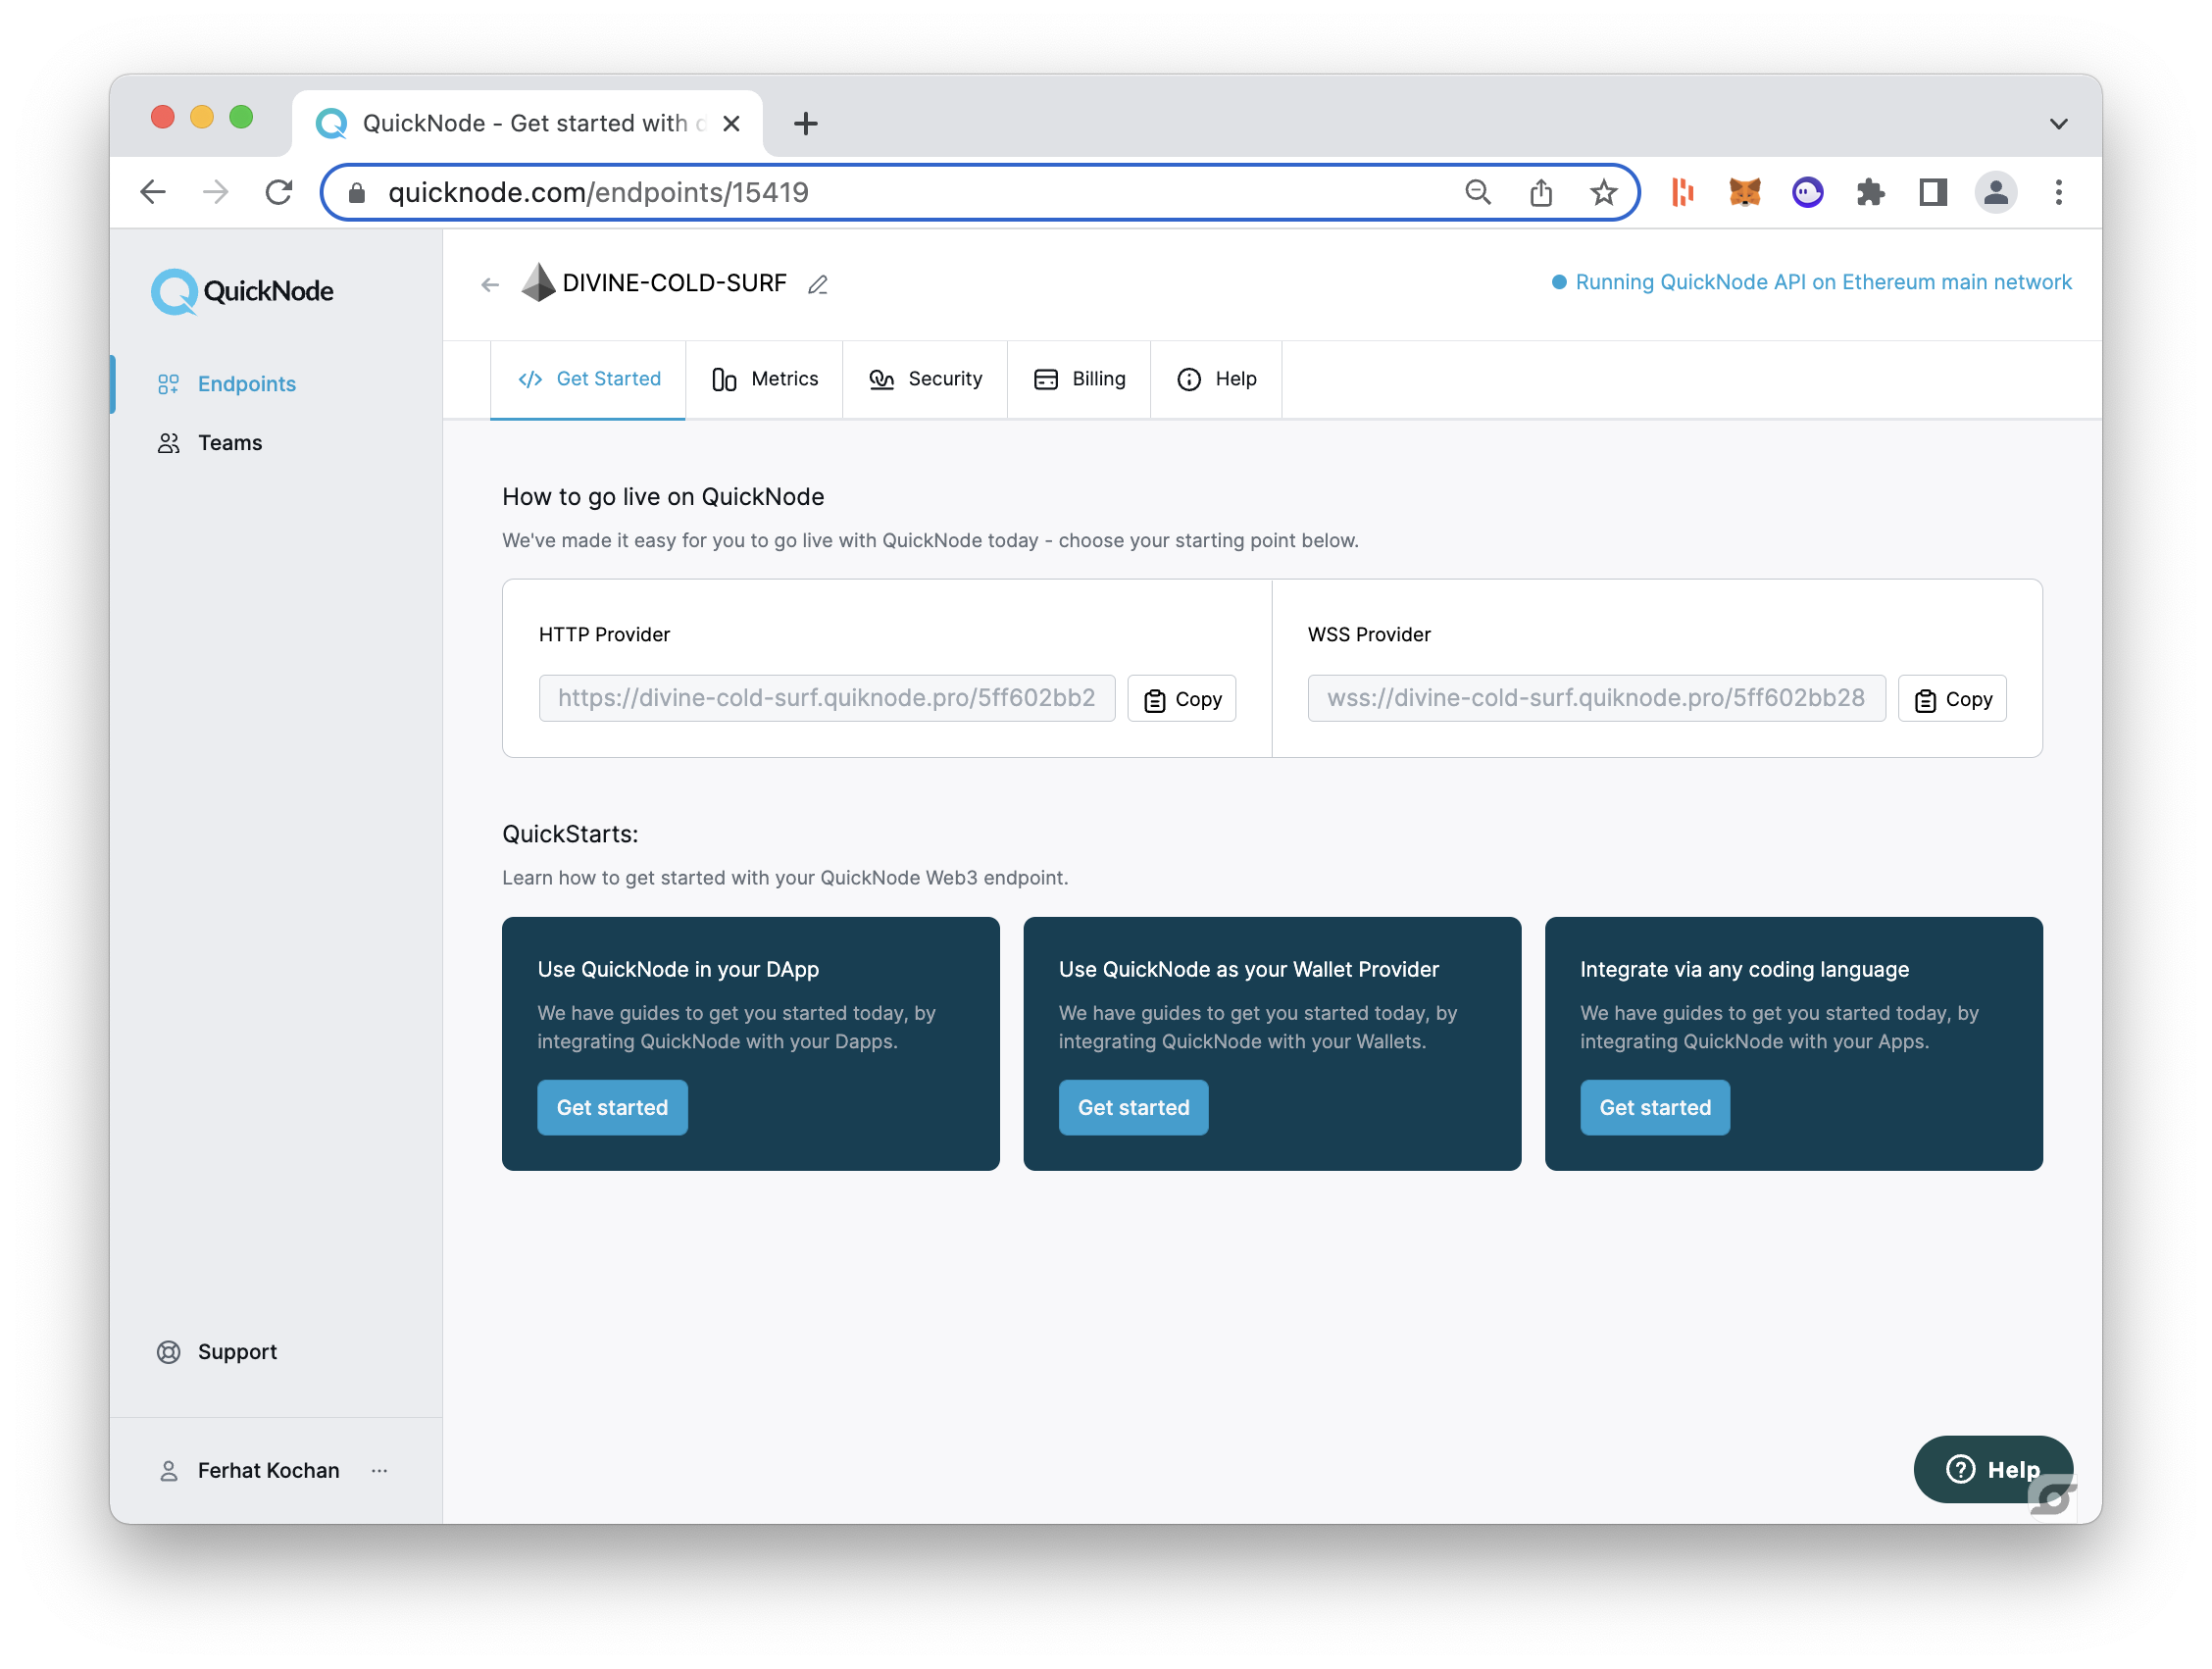
Once your endpoint is ready, copy the HTTP Provider link and keep it handy as you'll need it in the next section.
Building the NFT Gallery
Now that we have our Ethereum node and React project set up, it's time to get to building! We will open our project in the code editor of preference (mine is VScode) and then start building the functions we need to load and display NFT data on our frontend.
First, we will enable tailwind so our frontend looks pretty! Navigate to the src/Index.js file and input the following link element in between lines 9-10 (i.e, between the <React.StrictMode> & <App /> elements):
<link href="https://cdn.jsdelivr.net/npm/tailwindcss/dist/tailwind.min.css" rel="stylesheet" />
Then, we will replace the code in src/App.js with the following code:
//src/App.js
//Import libraries and components
import { useEffect, useState } from 'react';
import { ethers } from "ethers";
import NFTCard from './components/NFTCard';
import CollectionSearch from './components/CollectionSearch';


function App() {
  //State variables
  const [nfts, setNFTs] = useState([])
  const [isLoading, setIsLoading] = useState(true)
  const [address, setAddress] = useState('0xaAdBA140Ae5e4c8a9eF0Cc86EA3124b446e3E46A')

  //function to fetch nfts by collection
  const fetchCollection = async () => {
    const provider = new ethers.providers.JsonRpcProvider("<YOUR QUICKNODE HTTP ENDPOINT>");
    const collection = await provider.send("qn_fetchNFTsByCollection", [
      {
        collection: address,
        page: 1,
        perPage: 10,
      }
    ]);
    return collection
  }

  //useEffect renders every time address is set
  useEffect(() => {
    fetchCollection()
    .then(data => {
      setNFTs(data.tokens)
      setIsLoading(false)
      console.log(data)
    })
    .catch(err => setNFTs([]))
  }, [address]);


  //jsx containing our conditional rendering
  return (
    <div className='container mx-auto'>
      <CollectionSearch searchText={(text) => setAddress(text)} />
      {!isLoading && nfts.length === 0 && <h1 className='text-5xl text-center mx-auto mt-32'>No Collection Found</h1>}
      <div className='grid grid-cols-3 gap-4'>
        {nfts.map(token => <NFTCard key={token.name} nft={token} />)}
      </div>
    </div>
  );
}

export default App;
Remember to input your QuickNode HTTP URL in the provider variable above
Note: If you plan to publish your code publicly, we recommend using a .env file to store your QuickNode RPC endpoint to prevent it from being compromised.
So what does the code above do?
Starting from the top to bottom, we will first import the required libraries and components. Next, we will create three useState variables that we'll need when fetching data from the NFT API. The nfts state variable will hold the array of NFT data (i.e., name, token ID, collection name, traits, and transaction history). The other two useState variables will track the loading state and the address the user searches for. For convenience, we will set a default address in our state variable address (e.g., 0xaAdBA140Ae5e4c8a9eF0Cc86EA3124b446e3E46A).
We also created a fetchCollection function that uses Ethers.js to request data from the NFT API (specifically the qn_fetchNFTsByCollection method). Our request includes the collection address (i.e., collection), the page number we would like returned (i.e., page), and the number of NFTs we would like returned on each page (i.e., perPage). In this example, we set the perPage value to 10, but feel free to modify this number. Note, you can request up to 100 items per page (if this field is omitted, the default is set to 40 items per page). Additionally, the useEffect function will run our fetchCollection() function every time we set a new value in the address state variable, along with printing the data in the console.
In the return() call (which contains our JSX), we first input our CollectionSearch component. This component contains our search form and its associated event handling. Our logic is, if the search is valid, we will map over each NFT in the response and map it into our NFTCard component. A No Collection Found banner will show on the page if the search returns an error.
Moving forward, we will create a new folder under the src directory called components. Once our components folder is created, we will make a new file inside it called CollectionSearch.js and input the following code:
//src/components/CollectionSearch.js
import React, { useState } from 'react';

//component containing our form, button and state handling logic
const CollectionSearch = ({ searchText }) => {
    const [text, setText] = useState('');

//form event handling logic - sets our state variable text
const handleSubmit = (e) => {
        e.preventDefault();
        searchText(text);
}

//jsx containing our form and button - enhanced with tailwindcss
return (
        <div className='max-w-sm rounded overflow-hidden my-10 mx-auto'>
            <form onSubmit={handleSubmit} className="w-full max-w-sm">
                <div className="flex items-center border-b-2 border-purple-500 py-2">
                    <input onChange={e => setText(e.target.value)} className="appearance-none bg-transparent border-none w-full text-gray-700 mr-3 py-1 px-2 leading-tight focus:outline-none" type="text" placeholder="Search Collection Address" />
                    <button className="flex-shrink-0 bg-purple-500 hover:bg-purple-700 border-purple-500 hover:border-purple-700 text-sm border-4 text-white py-1 px-2 rounded" type="submit">
                        Search
                    </button>
                </div>
            </form>
        </div>
    )
}

export default CollectionSearch;
The code above does a few things; it will create the form and button element users will use to search for different collections. It will also keep track of the latest search.
Lastly, we will need to create another component to render our NFTs and associated metadata. Create a file in the components called NFTCard.js, then input the following code:
//src/components/NFTCard.js
import React from 'react';

//component that takes an nft object and maps it to corresponding elements
const NFTCard = ({nft}) => {
    return (
        <div className='max-w-lg rounded overflow-hidden shadow-lg'>
            <img src={nft.imageUrl} alt="" className='w-full' />
            <div className='px-4 py-4'>
                <div className='font-bold text-teal-600 text-xl mb-2'>{nft.name}</div>
                <ul>
                    <li>Collection Name: <strong>{nft.collectionName}</strong></li>
                </ul>
            </div>
            <div className='px-6 py-4'>
                {nft.traits?.map((trait, index) => (
                <span key={index} className="inline-block bg-gray-200
                 rounded-full px-3 py-2 text-sm font-semibold text-gray-700 mr-2">{trait['trait_type']}:{trait.value}
                </span>))}
                <div>
                </div>
            </div>
        </div>
    )
}

export default NFTCard;
The code above returns an NFTCard component that will take an image input and map the data to the card element.
At this point, if you are following all the instructions correctly, your frontend should look like this:
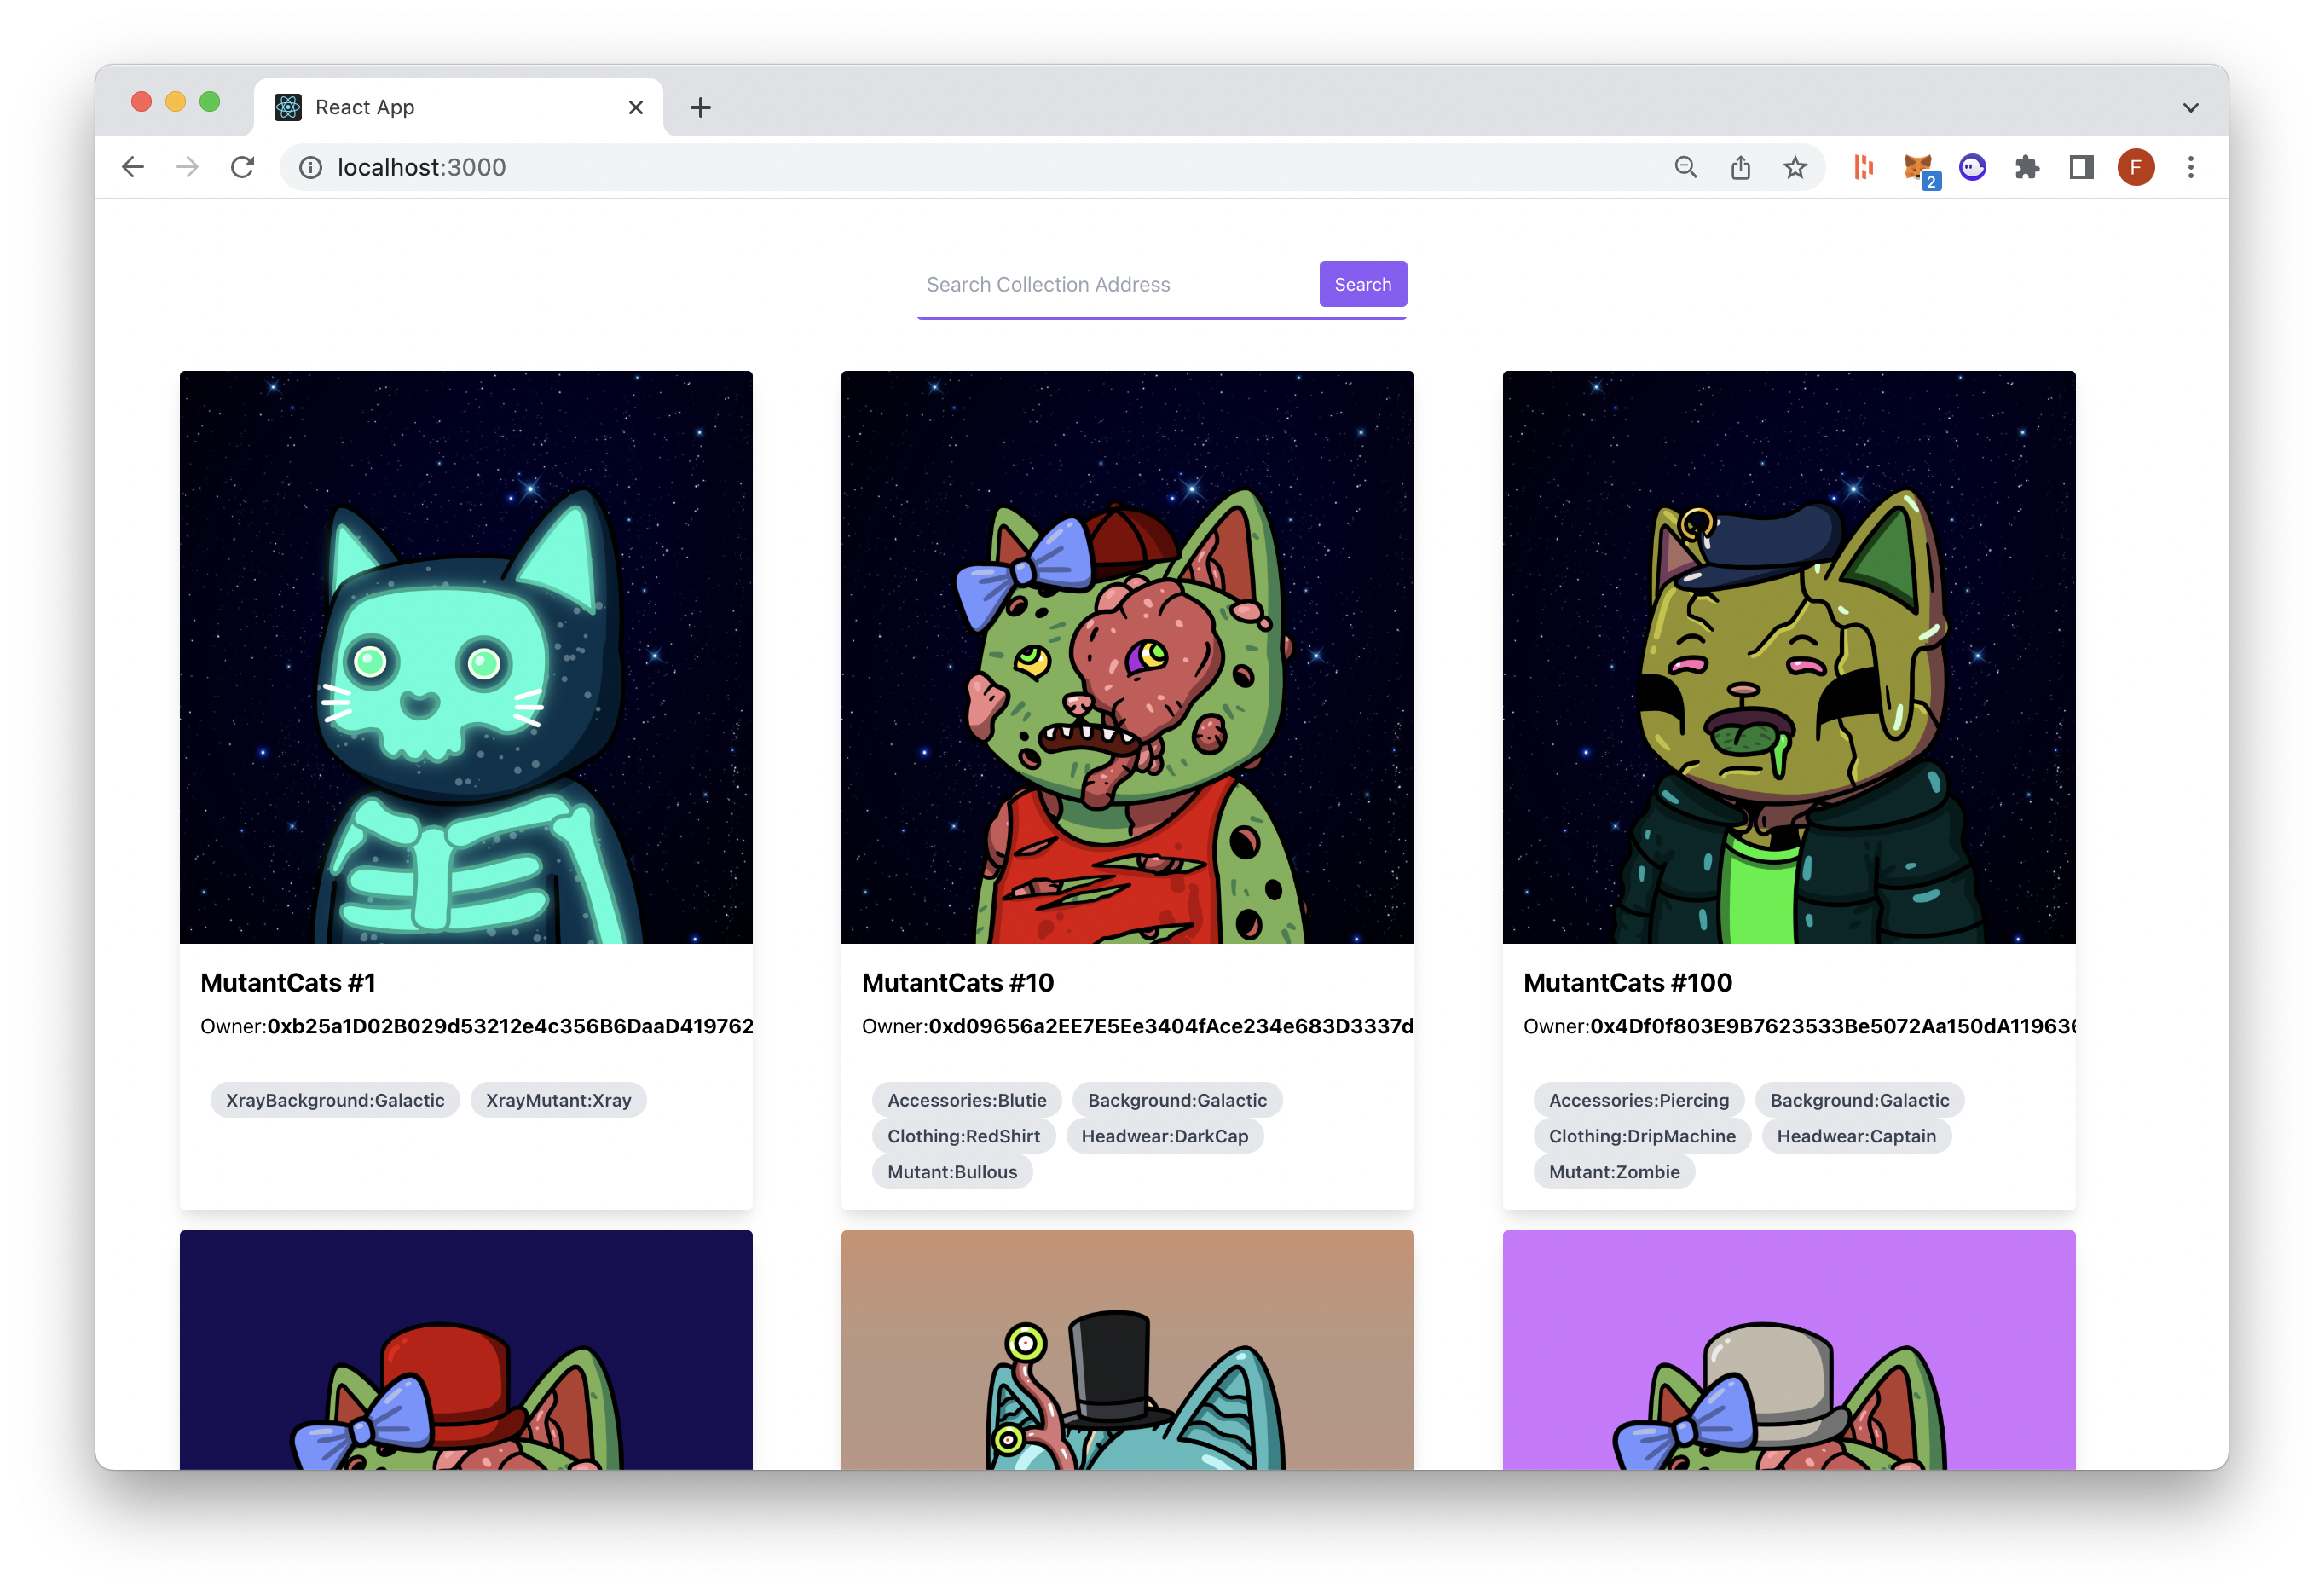
Here are some additional contract addresses you can use to test your new NFT Gallery!
- 0x2106C00Ac7dA0A3430aE667879139E832307AeAa (Loopy Donuts)
- 0xBC4CA0EdA7647A8aB7C2061c2E118A18a936f13D (Bored Ape Yatch Club)
- 0x7Bd29408f11D2bFC23c34f18275bBf23bB716Bc7 (Meebits)
Next Steps
If you want to build on top of this guide, here are some additional features you can implement on your frontend to improve the user experience:
- Add pagination so users can see the complete NFT collection
- Add a Modal window for viewing transaction history
Conclusion
Congratulations! You have learned how to query data from QuickNode's NFT API and display it on your React app! To continue building on your new skills and knowledge, check out our collection of guides here.
We ❤️ Feedback!
If you have any feedback or questions on this guide, feel free to reach out to us via Twitter or our Discord community server. We’d love to hear from you!