21 min read
As of August, 2023, the Clockwork team has announced they will no longer be supporting the Clockwork platform. This guide is for historic educational purposes only and will not be updated.
Overview
Clockwork is an automation primitive built on top of Solana. It allows you to create event-based triggers that execute Solana program instructions. This is useful for a variety of use cases, such as scheduling a transaction to be executed at a specific interval (e.g., to automate something like dollar-cost-averaging) or scheduling a transaction to be executed after a certain on-chain event has occurred (e.g., to automate something like distributions after an account balance exceeds a certain level). In this guide, we will explore what Clockwork is and how to use it to automate a simple Solana program.
What You Will Do
In this guide, you will learn how to use the Clockwork SDK to automate processes on Solana. You will:
- Learn the Basics of the Clockwork protocol
- Build a simple Solana program that has an instruction that is triggered by a Clockwork event
- Test the program on Solana's devnet
What You Will Need
Experience requirements:
- Experience with Solana Programming using Anchor (Complete our Counter Program Guide)
- Basic knowledge of Solana Fundamentals
- Basic JavaScript and Rust experience
Please make sure you have installed the required dependencies before proceeding:
- Solana CLI latest version installed
- Node.js (version 16.15 or higher) installed
- Devnet SOL (~ 3 SOL will be required to deploy the program to Devnet). Check out our Guide on Airdropping Devnet SOL.
- (optional for local deployment) Clockwork CLI
Dependencies Used in this Guide
| Dependency | Version |
|---|---|
| anchor-lang | 0.27.0 |
| solana-program | 1.75.0 |
| @project-serum/anchor | 0.26.0 |
| clockwork-sdk | 2.0.15 |
What is Clockwork?
Clockwork is an open-source tool built for Solana that allows you to automate your on-chain program execution without relying on a central server. Clockwork is a Solana geyser plug-in that is installed in a validator or RPC node. The plug-in is responsible for listening to triggers defined by user-defined Clockwork threads.
- Threads are on-chain accounts each containing a trigger, a set of instructions, and a solana balance used to pay for the execution of the instructions.
- Triggers are user-defined events that execute the instructions in a thread. There are two primary types of triggers:
Threads can be created using the Clockwork SDK using TypeScript or in your on-chain program using the Rust Crate. This guide will use the latter to create a thread that executes a simple Solana program instruction. ⏰ Time to get started!
Initiate a New Anchor Project
Anchor is a popular development framework for building Programs on Solana. To get started, check out our Intro to Anchor Guide.
Create a new project directory in your terminal with the following:
mkdir clockwork-demo
cd clockwork-demo
Create a new Anchor project using the following command:
anchor init clockwork-demo
Because we are just testing how to update a program's authority, we will not change the default 'Initialize' program inside lib.rs.
Connect to a Solana Cluster with Your QuickNode Endpoint
To build on Solana, you'll need an API endpoint to connect with the network. You're welcome to use public nodes or deploy and manage your own infrastructure; however, if you'd like 8x faster response times, you can leave the heavy lifting to us.
See why over 50% of projects on Solana choose QuickNode and sign up for a free account here. We're going to use a Solana Devnet endpoint.
Copy the HTTP Provider link: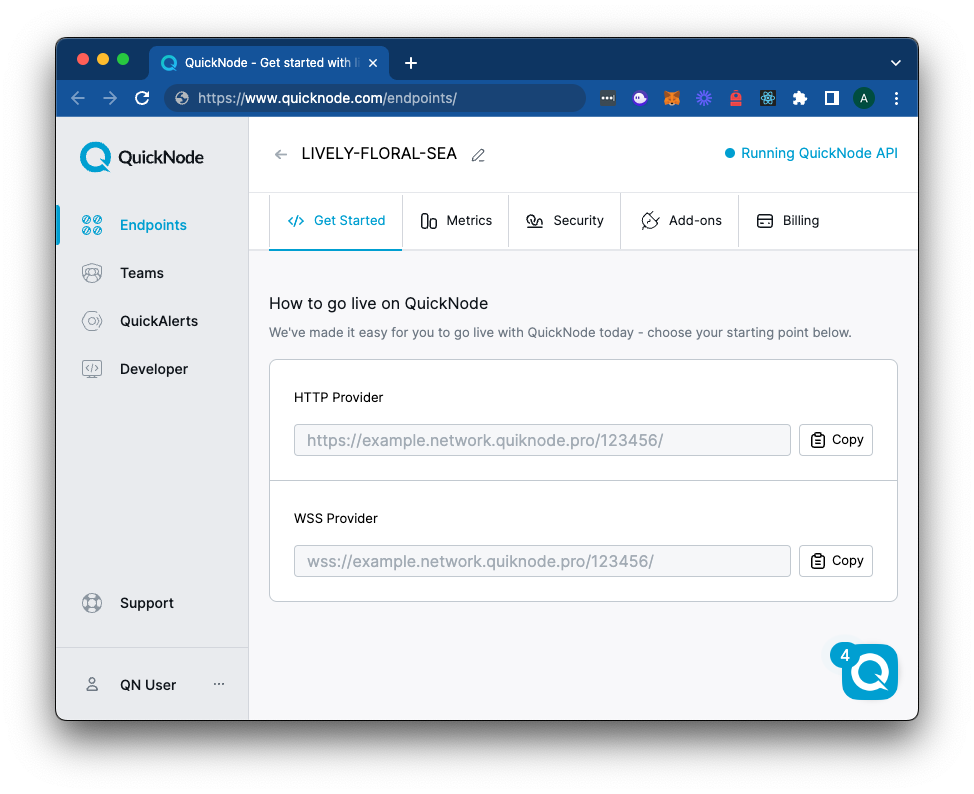
Update Program Config
Before deploying your program, we will need to update the program's config. Open the Anchor.toml file and update the provider.cluster field to your QuickNode endpoint.
[provider]
cluster = "https://example.solana-devnet.quiknode.pro/0123456/" # 👈 Replace with your QuickNode Devnet Endpoint
wallet = "~/.config/solana/id.json" # 👈 Replace with your wallet path
Double-check that the path to your wallet is correct. You can use any .json key (Check out our Guide on Creating Solana Vanity Addresses). You will need Devnet SOL in this wallet to deploy your program and run your tests. You can get some using the solana airdrop command or by using the tool below:
Also, in this same file, change [programs.localnet] to [programs.devnet]. We will come back here later to update the program ID.
Next, you'll need to navigate to programs/clockwork-demo/Cargo.toml and add the Clockwork SDK to your dependencies:
[dependencies]
anchor-lang = "0.27.0"
clockwork-sdk = { version = "2.0.15" }
Now that everything is set up let's build your program.
Create Your Program
Import Dependencies
Open the programs/clockwork-demo/src/lib.rs file and add the following dependencies to the top of your file:
use anchor_lang::prelude::*;
use anchor_lang::solana_program::{
    instruction::Instruction, native_token::LAMPORTS_PER_SOL, system_program,
};
use anchor_lang::InstructionData;
use clockwork_sdk::state::Thread;
This will allow us to use the Clockwork SDK and the Solana System Program.
Create Program Framework
Below your imports, you should have this boilerplate code from Anchor. We are going to add a new function that will be used to toggle an on-chain switch (toggle_switch) and a response function that will respond to our thread's triggers by logging a message to the program logs.
Create both functions and corresponding structs such that your code looks like this:
declare_id!("Fg6PaFpoGXkYsidMpWTK6W2BeZ7FEfcYkg476zPFsLnS");

#[program]
pub mod clockwork_demo {
    use super::*;
    pub fn initialize(ctx: Context<Initialize>) -> Result<()> {
        // TODO initialize switch
        // TODO initialize thread
        Ok(())
    }
    pub fn toggle_switch(ctx: Context<ToggleSwitch>) -> Result<()> {
        // TODO toggle switch
        Ok(())
    }
    pub fn response(ctx: Context<Response>) -> Result<()> {
        // TODO log message
        Ok(())
    }
}

#[derive(Accounts)]
pub struct Initialize {}

#[derive(Accounts)]
pub struct ToggleSwitch {}

#[derive(Accounts)]
pub struct Response {}

#[account]
pub struct Switch {
    pub switch_state: bool,
}

pub const SWITCH_SEED: &[u8] = b"switch";

pub const THREAD_AUTHORITY_SEED: &[u8] = b"authority";
None of this does anything yet, but we will use this as the framework for our program. Note that we have defined a Switch account type and two seeds that we will use to derive PDAs for our thread authority and switch PDAs. We will use these later.
Define Response Instruction
It can be helpful to start from the end and work backward. Let's start by defining our response instruction. When triggered, our thread will call this instruction and log a message to the program logs. For the thread to call this instruction, we must pass the thread and its authority in the context. Let's update our Response struct:
#[derive(Accounts)]
pub struct Response<'info>  {
    #[account(signer, constraint = thread.authority.eq(&thread_authority.key()))]
    pub thread: Account<'info, Thread>,

    #[account(seeds = [THREAD_AUTHORITY_SEED], bump)]
    pub thread_authority: SystemAccount<'info>,
}
Because our response is not performing any actions that require any accounts, we just need to pass the thread and its authority to authorize the transaction:
thread: The thread that is calling the response instruction (passed in as a signer, note that we use theconstraintfield to ensure that the thread's authority is equal to the thread authority derived from the seed)thread_authority: The thread authority derived from the seed.
And let's add a log message to our response function:
    pub fn response(_ctx: Context<Response>) -> Result<()> {
        msg!("Response to trigger at {}", Clock::get().unwrap().unix_timestamp);
        Ok(())
    }
We simply use the Solana program Clock to get and log the current unix timestamp.
Since we are not using the context, we can use _ctx to avoid a compiler warning.
Define Toggle Switch Instruction
Next, let's define our toggle_switch instruction that will toggle our switch's state. This instruction will be called by a payer to toggle the switch on or off. Our thread will monitor the state of the switch and execute our response to it when it changes. Let's first update our ToggleSwitch struct:
#[derive(Accounts)]
pub struct ToggleSwitch<'info> {
    #[account(mut, seeds = [SWITCH_SEED], bump)]
    pub switch: Account<'info, Switch>,

    #[account(mut)]
    pub payer: Signer<'info>,
}
What we have here is:
switch: The switch account that we are toggling (passed in as mutable; note that we useSWITCH_SEEDto derive our PDA)payer: The user's wallet address (passed in as a signer) that will pay for the transaction
Now let's update our toggle_switch function to toggle the switch on or off depending on its current state:
    pub fn toggle_switch(ctx: Context<ToggleSwitch>) -> Result<()> {
        let switch = &mut ctx.accounts.switch;
        switch.switch_state = !switch.switch_state;
        Ok(())
    }
This very simple function simply toggles the state of our switch to the opposite of its current state.
Initialize Thread and Switch
Let's start by creating our Initialize struct. Replace the existing, empty struct with the following:
#[derive(Accounts)]
#[instruction(thread_id: Vec<u8>)]
pub struct Initialize<'info> {
    #[account(
        init,
        payer = payer,
        seeds = [SWITCH_SEED],
        bump,
        space = 8 + 1 // 8 bytes for discriminator, 1 byte for bool
    )]
    pub switch: Account<'info, Switch>,

    #[account(mut)]
    pub payer: Signer<'info>,

    #[account(address = system_program::ID)]
    pub system_program: Program<'info, System>,

    #[account(address = clockwork_sdk::ID)]
    pub clockwork_program: Program<'info, clockwork_sdk::ThreadProgram>,

    #[account(mut, address = Thread::pubkey(thread_authority.key(), thread_id))]
    pub thread: SystemAccount<'info>,

    #[account(seeds = [THREAD_AUTHORITY_SEED], bump)]
    pub thread_authority: SystemAccount<'info>,
}
Our Initialize context struct will take in a thread_id (a unique identifier for the thread) as an argument and be comprised of six accounts:
switch: The Switch account that we will initialize with 9 bytes of data for our discriminator and switch state.payer: The signer who will pay to initialize the accounts.system_program: The Solana System Program to create the Switch account.clockwork_program: The Clockwork Thread Program to create the Thread account.thread: The Thread account that we will create.thread_authority: The PDA that owns and manages the Thread account.
Let's put them to use. Replace the initialize function with the following:
    pub fn initialize(ctx: Context<Initialize>, thread_id: Vec<u8>) -> Result<()> {
        // 1 - Get accounts
        let switch = &mut ctx.accounts.switch;
        let payer = &ctx.accounts.payer;
        let system_program = &ctx.accounts.system_program;
        let clockwork_program = &ctx.accounts.clockwork_program;
        let thread: &SystemAccount = &ctx.accounts.thread;
        let thread_authority = &ctx.accounts.thread_authority;

        // 2 - Prepare an instruction to be automated
        let toggle_ix = Instruction {
            program_id: ID,
            accounts: crate::accounts::Response {
                thread: thread.key(),
                thread_authority: thread_authority.key(),
            }
            .to_account_metas(Some(true)),
            data: crate::instruction::Response {}.data(),
        };

        // 3a - Define an account trigger to execute on switch change
        let account_trigger = clockwork_sdk::state::Trigger::Account {
            address: switch.key(),
            offset: 8, // offset of the switch state (the discriminator is 8 bytes)
            size: 1,   // size of the switch state (1 byte)
        };
        // 3b - Define a cron trigger for the thread (every 10 secs)
        let _cron_trigger = clockwork_sdk::state::Trigger::Cron {
            schedule: "*/10 * * * * * *".into(),
            skippable: true,
        };

        // 4 - Create thread via CPI
        let bump = *ctx.bumps.get("thread_authority").unwrap();
        clockwork_sdk::cpi::thread_create(
            CpiContext::new_with_signer(
                clockwork_program.to_account_info(),
                clockwork_sdk::cpi::ThreadCreate {
                    payer: payer.to_account_info(),
                    system_program: system_program.to_account_info(),
                    thread: thread.to_account_info(),
                    authority: thread_authority.to_account_info(),
                },
                &[&[THREAD_AUTHORITY_SEED, &[bump]]],
            ),
            LAMPORTS_PER_SOL/100 as u64,    // amount
            thread_id,                      // id
            vec![toggle_ix.into()],         // instructions
            account_trigger,                // trigger
        )?;

        // 5 - Initialize switch
        switch.switch_state = true;

        Ok(())
    }
A lot is going on here, so let's break it down.
- We get all the accounts we need to initialize our Switch and Thread accounts.
- We prepare an instruction to be automated. This instruction will be executed by the Thread account when the Switch account changes. It will call the
responsefunction on our program. This may look strange if you have yet to do much building on Solana. It's just important to understand that the instruction is defined by passing three key components: the program ID, the accounts that the instruction will use, and the data that the instruction will pass to the program (in this case, there's no data required). - We are defining two triggers to practice, though you can only use one for any thread you create. The first is an account trigger that will execute the instruction we just defined when the Switch account changes (we specify for the trigger to look at that specific account at the particular byte(s) we want to track--in this case, the
switch_statebool). The second is a cron trigger that will execute the instruction every 10 seconds. - We create a Cross Program Invocation (CPI) to the Clockwork Thread Program to create the Thread account.
- First, we fetch the bump for the Thread account authority using
ctx.bumps.get("thread_authority").unwrap(). - Next, we define our
CpiContext::new_with_signerto include theclockwork_program, our required accounts (thepayer,system_program,thread, andauthority), and the seeds for the thread_authority, which will sign the transaction. - Finally, we pass the required data for a new thread:
- the number of lamports (amount) to seed the thread (this will be used to cover the transaction and clockwork costs and need to be topped up for the thread to run continuously)
- the id of the thread (which we pass in as an argument to the
initializefunction) - the instruction(s) to execute when the thread is triggered (in this case, just the Response we defined above)
- the trigger(s) to execute the instruction(s) (in this case, just the Account trigger we defined above), but you can modify this later to try the cron trigger.
- First, we fetch the bump for the Thread account authority using
- Finally, we set the
switch_statetotrueto initialize the Switch account.
Whew! Great work. Now let's build and deploy our program!
Build and Deploy
Build the Program
Let's build our program by running the following command in your terminal:
anchor build
After a couple of minutes, you should see something like this:
   Compiling clockwork-demo v0.1.0
    Finished release [optimized] target(s) in 3.08s
If you get any errors, follow the console's instructions to debug or revisit the instructions above. If you get stuck, feel free to contact us on Discord - we're here to help!
Before we deploy the program, we need to update our program ID in lib.rs and Anchor.toml. You can find the program ID by running the following command in your terminal:
anchor keys list
Copy the key from your terminal and add it to lib.rs and Anchor.toml. In lib.rs, update the declare_id field:
declare_id!("YOUR_PROGRAM_ID_HERE");
In Anchor.toml, update the id field:
[programs.devnet] # Make sure you're using devnet
test = "YOUR_PROGRAM_ID_HERE"
After you have updated your program addresses, go ahead and build your program one more time to update those program addresses:
anchor build
Great. You should be all set to deploy your program! Let's do it.
Deploy the Program
Let's deploy our program to the Solana devnet by running the following command in your terminal:
anchor deploy
You should see a successful deployment:
Deploying program "test"...
Program path: ../clockwork/clockwork-demo/target/deploy/test.so...
Program Id: 9jA8jEj1opkV2zFryS6tK1jrGLdmVwtUp86TFc7Frtzs

Deploy success
Create Tests
Now that our program is deployed, let's create some tests to ensure everything is working as expected. First, let's install the Clockwork TS SDK. In your terminal, run the following command:
npm install @clockwork-xyz/sdk # or yarn add @clockwork-xyz/sdk
Next, let's create a new file called clockwork-demo.ts in the programs/clockwork-demo/tests directory. In this file, we will create a test that will initialize our Switch account and a Thread account:
import { assert } from "chai";
import * as anchor from "@project-serum/anchor";
import { ClockWorkDemo } from "../target/types/clockwork_demo";
import { ClockworkProvider } from "@clockwork-xyz/sdk";
const { LAMPORTS_PER_SOL, PublicKey, SystemProgram, TransactionConfirmationStatus, SignatureStatus, Connection, TransactionSignature } = anchor.web3;

async function confirmTransaction(
    connection: Connection,
    signature: TransactionSignature,
    desiredConfirmationStatus: TransactionConfirmationStatus = 'confirmed',
    timeout: number = 30000,
    pollInterval: number = 1000,
    searchTransactionHistory: boolean = false
): Promise<SignatureStatus> {
    const start = Date.now();

    while (Date.now() - start < timeout) {
        const { value: statuses } = await connection.getSignatureStatuses([signature], { searchTransactionHistory });

        if (!statuses || statuses.length === 0) {
            throw new Error('Failed to get signature status');
        }

        const status = statuses[0];

        if (status === null) {
            await new Promise(resolve => setTimeout(resolve, pollInterval));
            continue;
        }

        if (status.err) {
            throw new Error(`Transaction failed: ${JSON.stringify(status.err)}`);
        }

        if (status.confirmationStatus && status.confirmationStatus === desiredConfirmationStatus) {
            return status;
        }

        if (status.confirmationStatus === 'finalized') {
            return status;
        }

        await new Promise(resolve => setTimeout(resolve, pollInterval));
    }

    throw new Error(`Transaction confirmation timeout after ${timeout}ms`);
}

describe("Clockwork Demo", async () => {
  // Configure Anchor and Clockwork providers
  anchor.setProvider(anchor.AnchorProvider.local());
  const program = await anchor.workspace.ClockWorkDemo as anchor.Program<ClockWorkDemo>;
  const { connection } = program.provider;
  const provider = anchor.AnchorProvider.local();
  const payer = provider.wallet.publicKey;
  anchor.setProvider(provider);
  const clockworkProvider = ClockworkProvider.fromAnchorProvider(provider);

  console.log("Initiating tests for program:", program.programId.toBase58());
  console.log(`https://explorer.solana.com/address/${program.programId.toBase58()}?cluster=devnet`);

  // Generate PDAs
  const [switchPda] = PublicKey.findProgramAddressSync(
    [anchor.utils.bytes.utf8.encode("switch")], // 👈 make sure it matches on the prog side
    program.programId
  );
  const threadId = "thread-test-"+ new Date().getTime() / 1000;
  const [threadAuthority] = PublicKey.findProgramAddressSync(
    [anchor.utils.bytes.utf8.encode("authority")], // 👈 make sure it matches on the prog side
    program.programId
  );
  const [threadAddress, threadBump] = clockworkProvider.getThreadPDA(threadAuthority, threadId);

  // Fund the payer
  beforeEach(async () => {
    await connection.requestAirdrop(payer, LAMPORTS_PER_SOL * 100);
  });
  it("Initiates thread and switch", async () => {
    try {
      // Generate and confirm initialize transaction
      const signature = await program.methods
        .initialize(Buffer.from(threadId))
        .accounts({
          payer,
          systemProgram: SystemProgram.programId,
          clockworkProgram: clockworkProvider.threadProgram.programId,
          thread: threadAddress,
          threadAuthority: threadAuthority,
          switch: switchPda,
        })
        .rpc();
      assert.ok(signature);
      let { lastValidBlockHeight, blockhash } = await connection.getLatestBlockhash('finalized');
      const confirmation = await confirmTransaction(connection, signature);
      assert.isNotOk(confirmation.err, "Transaction resulted in an error");

      // Check if thread and switch accounts were created
      const switchAccount = await program.account.switch.fetch(switchPda);
      assert.ok(switchAccount.switchState, "Switch state should be true");
    } catch (error) {
      assert.fail(`An error occurred: ${error.message}`);
    }
  });
  it("Toggles switch 5 times", async () => {
    let slot = 0;
    for (let i = 0; i < 5; i++) {
      try {
        // Generate and confirm Toggle
        const signature = await program.methods
          .toggleSwitch()
          .accounts({
            switch: switchPda,
            payer,
          })
          .rpc();
        assert.ok(signature);
        let { lastValidBlockHeight, blockhash } = await connection.getLatestBlockhash('finalized');
        const confirmation = await confirmTransaction(connection, signature);
        assert.isNotOk(confirmation.err, "Transaction resulted in an error");

        // Wait for 1 second before checking the thread
        await new Promise(resolve => setTimeout(resolve, 1000));

        // Check if the thread triggered
        const execContext = (await clockworkProvider.getThreadAccount(threadAddress)).execContext;
        if (execContext.lastExecAt) {
          console.log(`Loop ${i+1} Slot of last thread trigger: `, execContext.lastExecAt.toNumber());
          assert.ok(execContext.lastExecAt.toNumber() > slot, "Thread should have triggered");
          slot = execContext.lastExecAt.toNumber();
        }

        // Wait for 1 second before next toggle
        await new Promise(resolve => setTimeout(resolve, 1000));
      } catch (error) {
        assert.fail(`An error occurred: ${error.message}`);
      }
    }
  });
});
You can now access Logs for your RPC endpoints, helping you troubleshoot issues more effectively. If you encounter an issue with your RPC calls, simply check the logs in your QuickNode dashboard to identify and resolve problems quickly. Learn more about log history limits on our pricing page.
There's a lot going on here, so let's try and break it down:
- Import the necessary dependencies
- Configure the Anchor and Clockwork providers
- Generate the PDAs for the Switch and Thread accounts
- Fund the payer by calling
requestAirdrop - Create a test that will initialize the Switch and Thread accounts
- Generate and confirm the initialize transaction
- Check if the Switch account was created
- Create a test that will toggle the Switch account 5 times
- Generate and confirm the toggle transaction
- Check if the Thread account was triggered (after a brief delay)
- Wait for 1 second before toggling again
That final component effectively changes the state of the Switch account, which triggers the Thread account. We then check the thread's last execution time to ensure it was triggered. Pretty cool, right?
Now that we have our tests, let's run them! In your terminal, run the following command:
anchor test --skip-deploy --skip-build
We skip the build and deploy steps because we have already done that.
If your program is working correctly, you should see something like this:
Initiating tests for program: 9jA8jEj1opkV2zFryS6tK1jrGLdmVwtUp86TFc7Frtzs
https://explorer.solana.com/address/9jA8jEj1opkV2zFryS6tK1jrGLdmVwtUp86TFc7Frtzs?cluster=devnet


  ✔ Initiates thread and switch (141ms)
Loop 1 Slot of last thread trigger:  84
Loop 2 Slot of last thread trigger:  89
Loop 3 Slot of last thread trigger:  94
Loop 4 Slot of last thread trigger:  99
Loop 5 Slot of last thread trigger:  104
  ✔ Toggles switch 5 times (11981ms)

  2 passing (12s)

✨  Done in 13.05s.
Great job! In addition to seeing the successful tests in your terminal, you can also see them in the Solana Explorer (we logged a link to the program in the terminal).
Extra Credit - Cron Jobs
Want to keep going? Try changing your trigger from an account to a cron job. If you recall, in our program, lib.rs, we created an unused cron_trigger variable that sets a schedule to run every 10 seconds. Can you modify the program to use this trigger instead of the Switch account? Here are some tips on how to make it happen:
- Remove the
_fromlet _cron_trigger = ...inlib.rsand call it in your CPI (instead ofaccount_trigger). - Rebuild and redeploy your program.
- Update your tests to use the new trigger - instead of toggling the Switch account, you'll need to wait for the cron job to trigger the Thread account.
If you run into issues, check out this example repo from the Clockwork team.
Time's Up!
Great work. You have just created a program that can be executed automatically by an account change or a cron job. You can now use this program to build a variety of applications, including:
- automated DeFi
- advanced gaming
- analytics tooling
- payments & subscriptions
- and more!
If you're stuck, have questions, or just want to talk shop, drop us a line on Discord or Twitter!
We ❤️ Feedback!
If you have any feedback on this guide, let us know. We'd love to hear from you.