6 min read
Overview
While Ethereum has been trying to scale, it has encountered some gas price issues. Many layer 2 solutions and sidechains sprang into existence to solve this problem, but Ethereum is the main chain, and at some point, it has to be improved. EIP-1559 was introduced to reduce the volatility of gas prices on-chain. In this guide, we will learn how to send an EIP-1559 transaction using ethers.js.
Prerequisites
- An Ethereum Sepolia Endpoint (you can create a free account here)
- Ethereum wallet (e.g., MetaMask)
- Node.js installed
- Code editor and CLI.
- Water, because water is important.
| Dependency | Version |
|---|---|
| node.js | v18.13.0 |
| ethers.js | 5.7 |
What is EIP-1559?
EIP stands for Ethereum Improvement Proposals, which defines the standards around Ethereum protocol. Anyone can propose EIPs as Ethereum is open source. Later these EIPs can integrate into the core protocol after going through an approval process.
Before EIP-1559, the transactions with a lesser gas fee on the Ethereum chain often remained pending for a long time because the blocks are always filled with the highest paying transactions. To eliminate this, EIP-1559 introduced a more sophisticated and fair system of gas fees with a base fee per block and a tip for the miner. The base fee makes sure that the transactions get included in the blocks, and the tip is to reward the miners. With EIP-1559, the gas limit of the blocks doubled. A 100% full block pre EIP-1559 is only 50% full post EIP-1559, which means there is more room for additional transactions.
Now let us understand the new variables/mechanics of gas after 1559:
-
baseFeePerGas: This is the base fee per gas generated with every block header by the protocol. baseFeePerGas requires the minimum multiplier for the gasUsed attribute for a transaction to be added to a block. For example, the gas for your transaction will be baseFeePerGas*gasUsed. This is the part of the transaction fee that is burned in every block. Each block's baseFeePerGas can increase or decrease by 12.5% depending on how full the block is compared to the previous block. For example, if 100% full then baseFeePerGas goes +12.5%, if 50% full then it remains the same, if 0% full then -12.5%.
-
maxPriorityFeePerGas: Set by user. This is the part of the gas that goes to miners. Users can pay a premium for a high-priority transaction using this variable. Whenever a block gets 100% full, this is the deciding factor for transaction priority, just like the pre-1559 era.
-
maxFeePerGas: Set by user. This represents the maximum amount of gas fee a user is willing to pay for a transaction (inclusive of baseFeePerGas + maxPriorityFeePerGas). Once the transaction is confirmed, the difference between maxFeePerGas and baseFeePerGas + maxPriorityFeePerGas is refunded back to the user/sender of the transaction.
Now that we know about the EIP-1559, it would be good to see it in action by sending an EIP-1559 transaction.
Set Up Your QuickNode Ethereum Endpoint
The first step on our journey to send a transaction would be to have an Ethereum Testnet endpoint set up; we will be using the Sepolia Testnet to make the transaction, as sending transactions on the Ethereum Mainnet would cost real ETH. For convenience, we will create a free QuickNode account here and easily generate a new endpoint.
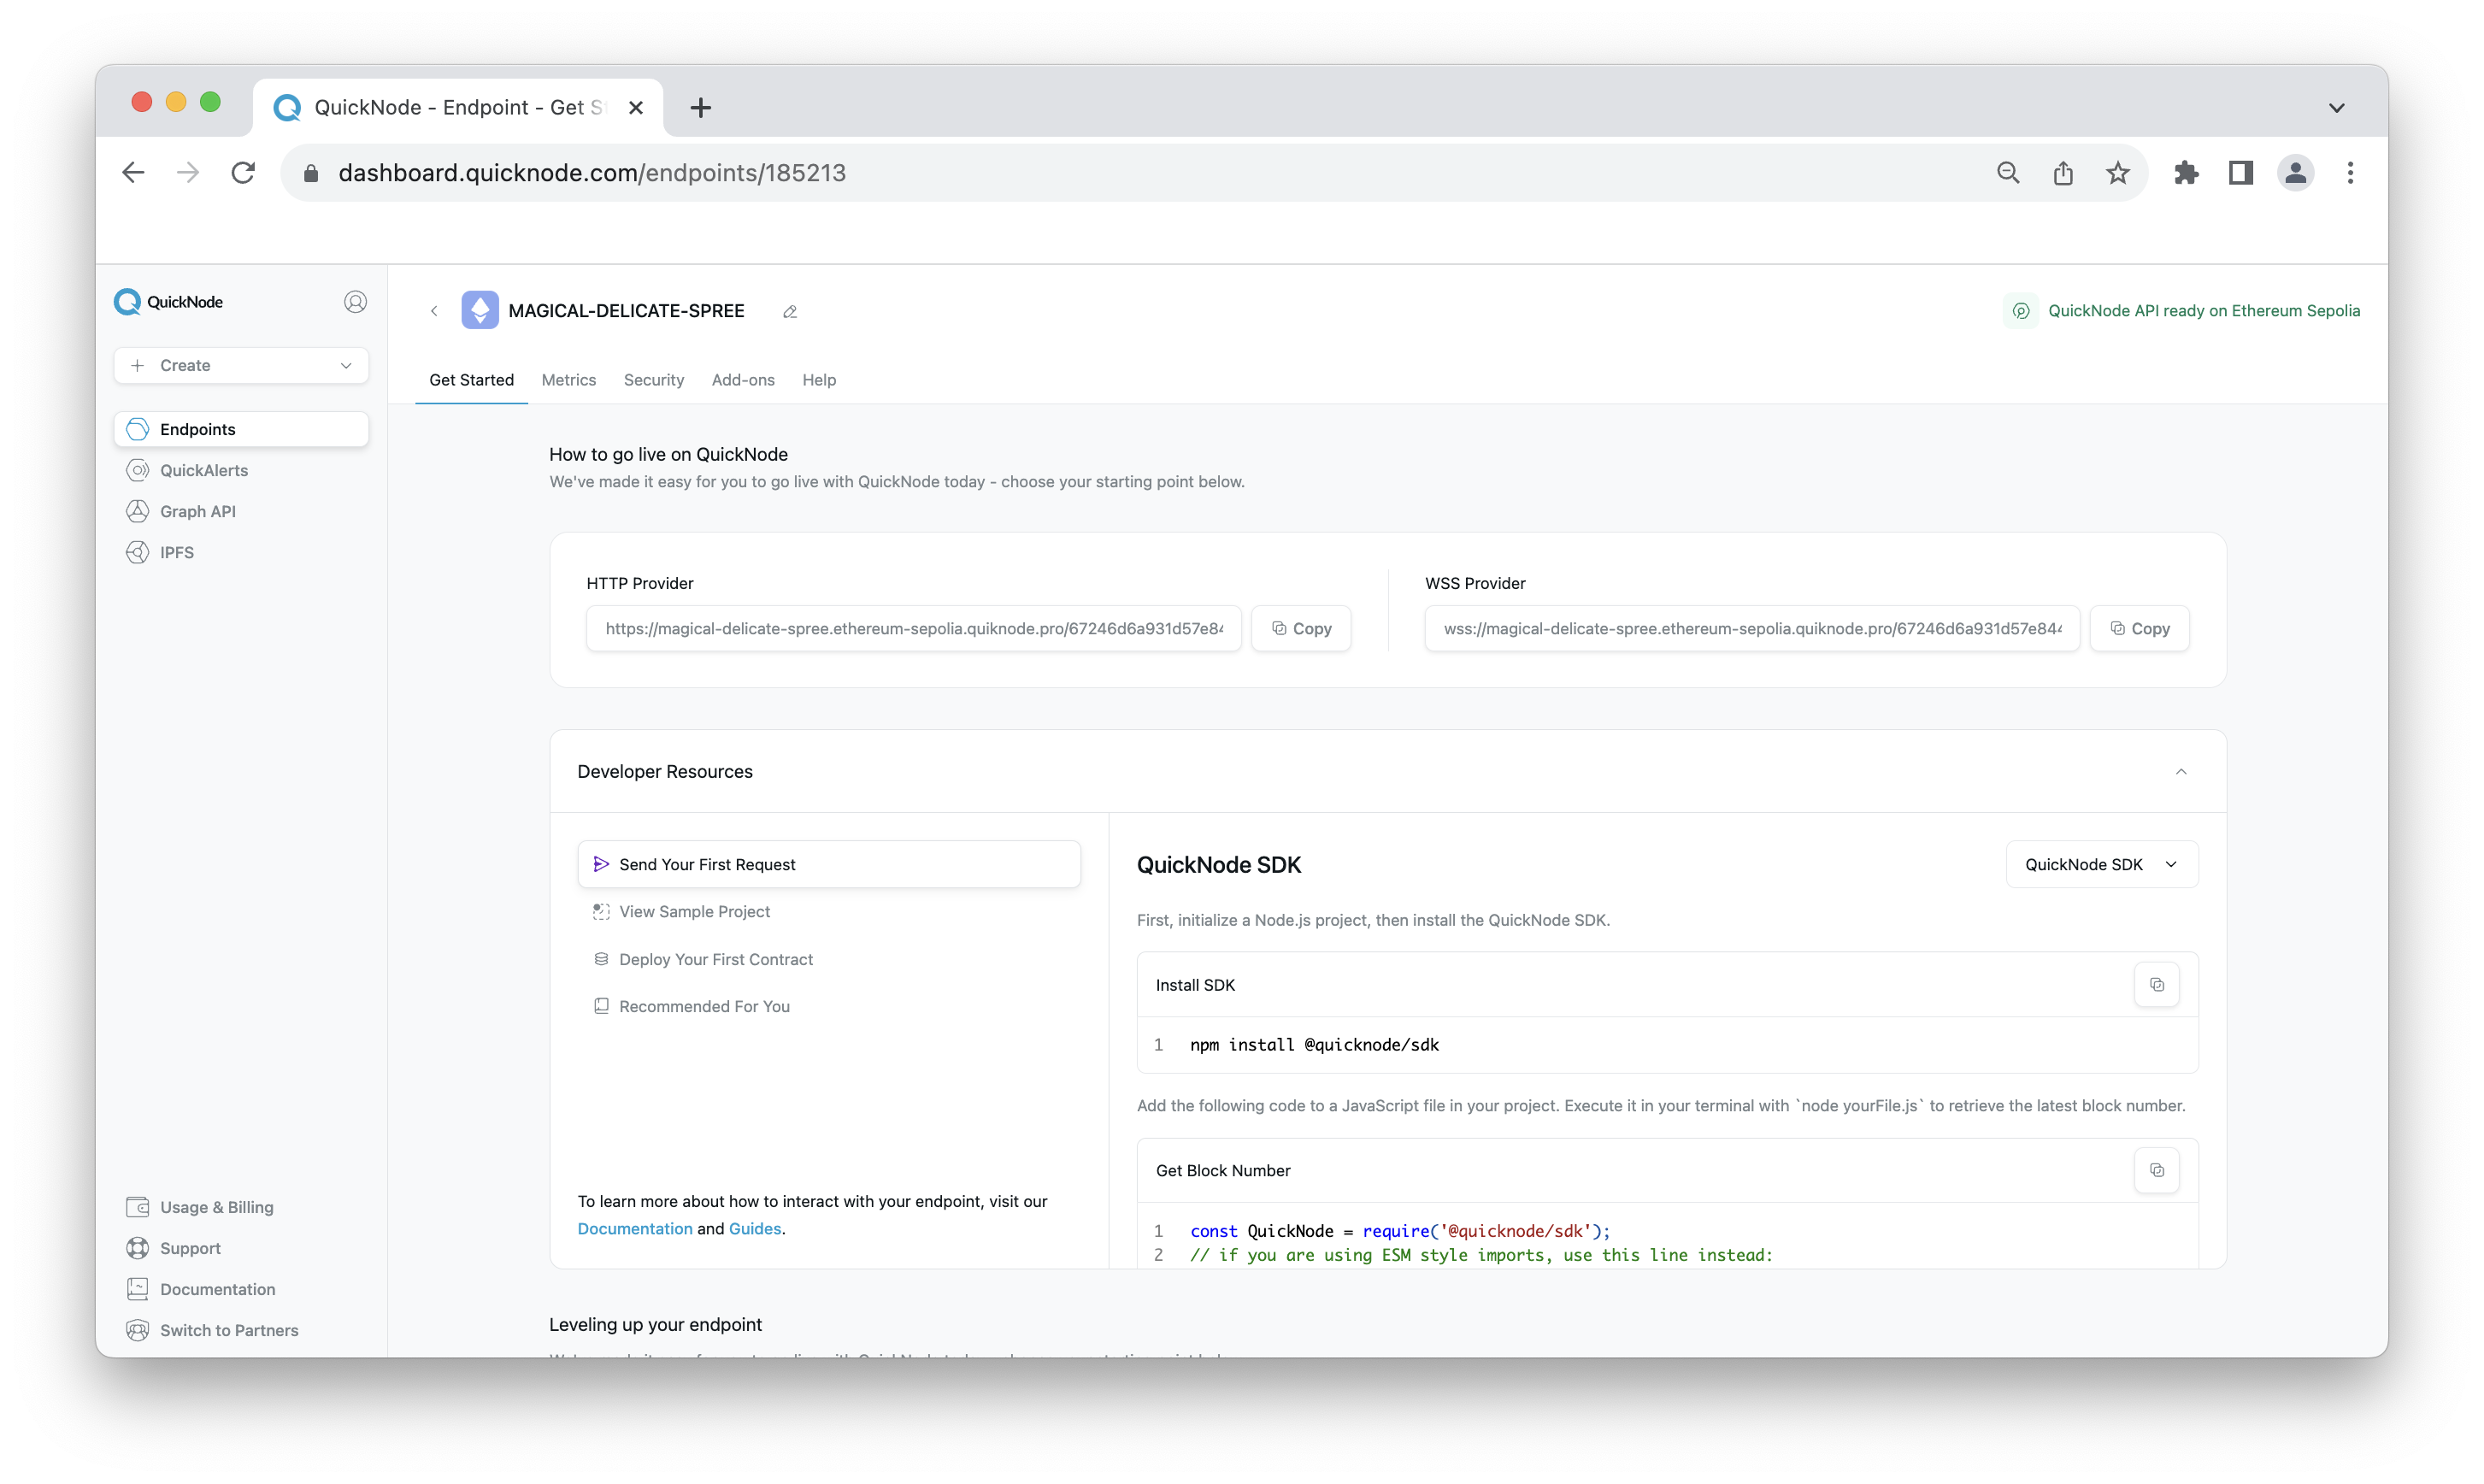
Save the HTTP URL as we will be using it later.
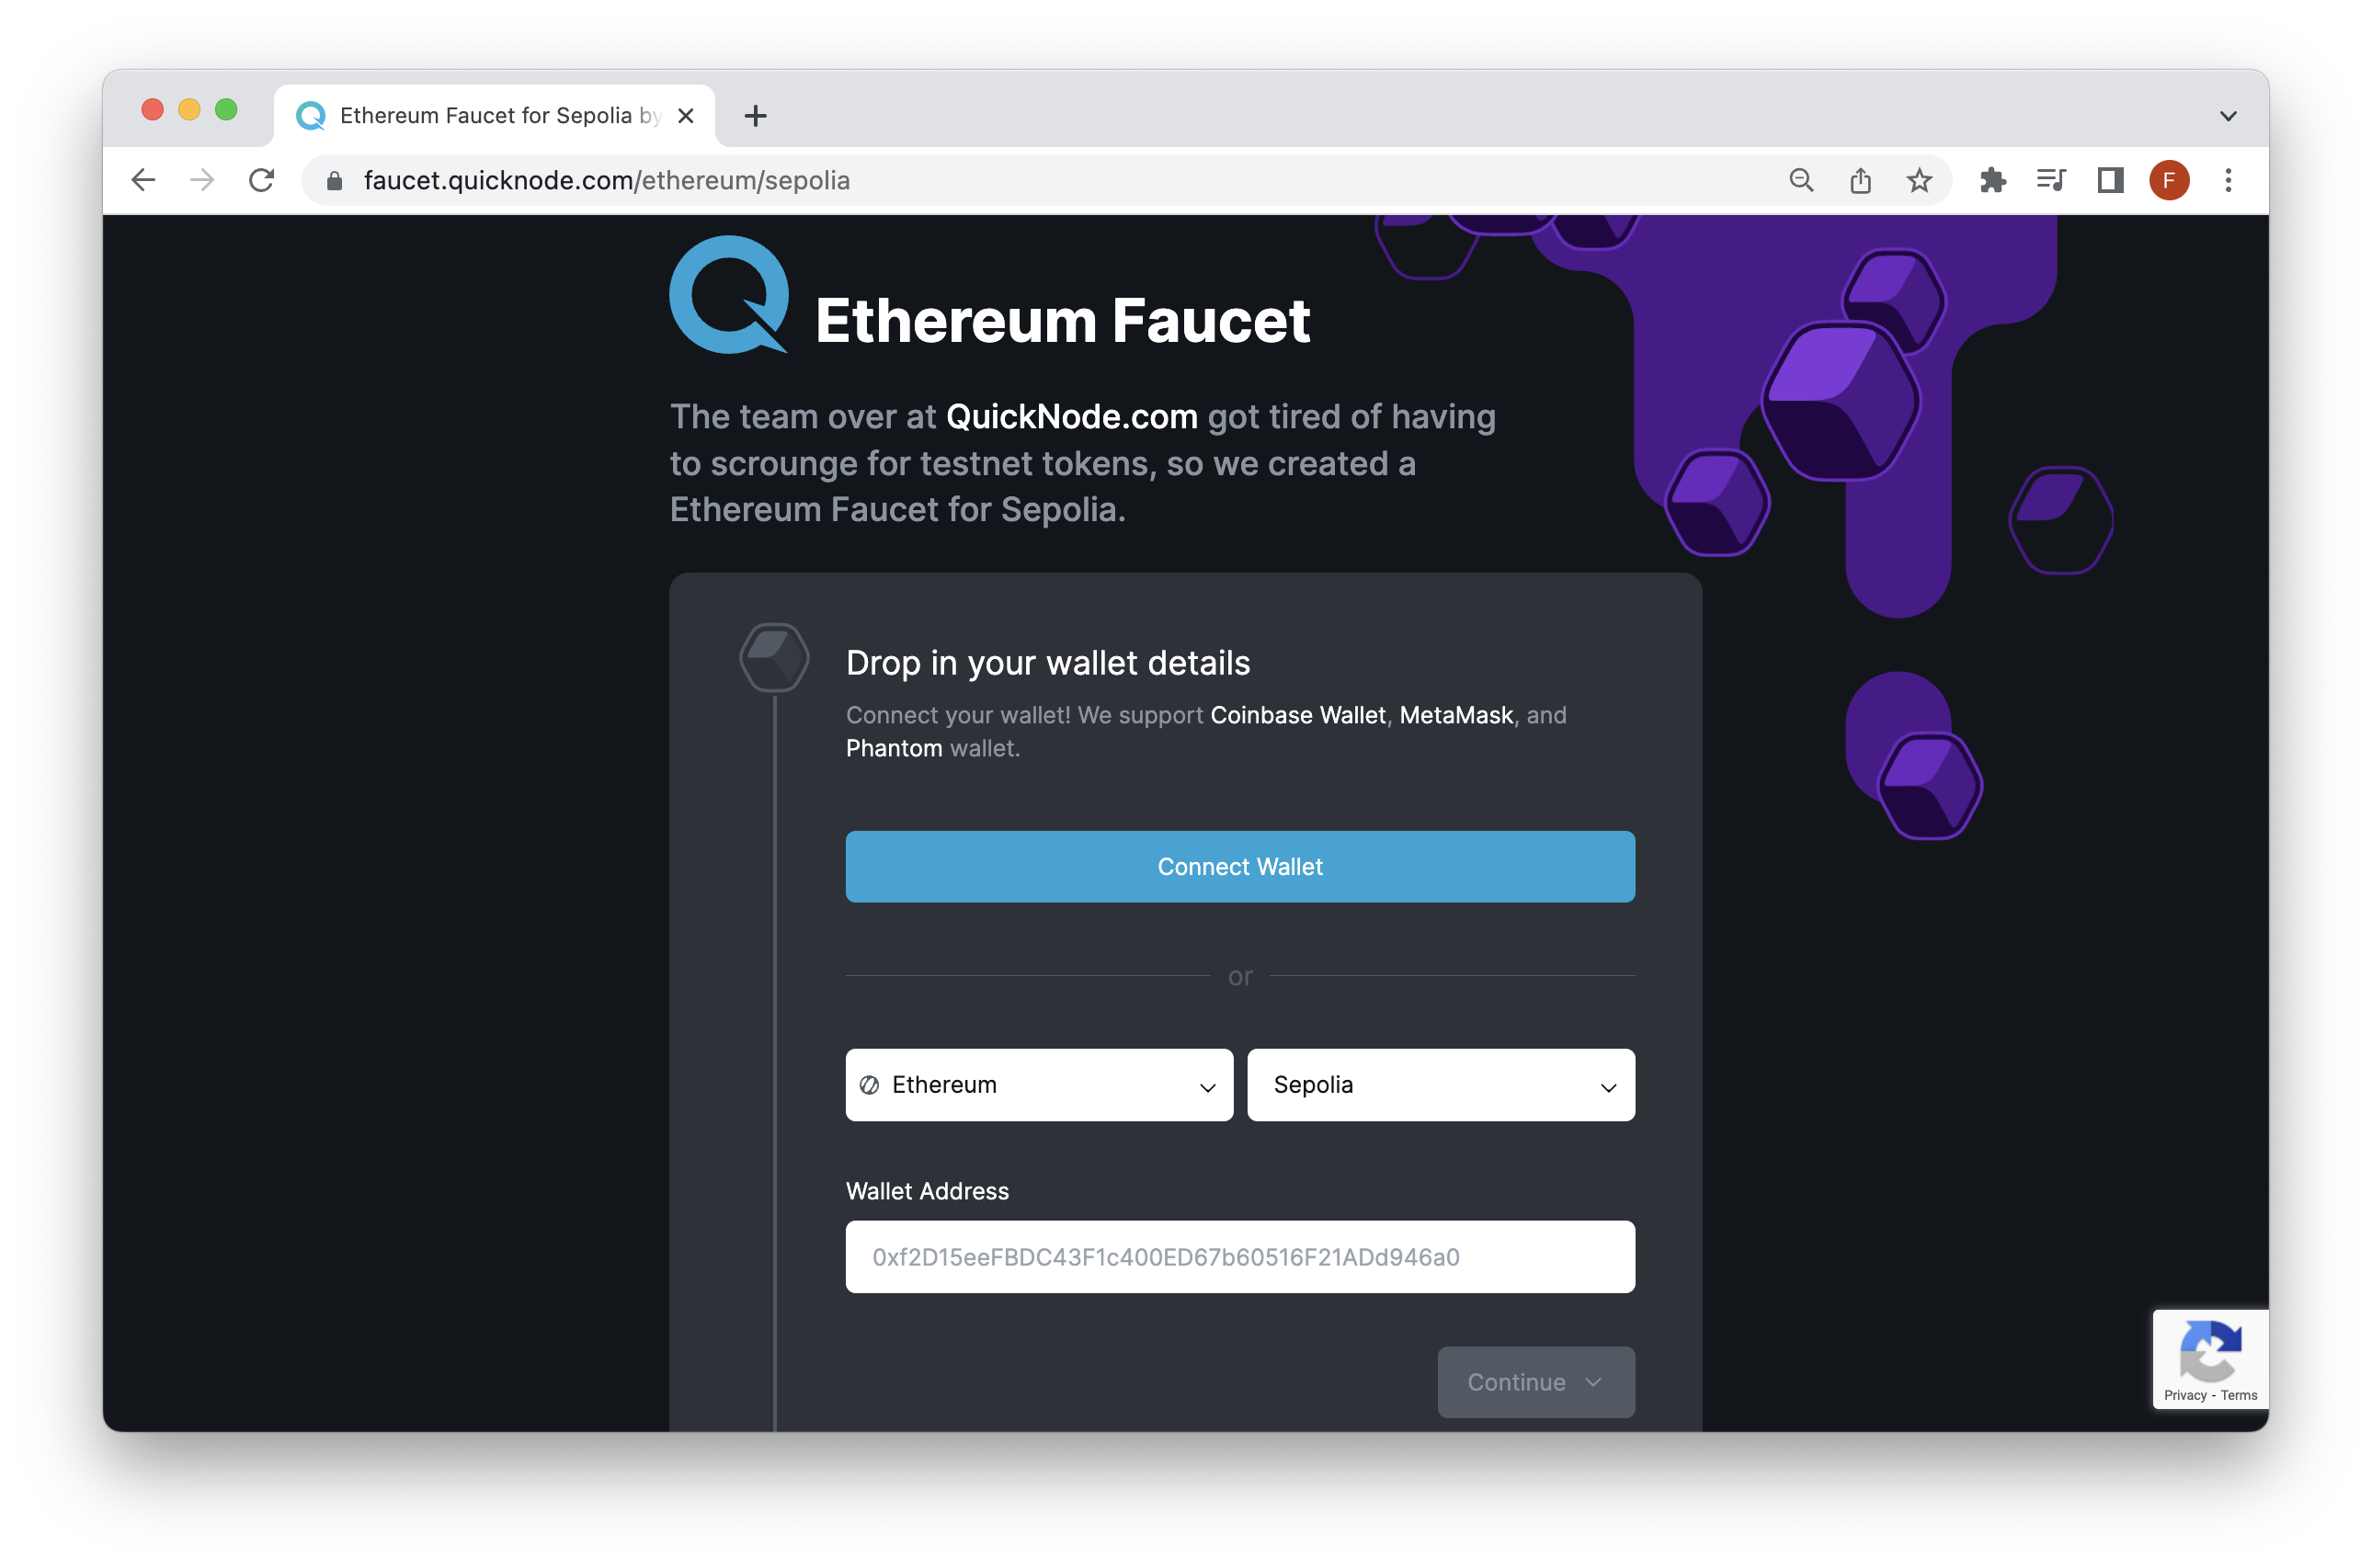
Getting funds in the wallet
If you're in need of ETH on Sepolia testnet, the Multi-Chain QuickNode Faucet makes it easy to obtain test ETH!
Navigate to the Multi-Chain QuickNode Faucet and connect your wallet or paste in your wallet address to retrieve test ETH. You can also tweet out your request to get a bonus!
Next, let's cover the required libraries.
Installing required libraries
We will use the ethers.js library to send our transaction and the log-timestamp library to log the time of each step of our script execution.
Create a project directory and cd into it:
mkdir eipDemo
cd eipDemo
Then, initialize an npm project with the default options:
npm init --y
To install these libraries, we will use the node.js package manager, npm.
npm install log-timestamp ethers@5.7
Make sure that your ethers.js installation version is 5.7
Now, we should have our libraries installed in our project directory.
Making an EIP-1559 transaction
Create a JavaScript file named index.js, and paste the following code in it:
require("log-timestamp");
const ethers = require("ethers");

const privateKey = ("ADD_YOUR_PRIVATE_KEY_HERE").toString('hex');
const wallet = new ethers.Wallet(privateKey);

const address = wallet.address;
console.log("Public Address:", address);

const httpsUrl = "ADD_YOUR_HTTP_URL_HERE";
console.log("HTTPS Target", httpsUrl);

const init = async function () {
  const httpsProvider = new ethers.providers.JsonRpcProvider(httpsUrl);

  let nonce = await httpsProvider.getTransactionCount(address);
  console.log("Nonce:", nonce);

  let feeData = await httpsProvider.getFeeData();
  console.log("Fee Data:", feeData);

  const tx = {
    type: 2,
    nonce: nonce,
    to: "0x8D97689C9818892B700e27F316cc3E41e17fBeb9", // Address you want to send to
    maxPriorityFeePerGas: feeData["maxPriorityFeePerGas"], // Recommended maxPriorityFeePerGas
    maxFeePerGas: feeData["maxFeePerGas"], // Recommended maxFeePerGas
    value: ethers.utils.parseEther("0.01"), // .01 ETH
    gasLimit: "21000", // Basic transactions cost exactly 21000 gas
    chainId: 11155111, // Sepolia chain ID; change if using another network
  };
  console.log("Transaction Data:", tx);

  const signedTx = await wallet.signTransaction(tx);
  console.log("Signed Transaction:", signedTx);

  const txHash = ethers.utils.keccak256(signedTx);
  console.log("Precomputed txHash:", txHash);
  console.log(`https://sepolia.etherscan.io/tx/${txHash}`);

  httpsProvider.sendTransaction(signedTx).then(console.log);

};

init();
You can now access Logs for your RPC endpoints, helping you troubleshoot issues more effectively. If you encounter an issue with your RPC calls, simply check the logs in your QuickNode dashboard to identify and resolve problems quickly. Learn more about log history limits on our pricing page.
Replace ADD_YOUR_PRIVATE_KEY_HERE on line 4 with your wallet private key, and ADD_YOUR_HTTP_URL_HERE on line 10 with your endpoint's HTTP URL we retrieved earlier.
Explanation of the code above:
Line 1-2: Importing the log-timestamp and ethers libraries.
Line 4-5: Saving our private key in the privateKey variable and initializing the wallet using privateKey.
Line 7-8: Getting the address of our wallet and printing it to the console.
Line 10-11: Saving our Endpoints HTTP URL in the httpUrl variable and printing it to the console.
Line 13: Starting an async init function.
Line 14: Initializing our provider and saving to the httpsProvider variable.
Line 16-17: Getting nonce from the provider and printing it to the console.
Line 19-20: Getting fee data, i.e., gasPrice, maxPriorityFeePerGas, maxFeePerGas from the node and saving it to the feeData variable, then printing it to the console.
Line 22-30: Transaction object tx: mentioning transaction as type 2 which is EIP-1559 transaction, mentioning nonce parameter, mentioning the receiver’s address, maxPriorityFeePerGas parameter and getting the info from feeData variable, maxFeePerGas parameter and getting the data from feeData variable, value parameter has the amount of ETH to be sent, gasLimit and chainId which is 11155111 here as the chain is Sepolia.
Line 32: Printing the transaction object.
Line 34-35: Signing the transaction using our wallet and printing the signed transaction raw data to the console.
Line 37: Applying keccak256 to the raw transaction to get transaction hash and saving it to txHash variable.
Line 38-39: Printing the transaction has to console, along with the link to Sepolia Etherscan.
Line 41: Sending our transaction using our node.
Save the file and run the script using:
node index.js
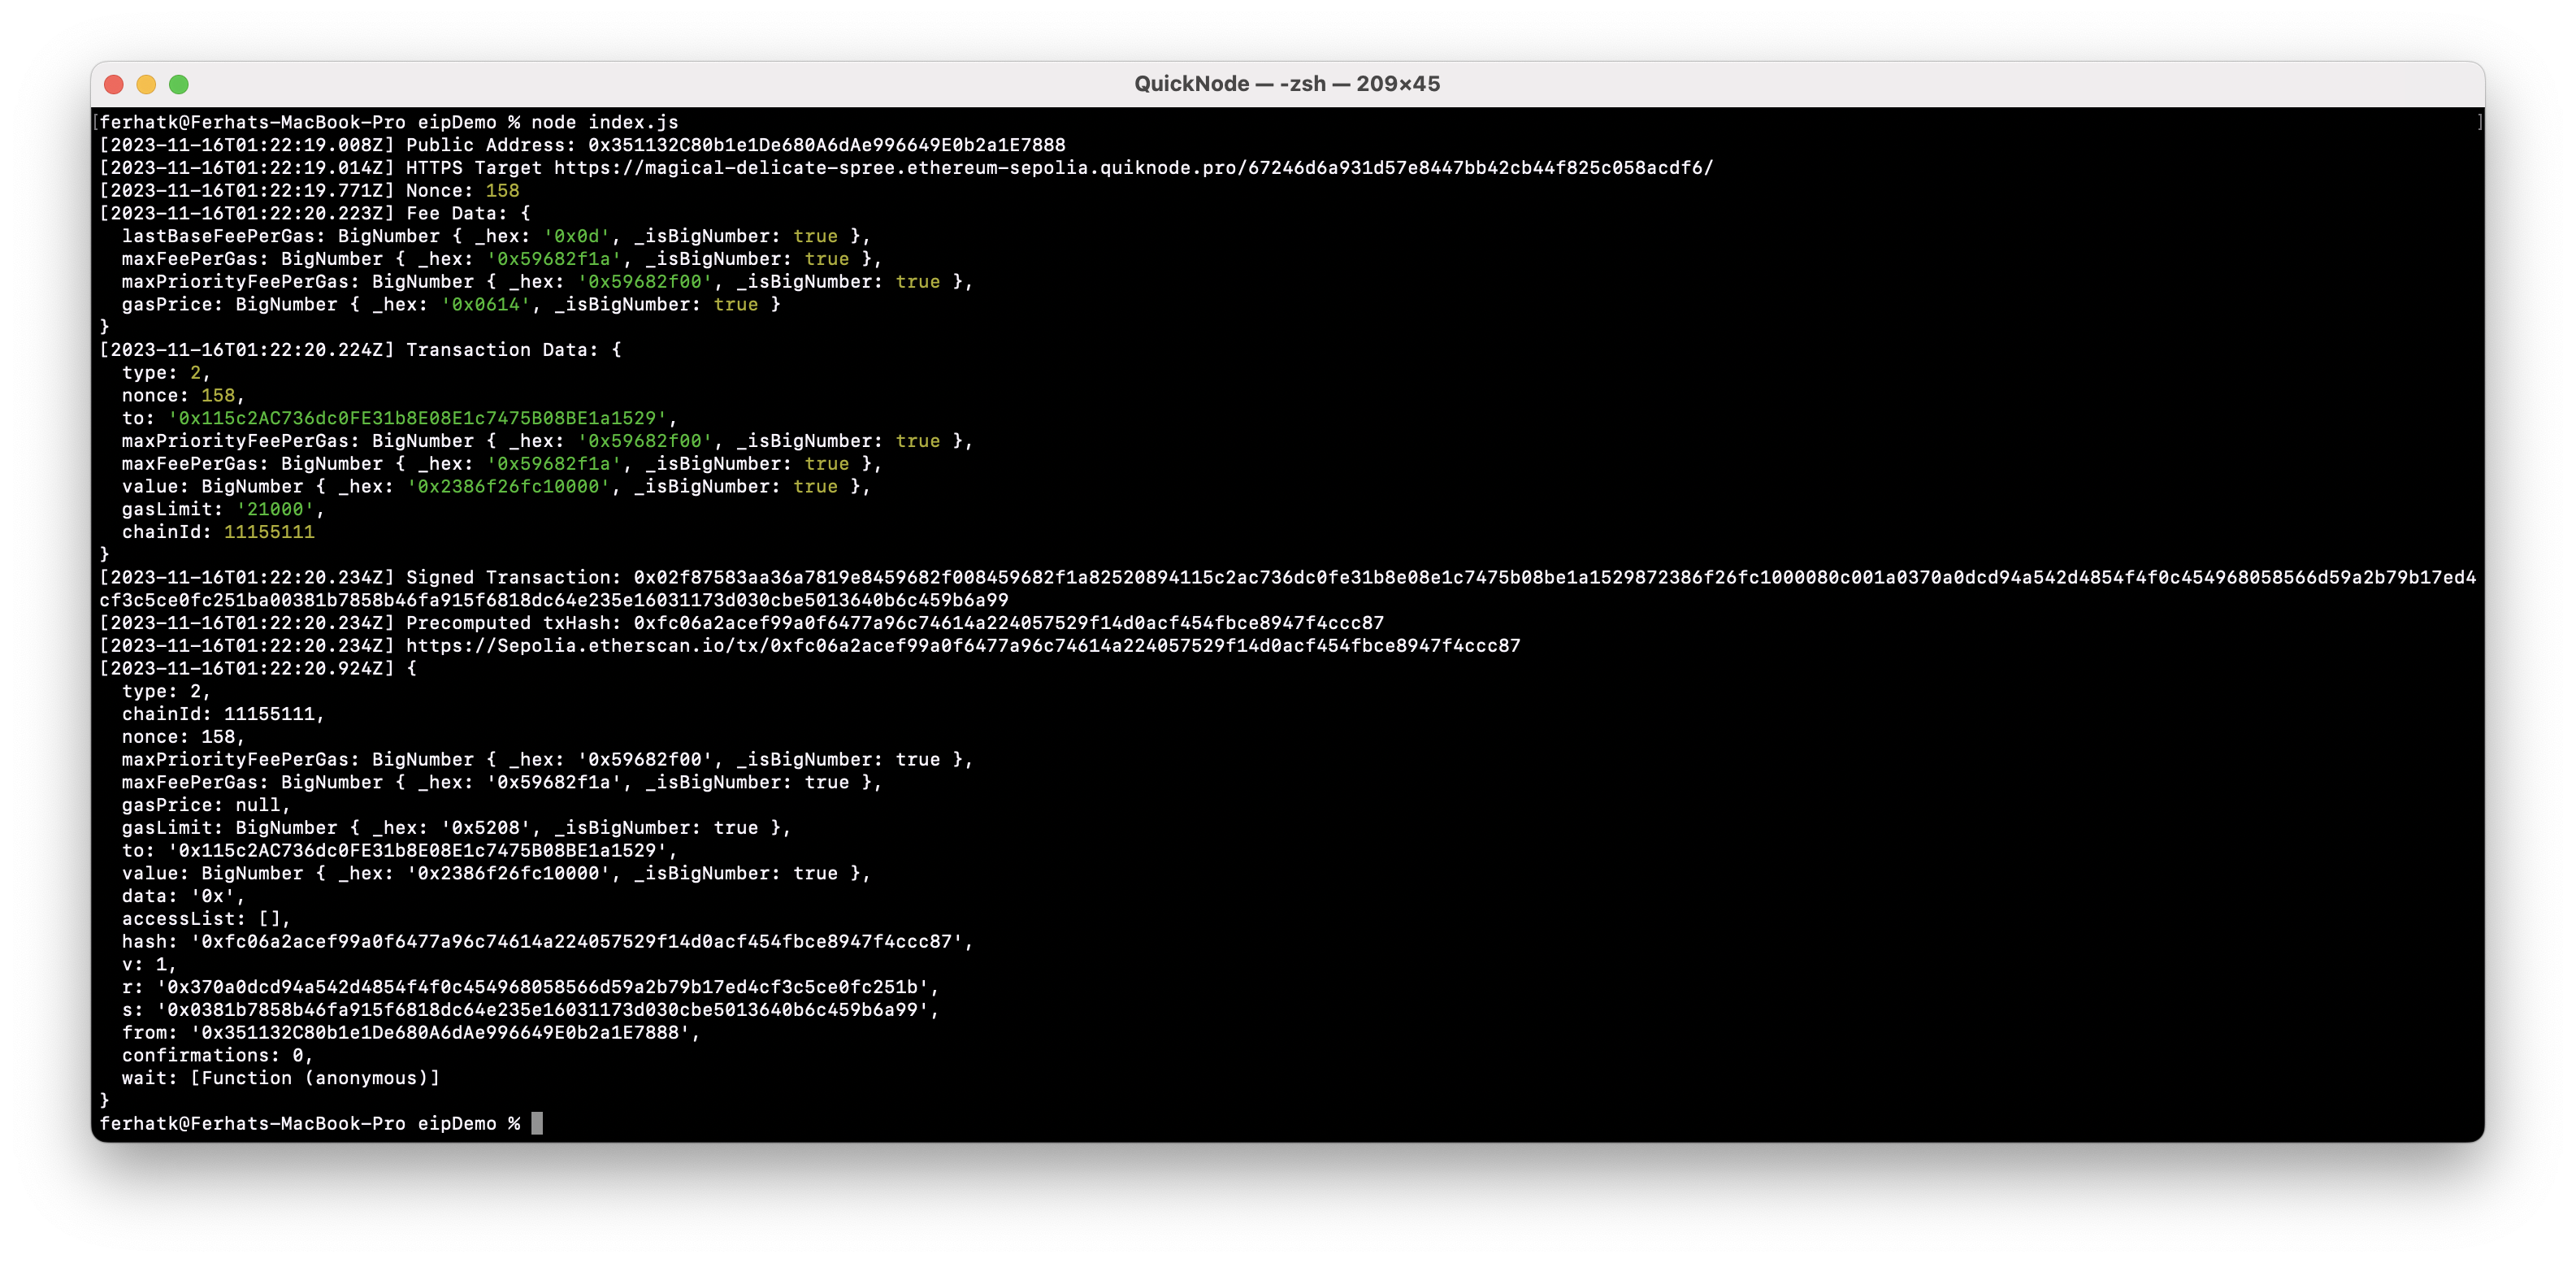
Upon successful execution, the output will look like this:
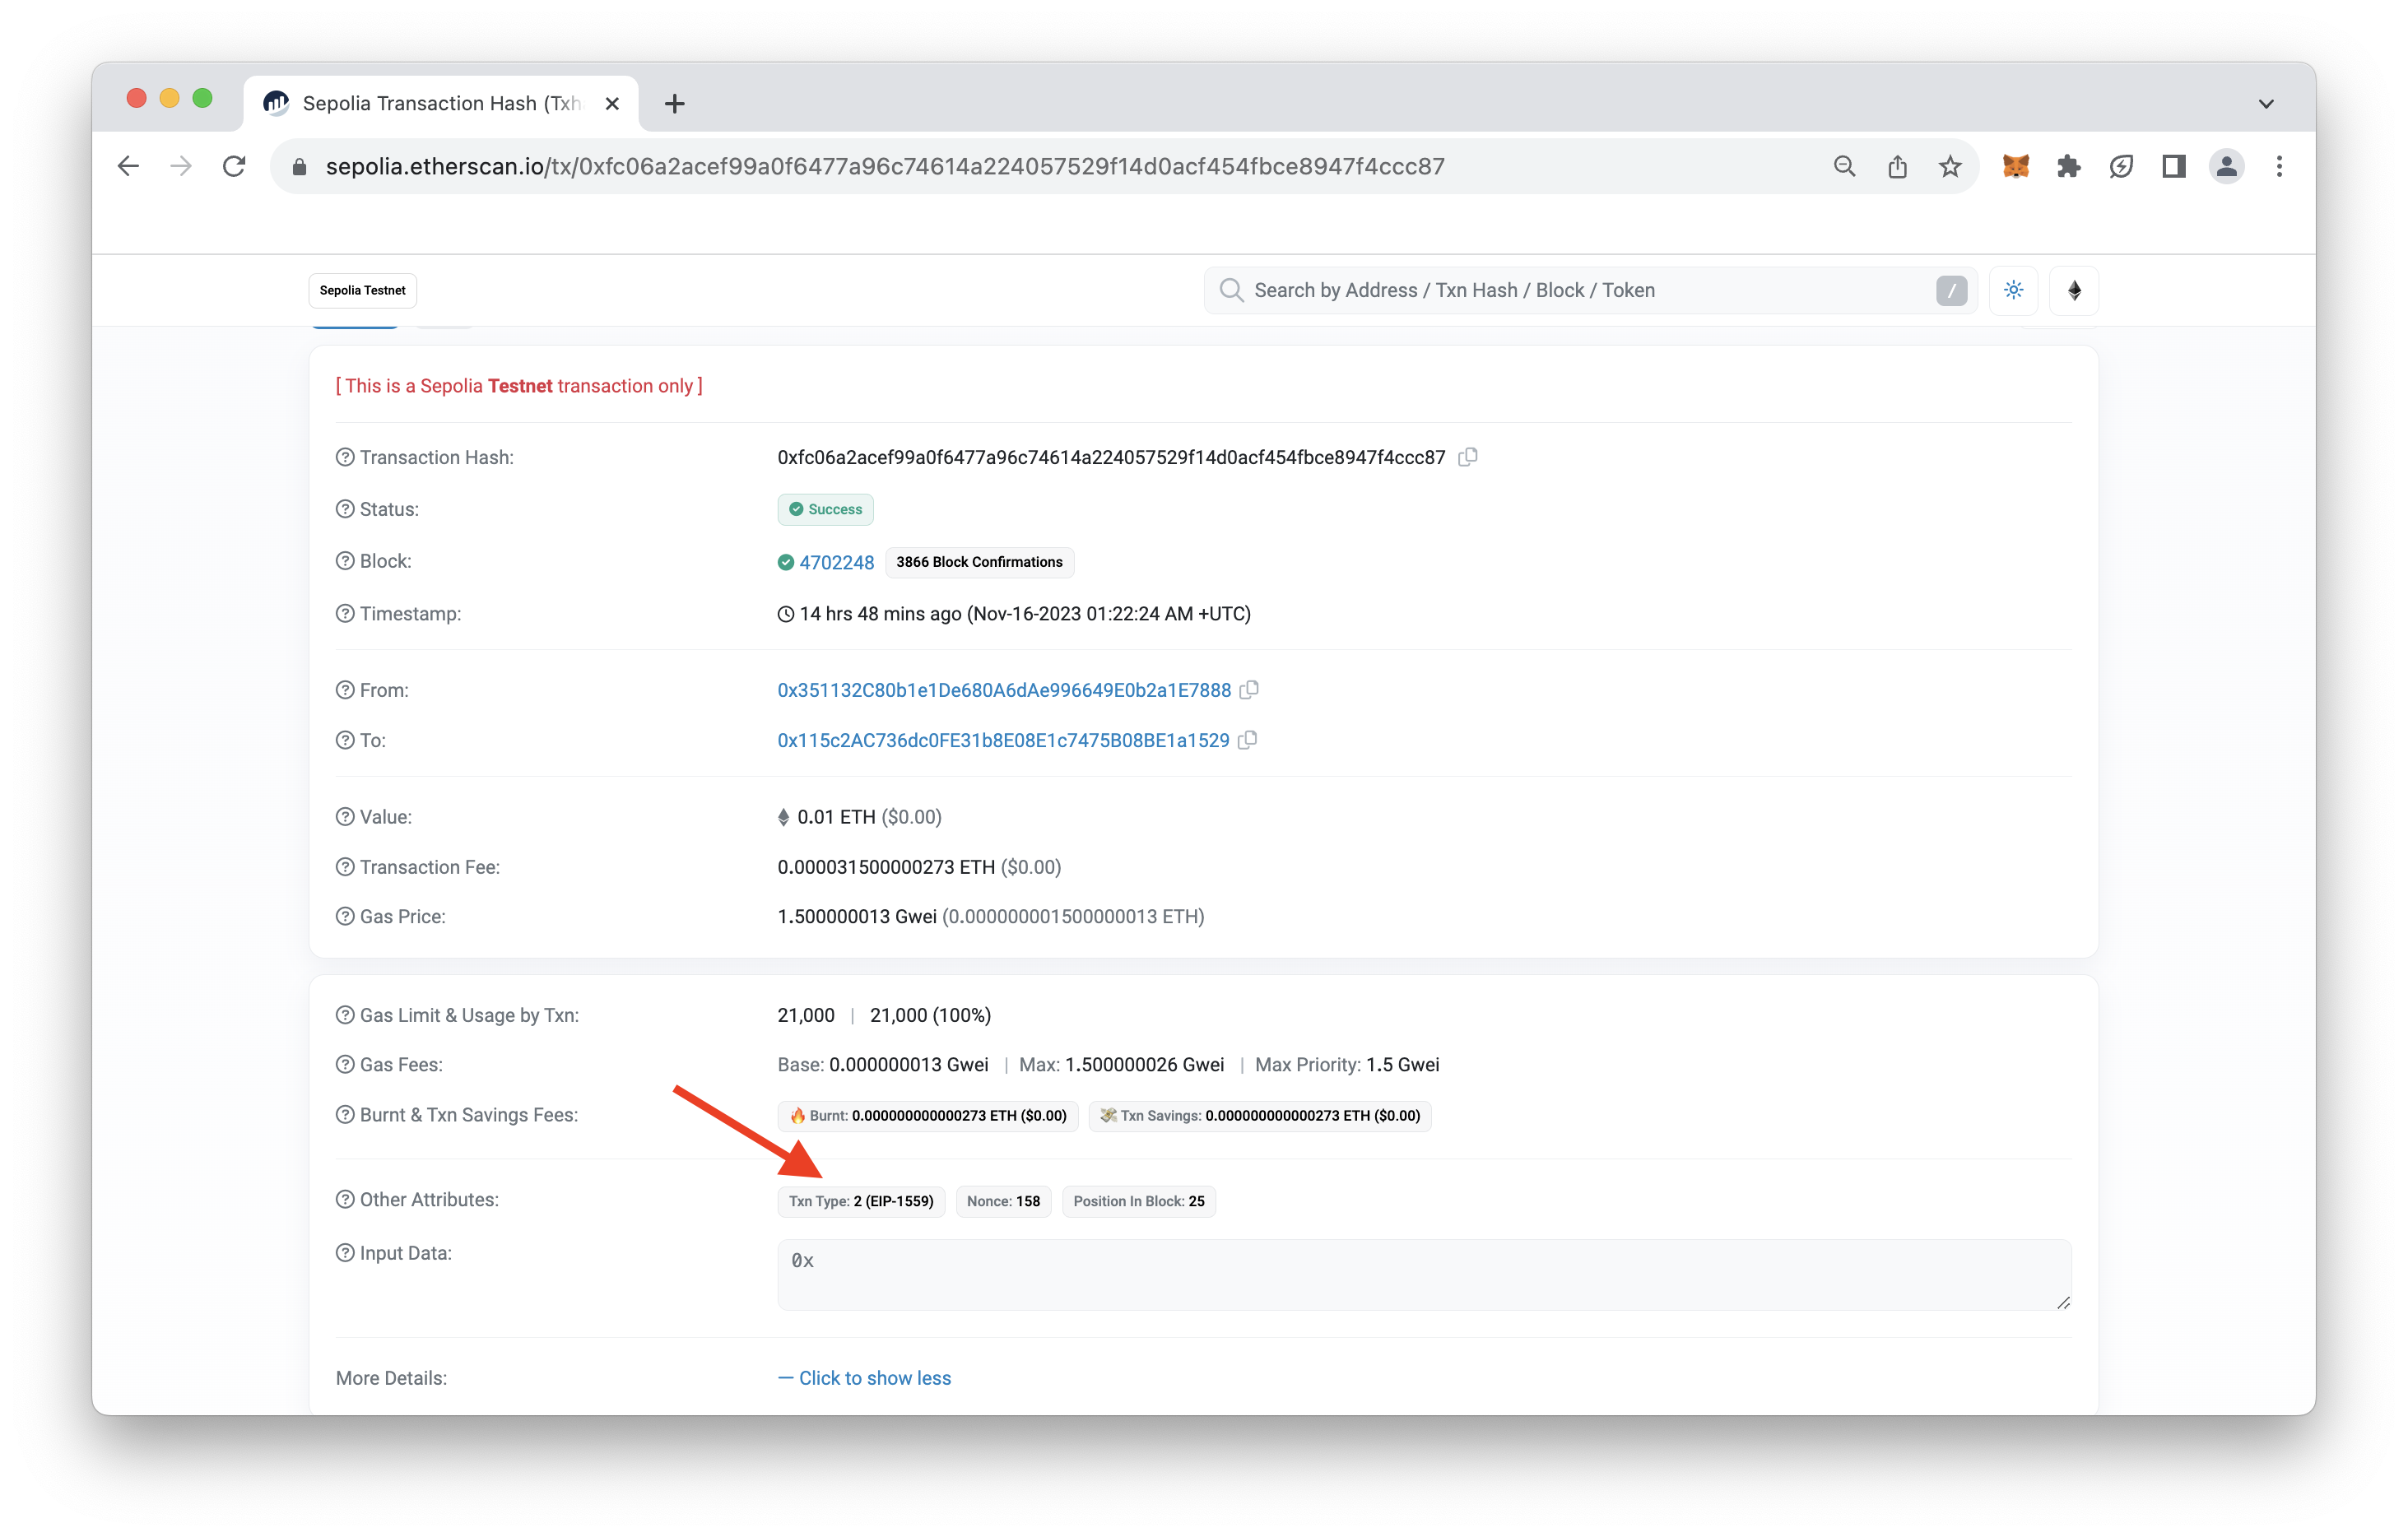
You can also navigate to a block explorer such as Etherscan to view the transaction. Copy the transaction hash or search for the address you sent from/to.
Once you find the transaction, you can confirm it was sent using EIP-1559 by clicking the Click to show more text on the More Details field.
Conclusion
I hope now you have a better understanding of EIP-1559 as in this guide, we learned about EIP-1559, and how to send an EIP-1559 transaction.
Subscribe to our newsletter for more articles and guides on Web3 and blockchain. If you have any questions, feel free to use our dedicated channel on Discord or provide feedback using the form below. Stay up to date with the latest by following us on Twitter and our Telegram announcement channel.
We ❤️ Feedback!
Let us know if you have any feedback or requests for new topics. We'd love to hear from you.