
6 min read
Overview
In this guide, we delve into the practical aspects of interacting with the Ethereum blockchain, specifically focusing on the transfer of ERC-20 tokens. ERC-20 tokens are a standard type of Ethereum token, widely used in various applications. We'll explore how to accomplish this using the popular library: Web3.py for Python.
What You Will Do
- Understand the basics of ERC-20 tokens and their transfer methods
- Set up your development environment with the necessary libraries
- Implement an ERC-20 token transfer to an Ethereum address
- Implement an ERC-20 token approval and transfer on behalf of a smart contract
What You Will Need
- Basic understanding of Ethereum and smart contracts.
- Familiarity with Python
- A text editor or an IDE (e.g., VS Code)
- Access to an Ethereum node or a service like Quicknode for connecting to the Ethereum network (or 24 other blockchains and counting! Sign up for free here
- An EVM wallet (with access to your private key, like MetaMask or a burner wallet)
| Dependency | Version |
|---|---|
| Python | 3.9.6 |
| web3.py | 6.18.0 |
ERC-20 Tokens & Approvals
For a detailed understanding of ERC-20 tokens, their roles in the Ethereum ecosystem, and insights into the 'approve' function crucial for ERC-20 smart contract approvals, please refer to our comprehensive guide: How to Send ERC-20 Tokens using Viem and Quicknode. This guide will specifically focus on the practical implementation aspects using Web3py.
Now, before we delve into the technicalities of sending ERC-20 tokens, let's first set up a free Quicknode endpoint and fund our wallet.
Project Prerequisite: Create a Quicknode Endpoint
You're welcome to use public nodes or deploy and manage your own infrastructure; however, if you'd like 8x faster response times, you can leave the heavy lifting to us. Sign up for an account here.
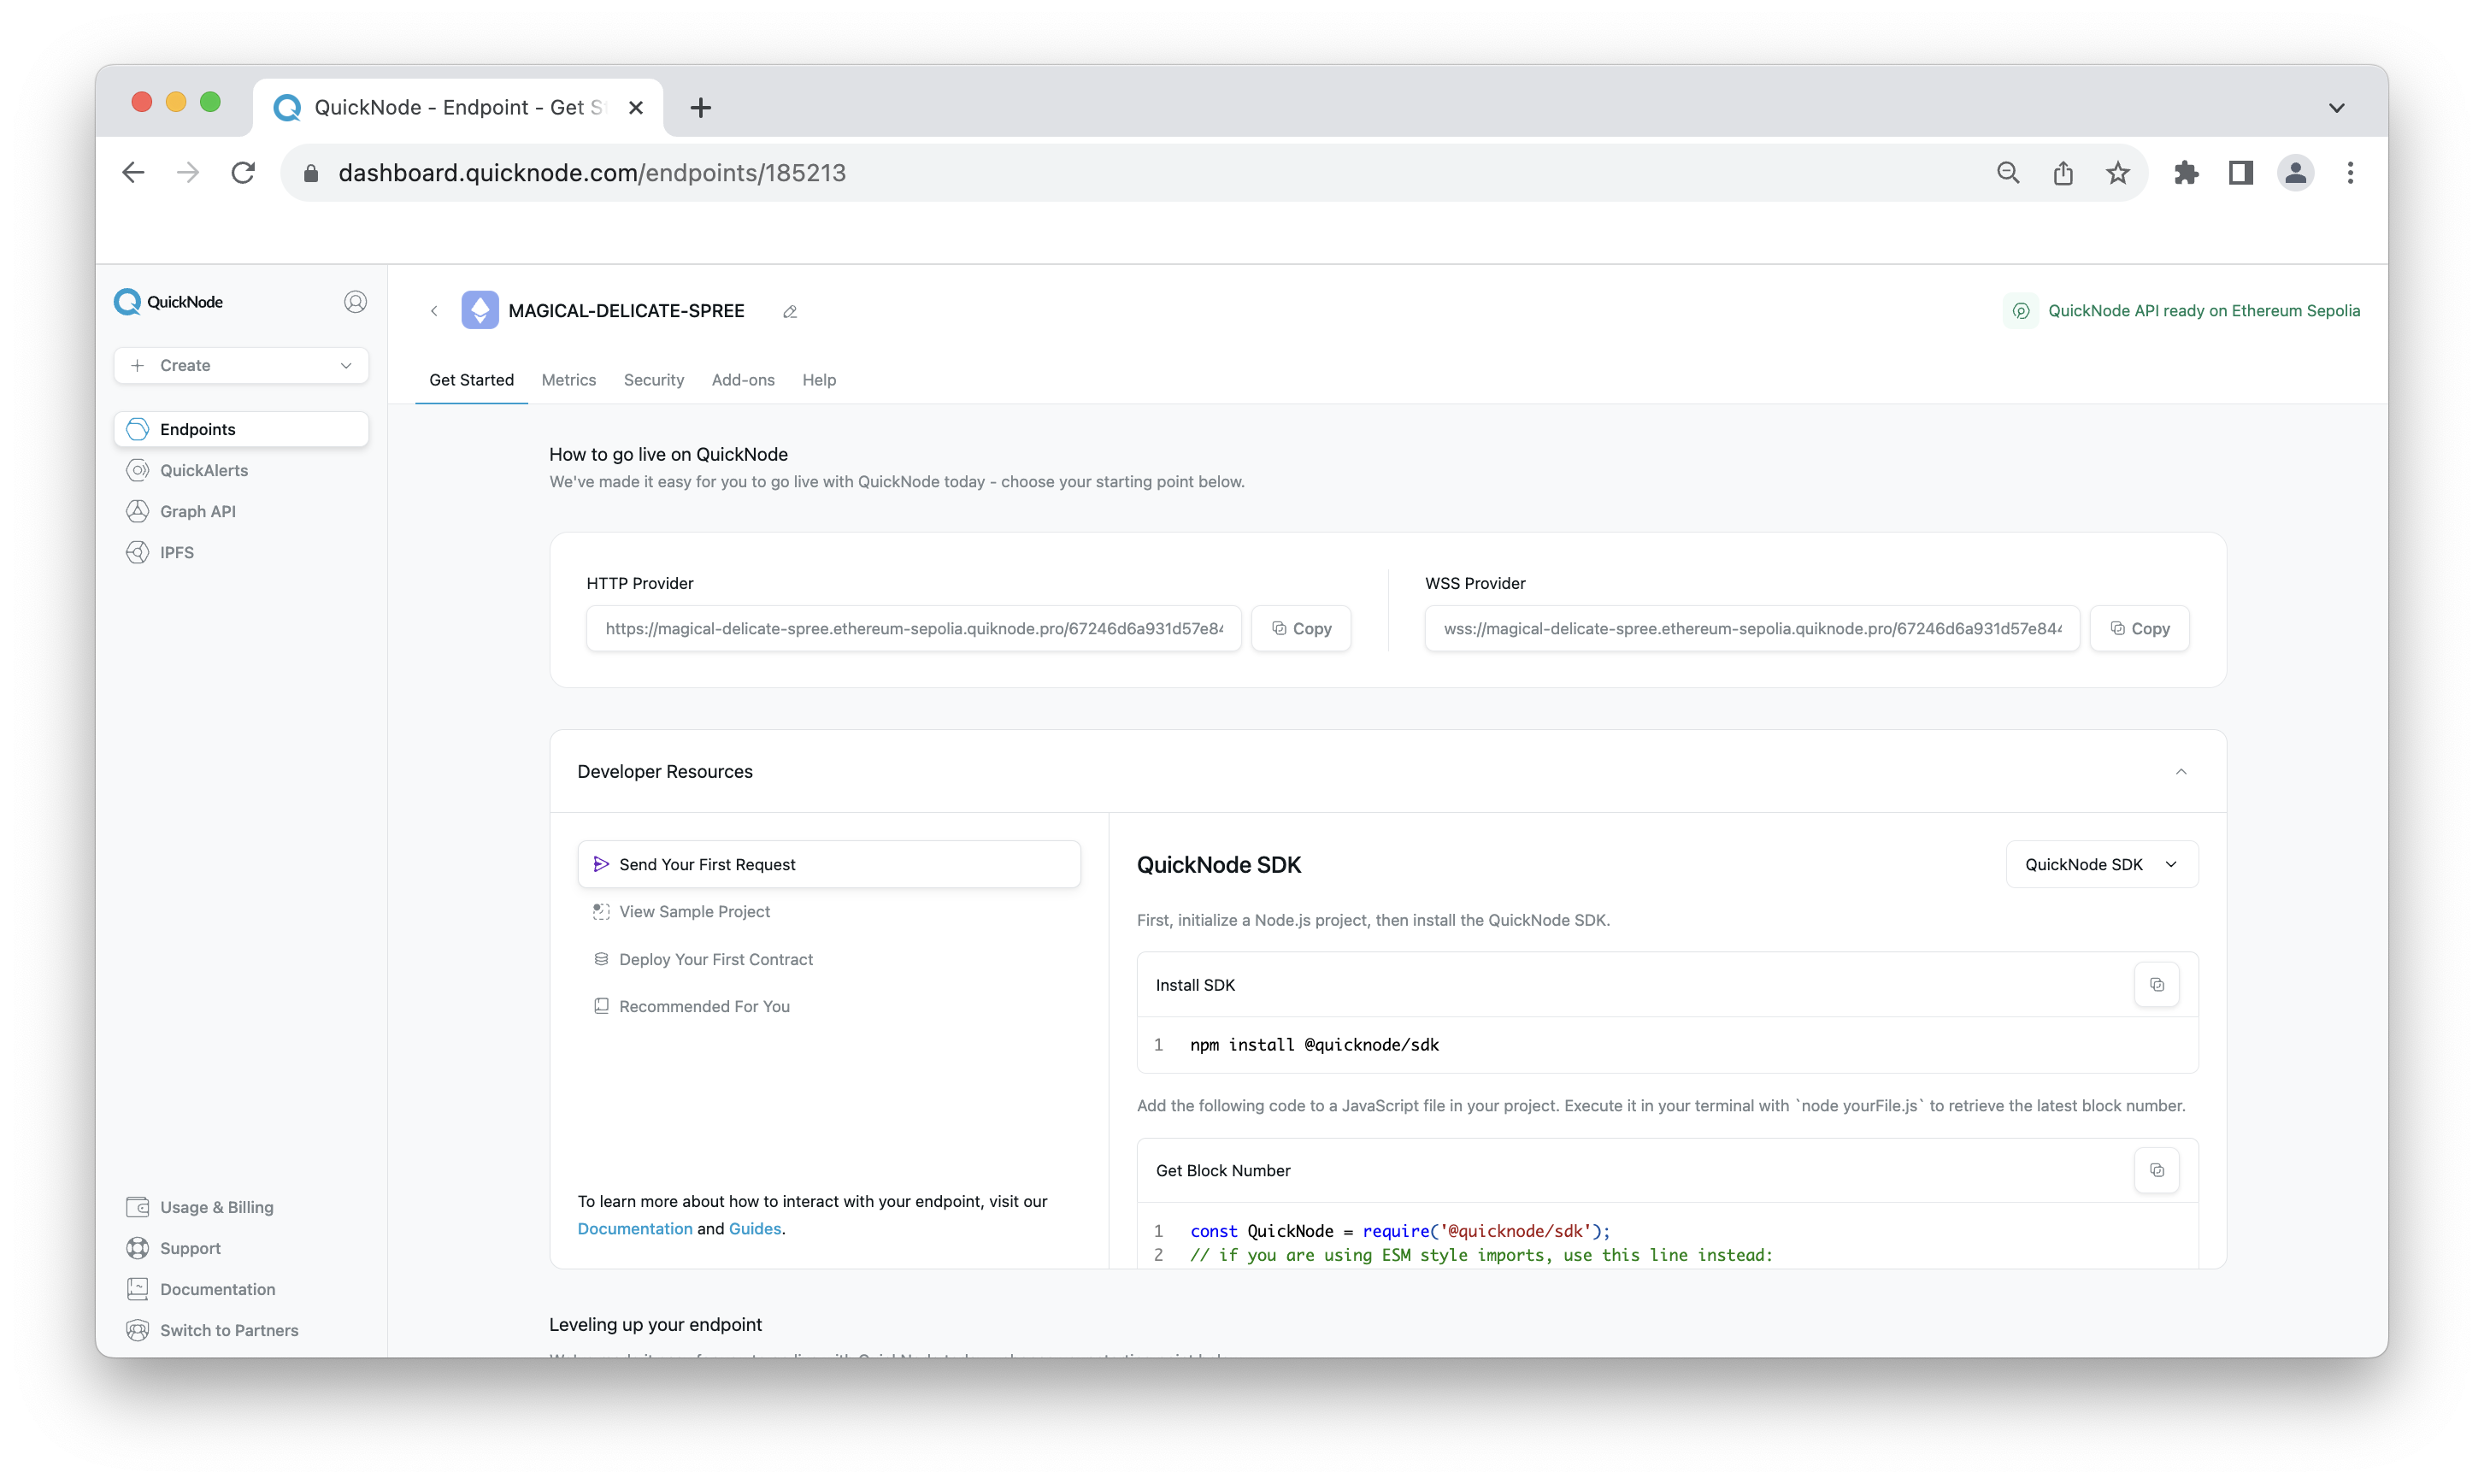
Once logged in, click the Create an endpoint button, then select the blockchain and network you want to deploy on. For the purpose of this guide, we'll choose the Ethereum Sepolia chain.
After creating your endpoint, keep the page handy, as we'll need it in the technical coding portion of this guide.
Note that although we are using Ethereum Sepolia for the demonstration of this guide, you can also use other EVM-compatible chains like Base, Polygon, Arbitrum, and more to interact with smart contracts and ERC-20 tokens.
With our infrastructure created, let's now move on to the technical part.
Project Prerequisite: Fund Your Wallet
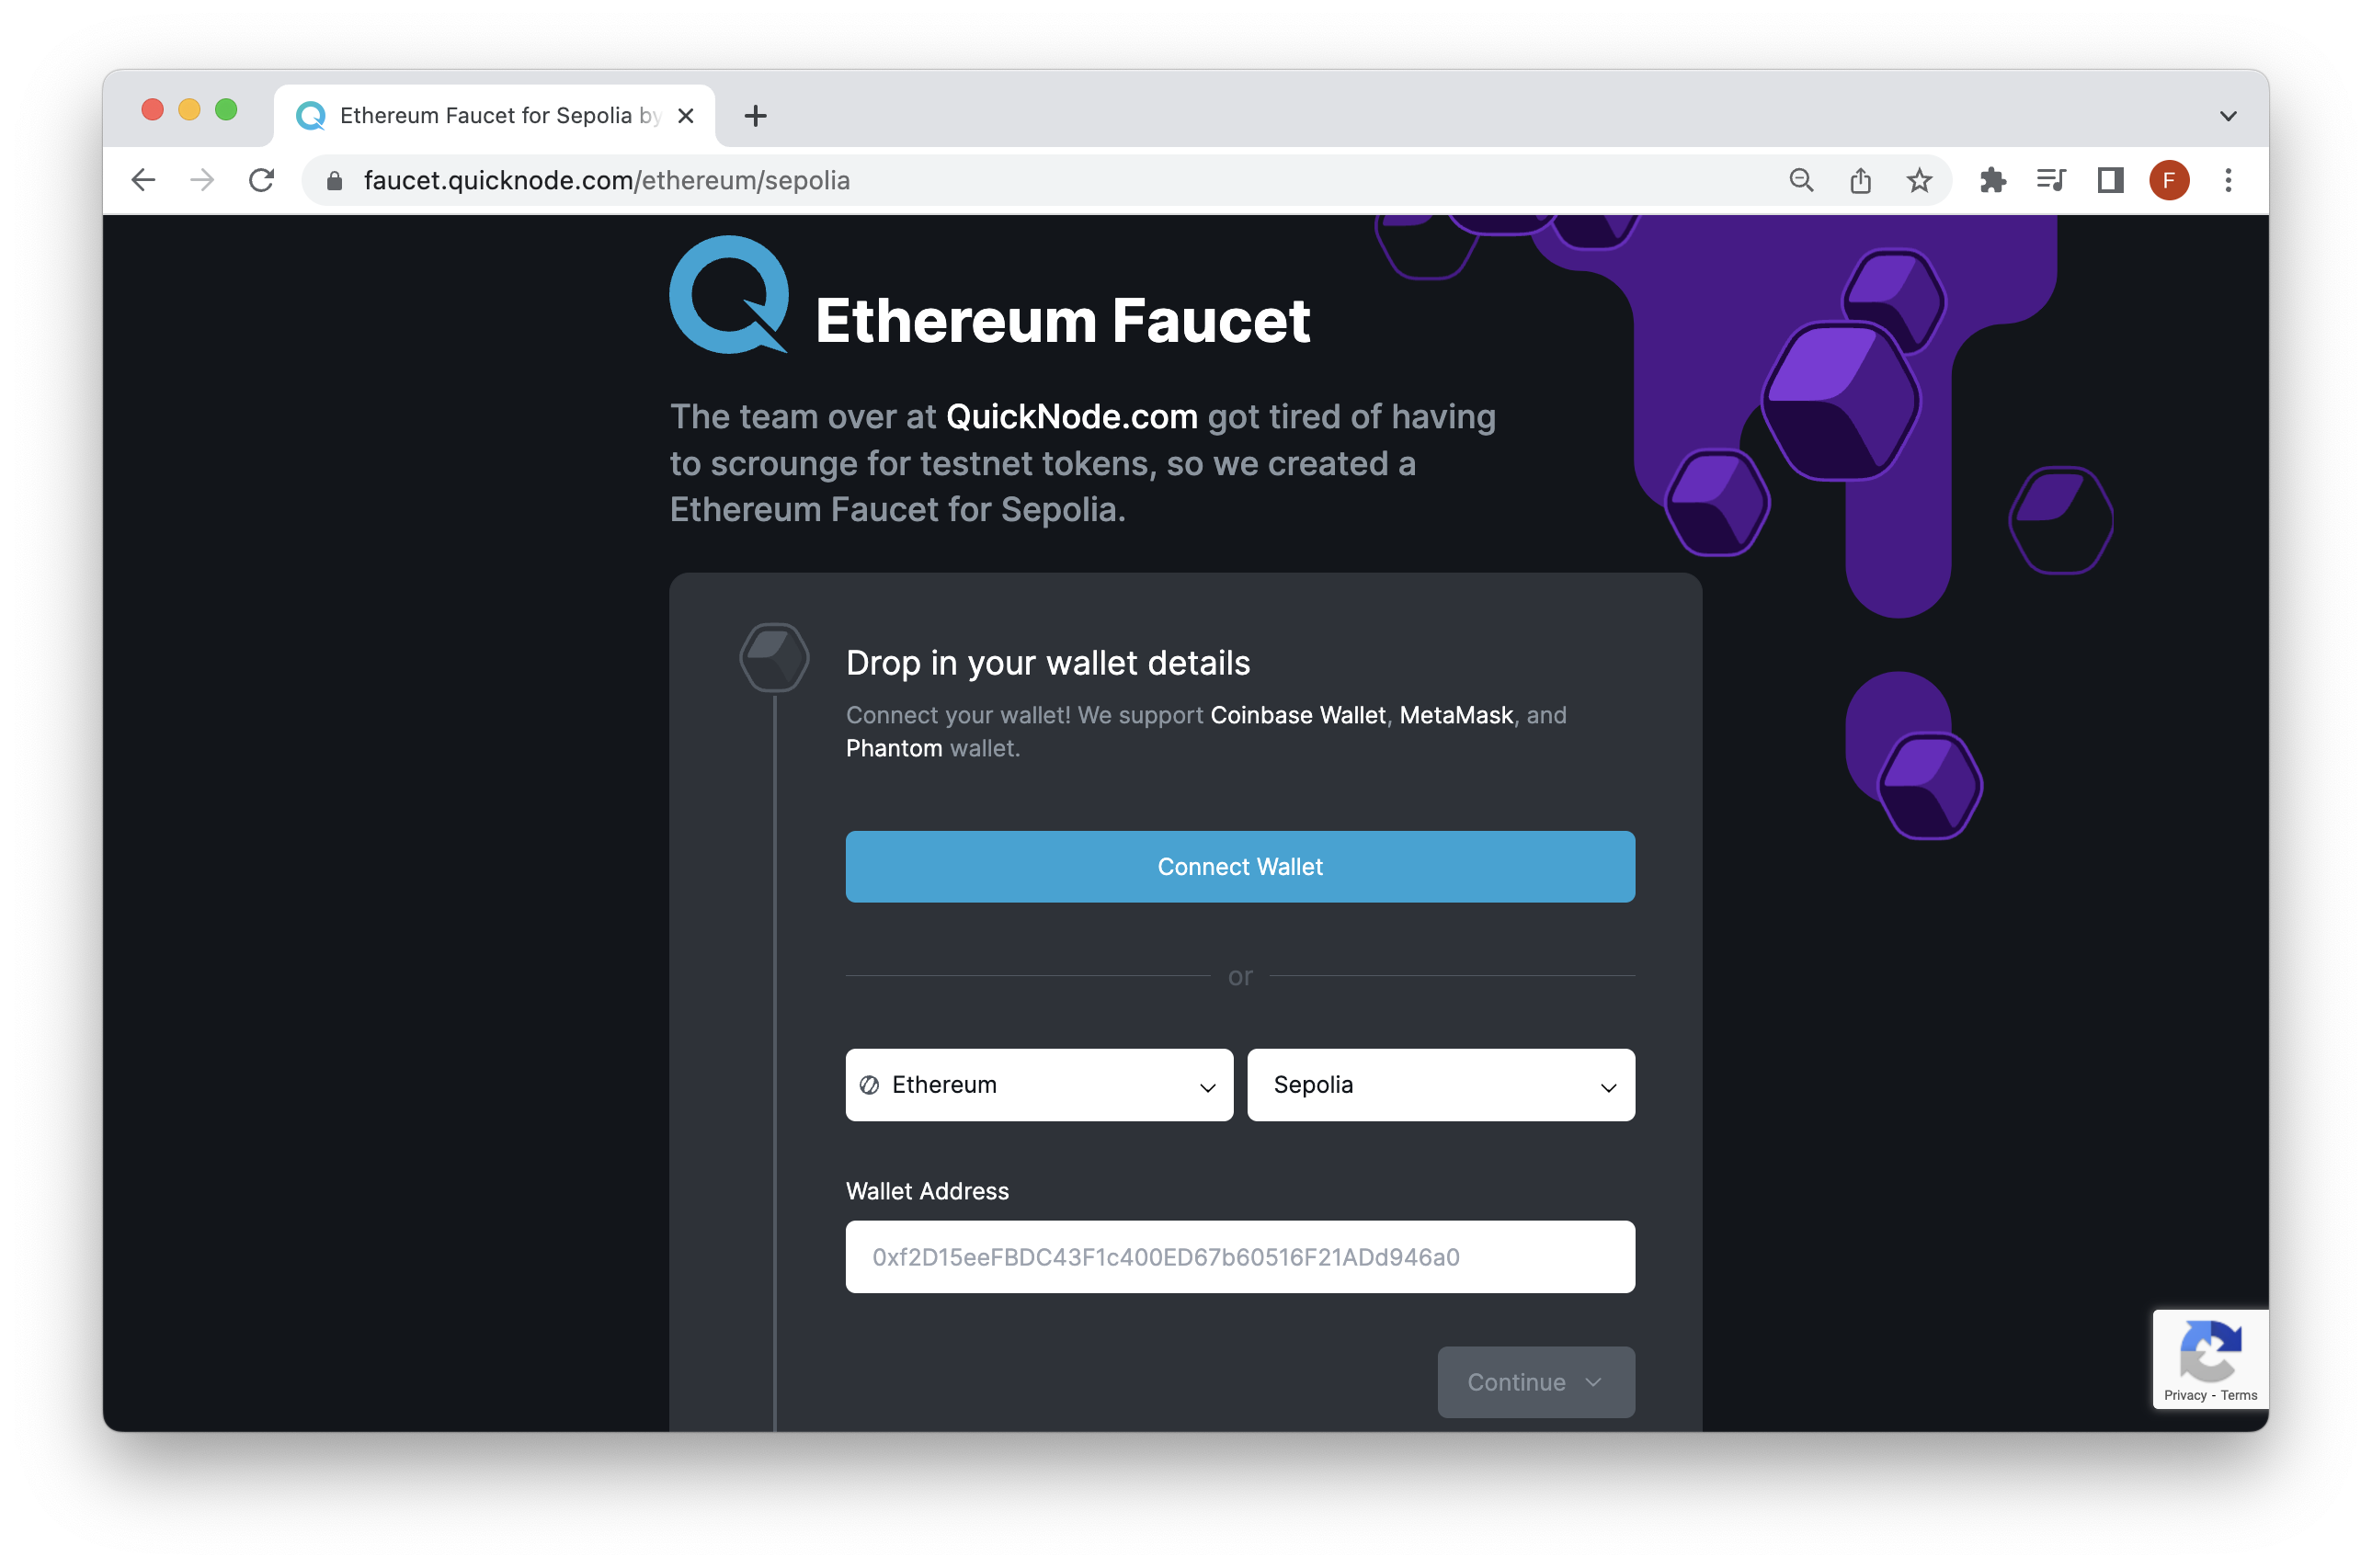
If you're in need of ETH on Sepolia testnet, the Multi-Chain Quicknode Faucet makes it easy to obtain test ETH!
Navigate to the Multi-Chain Quicknode Faucet and connect your wallet (e.g., MetaMask, Coinbase Wallet) or paste in your wallet address to retrieve test ETH. Note that there is a mainnet balance requirement of 0.001 ETH on Ethereum Mainnet to use the EVM faucets. You can also tweet or login with your Quicknode account to get a bonus!
For the remainder of this guide, we'll transition to the coding portion and demonstrate how to send ERC-20 tokens to an Ethereum address and approve a smart contract a certain allocation of ERC-20 tokens.
Send an ERC-20 Token using Web3.py
We'll be using a popular web3 SDK called Web3.py designed for Ethereum interaction. With Web3.py, developers and users can send transactions, interact with smart contracts, read block data, and a variety of other use cases.
Step 1: Install the SDK and Set Up Project
First, make sure you have Python (version 3+) installed, then open your terminal and install the Web3py library via Pip:
pip install web3
If you encounter issues during the installation process, it's possible that your environment is not configured correctly. Refer to the troubleshooting guide for instructions on how to establish a clean environment.
Step 2: Create and Configure the File
Next, let's create a file called main.py:
echo > main.py
Following, let's input the following Python code:
from web3 import Web3
from web3.middleware import geth_poa_middleware
import json

# Constants for the RPC URL and contract details
RPC_URL = 'YOUR_QUICKNODE_ENDPOINT'
CONTRACT_ADDRESS = Web3.to_checksum_address('ERC20_CONTRACT_ADDRESS')
TO_ADDRESS = 'TO_ADDRESS'  # Adjust the to address

# Replace with your private key
private_key = 'YOUR_PRIVATE_KEY'

# Check if the private key is provided
if not private_key:
    raise ValueError("Private key not provided.")

# Create a Web3 instance connected to the specified RPC URL
w3 = Web3(Web3.HTTPProvider(RPC_URL))

# Inject PoA middleware for networks using Proof of Authority consensus
w3.middleware_onion.inject(geth_poa_middleware, layer=0)

# Check for connection to the Ethereum network
if not w3.is_connected():
    raise ConnectionError("Failed to connect to HTTPProvider")

# Load the contract ABI from a file
with open('abi.json') as abi_file:
    contract_abi = json.load(abi_file)

# Create a contract object
contract = w3.eth.contract(address=CONTRACT_ADDRESS, abi=contract_abi)

# Define transaction details
token_amount = w3.to_wei(1, 'ether')  # Adjust the amount as needed

# Get the nonce for the transaction
nonce = w3.eth.get_transaction_count(w3.eth.account.from_key(private_key).address)

# Build the transaction
transaction = contract.functions.transfer(TO_ADDRESS, token_amount).build_transaction({
    'chainId': w3.eth.chain_id,
    'gas': 2000000,  # Adjust the gas limit as needed
    'gasPrice': w3.eth.gas_price,  # Adjust the gas price as needed or use w3.eth.generate_gas_price()
    'nonce': nonce,
})

# Sign the transaction with the private key
signed_txn = w3.eth.account.sign_transaction(transaction, private_key)

# Attempt to send the transaction
try:
    tx_hash = w3.eth.send_raw_transaction(signed_txn.rawTransaction)
    print(f"Transaction sent! Hash: {tx_hash.hex()}")
except Exception as e:
    print(f"Error sending transaction: {e}")
Remember to replace the placeholders, YOUR_QUICKNODE_ENDPOINT, YOUR_PRIVATE_KEY, ERC20_CONTRACT_ADDRESS and TO_ADDRESS with their actual values.
IMPORTANT: You will also need to create a abi.json file in the same directory and include the ABI of the smart contract (ERC-20 token) from which you are transferring tokens. If the ERC-20 token you are transferring has its smart contract verified on Etherscan, you can retrieve the ABI via the Contract tab.
Step 3: Execute and Send the ERC-20 Token
Finally, we can execute the code by running the following terminal command:
python main.py
The output will look similar too:
Transaction sent! Hash: 0x9fc4ea7be48f5af020e257023e5e56c28246fe3d54c815bc5b623e45d5ef1aab
That's it!
Grant ERC-20 Token Access to Smart Contracts
As mentioned in the Approve section in this guide, you do not need to use the approve function to transfer ERC-20 tokens to a smart contract; however, if you would like the smart contract to access some or all of your ERC-20 tokens on your behalf, you will need to call the approve function first.
Let's demonstrate how to do this. We won't go over in-depth to set up your file (since it's the same process as above), so just follow along without coding.
transaction = contract.functions.approve(spender_address, token_amount).build_transaction({
    'chainId': w3.eth.chain_id,
    'gas': 2000000,  # Adjust the gas limit as needed
    'nonce': nonce,
})
Notice the only changes were to the function name and argument fields. We updated the function to approve since that's the function we want to call and updated the parameter value to spender_address, which should reference the contract address you want to approve tokens to. So to recap, the main thing you'll need to add or change when using the approve function will be to call that new function and update the address to reference the spender_address address (smart contract).
Final Thoughts
Congratulations on completing this guide! You've now equipped yourself with the knowledge to send ERC-20 tokens using Web3.py confidently. This skill is a fundamental part of interacting with the Ethereum blockchain and a valuable asset in your Web3 toolbox.
What's Next?
- Experiment and Explore: Try sending tokens between different accounts or integrate these methods into your own projects.
- Deepen Your Knowledge: Dive deeper into smart contract development and explore other token standards like ERC-721 or ERC-1155.
- Join the Community: Engage with other developers, share your experiences, and collaborate on projects.
Remember, blockchain development is an ever-evolving field, and staying updated is 🔑. Subscribe to our newsletter for more articles and guides on Web3 and blockchain. If you have any questions or need further assistance, feel free to join our Discord server or provide feedback using the form below. Stay informed and connected by following us on Twitter (@Quicknode) and Telegram announcement channel.
We ❤️ Feedback!
Let us know if you have any feedback or requests for new topics. We'd love to hear from you.