
3 min read
Overview
For seamless interactions with dApps on Ethereum and EVM-compatible chains, a dependable non-custodial wallet like Rabby Wallet is key. By default, non-custodial wallets connect to standard public RPC nodes, which are sufficient for everyday use, but a power user may require a more performant custom RPC provider.
Importance of Using Custom RPC Provider
Considering these wallets operate on public nodes that service a multitude of users simultaneously, there’s a potential for slowdowns or even temporary disruptions. When public nodes are congested or experience downtime, having the ability to switch to a custom RPC provider can be a game-changer. This ensures faster transactions and real-time data regardless of the status of public nodes, keeping you a step ahead in the fast-paced realm of Ethereum and other EVM-compatible blockchains.
In this guide, we’ll cover how to set up a custom RPC provider in Rabby Wallet.
Although the images used in this guide show the steps to have a custom RPC on Ethereum, they are applicable to other EVM chains (e.g., Polygon, Arbitrum) as well.
What is Rabby Wallet?
Rabby Wallet is a game-changing Web3 wallet that is a browser extension that offers a secure and user-friendly gateway to the Ethereum blockchain and other EVM (Ethereum Virtual Machine) compatible networks. As a non-custodial wallet, it gives users complete control over their private keys — and, by extension, their funds — without relying on a third party for security. It is one of the best wallets for interacting with dApps and DEXs (decentralized applications and exchanges).
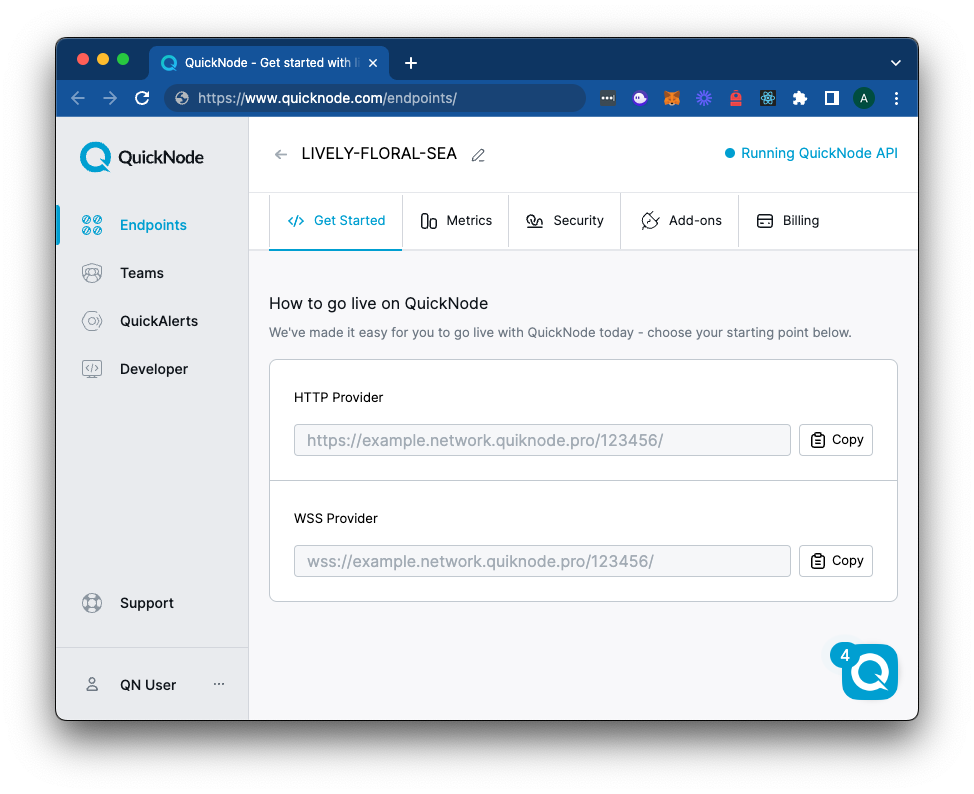
Creating an Endpoint on Quicknode
You can create an account on Quicknode.com within a few clicks to have a custom RPC endpoint.
Once logged in, click the Create an endpoint button, then select chain and network based on your preference.
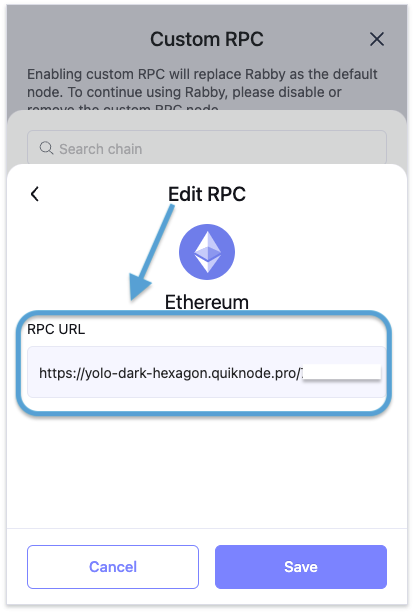
After creating your endpoint, copy the HTTP Provider link and keep it handy, as you'll need it next.
Setting up Rabby Wallet with a Custom Provider
Download the Rabby browser extension if you haven’t already. Create a new wallet or import your existing wallet if you have one. Make sure to keep your seed phrase safe.
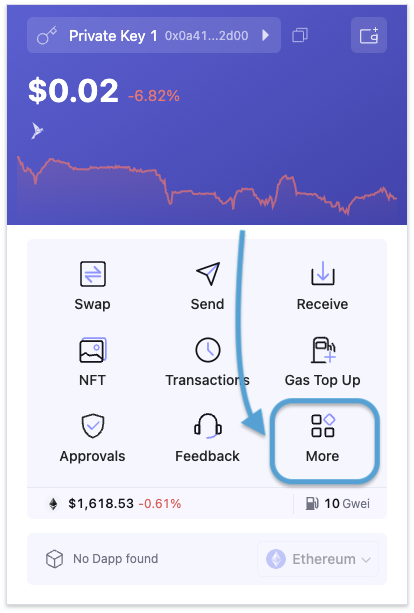
Step 1: Open the Rabby extension and click "More" at the bottom right of the page.
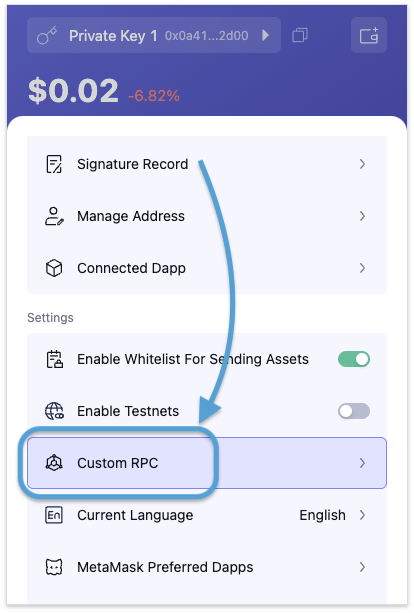
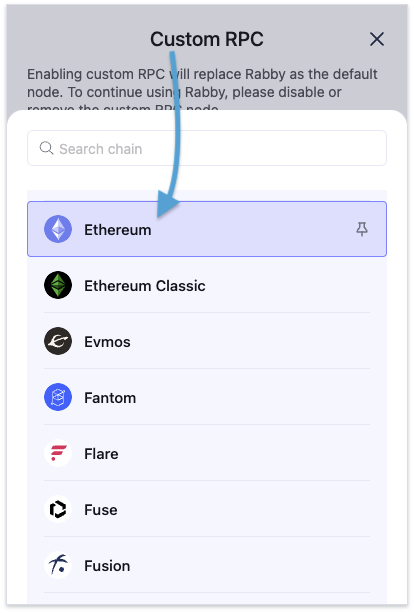
Step 2: Click "Custom RPC".
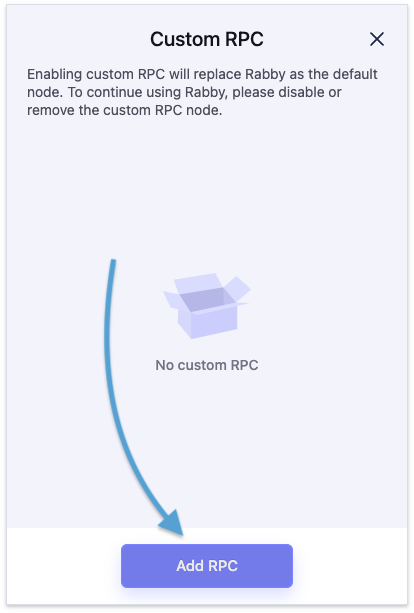
Step 3: Click "Add RPC".
Step 4: Select the network.
Step 5: Paste the HTTP provider link of your endpoint (be sure to include the "/" at the end), and click "Save".
All is done! Now, you will use your custom provider instead of public ones while using decentralized applications.
If your Quicknode account supports more than one endpoint, you can repeat the same process for other EVM-compatible networks as well.
Conclusion
Now, you have successfully added Quicknode as the custom RPC provider in the Rabby Wallet. Whether you're a casual user or a hardcore enthusiast, the advantages of using Quicknode can greatly enhance your interactions with decentralized applications and networks.
If you have any questions or need further assistance, feel free to join our Discord server or provide feedback using the form below. Stay up to date with the latest by following us on Twitter (@Quicknode) and Telegram announcement channel.
We ❤️ Feedback!
Let us know if you have any feedback or requests for new topics. We'd love to hear from you.