
7 min read
Overview
In this guide, we will walk through the process of creating and deploying a game-related smart contract on Polygon's zkEVM testnet chain. We will also demonstrate how to interact with the smart contract once it has been deployed.
What You Will Need
- Basic understanding of blockchain concepts and smart contracts
- Access to the Polygon zkEVM testnet (you can get access here)
What You Will Do
- Learn about Polygon zkEVM
- Create and Deploy a Coin Flip Smart Contract on Remix.IDE
- Interact with the Deployed Smart Contract
What is Polygon zkEVM
Polygon zkEVM is a layer-2 scaling solution that uses zero-knowledge proofs to enable fast and low-cost transactions on the Ethereum network. It is designed to be fully compatible with Ethereum, making it easy for developers to port their existing smart contracts to the Polygon network.
To learn more about Polygon zkEVM, check out this Quicknode guide - What is Polygon zkEVM? and this blog post!
Developer Environment Setup
Before we begin, you will need to set up a development environment for Polygon. Follow the steps below to get started:
Get a Web3 Wallet
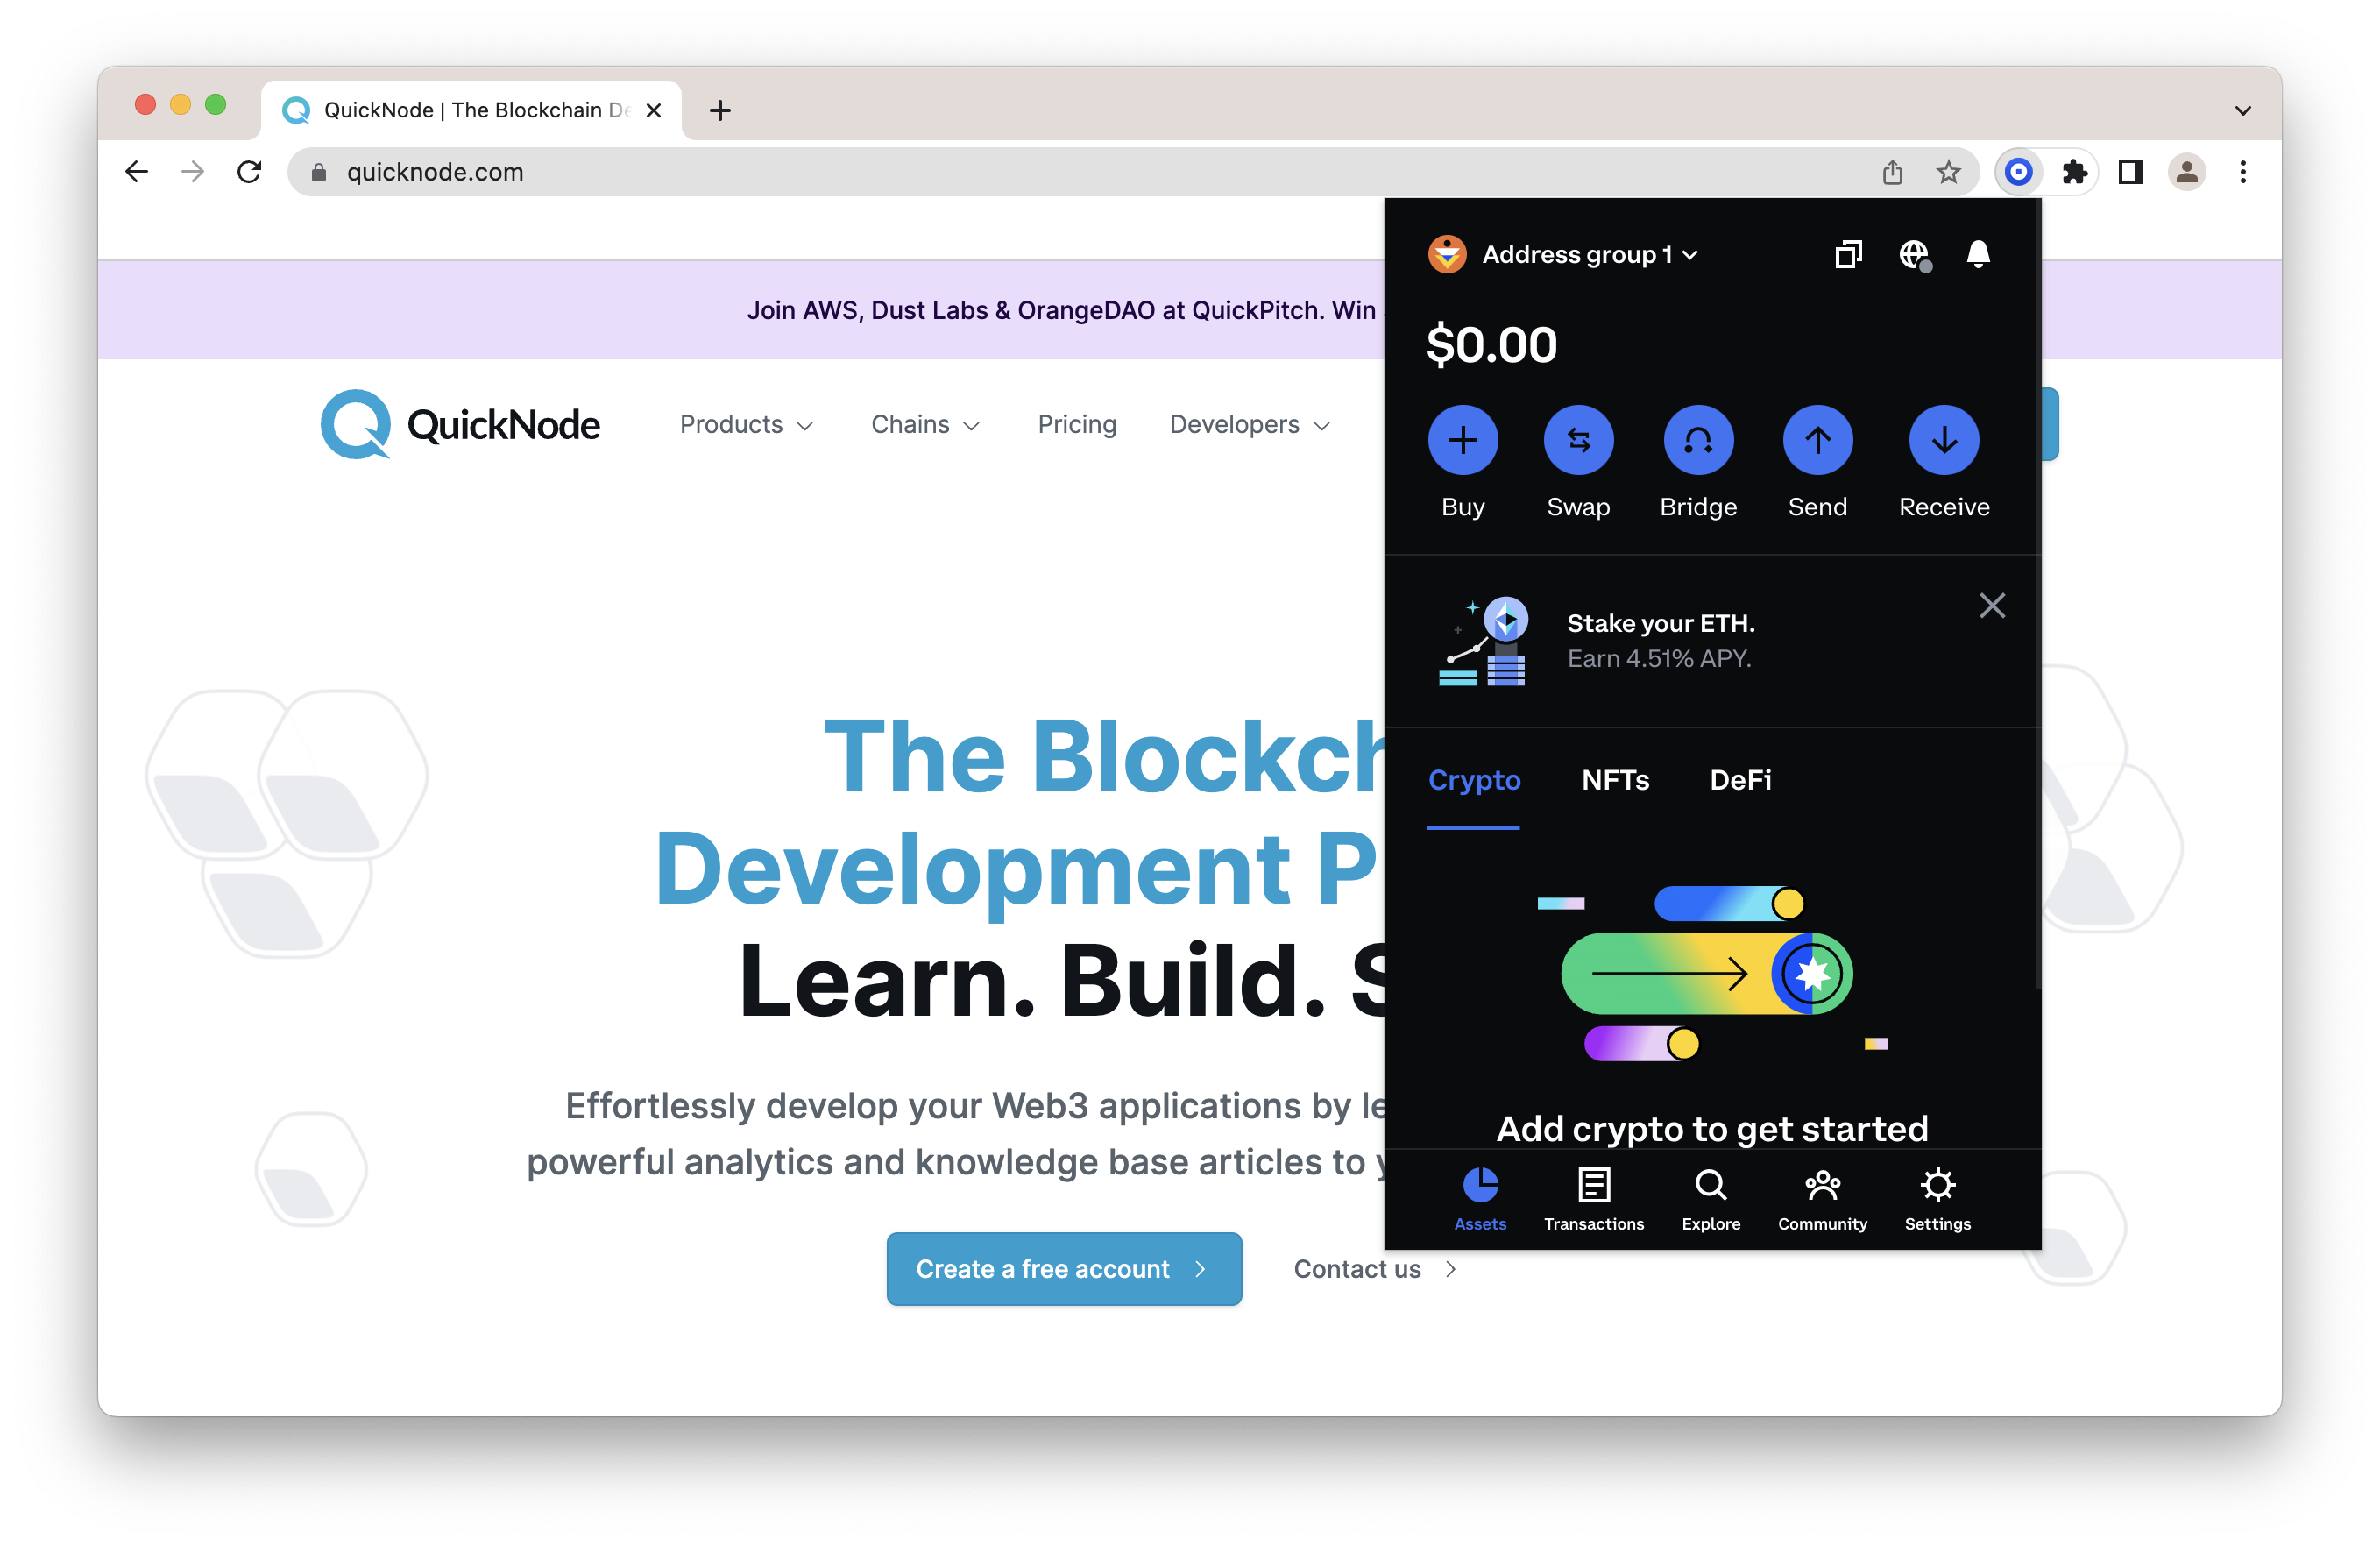
You'll need a non-custodial wallet in order to deploy a smart contract on Polygon zkEVM. You can use a browser extension such as MetaMask or Coinbase Wallet.
For the purpose of this tutorial, we'll demonstrate using Coinbase Wallet. Install the extension on your browser, then save and verify your seed phrase.
Fund your wallet
Not only do you need a Web3 wallet, but you'll need some ETH in order to pay for the deployment and contract interaction. To get some ETH on Polygon zkEVM, you'll need to bridge funds from another network, such as Ethereum mainnet or Goerli testnet. This guide will demonstrate using the Goerli testnet to bridge to Polygon zkEVM testnet.
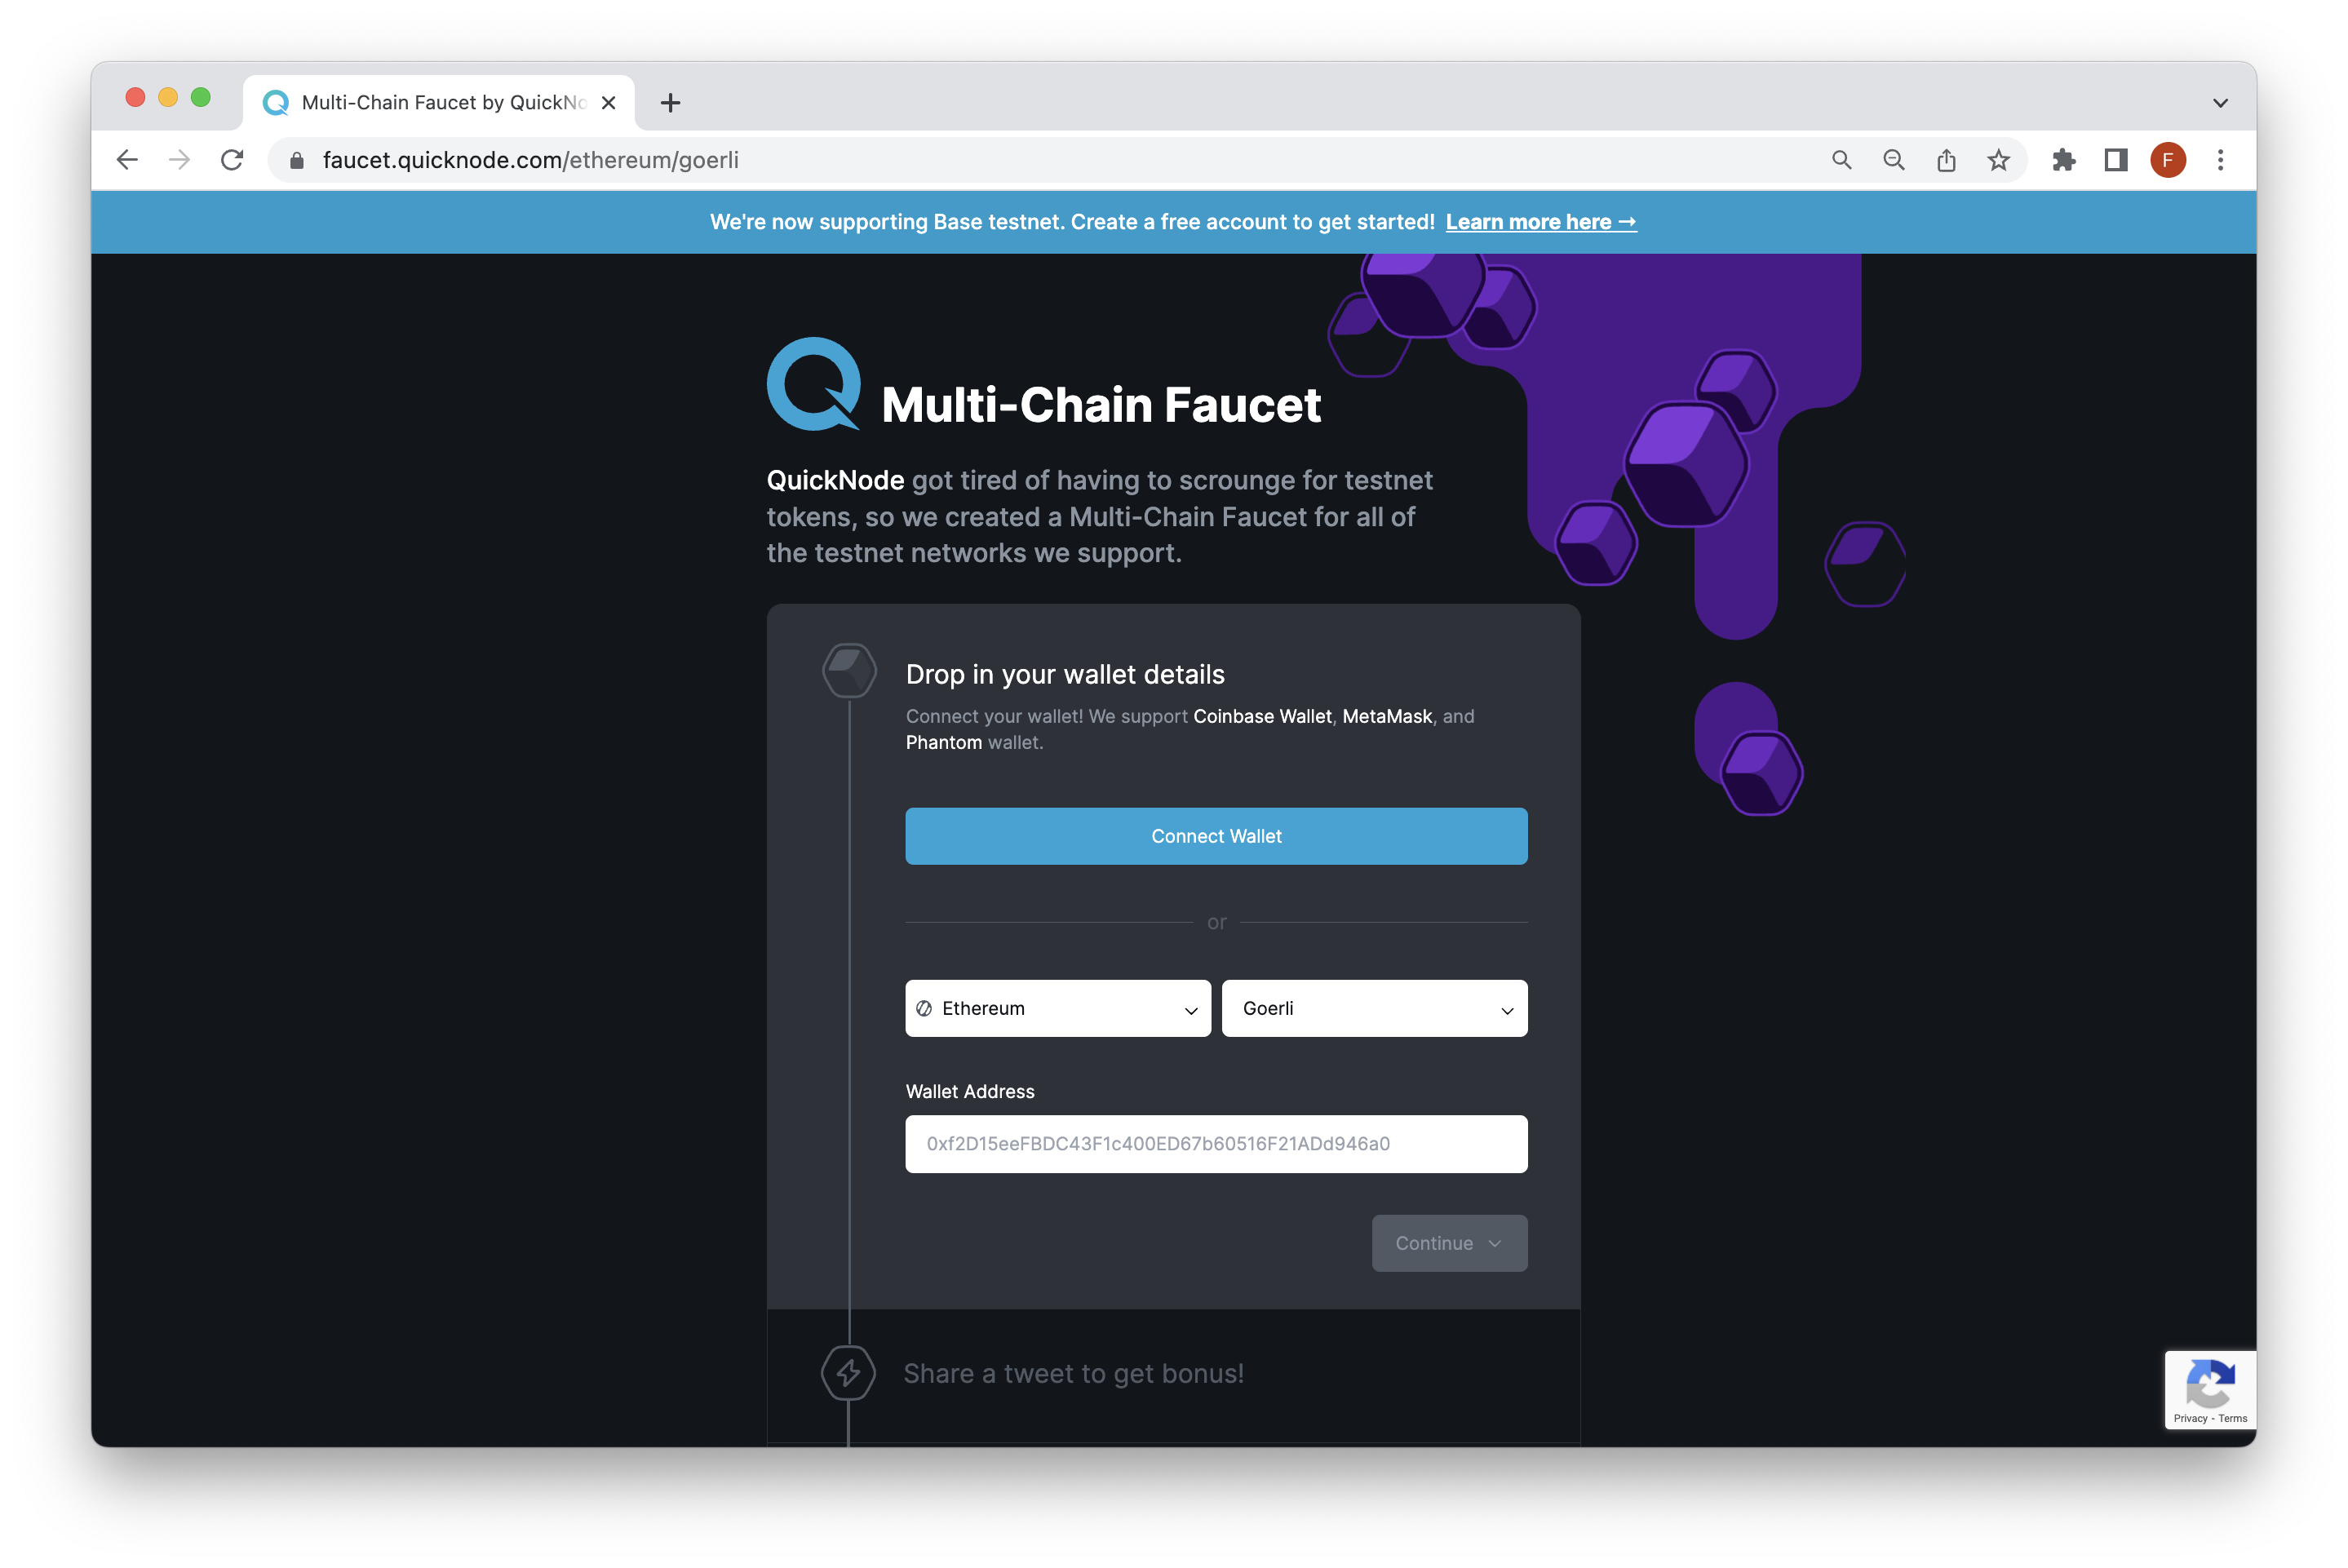
First, go to the Quicknode Multi-Chain Faucet, and paste it into your wallet address to receive some testnet ETH. You can also tweet to get some bonus ETH (I recommend it!).
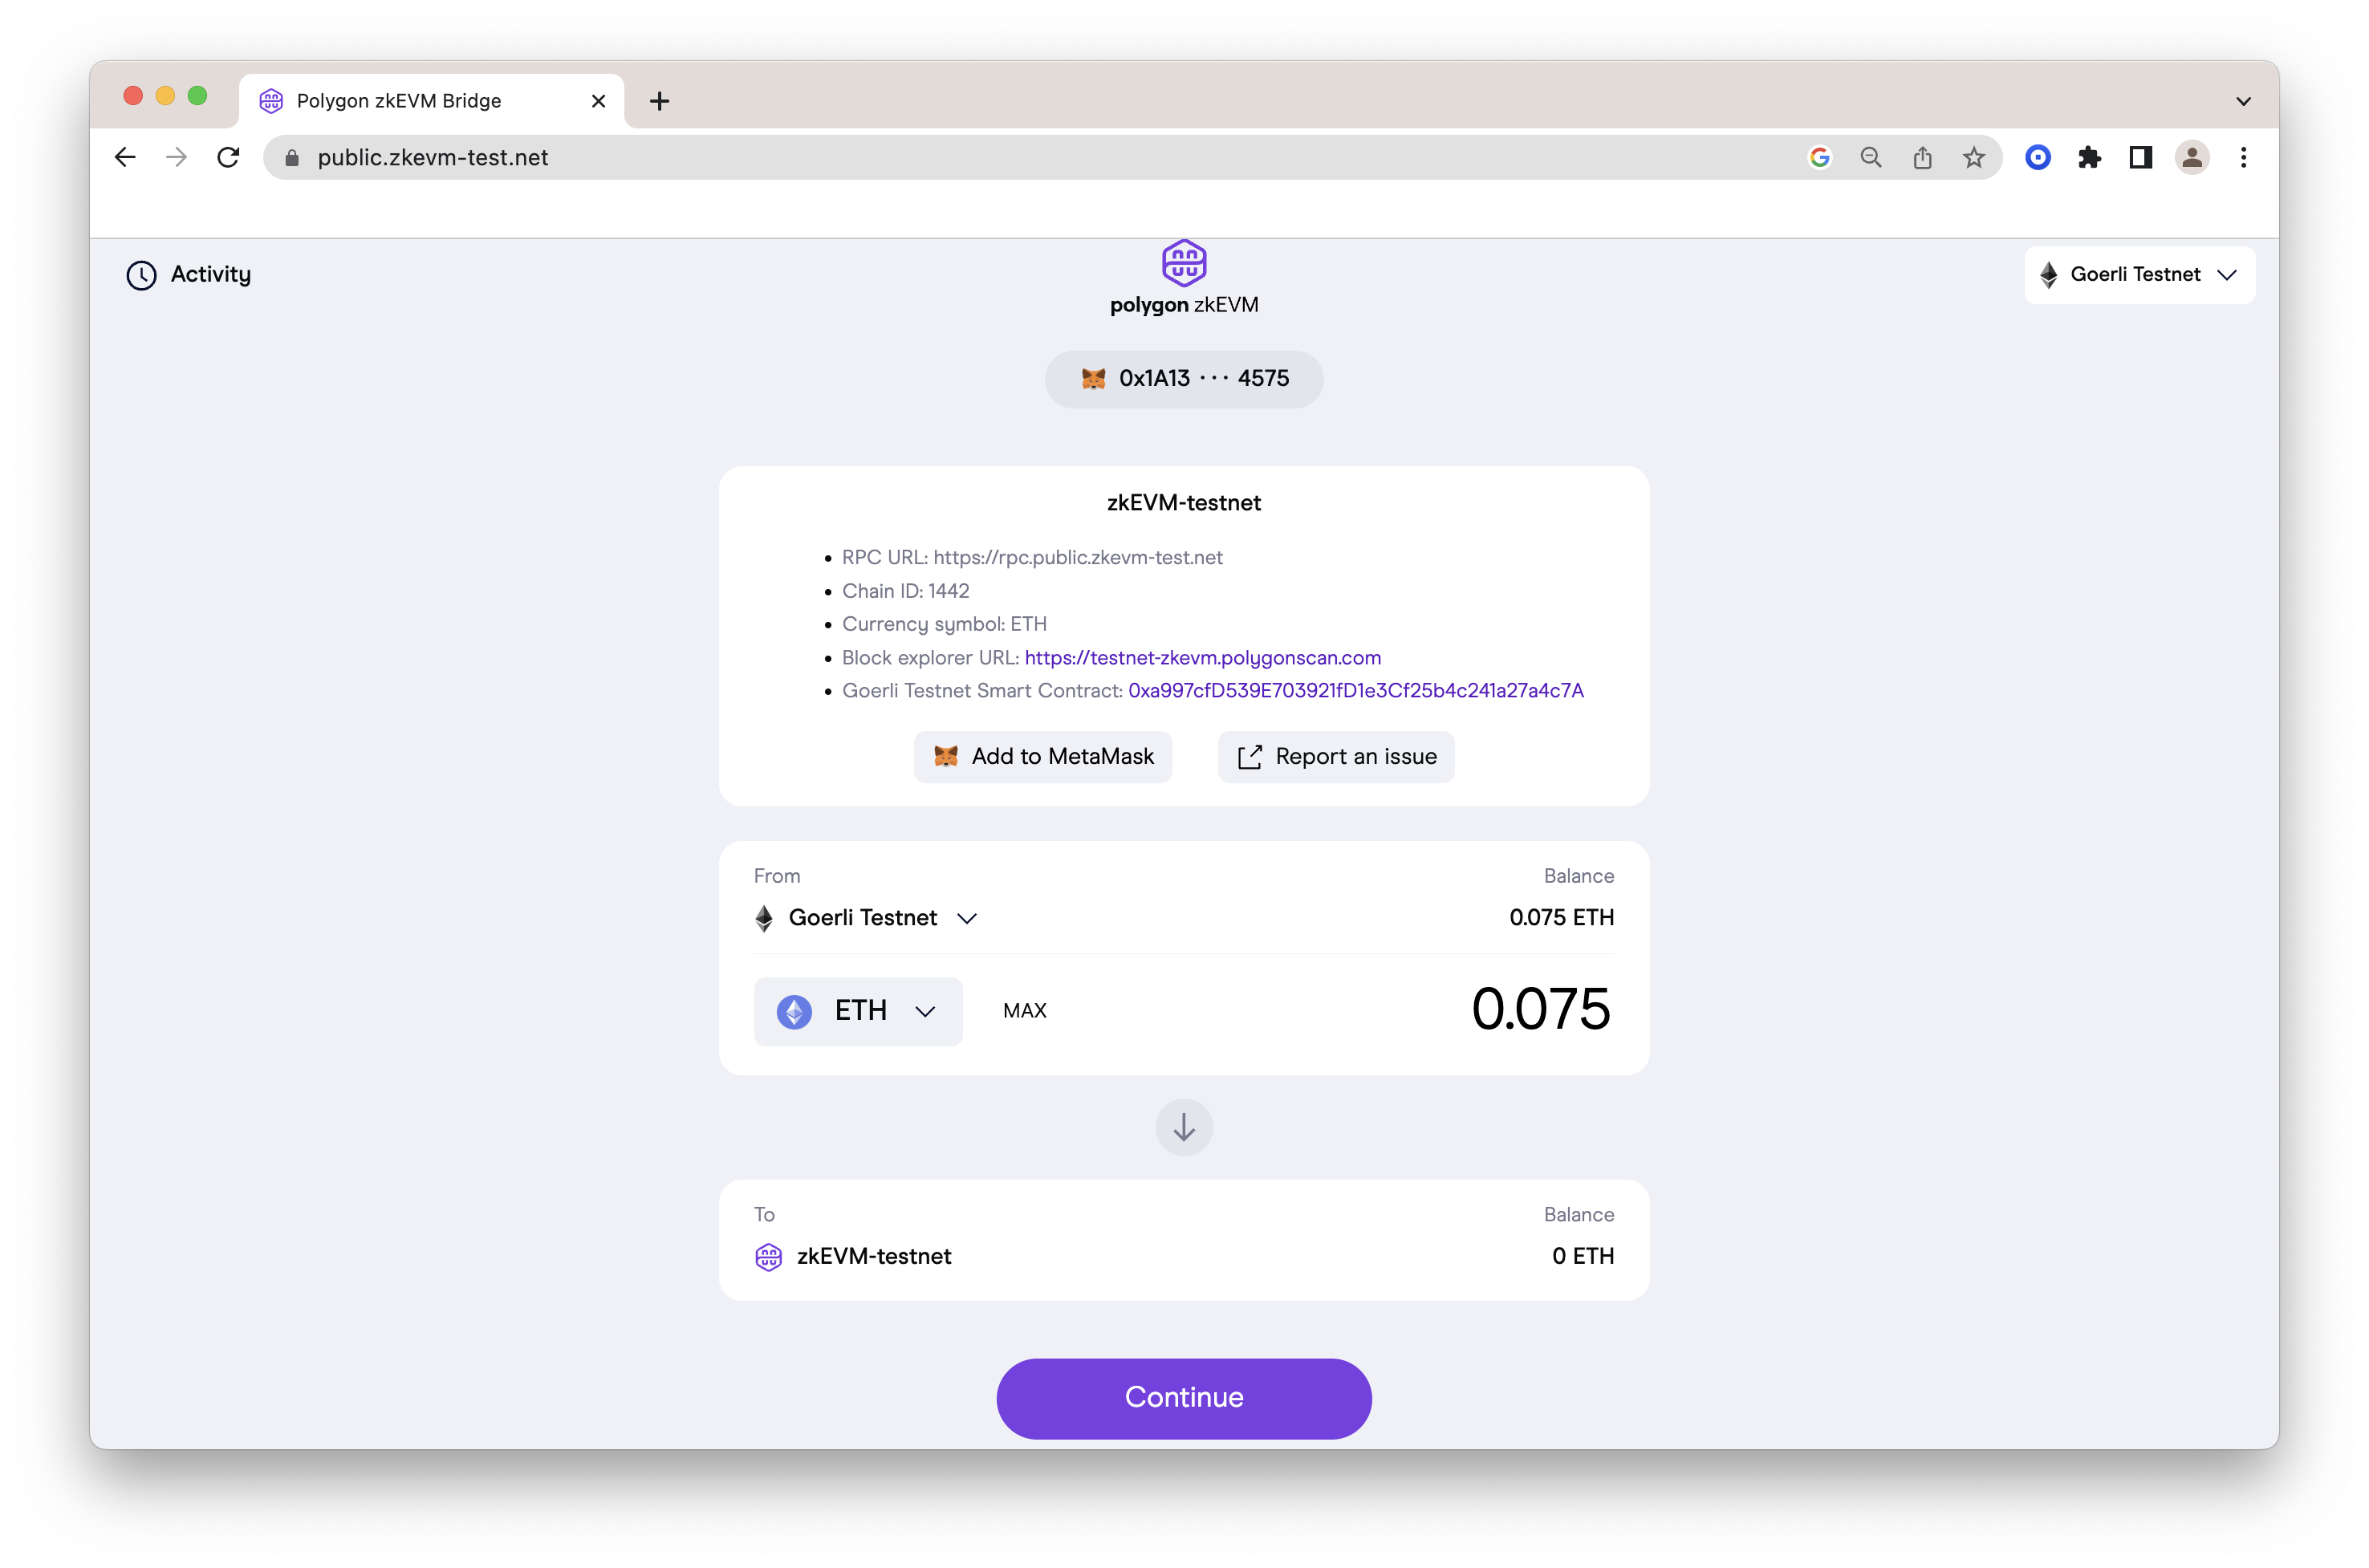
Once your wallet is funded, go to the mainnet or testnet bridge. Once you connect your wallet and see your balance, enter the amount you want to bridge and confirm (sign) the transaction.
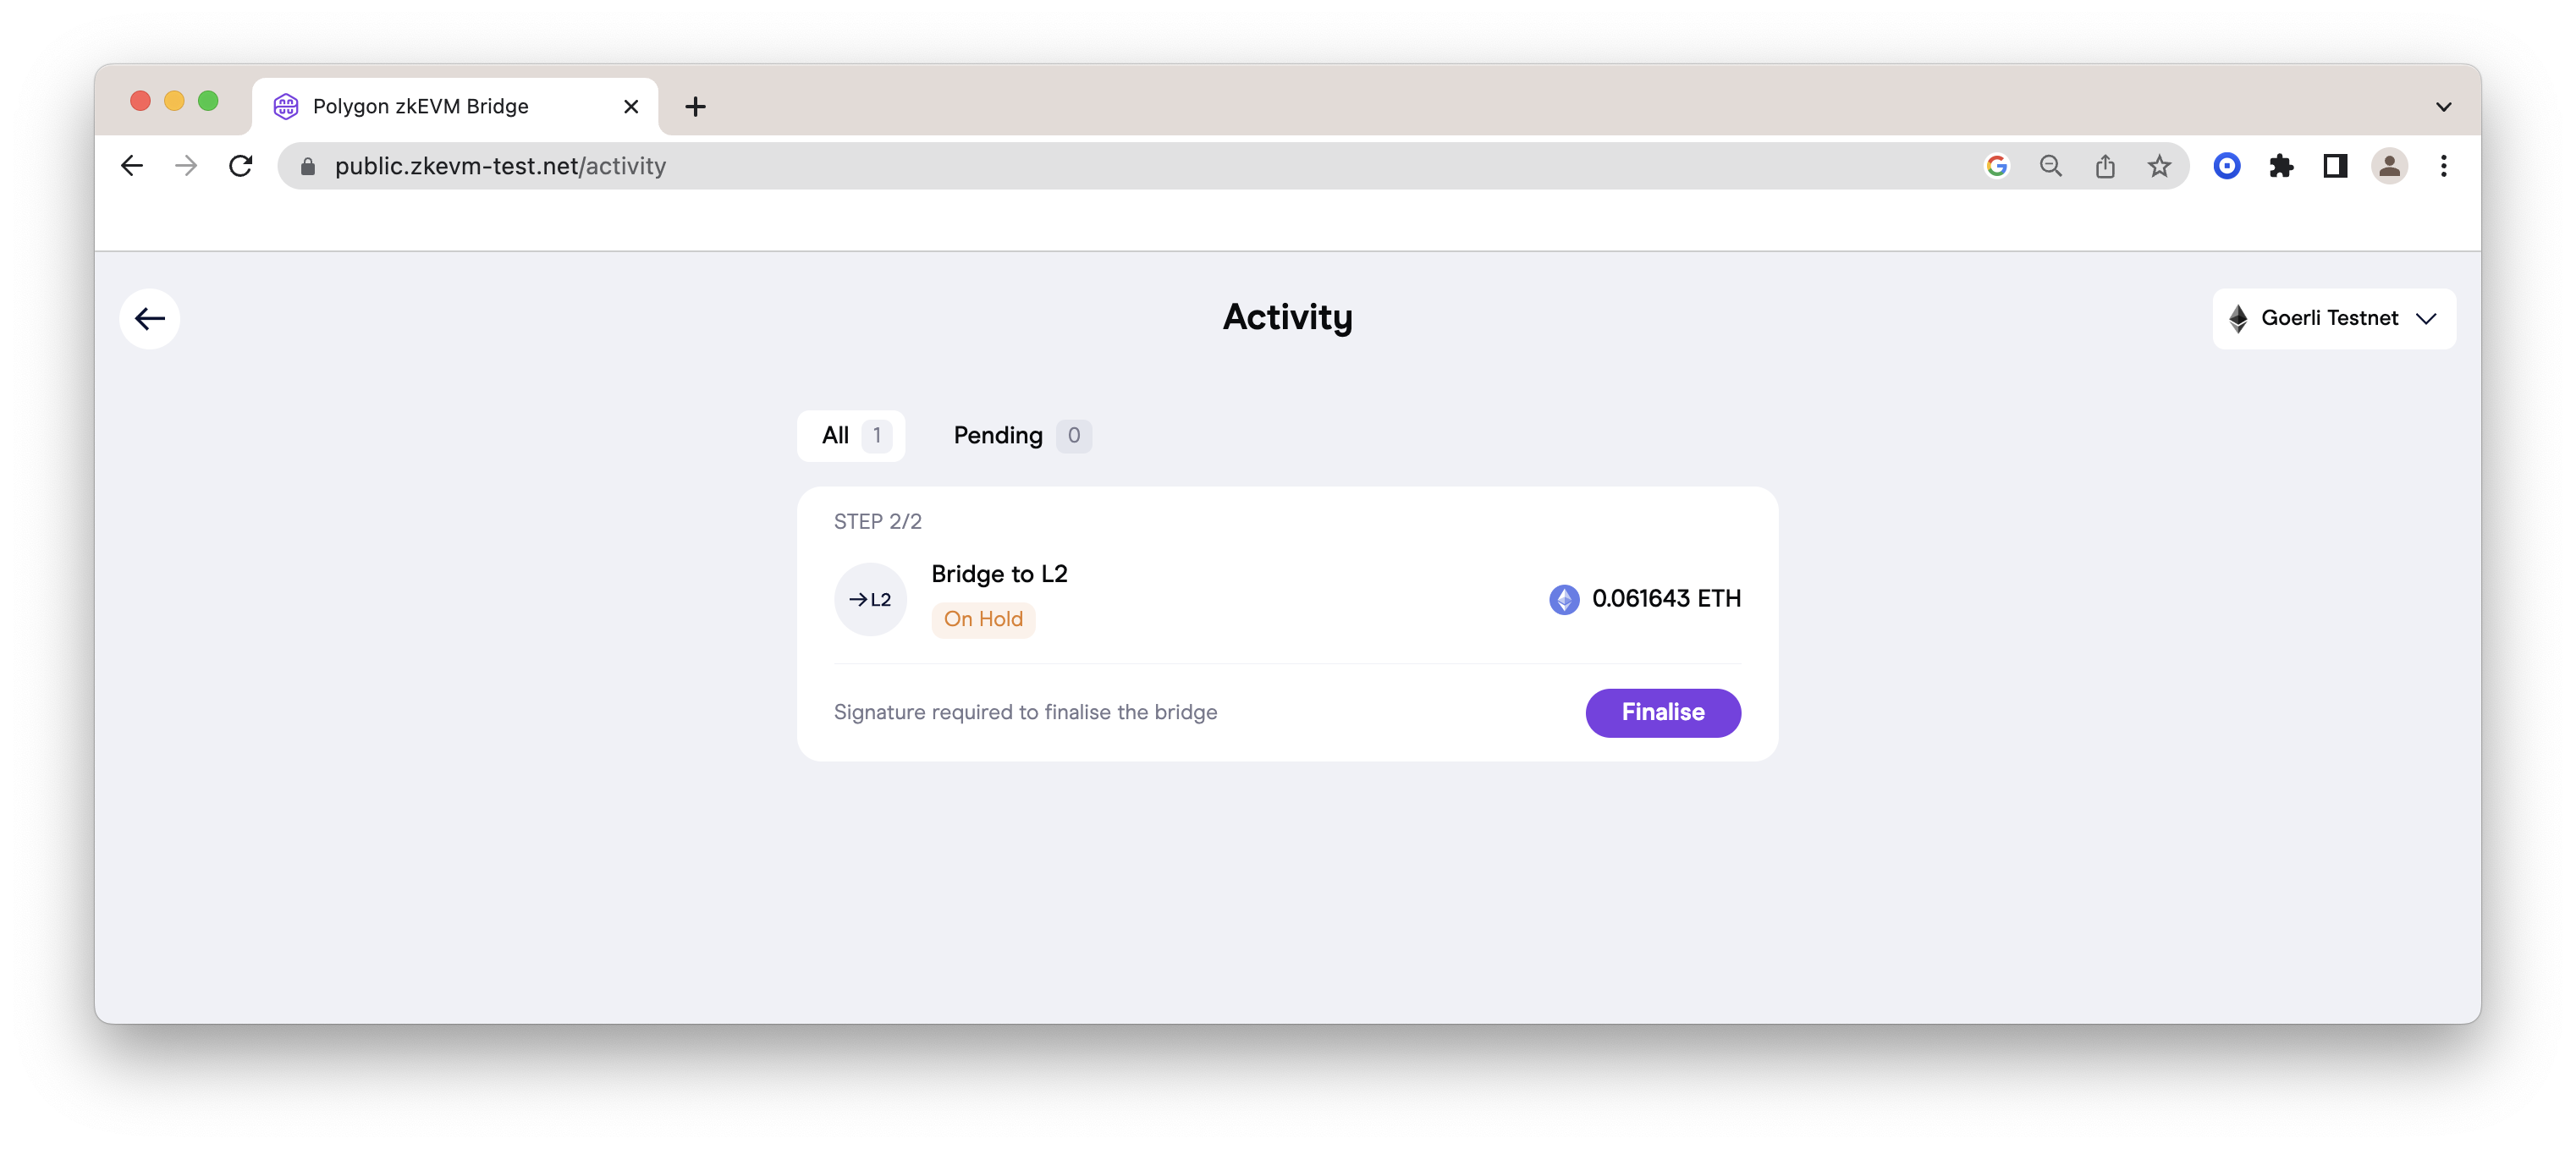
You'll need to wait for the checkpoint, then finalize the bridge transfer when prompted. Note, you will need to change networks back to zkEVM testnet in order to sign the 2nd confirmation transaction properly.
We'll verify our balance by checking the block explorer here (as they say, "dont trust, verify" 😉). Once your wallet is funded on Polygon zkEVM testnet, you can move on to the next section!
Get access to the Polygon zkEVM testnet
Every request to the Polygon zkEVM testnet network requires an API endpoint to connect with the network. This is where Quicknode comes in! You're welcome to use public nodes or deploy and manage your own infrastructure; however, if you'd like 8x faster response times, you can leave the heavy lifting to us. See why over 50% of projects on Ethereum choose Quicknode and sign up for an account here. Note that Quicknode also supports Polygon zkEVM mainnet!
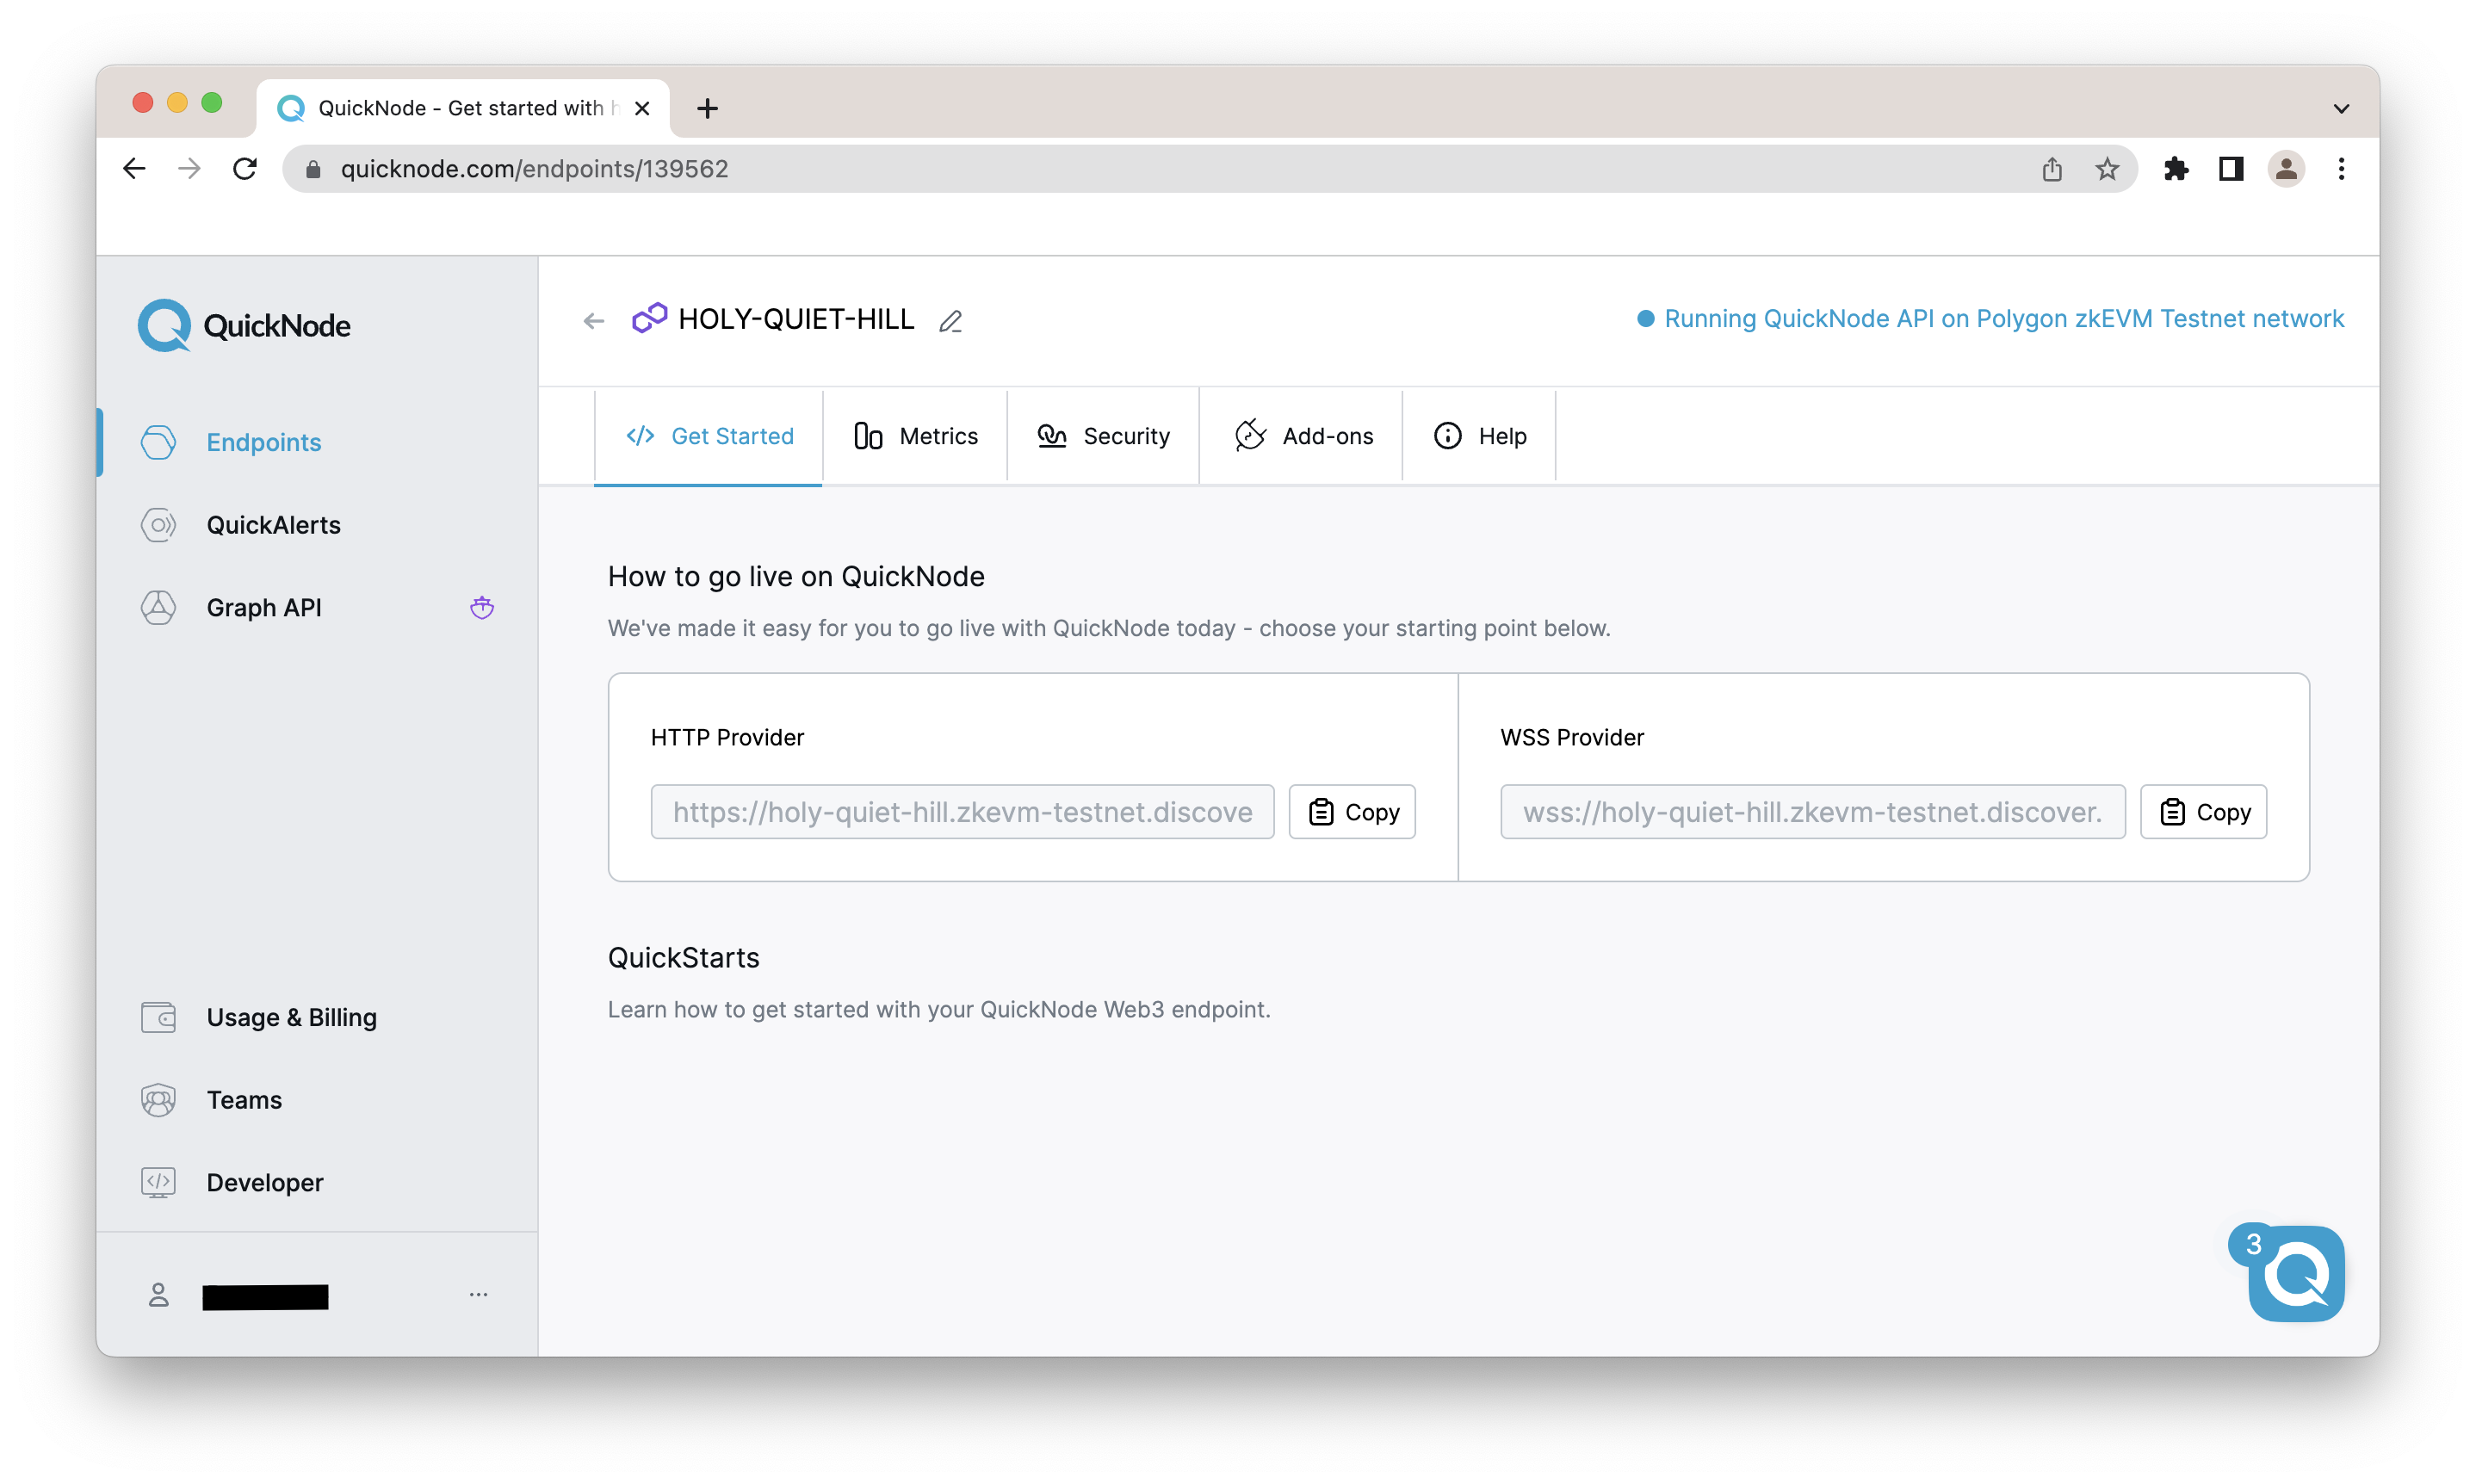
Add Quicknode Details to Web3 Wallet
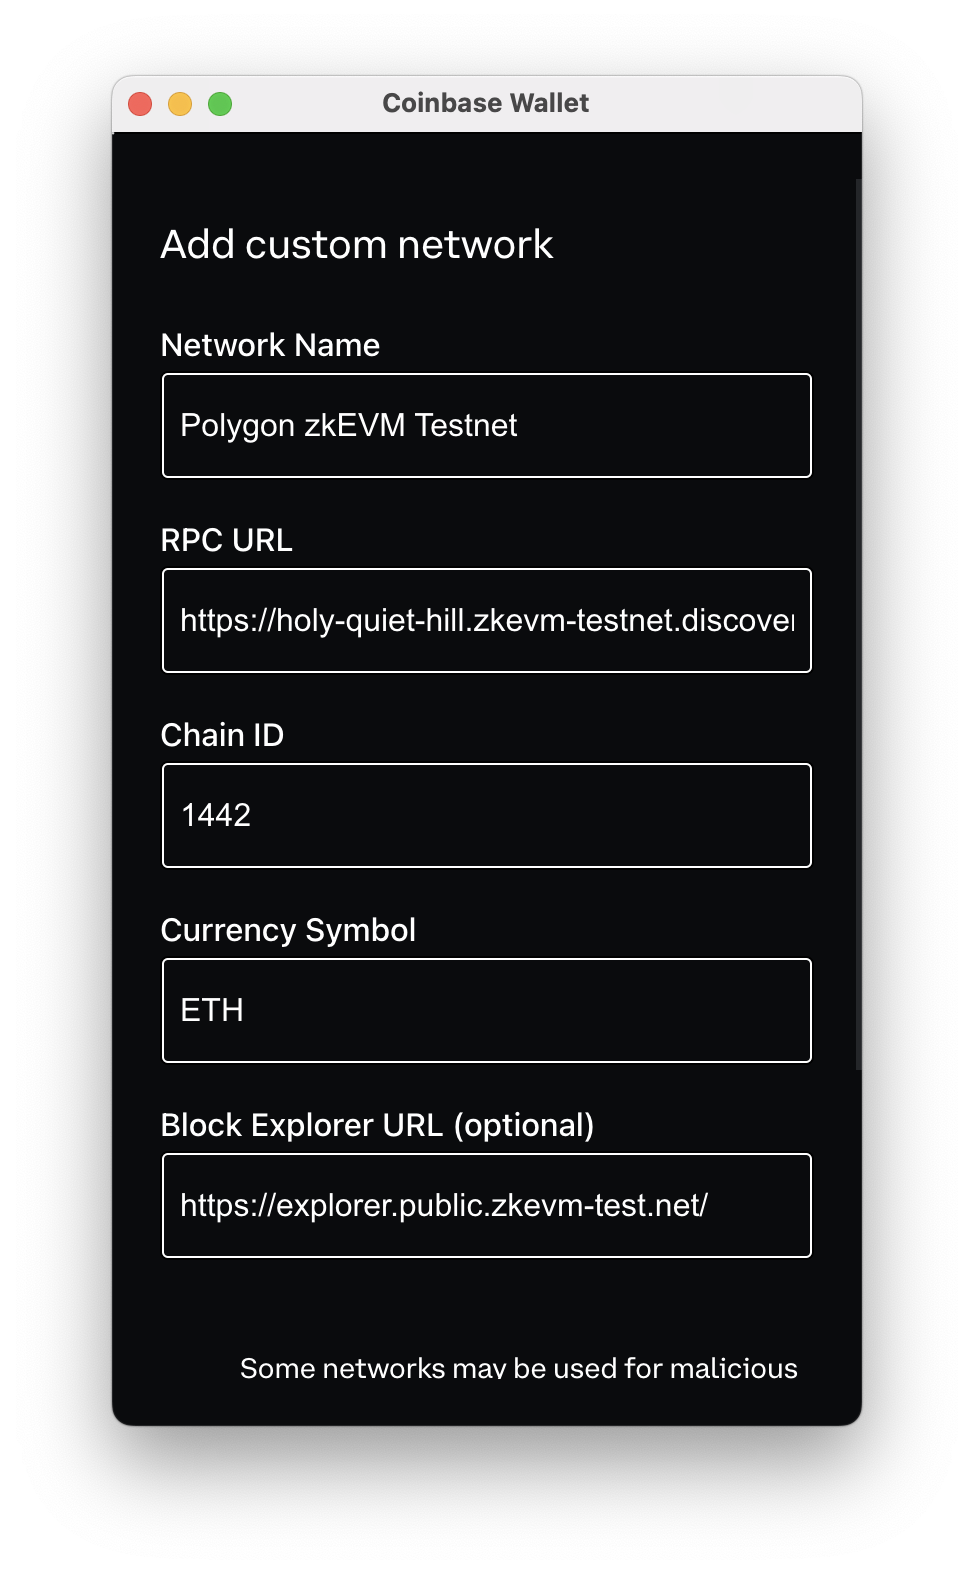
You should also add your Quicknode endpoint to your wallet. To do this on Coinbase Wallet, in upper right corner, click the globe icon, then click More Networks and click the plus sign in the top right. Then, add your details:
Polygon zkEVM (mainnet)
- Chain ID: 1101
- RPC URL: Quicknode HTTP Provider URL
- Block Explorer: https://zkevm.polygonscan.com/
Polygon zkEVM testnet
- Chain ID: 1442
- RPC URL: Quicknode HTTP Provider URL
- Block Explorer: https://explorer.public.zkevm-test.net/
Creating a Smart Contract
For this guide, we will create a simple game-related smart contract that allows players to bet on the outcome of a coin flip. Navigate to Remix.IDE, and create a blank workspace by clicking on the + button. Then, click the document icon to create a new file and name it CoinFlip.sol.
Once you've created a CoinFlip.sol file in Remix.IDE, paste the following code into the file:
// SPDX-License-Identifier: MIT
pragma solidity ^0.8.0;

contract CoinFlip {
    address public player1;
    address public player2;
    uint256 public pot;
    uint256 public winner;
    address public winnerAddress;

    event GameStarted(address indexed player1, address indexed player2, uint256 pot);
    event GameFinished(address indexed winnerAddress, string winner, uint256 pot);

    function enter() public payable {
        require(msg.value == .001 ether, "Must send .001 ether to enter");
        if (player1 == address(0)) {
            player1 = msg.sender;
        } else {
            require(player2 == address(0), "Both players have already entered");
            player2 = msg.sender;
            emit GameStarted(player1, player2, pot);
        }
        pot += msg.value;
        winner = 0;
        winnerAddress = address(0);
    }

    function flipCoin() public {
        require(msg.sender == player1 || msg.sender == player2, "Sender is not a player");
        uint256 result = uint256(keccak256(abi.encodePacked(block.timestamp, block.difficulty, block.coinbase))) % 2;
        winner = result == 0 ? 1 : 2;
        winnerAddress = winner == 1 ? player1 : player2;
        string memory winnerName = winner == 1 ? "player1" : "player2";
        emit GameFinished(winnerAddress, winnerName, pot);
        payable(winnerAddress).transfer(pot);
        pot = 0;
        player1 = address(0);
        player2 = address(0);
    }
}
Remix.IDE should automatically compile the pasted code. You can verify this by checking the Compile Tab and looking if there's a green checkmark.
The smart contract above is designed to enable two players to participate in a game where the winner takes the pot. The contract contains two main functions, enter() and flipCoin().
The enter() function is used to allow players to enter the game by sending 0.001 ether to the contract. Once both players have entered, the function emits a GameStarted event with the addresses of both players and the pot value. The function then assigns each player to player1 or player2, and increments the pot value by the amount of ether sent by the player. The flipCoin() function is used to determine the winner of the game. This function checks that the sender is either player1 or player2, generates a random number to select the winner, and transfers the pot value to the winner's account. The winnerAddress variable can be called to see which address has won the flip. Finally, the function resets the values of player1 and player2 to zero, indicating the end of the game. The use of these functions, along with event emissions and variable updates, enables the CoinFlip contract to provide a simple and transparent game of chance for two players.
Deploying a Smart Contract
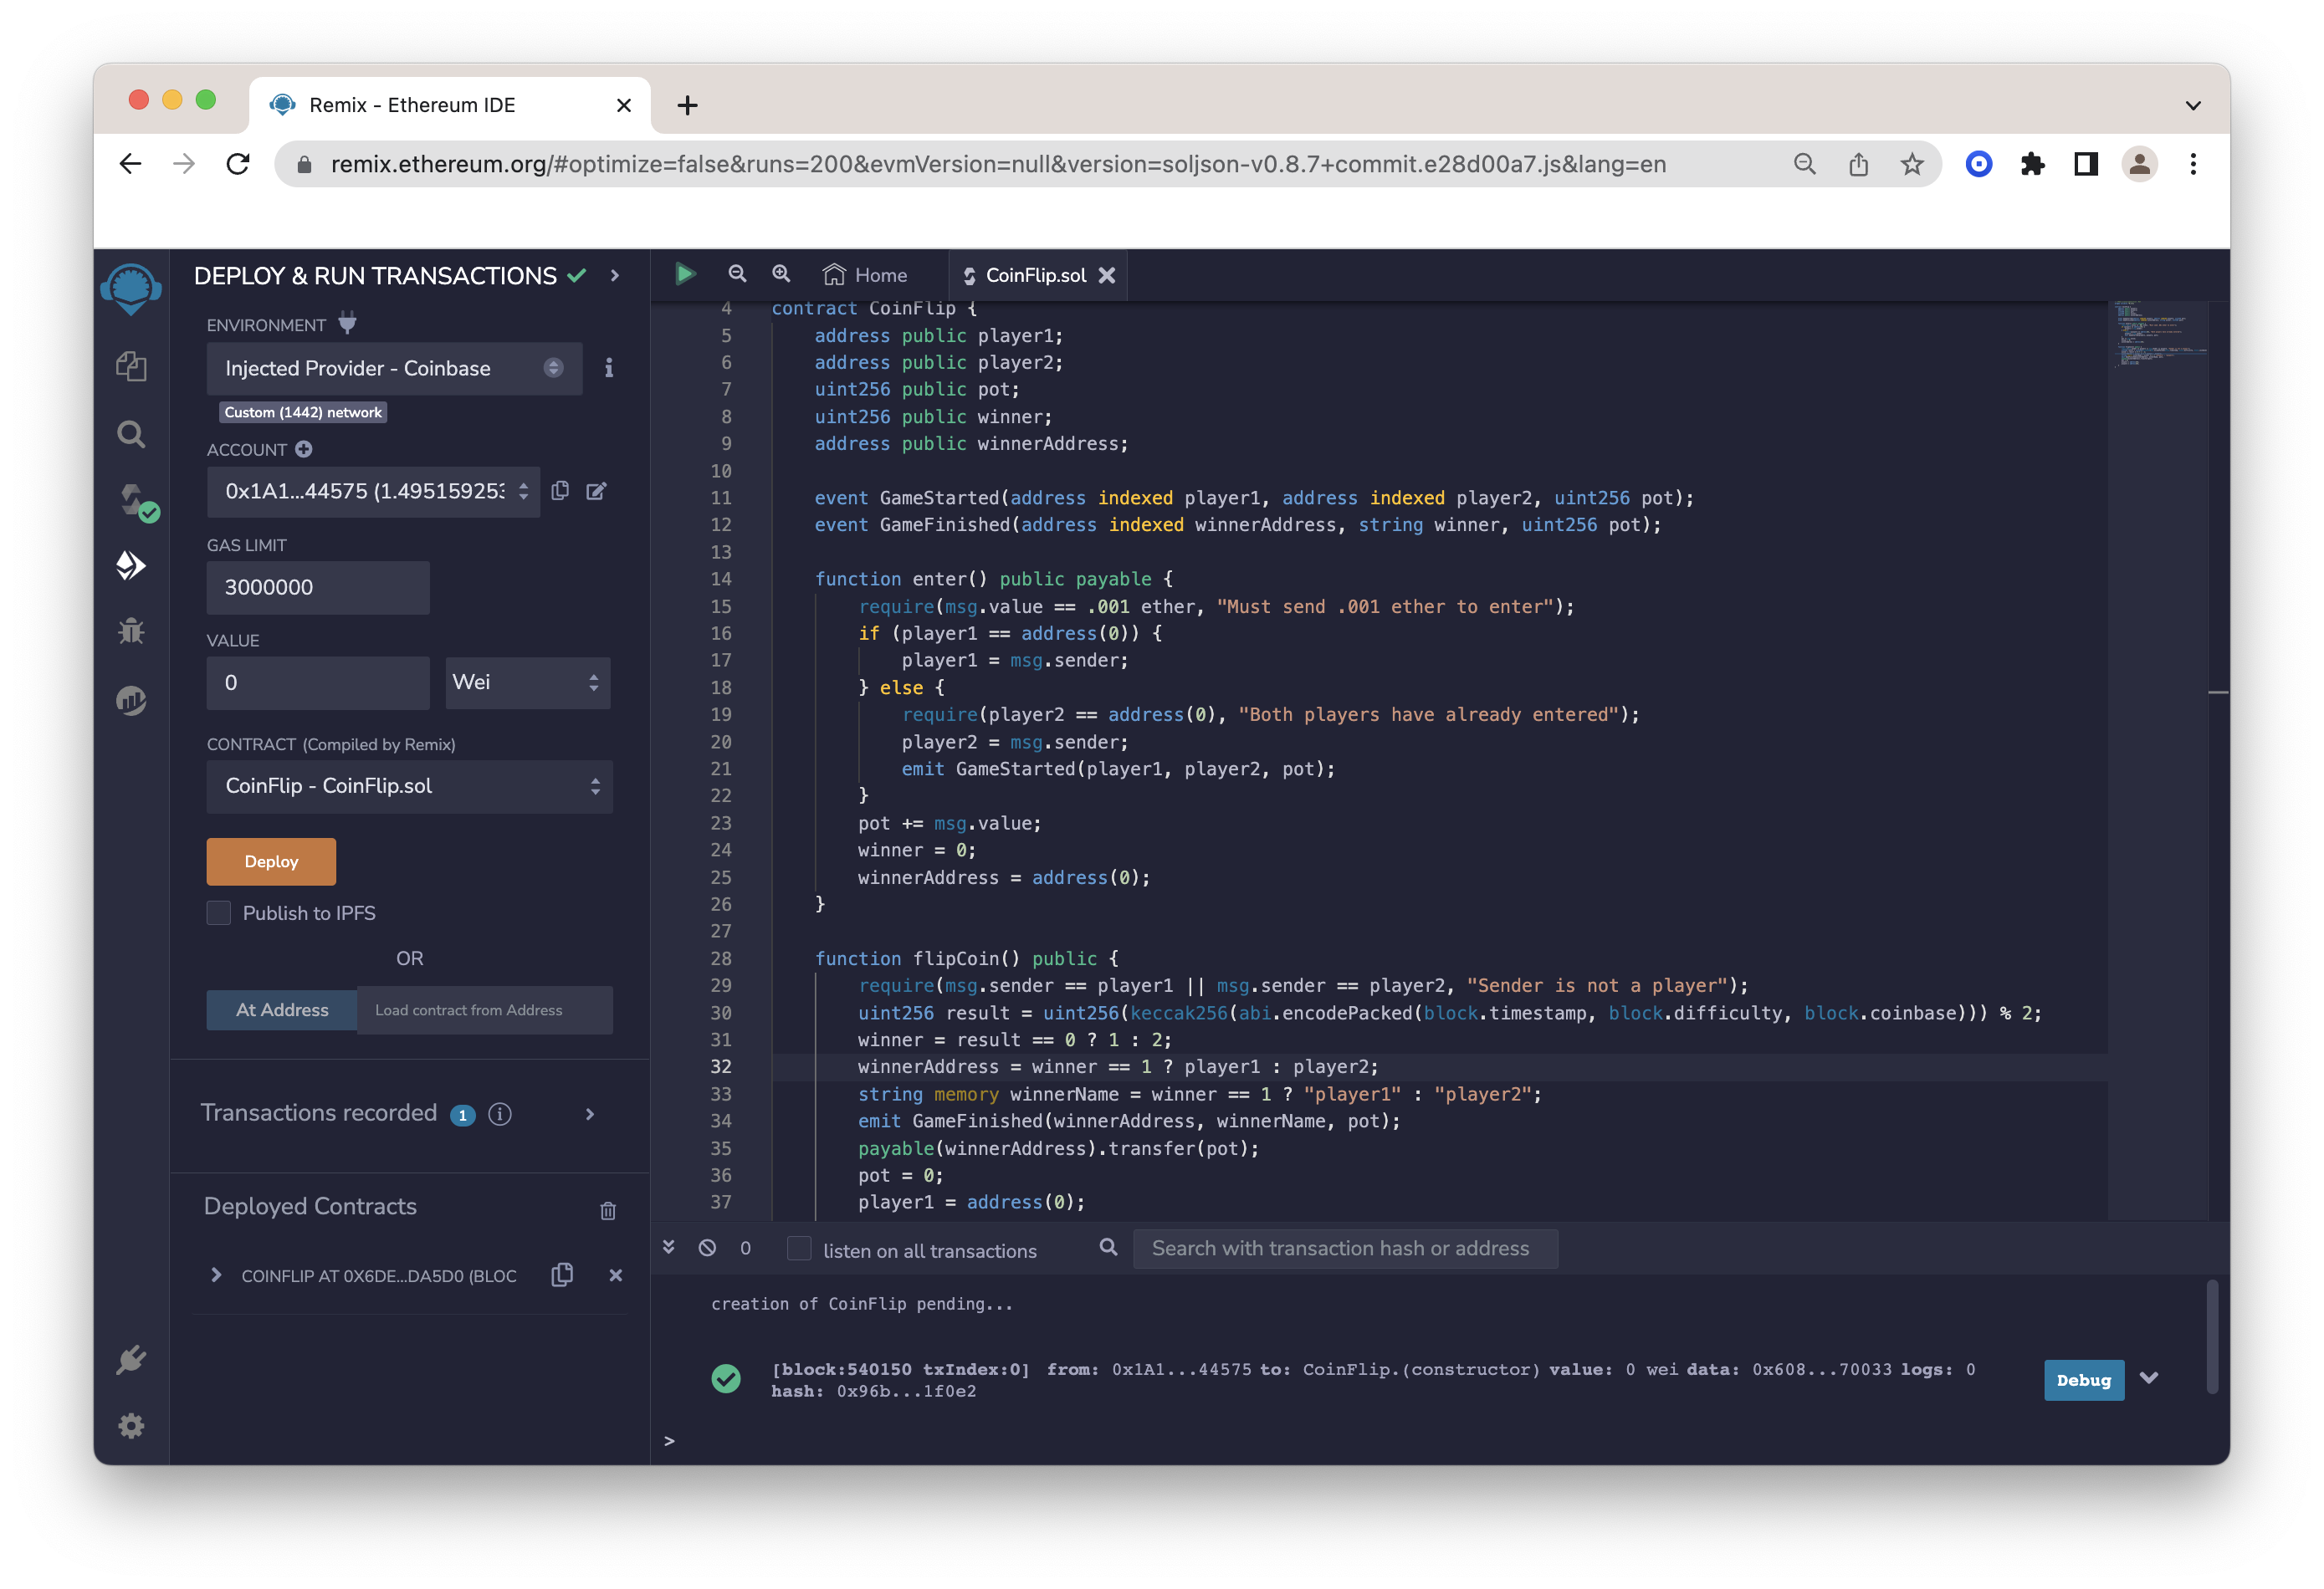
Now that we have a compiled smart contract, we can deploy it to the Polygon zkEVM testnet. Navigate to the Deploy & Run Transactions tab and confirm the CoinFlip.sol contract is selected under the dropdown.
Then, under environment, select Injected Provider and connect your wallet. Confirm that the correct network is selected.
Click the Deploy button and confirm the transaction in your wallet. Once the transaction is confirmed, you should see an output in the console on Remix.IDE:
You can verify the contract is deployed by checking the block explorer. Remember that this process is identical if you are deploying on Polygon zkEVM mainnet.
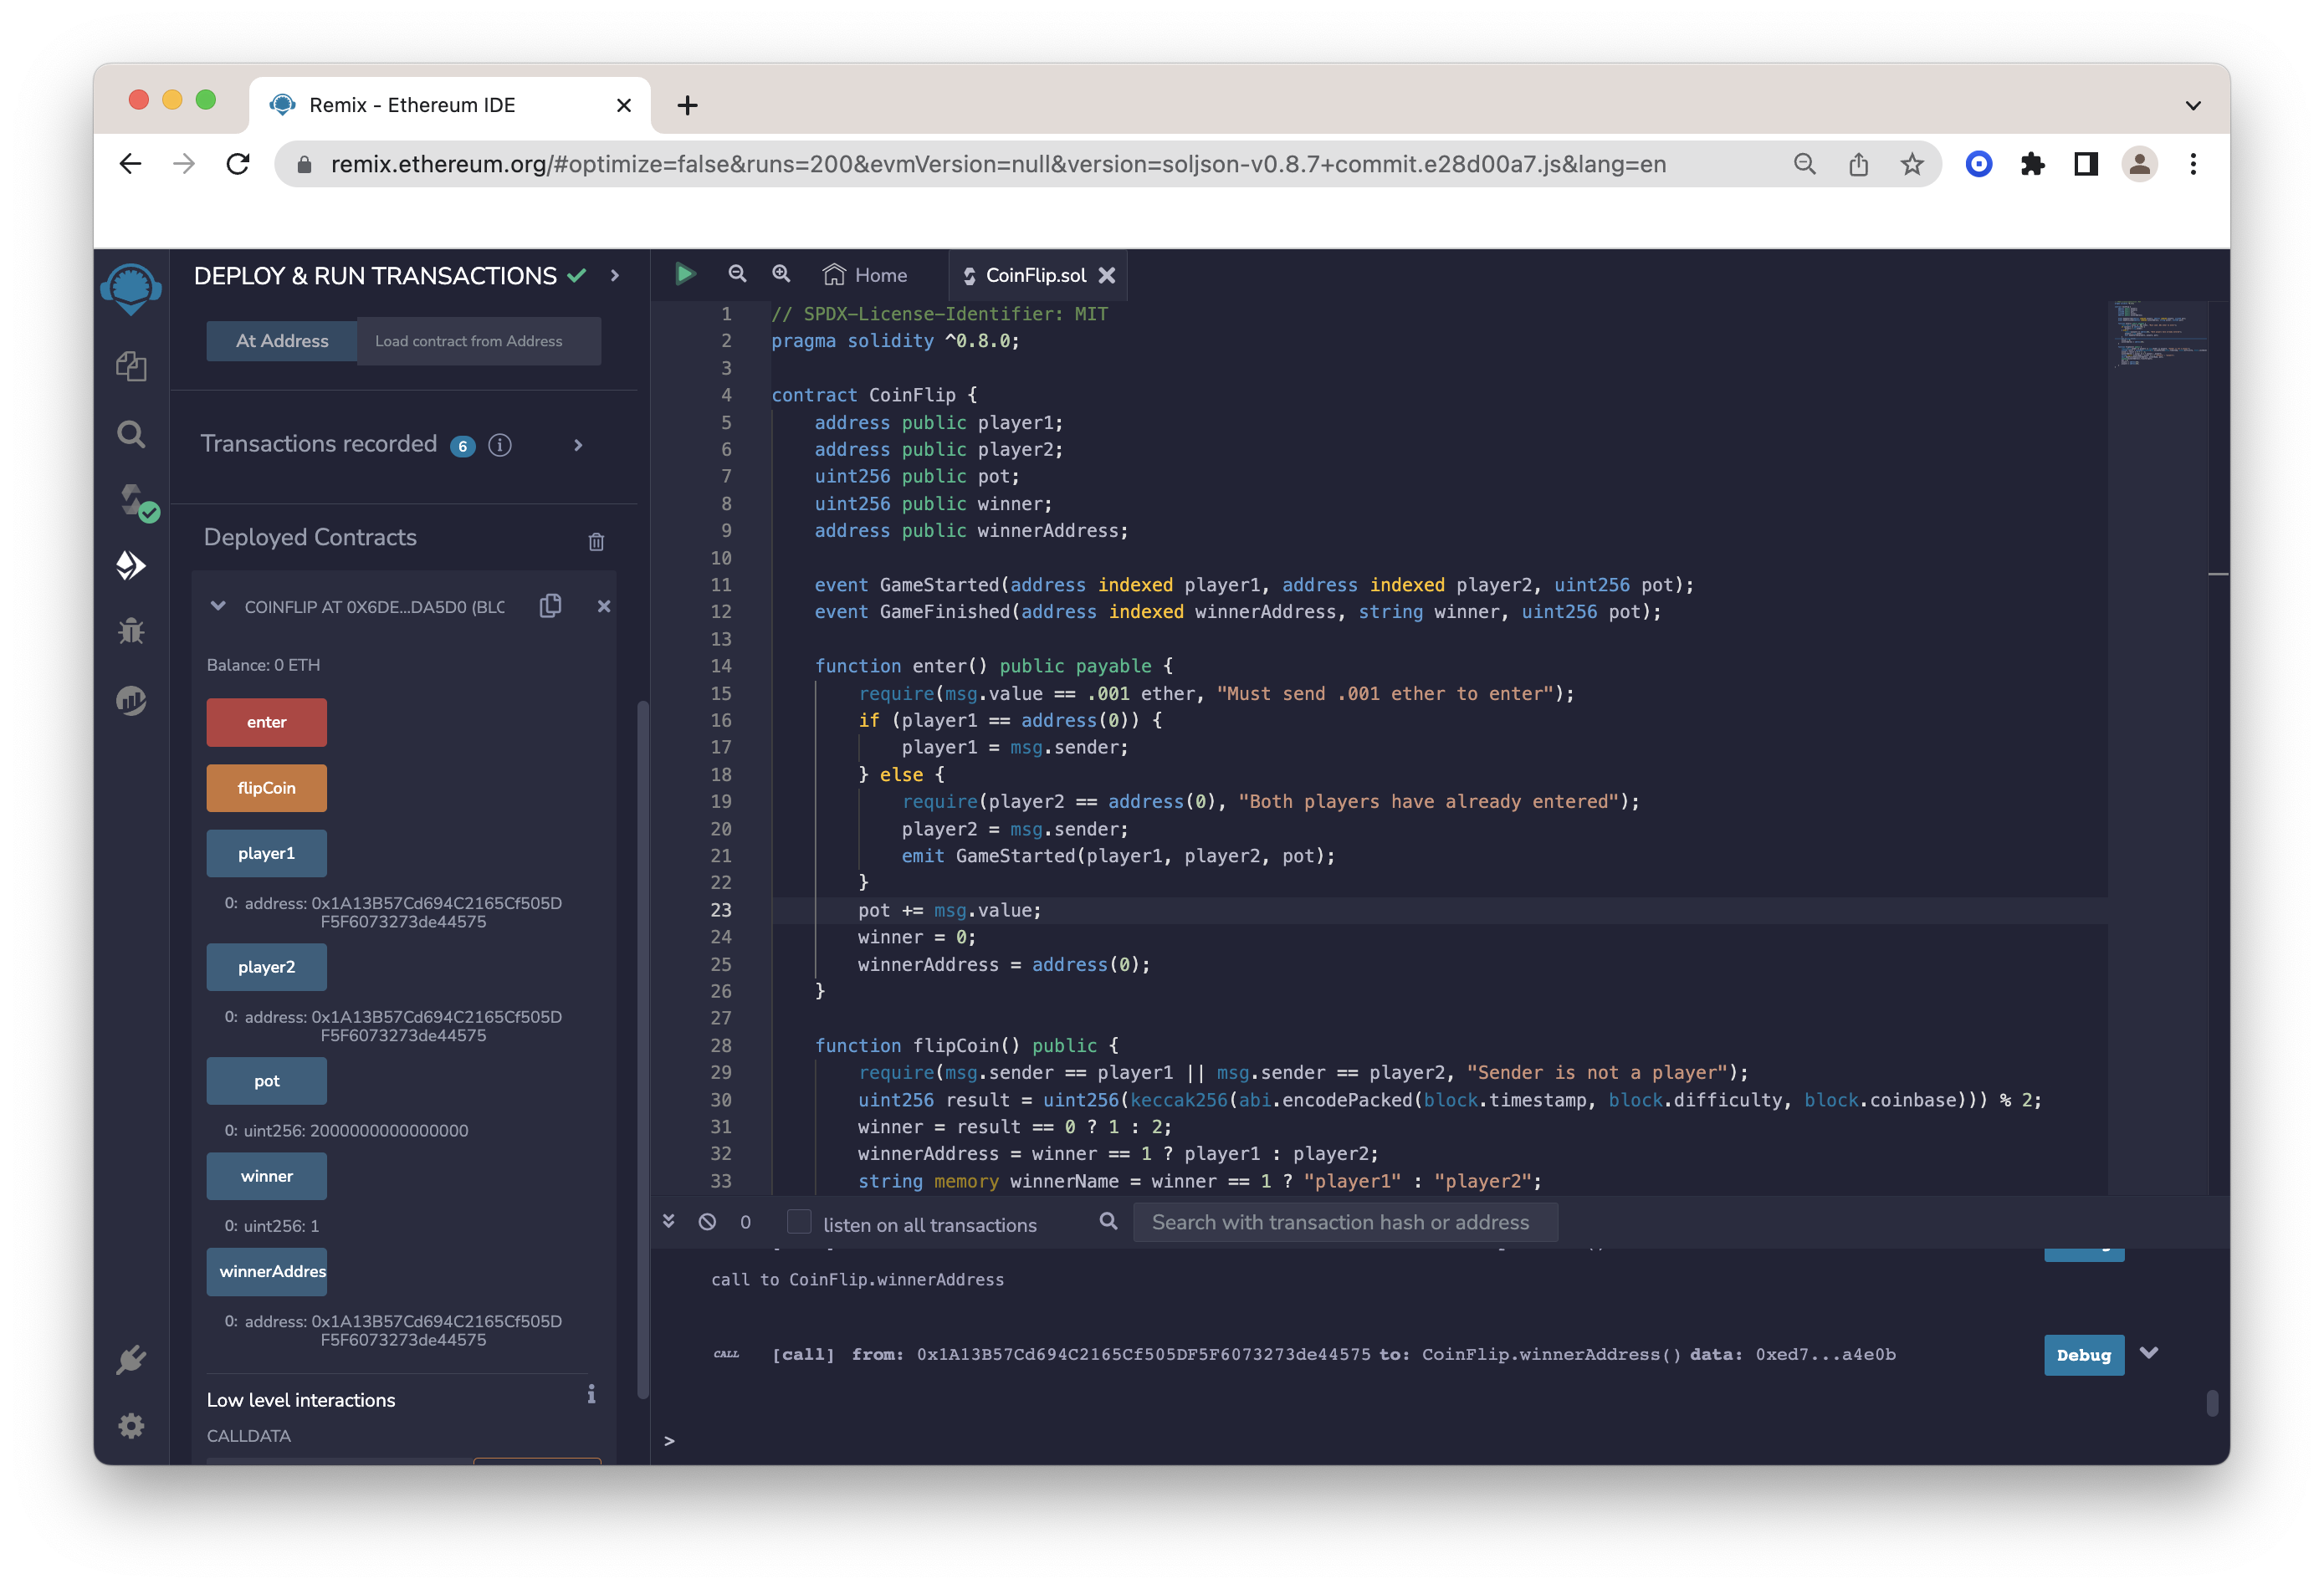
Interacting with the Smart Contract
Now with the Coin flip contract deployed, we can expand the Deployed Contracts tab in the lower left on Remix.IDE. You will see the functions and variables listed.
To enter the coin flip, enter 1000000000000000 Wei in the value field and then click the enter button. Confirm the transaction in your wallet.
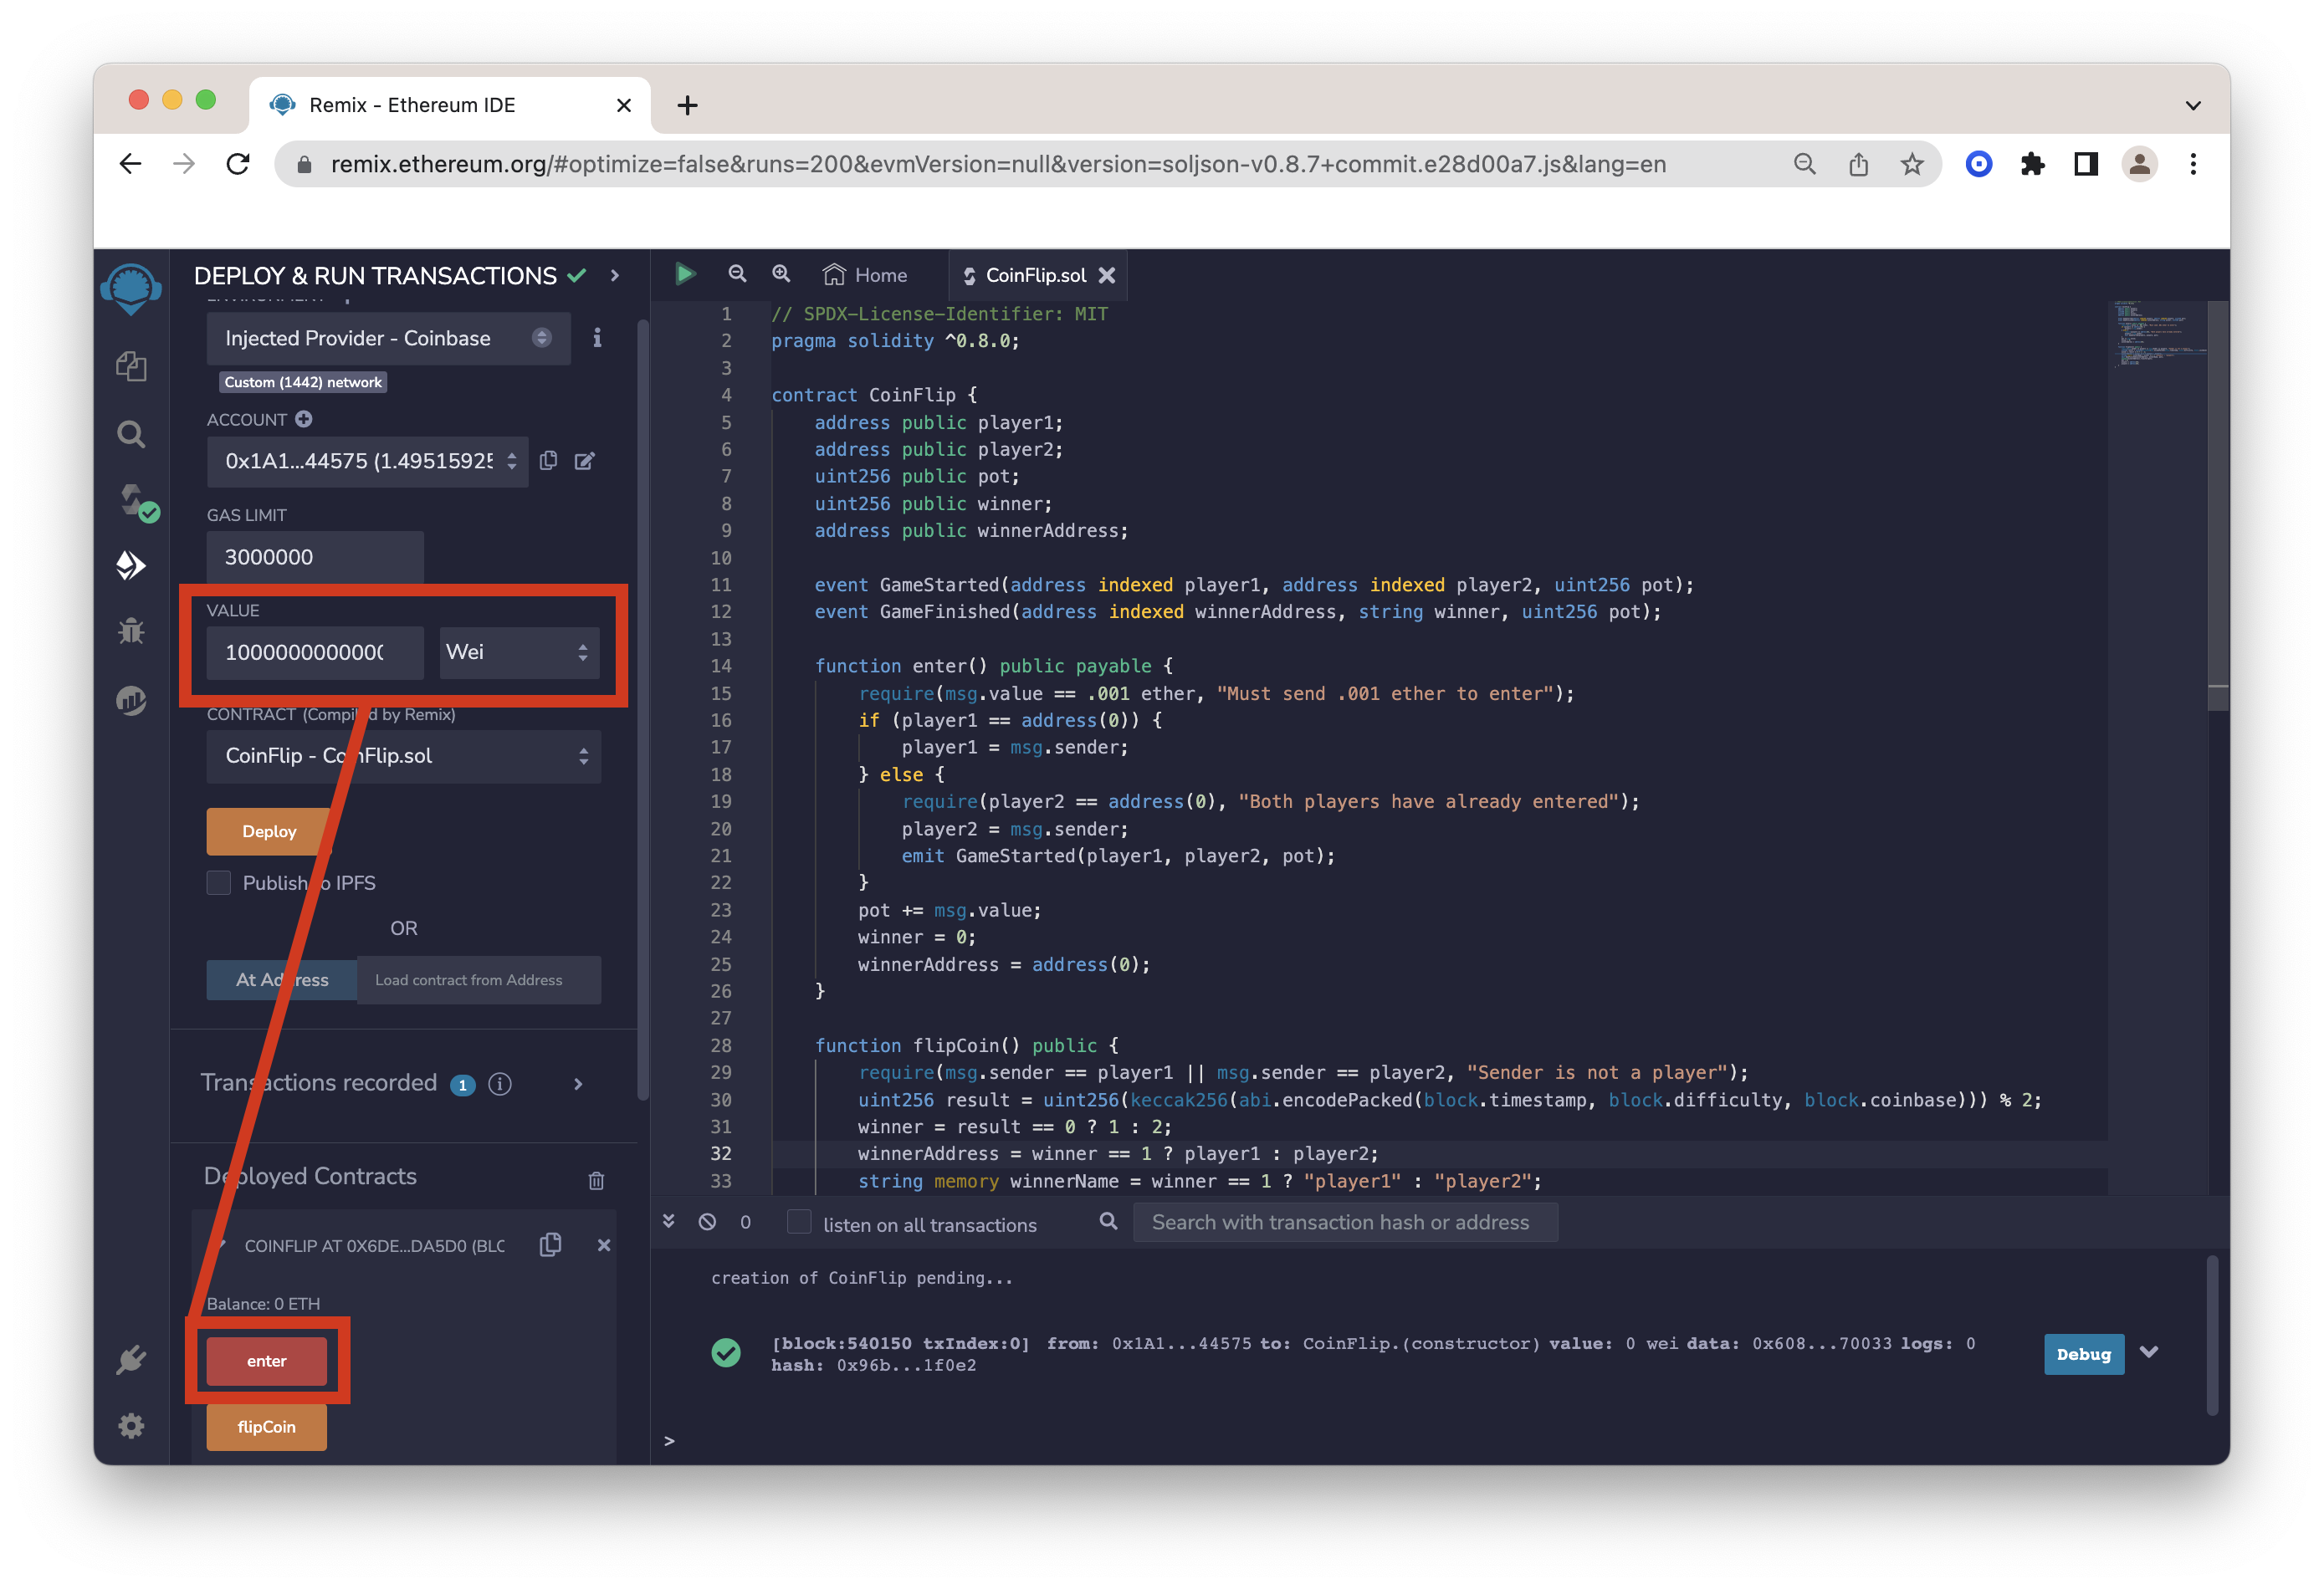
We'll need one more entry in the coin flip contract in order to get the winner. Currently, the coin flip contract is set up to where the same address can enter twice (we did this for demonstration purposes), however, in production, you'll want to change that logic. Click the same enter button and confirm the transaction in your wallet. Once the transaction is confirmed, you can then click the flipCoin function button to get the winner. You will see the balance increase in one of the entered accounts, this is the winner of the coin flip.
Additional Resources
With all the knowledge you have learned, you can now take it further. Check out this resource list to keep digging down the rabbit hole!
- Polygon zkEVM API Documentation
- What is Polygon zkEVM
- Quicknode & Polygon zkEVM: Unleashing the Future of Ethereum Scalability, Performance, and Security
Final Thoughts
Congrats, you have successfully created and deployed a game-related smart contract on the Polygon zkEVM testnet chain! You can now use these skills to create and deploy your own smart contracts on the Polygon zkEVM network. If you're having trouble, have questions, or just want to talk about what you're building, drop us a line on Discord or Twitter!
We ❤️ Feedback!
If you have any feedback on this guide, let us know. We'd love to hear from you!