
8 min read
This guide includes references to the Kovan testnet, which is no longer actively maintained. While specific steps related to this chain may not be applicable, the overall process may be valid for other chains. We recommend exploring current alternatives for your implementation. If you’d like to see an updated version of this guide, please let us know!
Overview
Sometimes, you submit a transaction on Ethereum without enough gas due to network congestion or too many pending transactions offering a higher gas price than you have offered on your transaction. If you have a high priority transaction but low gas, you could end up having to wait hours or even days for the transaction to settle. In these instances, you'll need to re-send a transaction with higher gas and the same nonce in order to have it mined sooner than later.
In this guide, we'll go over all of the terminology and information around sending a transaction on Ethereum and re-sending the same transaction using Ethers.js on one of the Ethereum test networks.
What is the transaction in Ethereum?
We do a transaction whenever we want to add, update or modify something on the Ethereum network. Basically, a transaction is the way the real world interacts with the Ethereum blockchain network. For every transaction we do on the Ethereum network, we need to pay a fee called gas. Gas is either in wei (smallest unit of ETH) or gwei.
Types of transactions in Ethereum
There are three common types of transactions on the Ethereum network:
- An ordinary transaction, when there is a transfer of ETH/ether from one account to another.
- A transaction creating a contract is the type of transaction where a smart-contract in deployed on the Ethereum blockchain network.
- A transaction invoking a contract, this transaction is sent with some data and is used to query/interact with a previously deployed smart-contract.
Parameters of a typical Ethereum transaction
- from: The sender address, a 20-byte address representing the account initiating the transaction.
- to: The receiver address, a 20-byte address representing an account of the receiver, or a contract account.
- value: This is the amount of ETH sent in the transaction from one account to another.
- data: This field contains the bytecode for contract deployment transactions. For the execution of a contract function, it has a function signature and encoded arguments. This field isn't needed or left empty in funds transfer transactions.
- gasLimit: This is the maximum amount in wei that a transaction can use as gas.
- gasPrice: This is the amount in wei the sender is willing to pay for the transaction.
- chainId: This is the network id of your Ethereum node (mainnet: 1, rinkeby: 4, kovan: 42, etc.)
- nonce: It is the number of transactions a particular address sends. Each time an address sends a transaction, nonce increases with 1.
Transaction flow in Ethereum
- Making a transaction object and supplying it with all the necessary parameters.
- Signing the transaction with the private key of the sender.
- Sending the transaction to the Ethereum blockchain network using an Ethereum node.
Signing a Transaction
Signing a transaction means generating a signature on a transaction object using the private key of the sender. If you want to learn more about signing and validating in Ethereum, here are some excellent reads: Signing and Verifying Ethereum Signatures by Yos and Ethereum: Signing and Validating by Angello Pozo.
Now, as we have a better understanding of transactions in Ethereum, let's send one ourselves.
Prerequisites
- NodeJS installed on your system
- A text editor
- Terminal aka Command Line
Installing necessary tools.
We'll use NodeJS to manage our library package and to work with the javascript file. To see if you have NodeJS installed on your system, open a terminal and run:
$ node -v
if not installed, you can download the LTS version of NodeJS from the official website.
To send a transaction, we'll use a short javascript code, and we'll use the ethers.js library (make sure it's version 5.7). You can install it with npm from the command line/terminal:
$ npm install --save ethers@5.7
The most common issue at this step is an internal failure with `node-gyp`. You can follow node-gyp installation instructions here.
Another common issue is a stale cache. Clear your npm cache by simply typing the below into your terminal:
$ npm cache clean
You can check out our ethers.js guide to learn more about the ethers.js library.
Creating a wallet and getting some test ETH
Now, let's create a wallet for ourselves. To do so, first, create an index.js file or a javascript file with the name of your choice. You can copy/paste this into your code editor:
var ethers = require('ethers');
var privateKey = "0x0111111111111111111122222222222222222223333333333333333333344445";
var wallet = new ethers.Wallet(privateKey);
console.log("Address: " + wallet.address);
Let's see what happens here: Importing the ethers.js library which we installed earlier (line 1), Creating a private key specific to our wallet, you'll need to create one for yourself it can be any number make sure it contains the same no of digits as above (line 2), Creating a wallet instance with ethers using the private key (line 3), Printing our wallet address with text "Address" in the console (line 4).
Now, run the file using:
$ node index.js
If everything goes well, the output shown in the terminal window should look like this:
Address: 0x3f5D3070Fc7924479B5e367a83EC2b284E9c4e04
As every transaction needs gas as a fee, and we'll need some to send in the transaction, let's get some test ETH in our wallet. For this purpose, we'll use a Kovan node, so head over to this Kovan faucet to get some test ETH, paste the wallet address that you got running the above code and click on 'send me KETH!'.
Note: This will be test ETH, which has no market value.
Set Up Your Quicknode Ethereum Endpoint
For our purposes today, we could use pretty much any Ethereum client, such as Geth or OpenEthereum (fka Parity). To boot an ethereum node all by ourselves, we'll first need to select a client and configure it; syncing an ethereum node and maintaining it is a challenging task; syncing an ethereum full node can take days.
Since that is a bit too involved for just sending one transaction, we'll grab a free endpoint from Quicknode to make this easy. After you've created your free ethereum endpoint, copy your HTTP Provider endpoint:
We're using a Kovan testnet node for this guide.
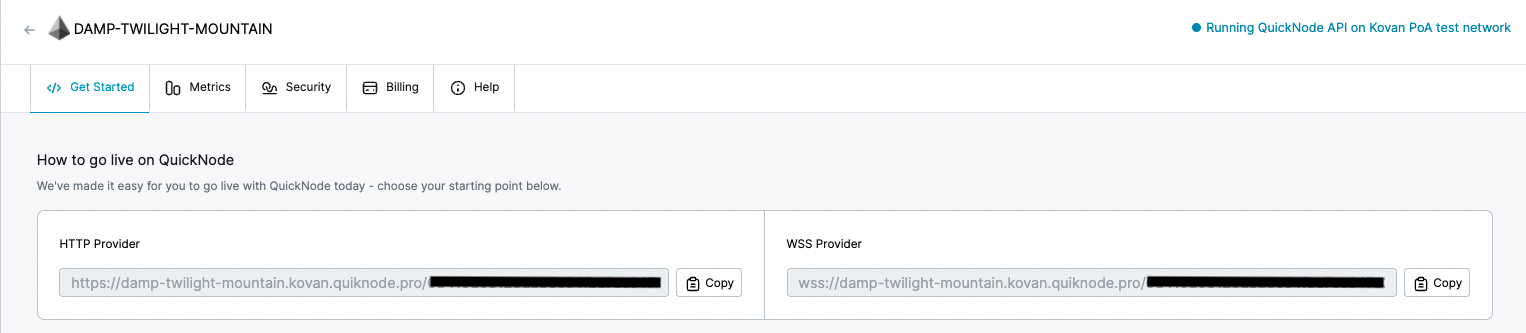
You'll need this later, so copy it and save it.
Sending and re-sending a transaction
Now, we have a wallet and some test ETH in it. So let's send a transaction to transfer some ETH into a different account/wallet. To do so, let's add some more good stuff to our index.js file. You can copy/paste this into your code editor:
var ethers = require('ethers');
var url = 'ADD_YOUR_ETHEREUM_NODE_URL';
var customHttpProvider = new ethers.providers.JsonRpcProvider(url);
var privateKey = "0x0111111111111111111122222222222222222223333333333333333333344445";
var wallet = new ethers.Wallet(privateKey);
console.log("Address: " + wallet.address);
tx = {
  to: "0x6E0d01A76C3Cf4288372a29124A26D4353EE51BE",
  value: ethers.utils.parseEther("0.05"),
  chainId: 42,
  nonce: 3
}
customHttpProvider.estimateGas(tx).then(function(estimate) {
    tx.gasLimit = estimate;
    tx.gasPrice = ethers.utils.parseUnits("0.14085197", "gwei");
    wallet.signTransaction(tx).then((signedTX)=>{
	customHttpProvider.sendTransaction(signedTX).then(console.log);
    });
});
So go ahead and replace `ADD_YOUR_ETHEREUM_NODE_URL` with the HTTP provider from the section above.
A quick explanation of the code above - we are importing the ethers library we installed earlier (line 1), setting our Ethereum node URL (line 2), instantiating an ethers JsonRpcProvider instance (line 3), Creating a private key specific to our wallet, you'll need to create one for yourself it can be any number make sure it contains the same no of digits (line 4), Creating a wallet instance with ethers using the private key (line 5), Printing our wallet address with text "Address" in the console (line 6), Creating a transaction object and adding the 'to' field with the receiver's address you can generate a random address using `var wallet = Wallet.createRandom();`, a 'value' field mentioning the value of the ETH to be sent, a 'chainId' field set 42 here as we're using Kovan, a nonce field set as 3 (line7-12), estimating the gasLimit via our node and setting the gas price (line13-15), Signing the the transaction object with our wallet's private key and sending it, also printing the transaction in the console(line16-18).
let's run this:
$ node index.js
We'll get an output something like this:
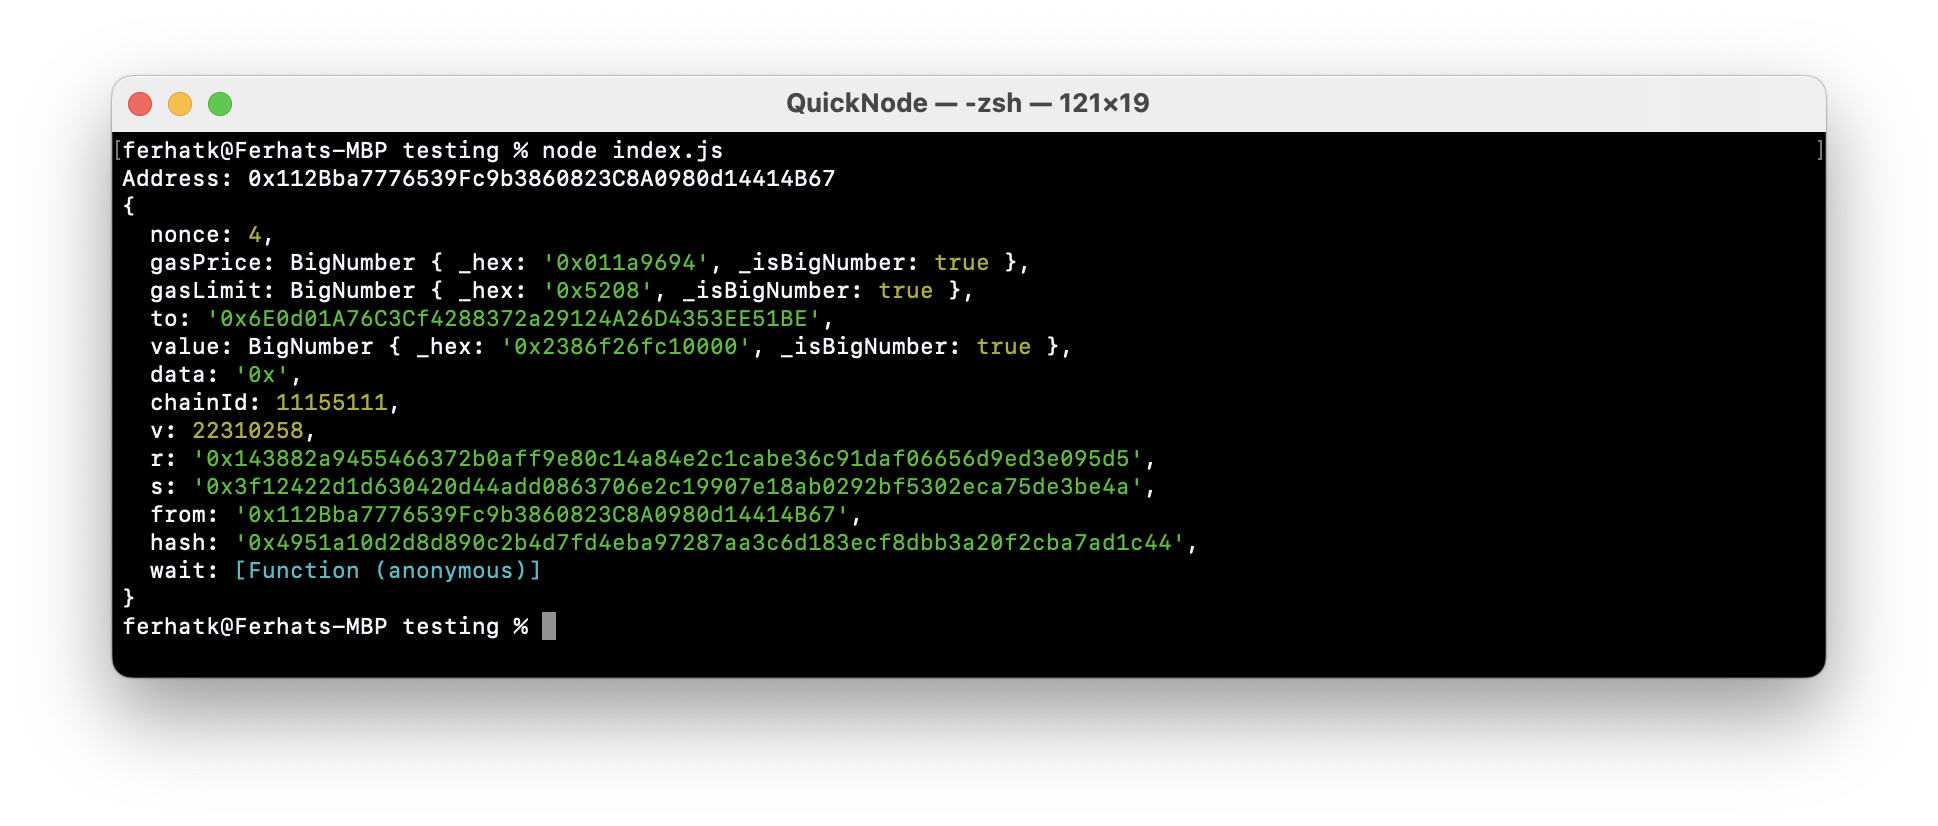
Grab the String of the hash field (something like '0xe49c8122656c612bf5f1e10b251f56671acf01d831b6876c37c5a52053035642') and paste it in the search box of Kovan etherscan to check the status of the transaction. You'll see that the transaction is yet to be added to the new block on the blockchain and has pending status. That's because we entered the gas value significantly low.
Now, Let's try to send the same transaction with the same nonce but this time increasing the gas value; change the gasPrice value on line 15 in the code from '0.14085197' to '2.14085197' and rerun the code:
$ node index.js
Copy the hash string from the new output and paste it in the search box of Kovan etherscan to check the status of the transaction. This time, our transaction will be added in the block and have a success status because we sent it with increased appropriate gasPrice value.
Note: It's important to note that the "nonce" value is the same across both transactions. As previously mentioned, the nonce is a pointer to the number of transactions an Ethereum address has. In order to re-submit a transaction with higher gas, you must use the same nonce as the original transaction. If you use an increased nonce, that will be a new transaction, thus spending more of your ETH than you intended.
Conclusion
So, as we saw with the above example, the gas price on a transaction should be competitive for a transaction to get approved. The miners of the blockchain set gas based on available block space and what all transactions are willing to pay to occupy that block space, when there is a transaction with the gas below the threshold gas value, it won't get approved. Transactions with higher gas value compared to other transactions get approved quickly.
Subscribe to our newsletter for more articles and guide on Ethereum. If you have any feedback, please feel free to reach out to us via Twitter, and you can always chat with us if you have a question via our community server on Discord. It has some of the coolest devs out there, thanks :)