
6 min read
This guide includes references to the Ropsten testnet, which is no longer actively maintained. While specific steps related to this chain may not be applicable, the overall process may be valid for other chains. We recommend exploring current alternatives for your implementation. If you’d like to see an updated version of this guide, please let us know!
Overview
ERC1155 has emerged as a gold standard to create NFTs; every major marketplace lists new tokens as an ERC1155 standard. In this guide, we will learn about the ERC1155 token standard and how to create an ERC1155 token.
What we will do:
- Create 3 NFT collections
- Create and deploy an ERC-1155 contract
- Update the contract to be compatible with OpenSea
- Deploy our NFT collections
What you will need:
- Image assets to create NFTs
- MetaMask and some Ropsten test ETH.
- Knowledge of ERC20 and ERC721 (NFT) token standards.
What is ERC1155?
ERC1155 is a multi-token standard that allows the creation of fungible, non-fungible, and semi-fungible tokens all in one contract. Before ERC1155, if a use case needed both ERC20 (fungible) and ERC721 (non-fungible) tokens, then separate contracts were required to achieve this. ERC1155 also allows for multiple NFT collections to be launched in just one smart contract instead of creating a different contract for each collection; this increases efficiency in smart contract construction and minimizes the transaction count, which is very important as it consumes less blockchain space. With ERC1155, batch transfer of tokens is also possible instead of transferring a token to a single address in previous standards.
A prevalent example of the ERC1155 application is blockchain-based decentralized games, as games need coins and collectibles, so ERC1155 has become a standard there. ERC1155 has also become a standard in the NFT space.
The previous ERC721 had a one-to-one mapping of token id with the address. ERC1155 has a rather complex mapping where the address in a combination of token id is mapped to the balance of the token.
Creating Metadata URI
We will create 3 NFT collections (rock, paper, and scissors) with a single NFT in each one. To upload our files to the decentralized storage IPFS, we can upload them through CLI or use this very easy-to-use tool NFT Storage.
We will be using the second option, NFT Storage. Sign in to NFT Storage and upload your image files for rock, paper, and scissors. You should see something like this once they've been uploaded successfully:
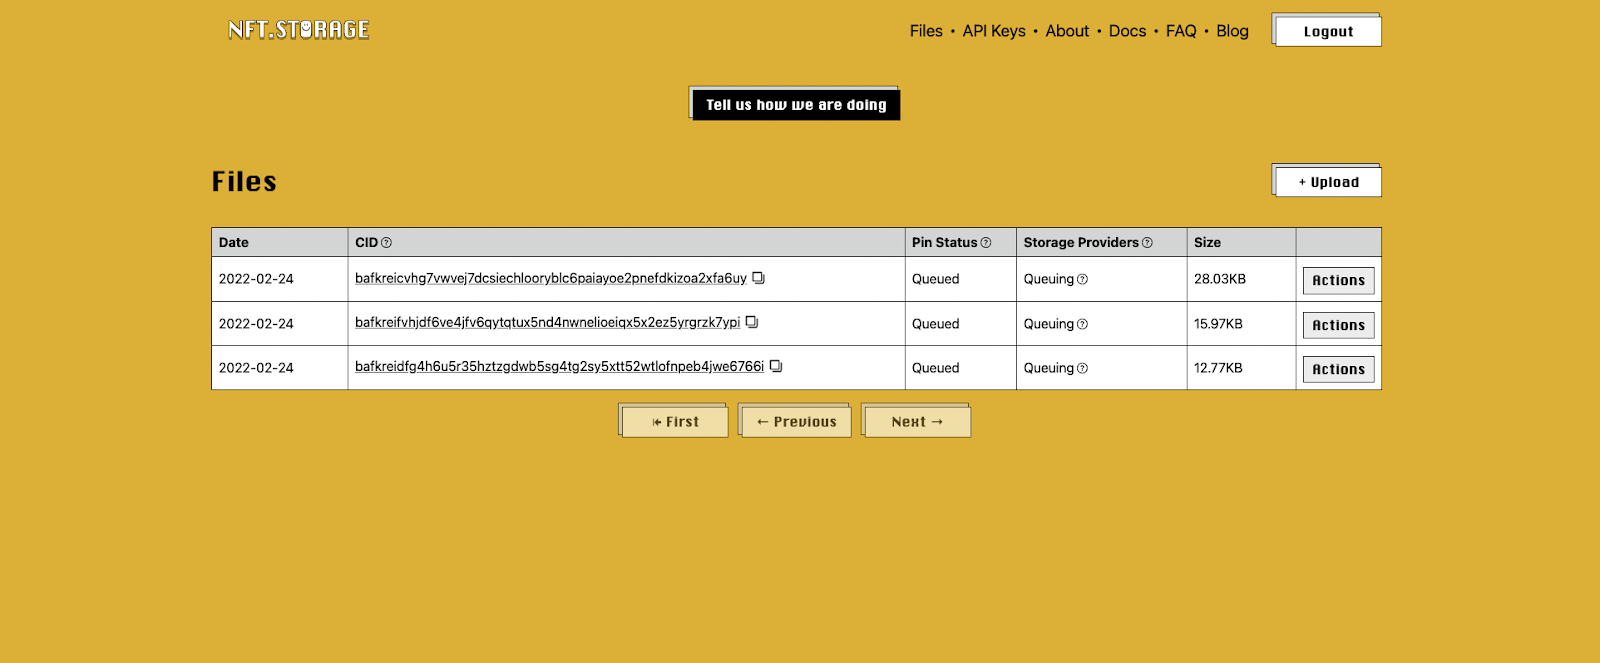
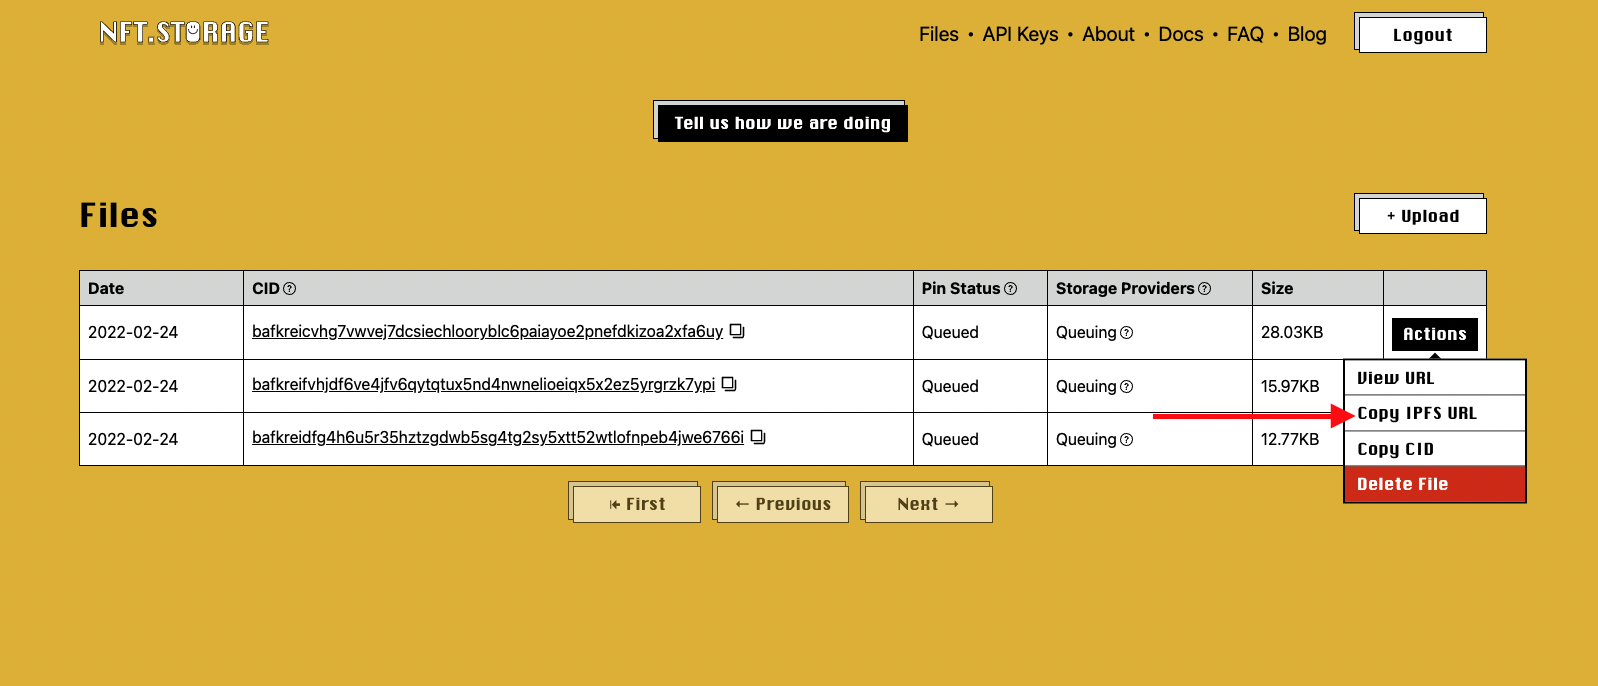
Click on "Actions" and copy the IPFS URL of each image; we will need it for the metadata of each collection.
We will create three JSON metadata files to store information about our NFT collections.
- 1.json: Rock collection
- 2.json: Paper collection
- 3.json: Scissors collection
Our 1.json file will look something like this:
{ //1.

    "name": "Rocks",

    "description": "This is a collection of Rock NFTs.",

    "image": "https://ipfs.io/ipfs/bafkreifvhjdf6ve4jfv6qytqtux5nd4nwnelioeiqx5x2ez5yrgrzk7ypi",

}
- name: Has the name of the NFT.
- description: Has the description of the NFT.
- image: Has the link to the image we got earlier (IPFS URL).
- If a collection has multiple images, which is usually the case, an extra parameter id is added to differentiate tokens amongst the collection.
Create the remaining JSON files, 2.json and 3.json, for paper and scissors collections, respectively.
To efficiently upload all the JSON files to IPFS, we will archive them in content-addressed format. https://car.ipfs.io/ helps archive files in IPFS compatible content-addressed archive (.car) format.
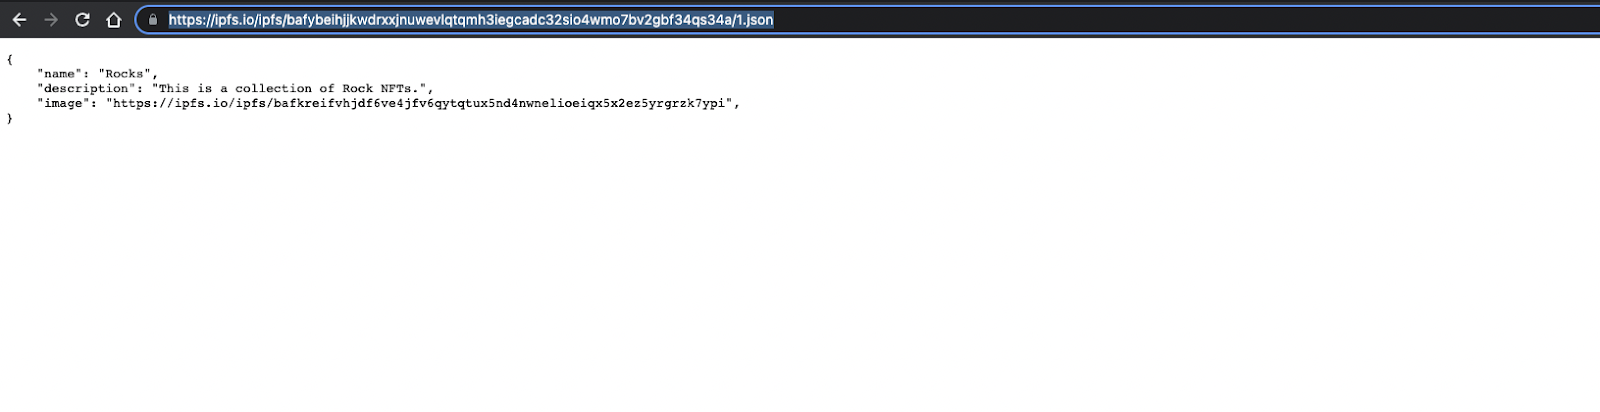
Head over to IPFS CAR and upload all three JSON files. Once uploaded, download the .car file and upload it to NFT Storage. All our JSON files are now stored on IPFS in an archived manner. Copy the IPFS URL of the uploaded .car file, and you should be able to access JSON files by just entering the file name at the end of the URL, for example:
https://ipfs.io/ipfs/bafybeihjjkwdrxxjnuwevlqtqmh3iegcadc32sio4wmo7bv2gbf34qs34a/1.json
Creating & Deploying the ERC1155 Contract
We will use the OpenZeppelin contracts library to create our ERC1155 contract and deploy it using Ethereum REMIX IDE on the Ropsten testnet. Make sure you have some Ropsten test ETH which you can also get from Ropsten Faucet.
Create a new file, token.sol, in REMIX and paste the following code into it.
// SPDX-License-Identifier: MIT
pragma solidity ^0.8.0;

import "@openzeppelin/contracts/token/ERC1155/ERC1155.sol";

contract rockPaperScissors is ERC1155 {
    uint256 public constant Rock = 1;
    uint256 public constant Paper = 2;
    uint256 public constant Scissors = 3;

    constructor() ERC1155("https://ipfs.io/ipfs/bafybeihjjkwdrxxjnuwevlqtqmh3iegcadc32sio4wmo7bv2gbf34qs34a/{id}.json") {
        _mint(msg.sender, Rock, 1, "");
        _mint(msg.sender, Paper, 1, "");
        _mint(msg.sender, Scissors, 1, "");
    }
}
Explanation of the code above:
Line 1: Specifying SPDX license type, which is added after Solidity ^0.6.8. Whenever the source code of a smart contract is made available to the public, these licenses can help resolve/avoid copyright issues. If you do not wish to specify any license type, you can use a special value UNLICENSED or simply skip the whole comment (it will not result in an error, just a warning).
Line 2: Declaring the Solidity version.
Line 4: Importing the OpenZeppelin ERC1155 contract.
Lines 6-9: Creating our contract named rockPaperScissors and creating three variables Rock, Paper, and Scissors; then assigning proper id to each one of them.
Lines 11-15: Initializing constructor with the link to our car file as a parameter, minting different NFT collections with parameters:
- Address on which tokens will be minted to, msg.sender here means the deployer of the contract.
- Token id, we have already assigned names to token id, so using names here.
- Quantity of each token.
- The last is the data field which is kept empty here.
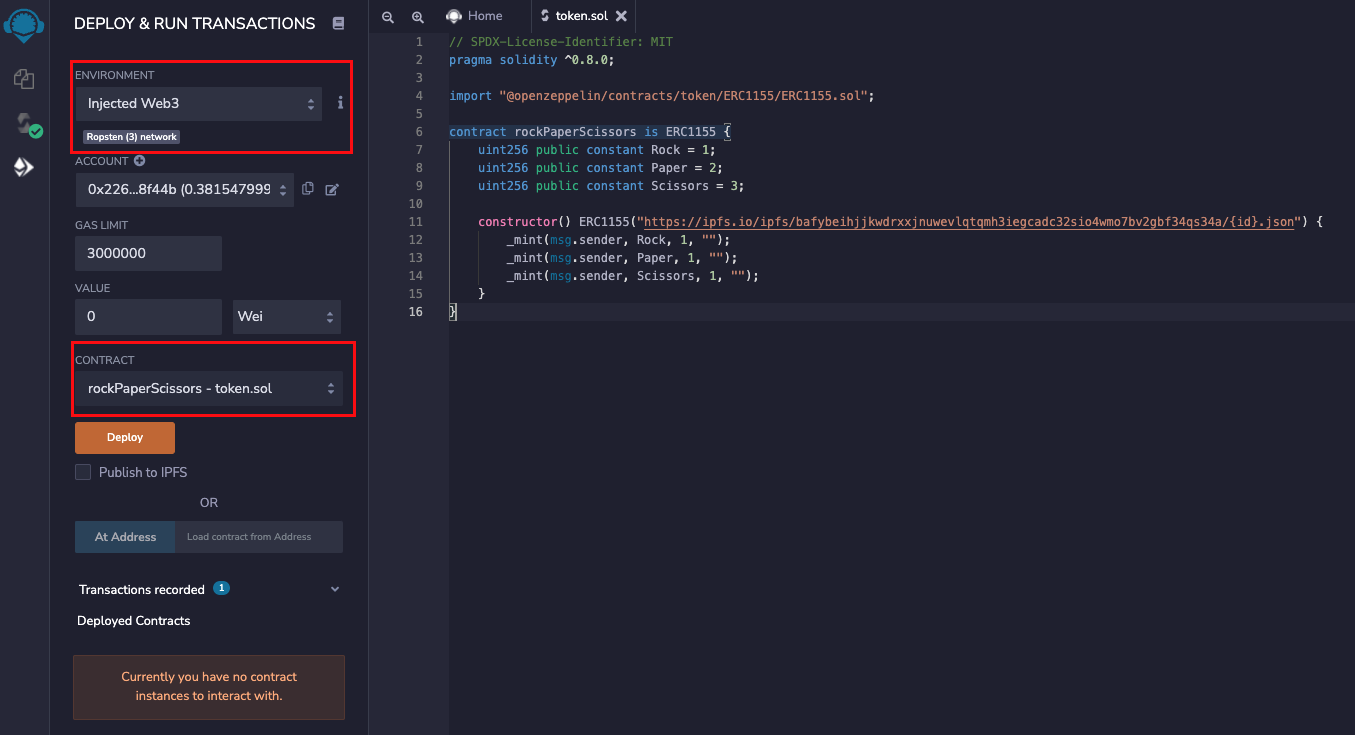
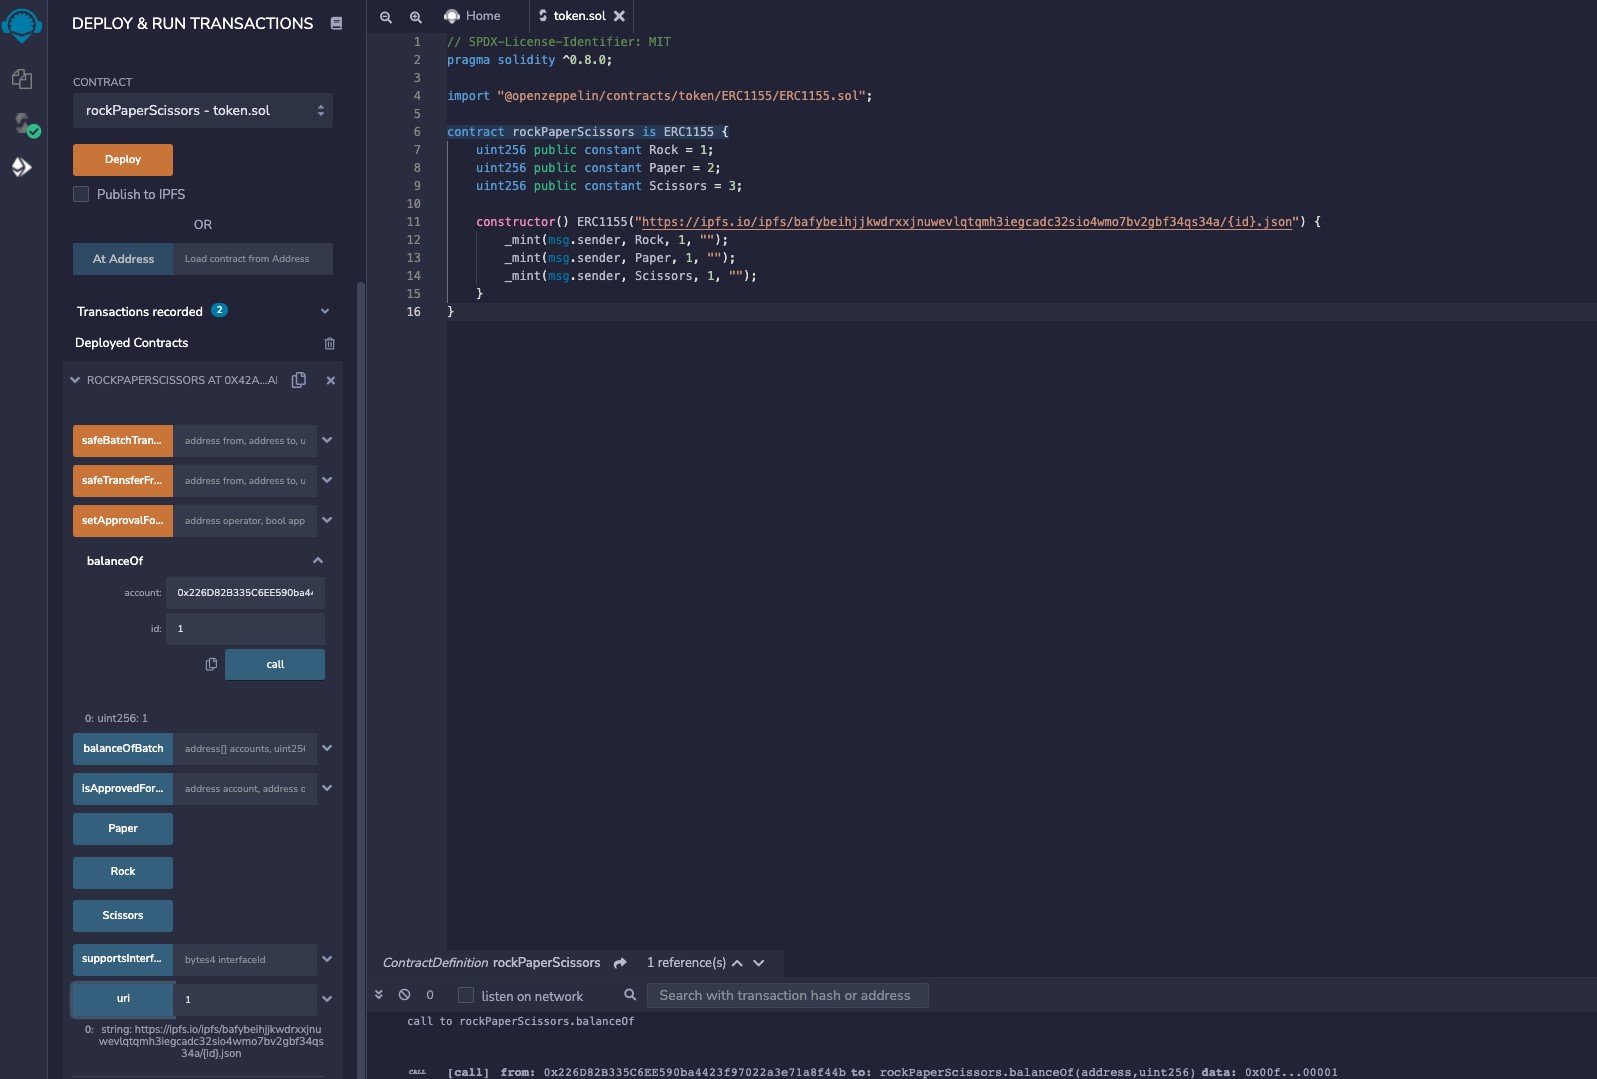
Compile the contract, go to the third tab on the left menu, select Injected Web3 as environment and deploy it by choosing the proper contract name:
Approve the transaction from MetaMask. Once the transaction is complete, your contract will be deployed.
Now you can perform functions like getting the balance of the token by entering the address and token id. We can also retrieve the URI of the token by entering the token id.
OpenSea does not support the returned URI format. So we will need to overwrite the URI function to return the file name as a string:
// SPDX-License-Identifier: MIT
pragma solidity ^0.8.0;

import "@openzeppelin/contracts/token/ERC1155/ERC1155.sol";
import "@openzeppelin/contracts/utils/Strings.sol";

contract rockPaperScissors is ERC1155 {
    uint256 public constant Rock = 1;
    uint256 public constant Paper = 2;
    uint256 public constant Scissors = 3;

    constructor() ERC1155("https://ipfs.io/ipfs/bafybeihjjkwdrxxjnuwevlqtqmh3iegcadc32sio4wmo7bv2gbf34qs34a/{id}.json") {
        _mint(msg.sender, Rock, 1, "");
        _mint(msg.sender, Paper, 1, "");
        _mint(msg.sender, Scissors, 1, "");
    }

    function uri(uint256 _tokenid) override public pure returns (string memory) {
        return string(
            abi.encodePacked(
                "https://ipfs.io/ipfs/bafybeihjjkwdrxxjnuwevlqtqmh3iegcadc32sio4wmo7bv2gbf34qs34a/",
                Strings.toString(_tokenid),".json"
            )
        );
    }
}
Additions:
Line 5: Importing an OpenZeppelin contract to convert Integer to String.
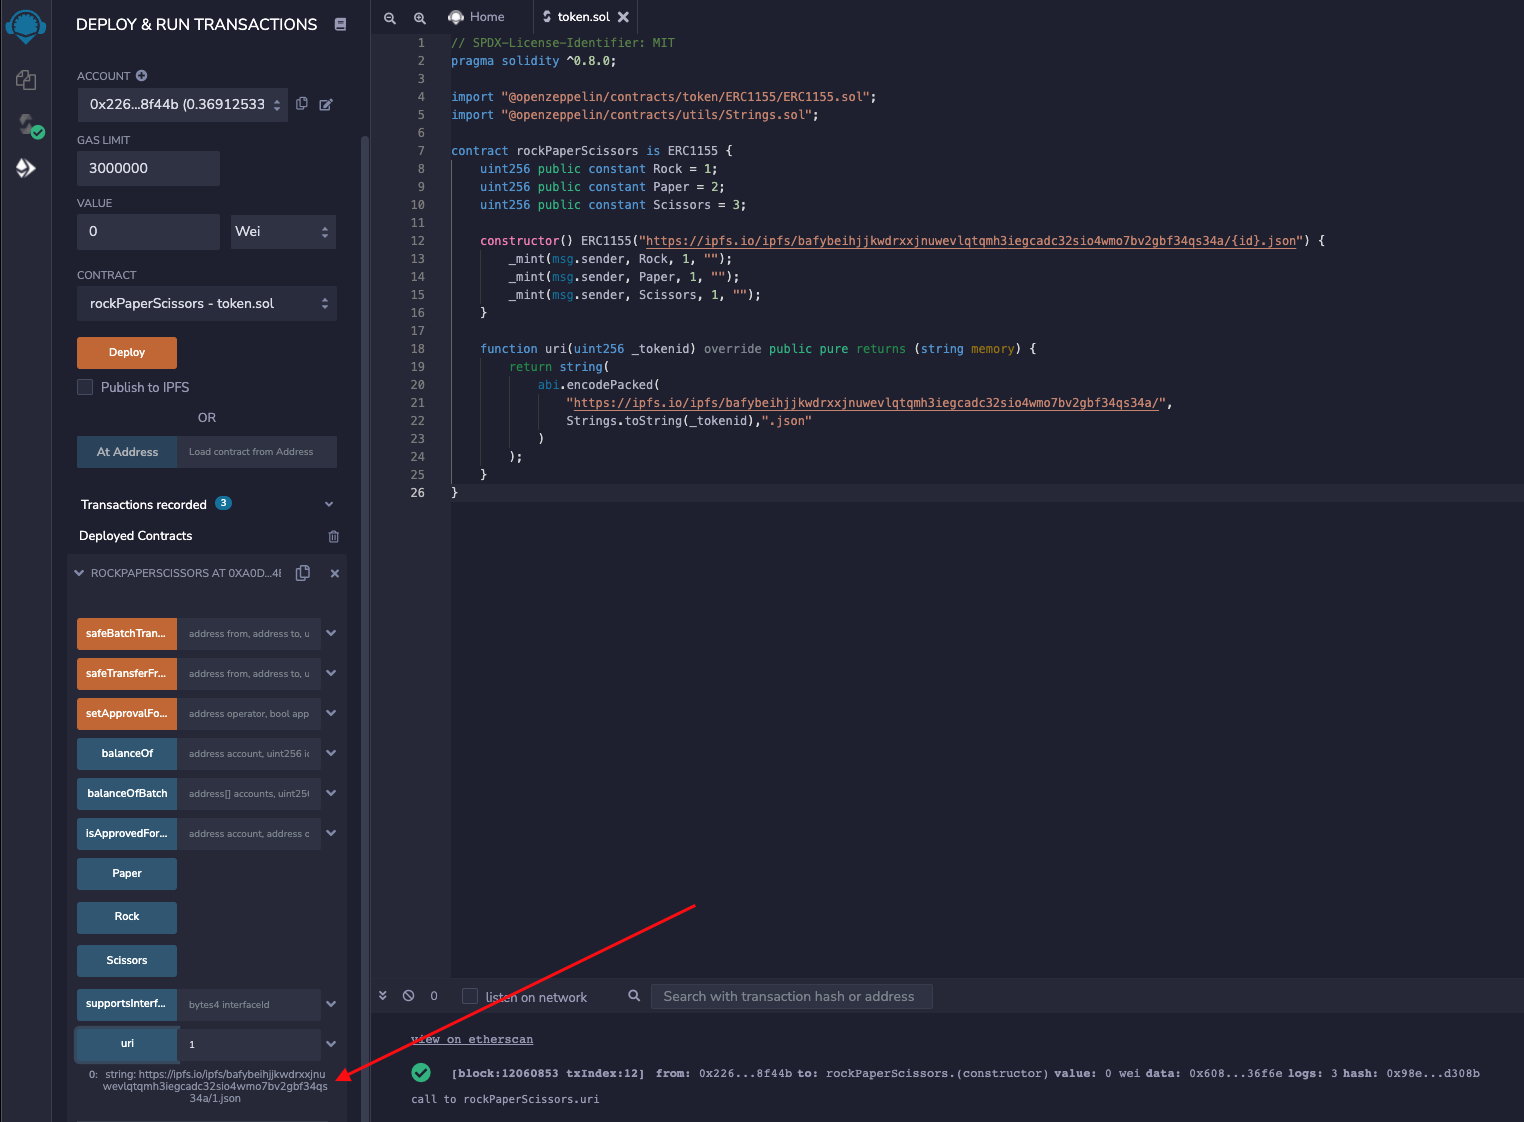
Lines 18-25: Overriding the URI function by creating a custom URI function and converting token if from integer to string, then returning the complete URI.
Recompile the contract and deploy it. When you query the contract for URI now, it will return a format supported by OpenSea.
Conclusion
Congratulations on deploying your ERC1155 tokens. If you made it here now you know about the ERC1155 multi-token standard and how to create and deploy ERC1155 NFTs.
Subscribe to our newsletter for more articles and guides on Ethereum. If you have any feedback, feel free to reach out to us via Twitter. You can always chat with us on our Discord community server, featuring some of the coolest developers you'll ever meet :)