
7 min read
This guide includes references to the Goerli testnet, which is no longer actively maintained. While specific steps related to this chain may not be applicable, the overall process may be valid for other chains. We recommend exploring current alternatives for your implementation. If you’d like to see an updated version of this guide, please let us know!
Overview
Blockchain provides us with the power of decentralization. Decentralization means the transfer of power to users/members rather than having a single centralized authority governing everything; it enables various use cases in finance, governance, voting, fundraising, etc. Today we will learn about one such fantastic application of decentralization through DAOs. By the end of this guide, you should better understand what a DAO is and how to create your own.
What You Will Do
- Learn about DAOs
- Configure the wallet with Quicknode endpoint
- Create a DAO with the settings of membership and governance on the Goerli Testnet
- Publish a proposal
What You Will Need
- A web3 wallet (e.g., MetaMask, WalletConnect compatible)
- Some Goerli test ETH (from the Quicknode Multi-Chain Faucet)
What is a DAO?
For decades the Principal-agent problem has been one of the biggest problems with traditional organizations. This problem occurs when an individual or entity makes decisions in their interest against moral principles, and these decisions affect the other stakeholders. For example, when an individual or entity has significant shares on the board, they become automatically more powerful than other members. Digital currencies are decentralized and cannot be controlled by a single entity; inspired by this emerged the concept of DAO, which stands for Decentralized Autonomous Organization, an organization governed by a set of rules written in smart contracts. This organization is controlled by its participating members.
All of the financial records, decisions, and any decision-making factors are transparent in a DAO because all of its actions are recorded on the blockchain. DAOs are generally created to form an organization of like-minded folks; there is no CEO, no boss, and all the decisions are governed by the group's approval. DAOs have a treasury that is inaccessible to anyone without the permission of the group.
Let us see some differences between traditional organizations and DAOs.

Traditional organizations
- Has a hierarchical structure.
- A change can be made by an individual or entity based on authority.
- Voting is conducted internally and manually.
- Is typically private and centralized.
DAOs
- Does not follow any hierarchy and is fully democratized.
- Voting from the group members is required to approve a change.
- Voting is conducted automatically without the intervention of any central authority.
- Is transparent to the public and decentralized.
Membership and Participation
Now that we have a basic understanding of DAOs, let us see how memberships are modeled in them. Different membership models usually determine how voting works in a DAO and its outcomes. Two types of popular membership models are token-based and share-based memberships.
- Token-based memberships
These types of memberships are used to govern broadly decentralized protocols and are fully permissionless. Tokens are distributed through liquidity or permissionless decentralized exchanges. Holding these tokens grants members the right to vote.
- Share-based memberships
These types of memberships are used to govern human-involved efforts like charity, fundraising, investments, etc. This is a more closed type of permissioned DAO, where members are allowed voting rights based on their shares which are usually offered in exchange for some tokens or proof of work.
We will create our very own DAO using Aragon.
What is Aragon?
Aragon builds flexible and secure tools that enable anyone to launch and manage Decentralized Autonomous Organizations (DAOs). In 2016, Aragon built the first DAO framework, which has since powered the creation of over 5000 DAOs and secured over 12B in value for leading projects like Lido, Decentraland, API3, Aavegotchi, and NFTX.
Aragon recently deployed the new modular Aragon OSx protocol and no-code Aragon App on Ethereum and Polygon. Driven by the mission to enable everyone to experiment with governance at the speed of software, Aragon aims to build a hyperstructure for governance. The Aragon Project is governed by Aragon Network Token (ANT) Holders in the Aragon DAO and built by globally distributed teams.
Creating an Ethereum Endpoint on Quicknode
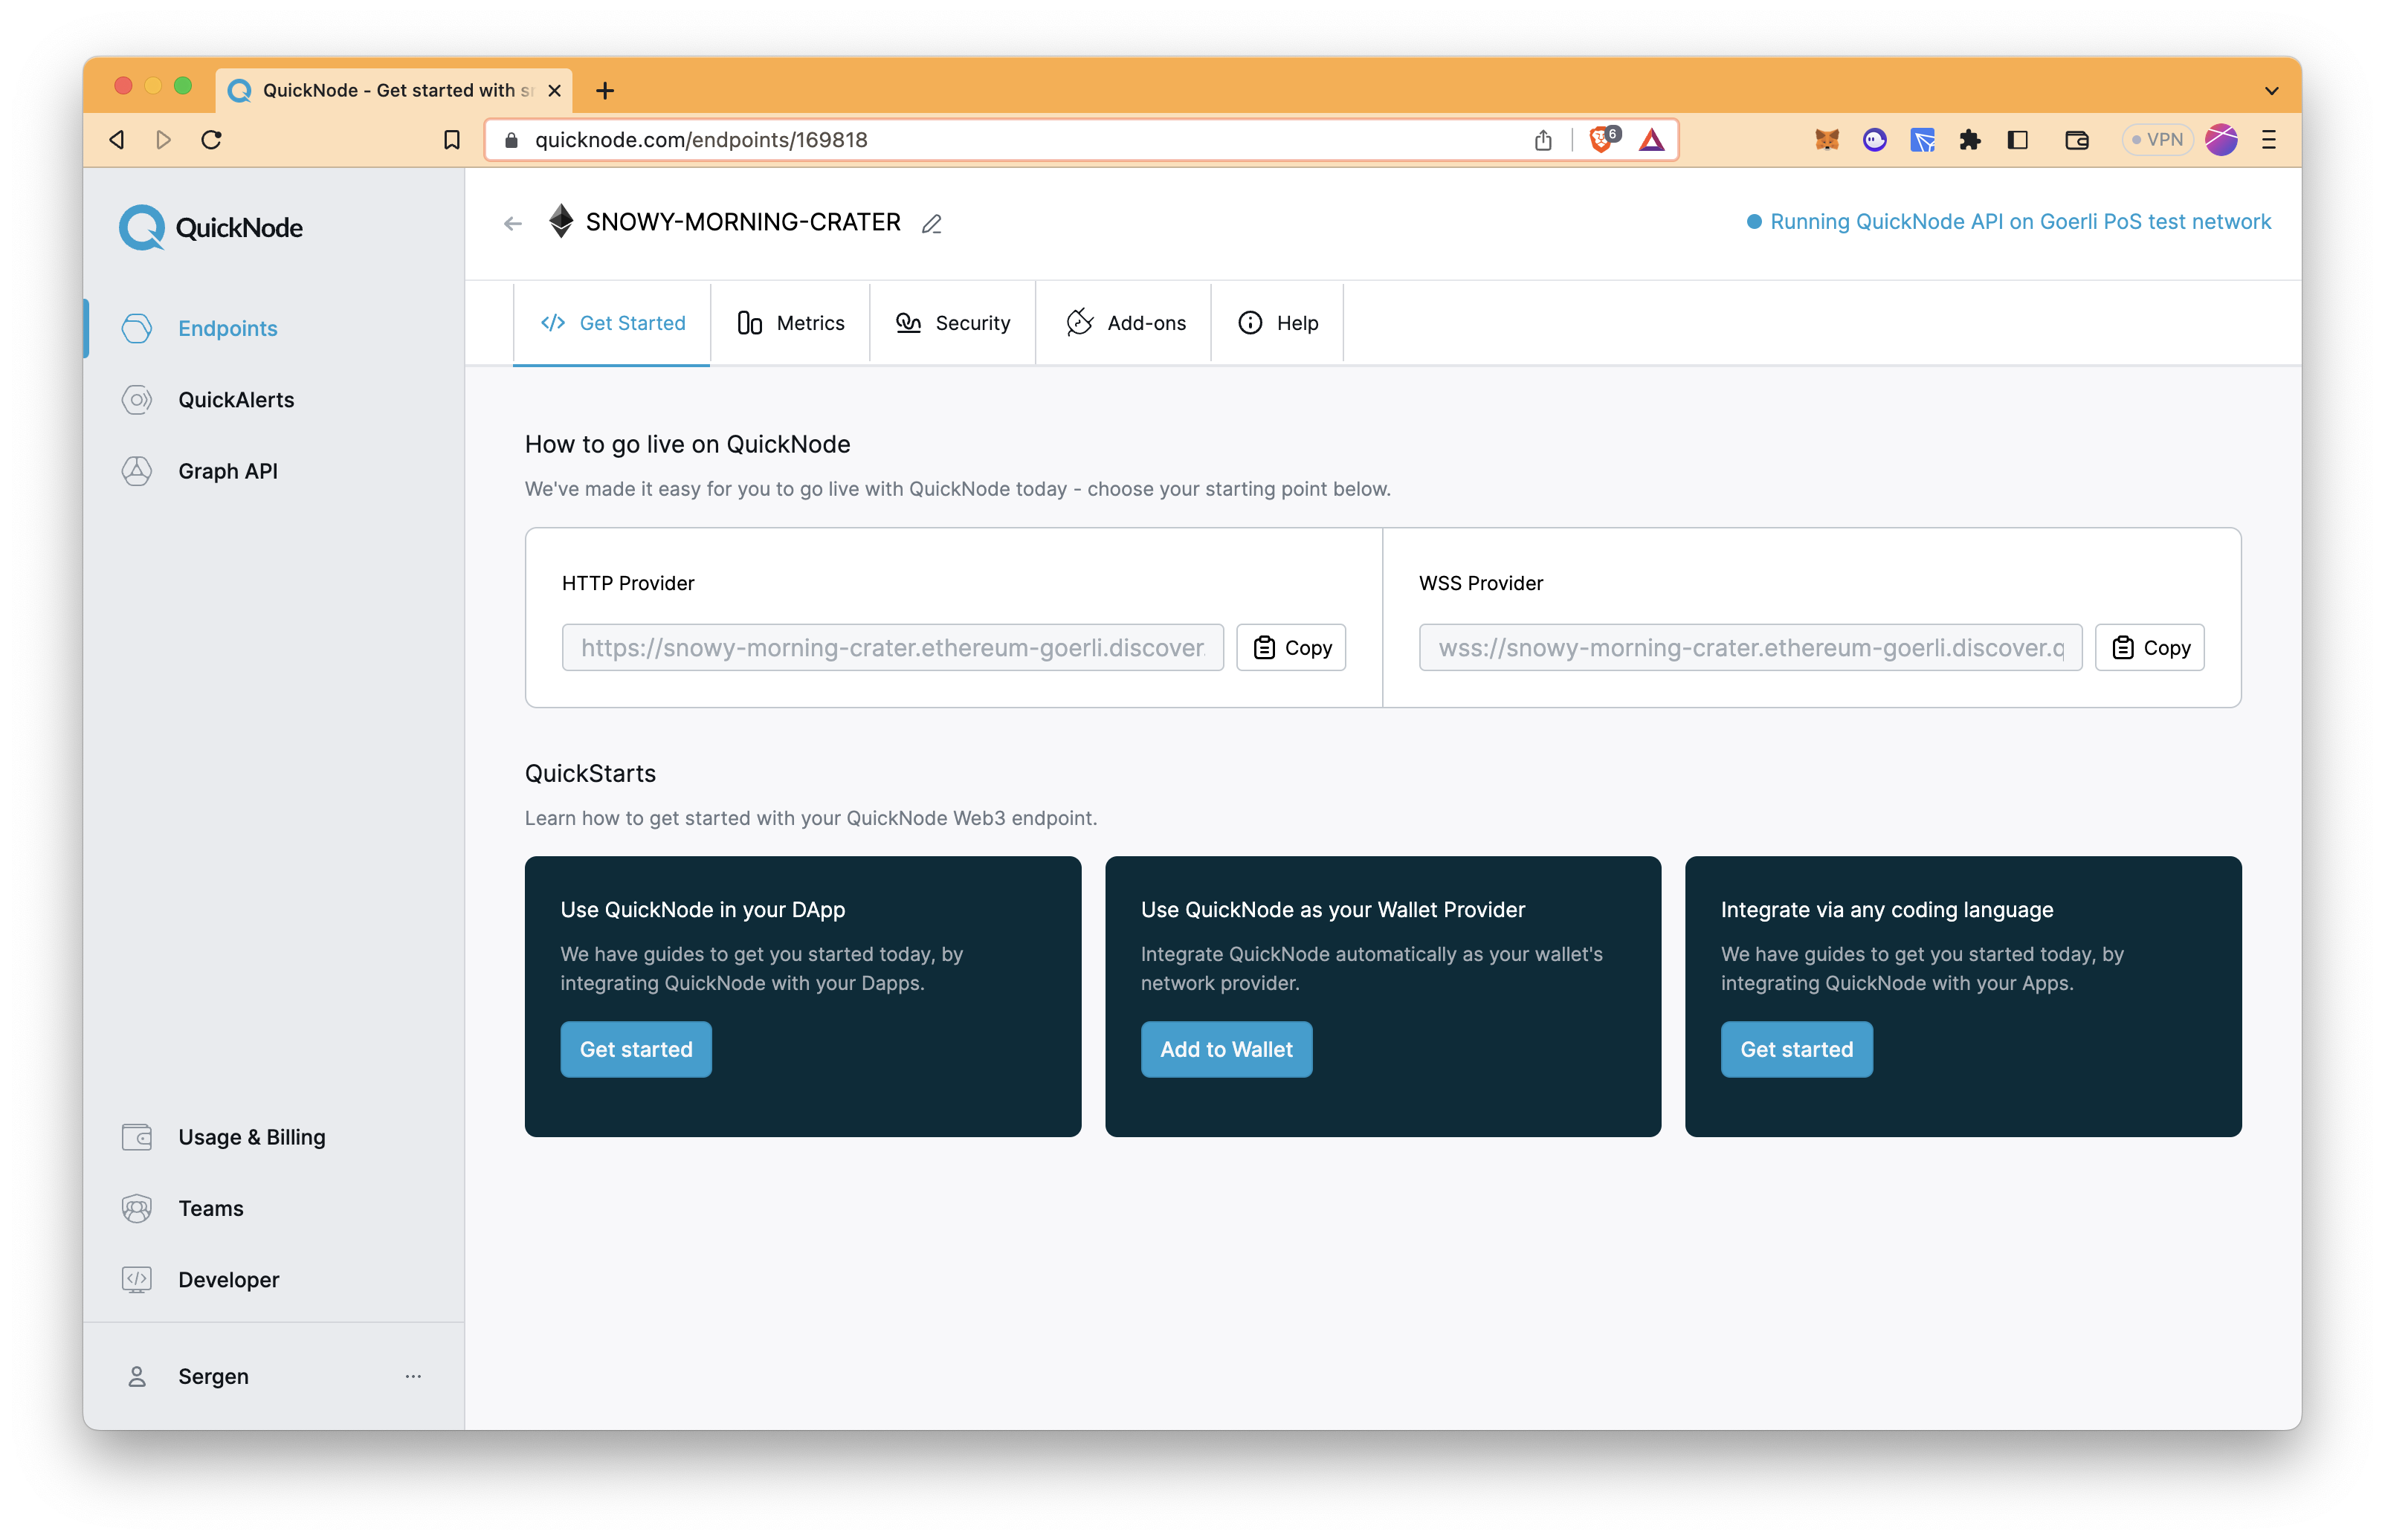
We will deploy our DAO on the Ethereum Goerli Testnet. To deploy a DAO to Ethereum's test blockchain, Goerli, you'll need an API endpoint to communicate with the network. You're welcome to use public nodes or deploy and manage your own infrastructure; however, if you'd like 8x faster response times, you can leave the heavy lifting to us. Sign up for an account here.
Copy the HTTP Provider link as it will be needed.
Configuring Your Web3 Wallet with Quicknode
If you're using MetaMask, you will need to configure your RPC settings. We will explain all steps to configure, but you can also refer to this guide for detailed information.
Open up MetaMask and click the network dropdown at the top. After, click the Add Network button.
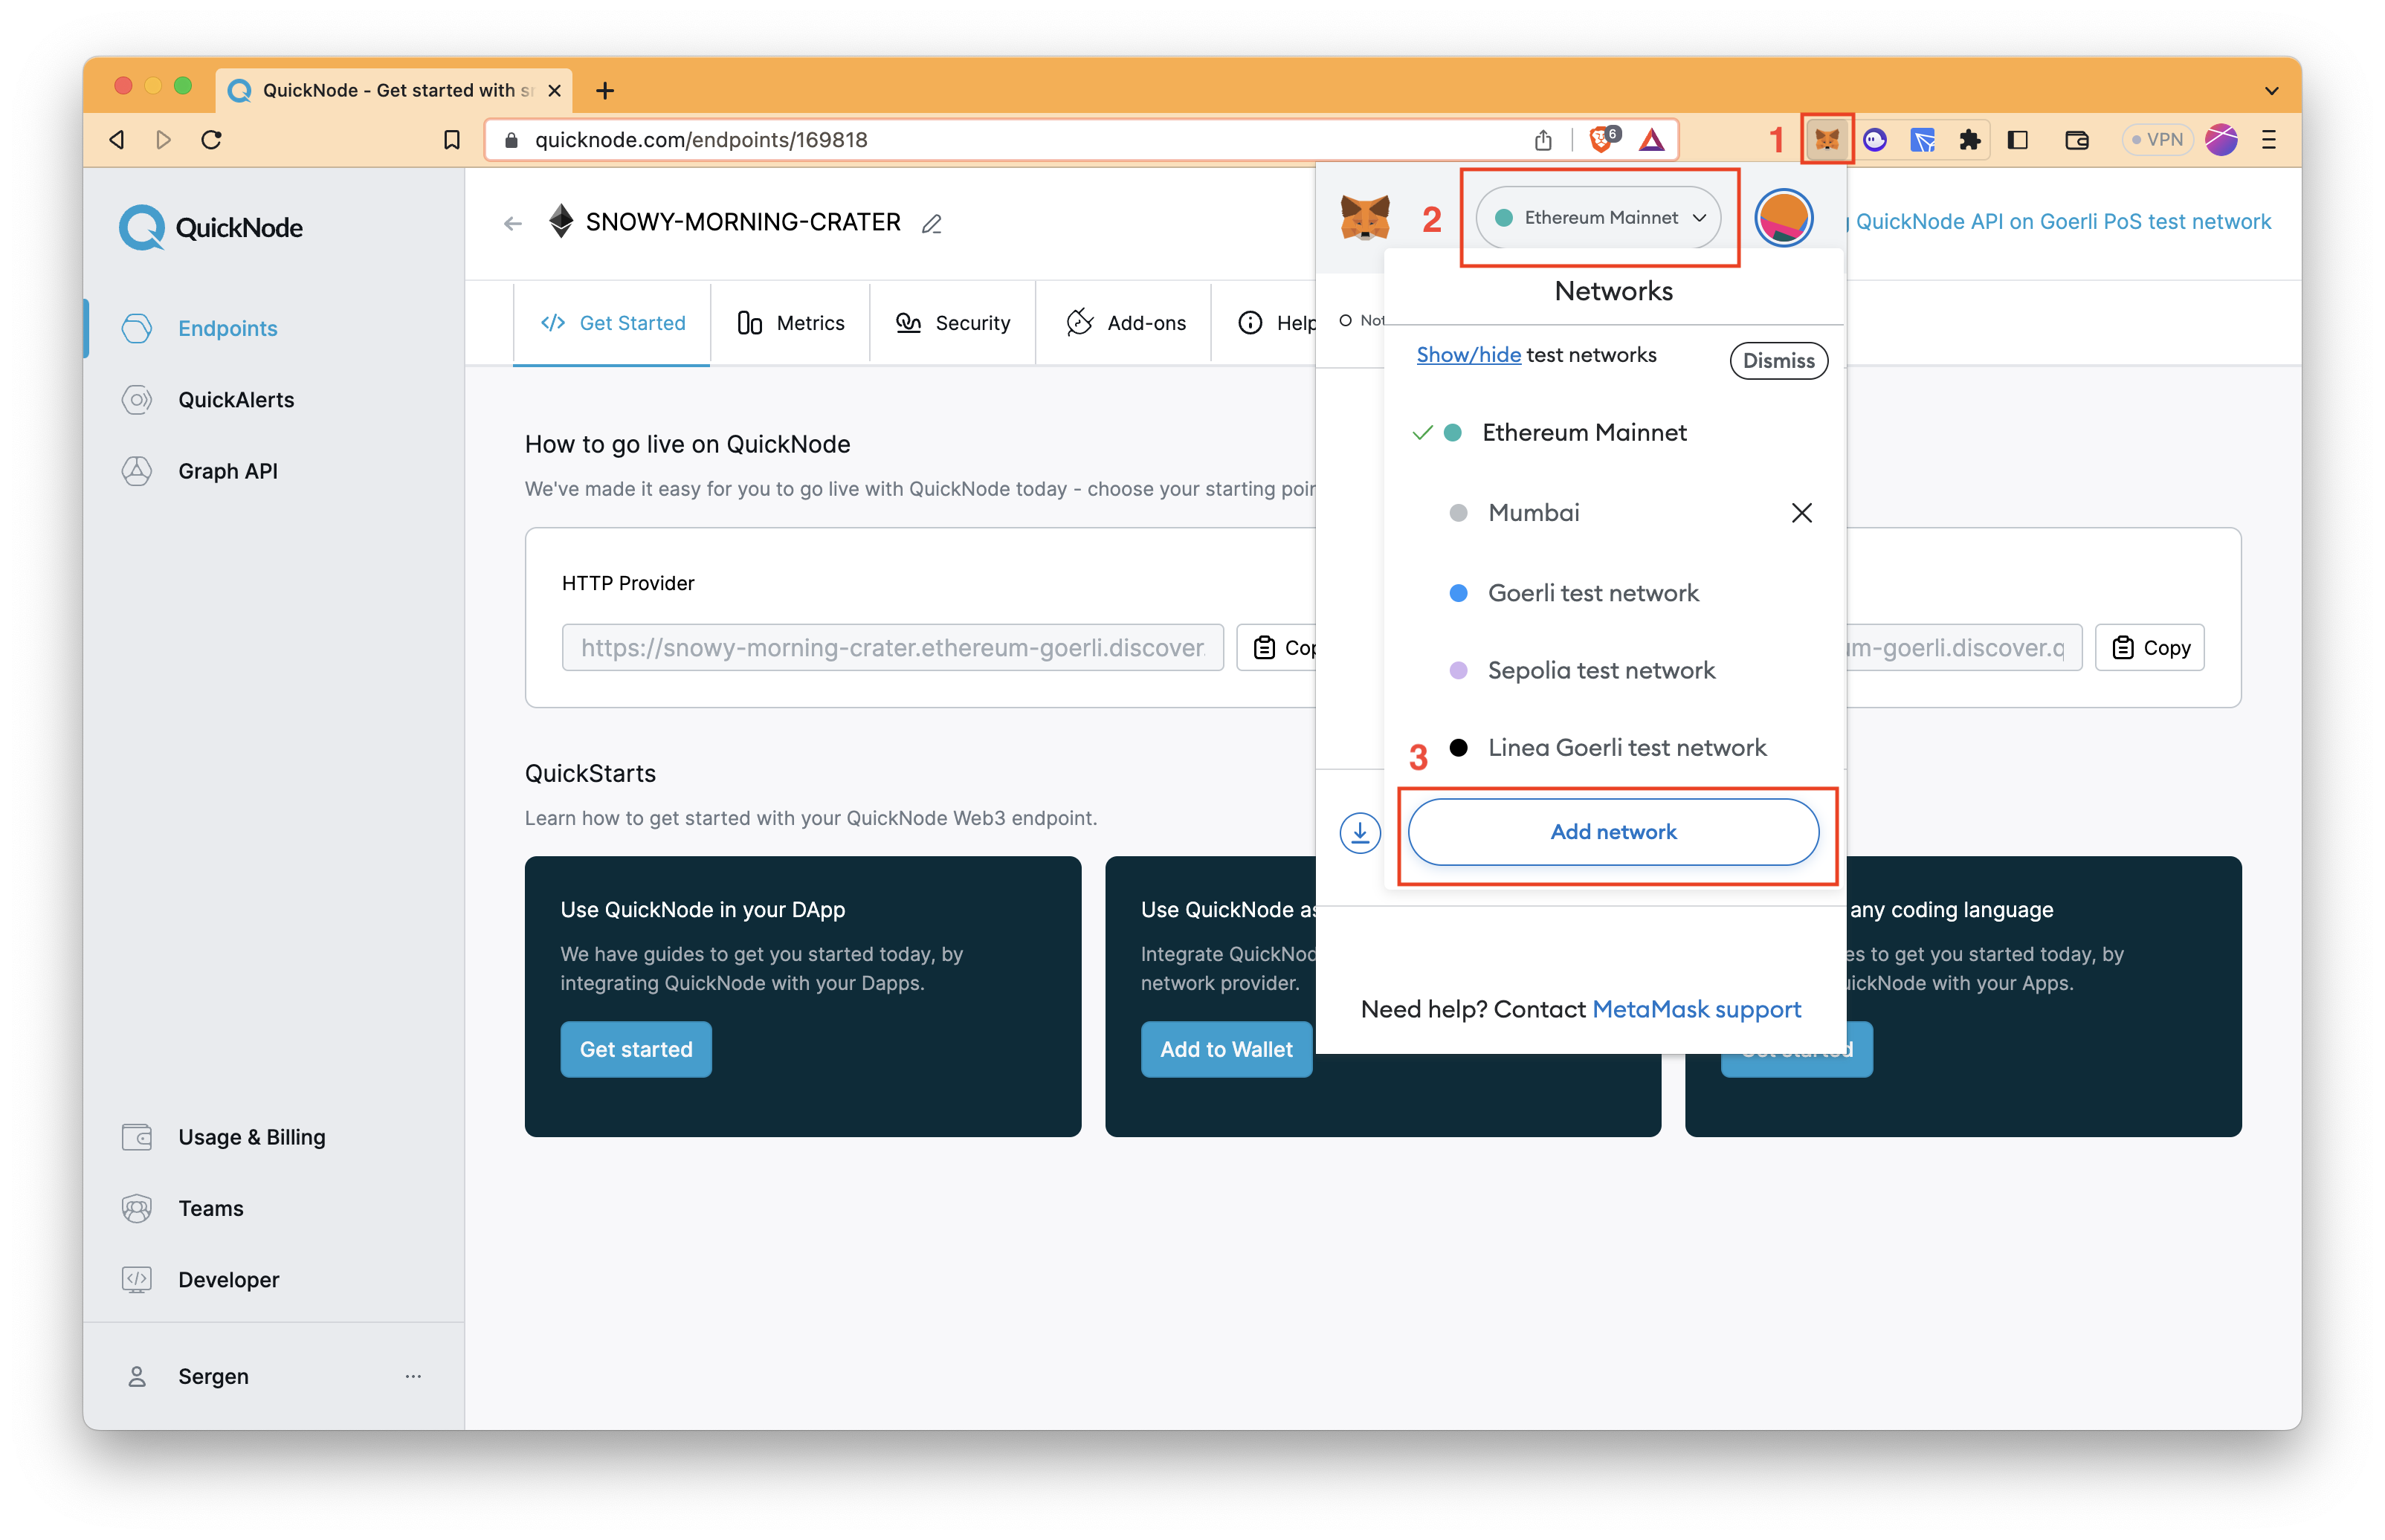
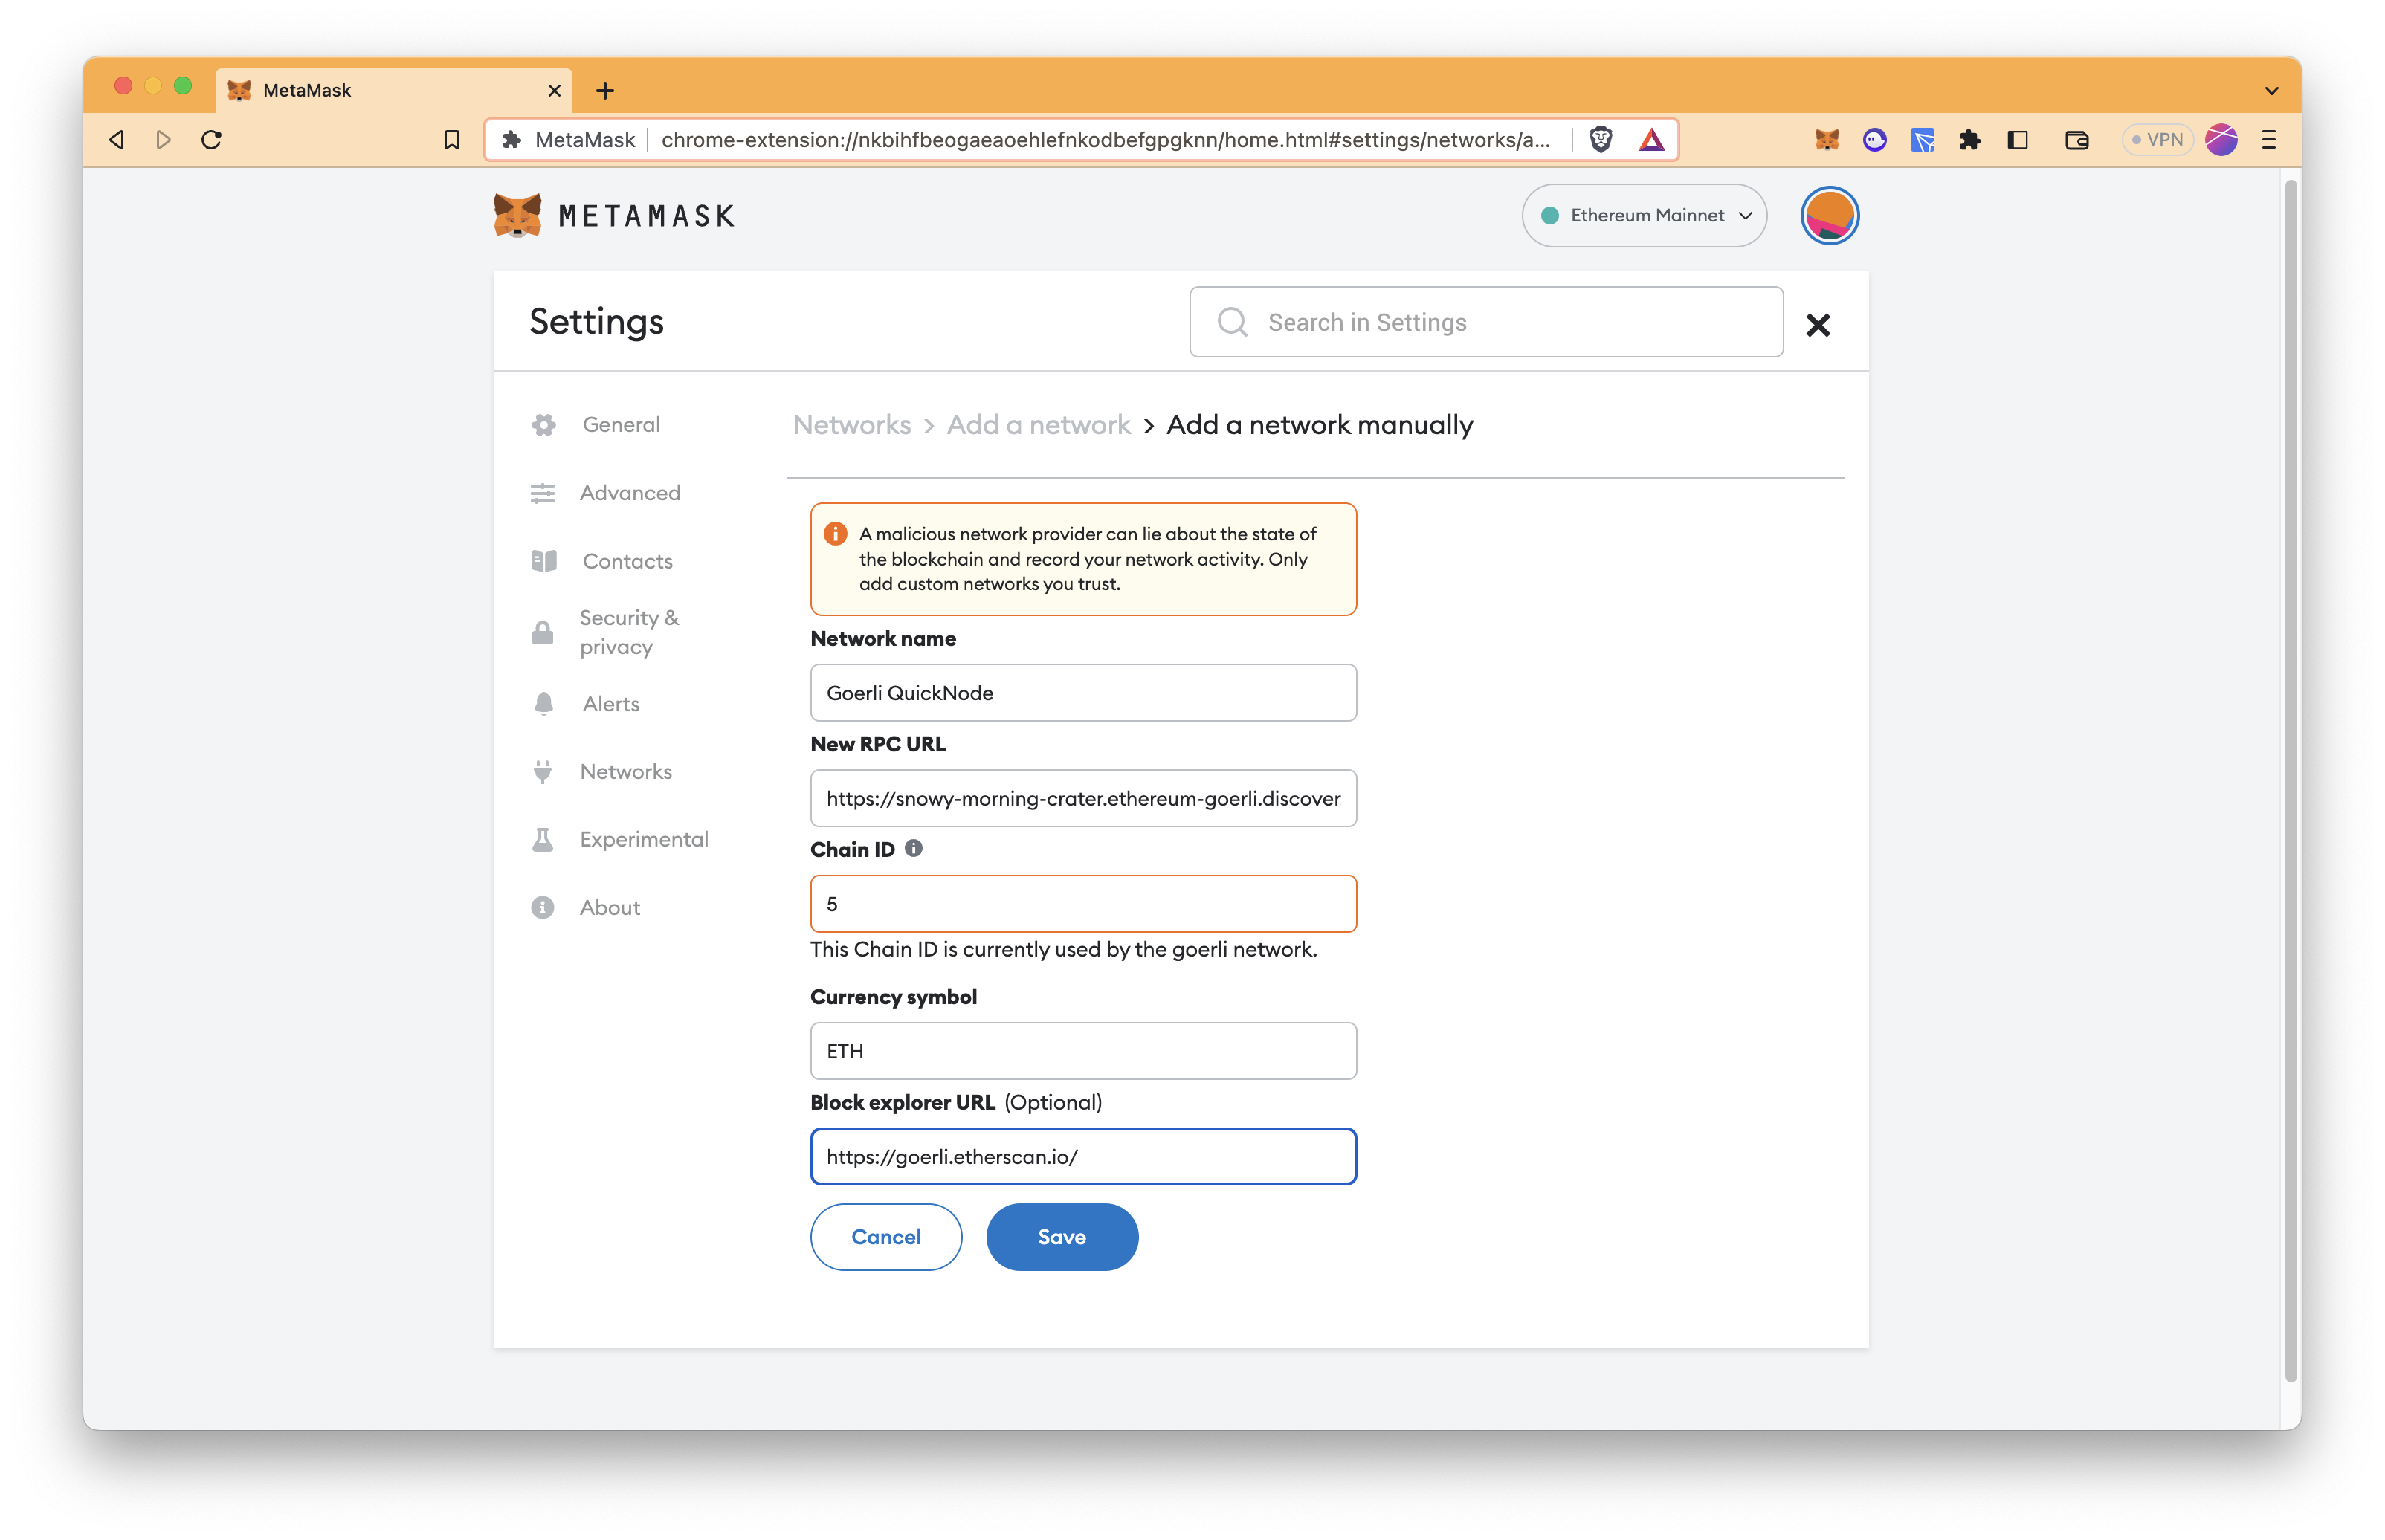
At the bottom of the page, click Add a network manually and fill out the following details:
- Network name: Goerli Quicknode
- New RPC URL: Enter the Quicknode HTTP URL you retrieved earlier
- Chain ID: 5
- Currency symbol: ETH
- Block Explorer URL: https://goerli.etherscan.io/
It should end up looking similar to this:
After saving the network, switch your network to the Goerli Quicknode on MetaMask.
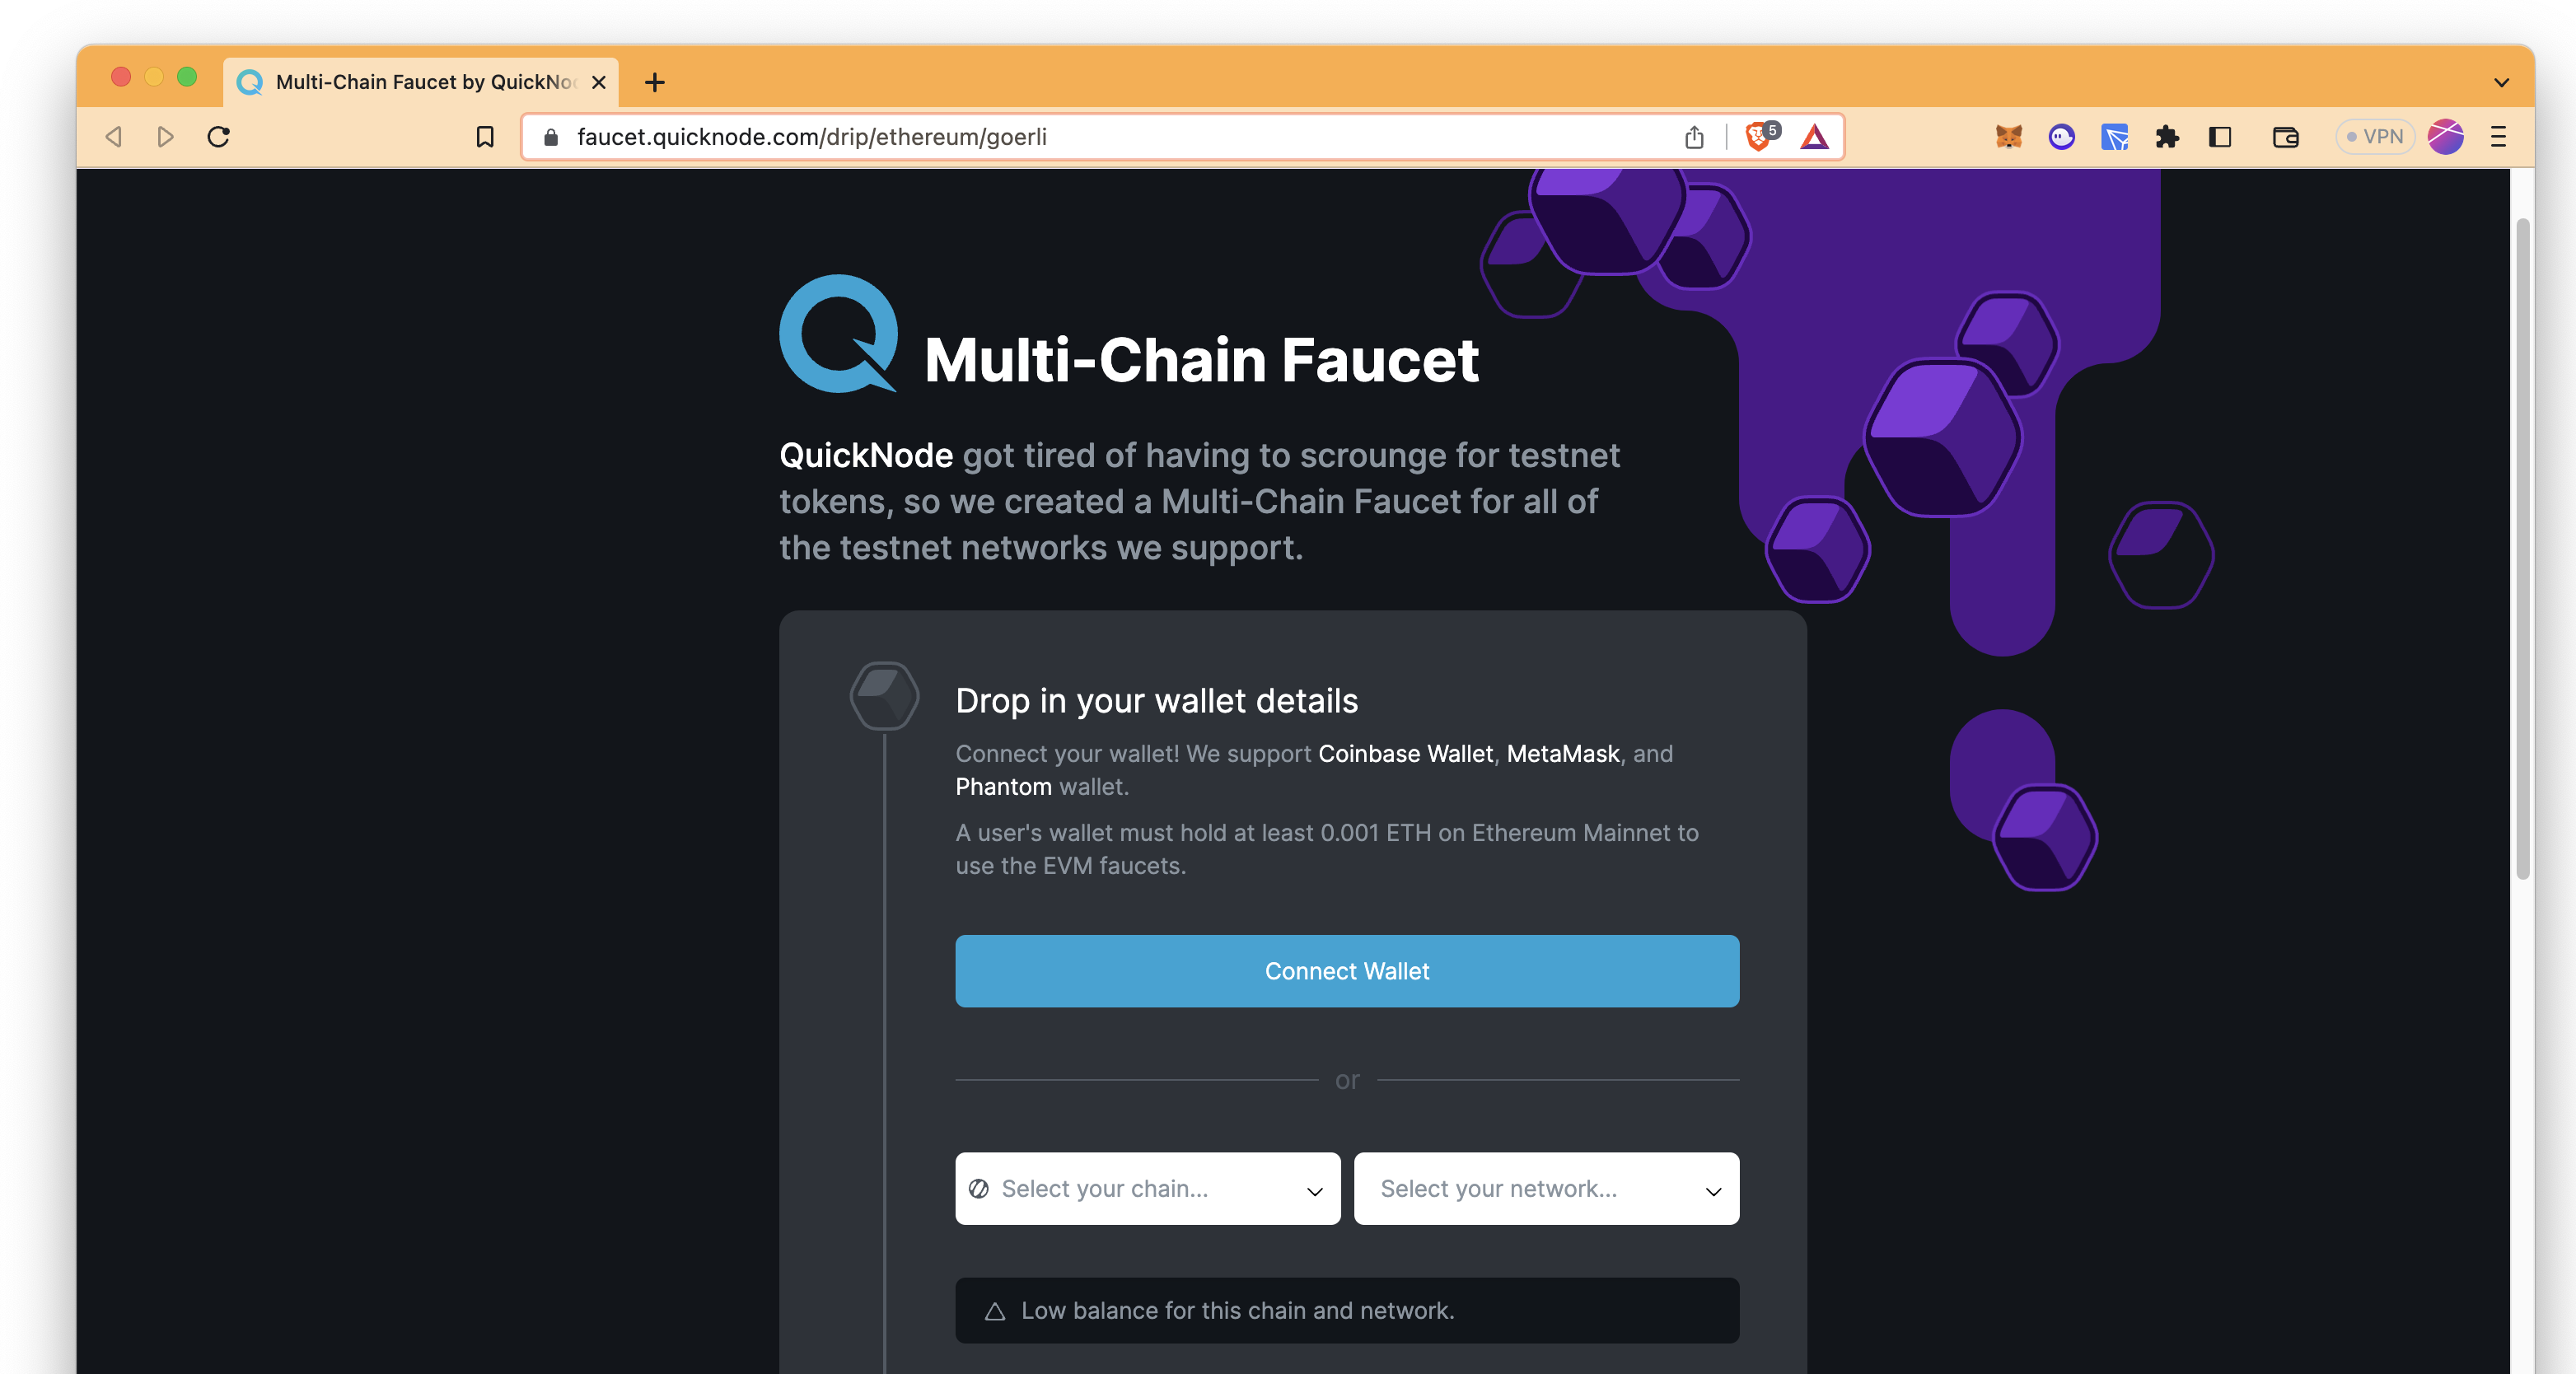
Now we will need some test ETH to make transactions. Head over to the Quicknode Multi-Chain Faucet, follow the instructions, and get some test ETH.
Creating Your DAO
Head over to the Aragon dApp and follow these steps:
Step 1: Select your Goerli Quicknode network in your MetaMask wallet (You should have test ETH in your wallet at this point, at least 0.2 test ETH is needed to proceed).
Step 2: Click on the "Connect account" button, select "MetaMask" and approve the request from MetaMask.
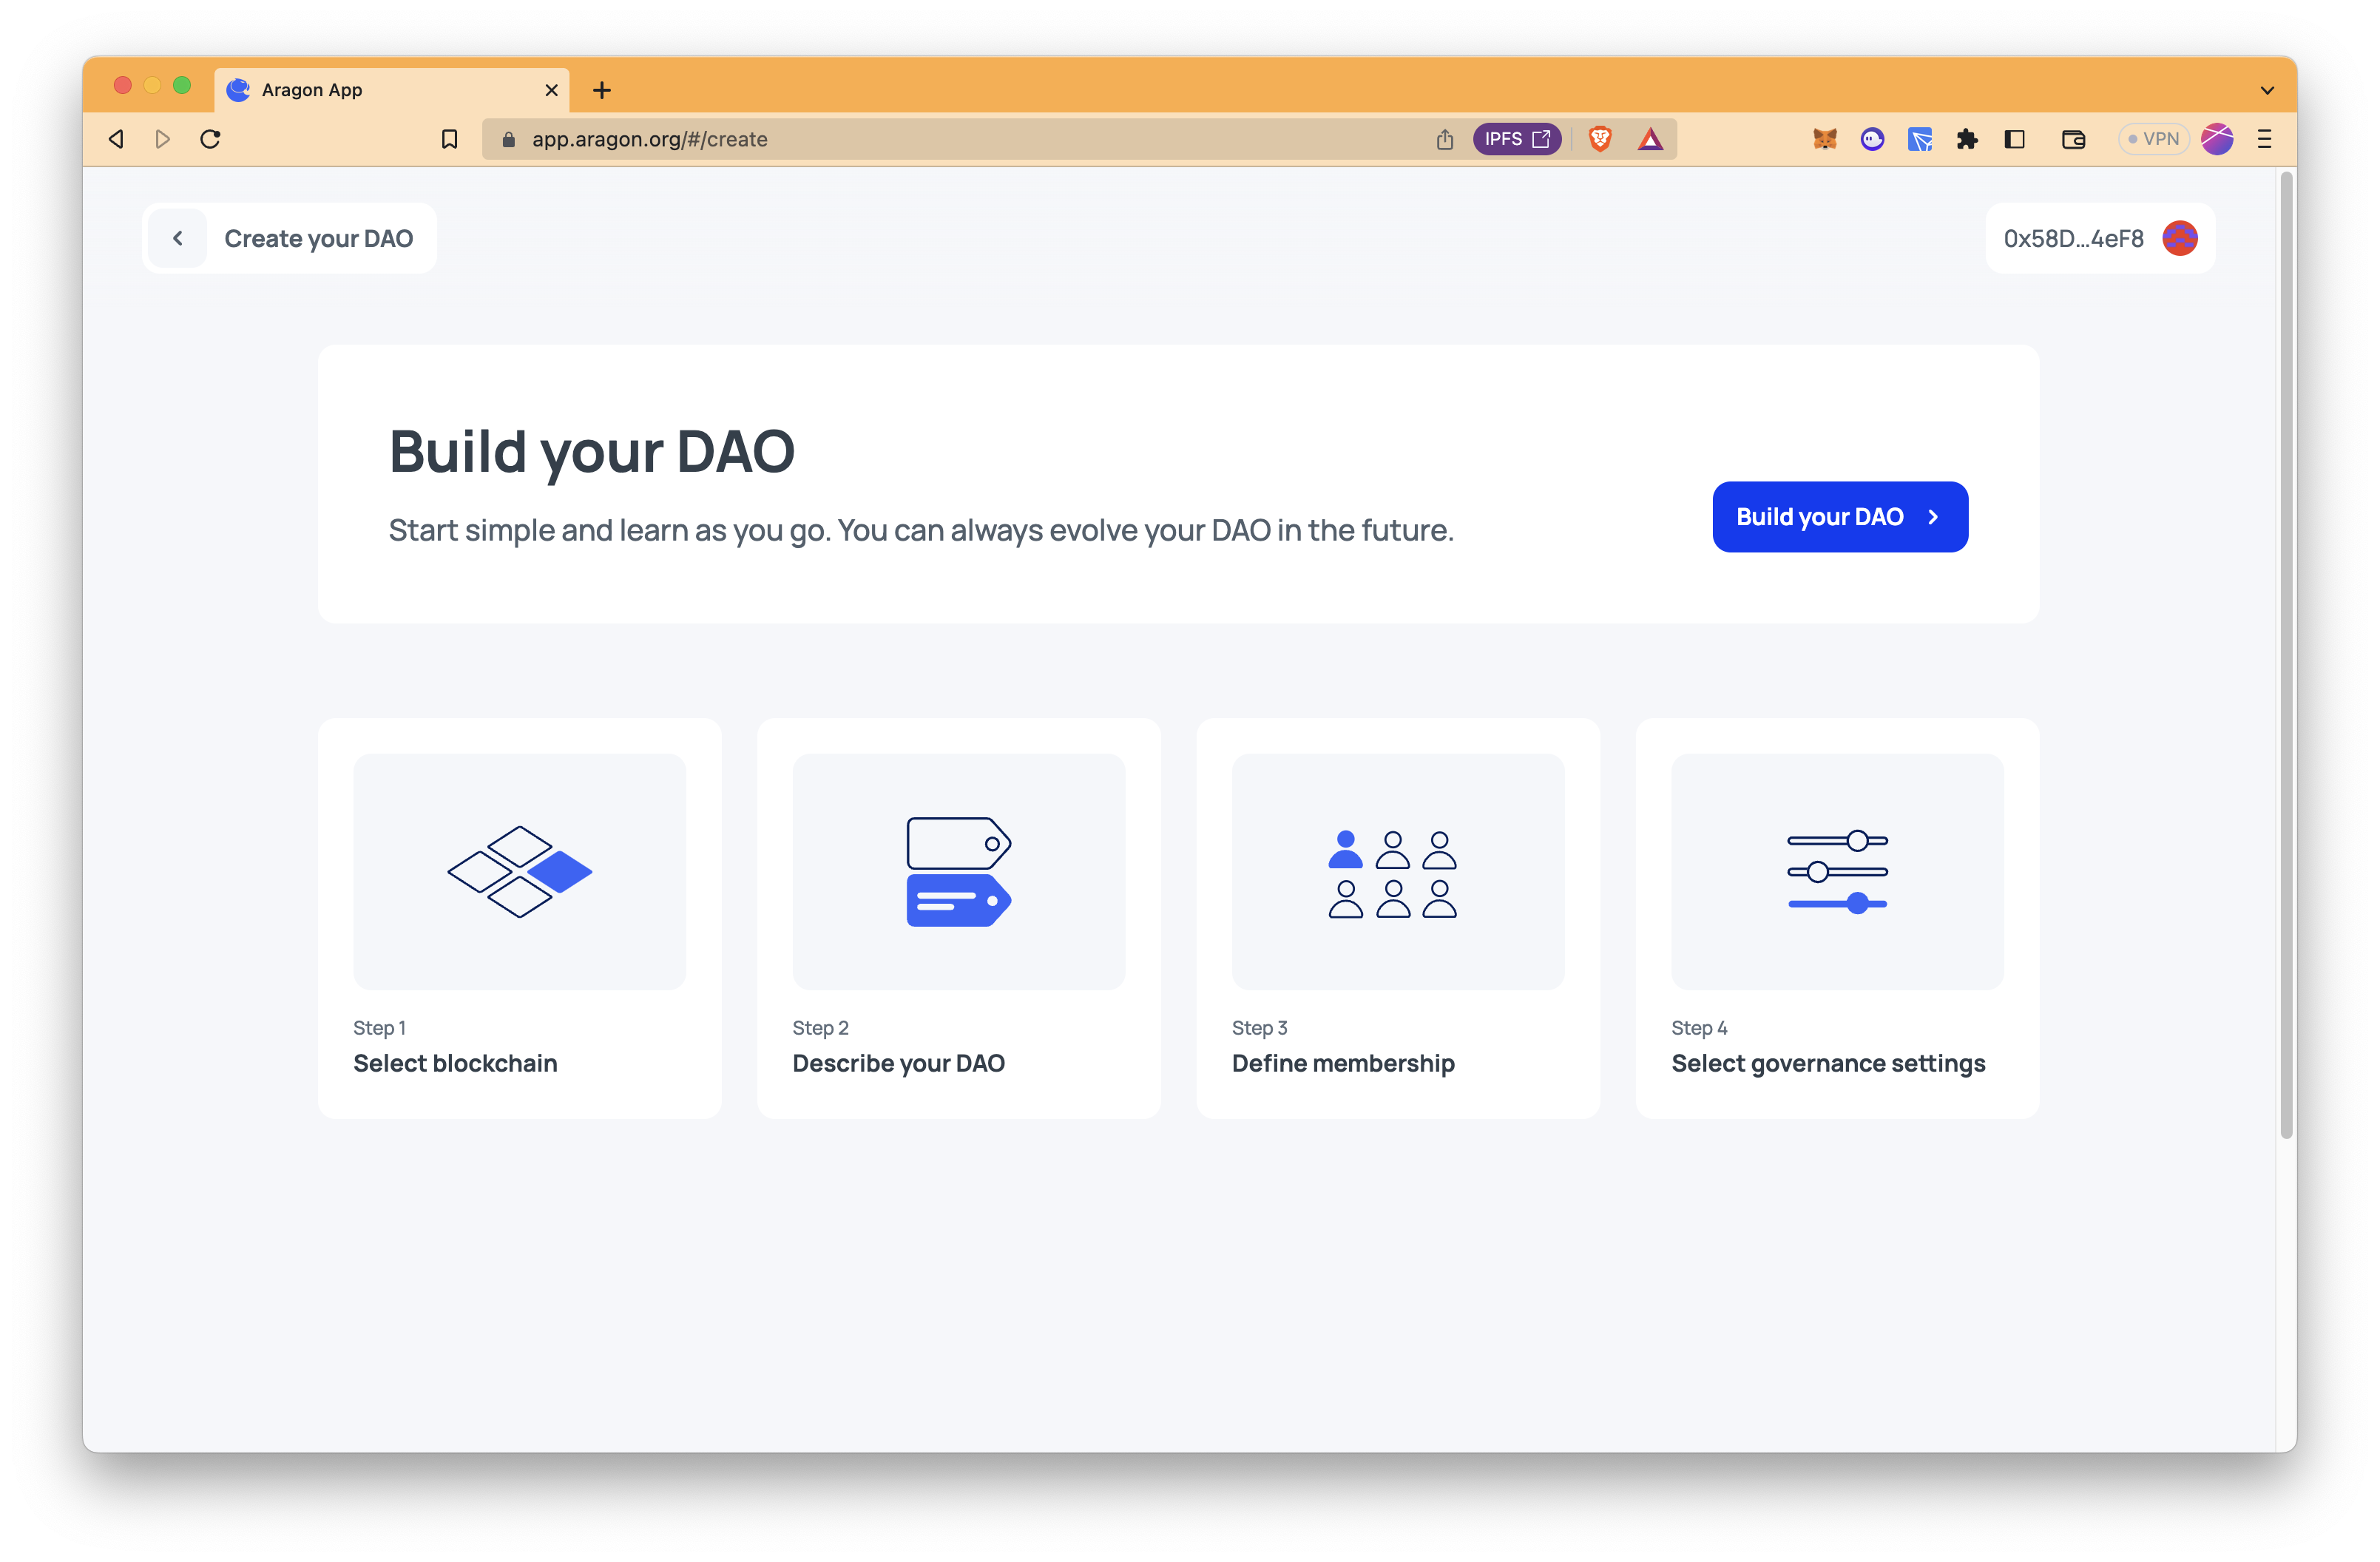
Step 3: Click the "Create a DAO" and "Build your DAO" buttons.
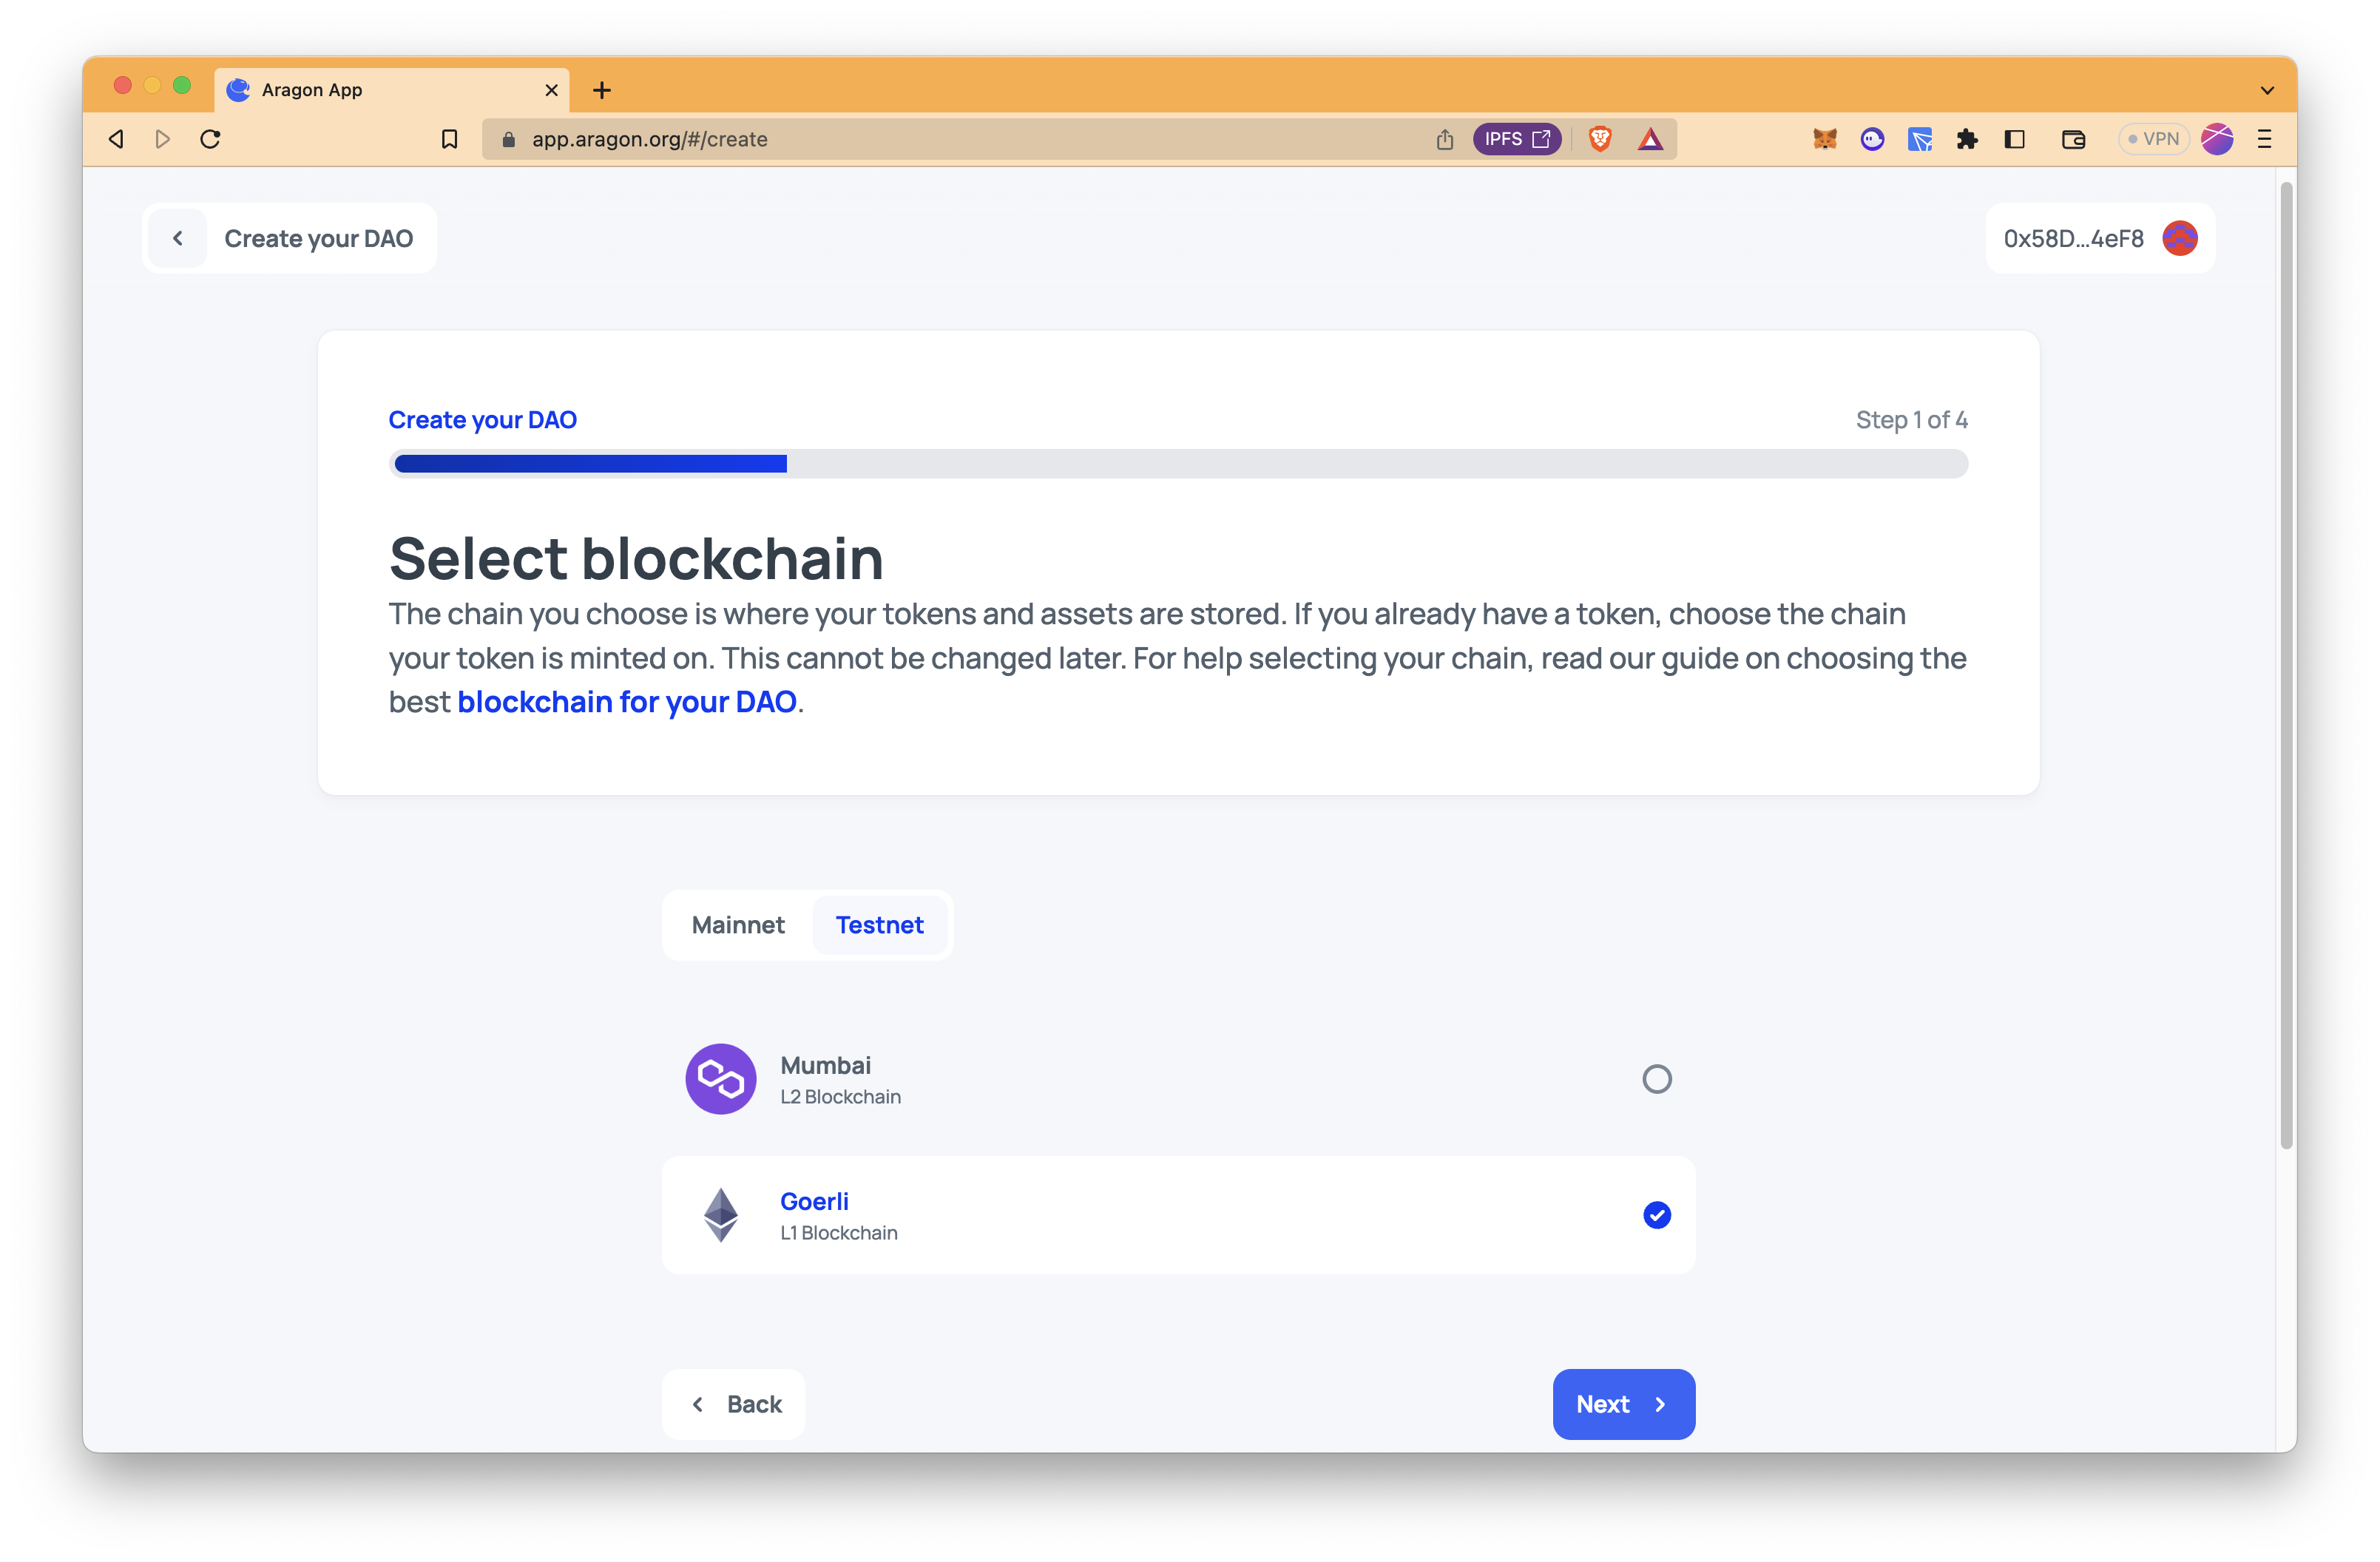
Step 4: Select a blockchain. We use "Goerli Testnet" in this guide.
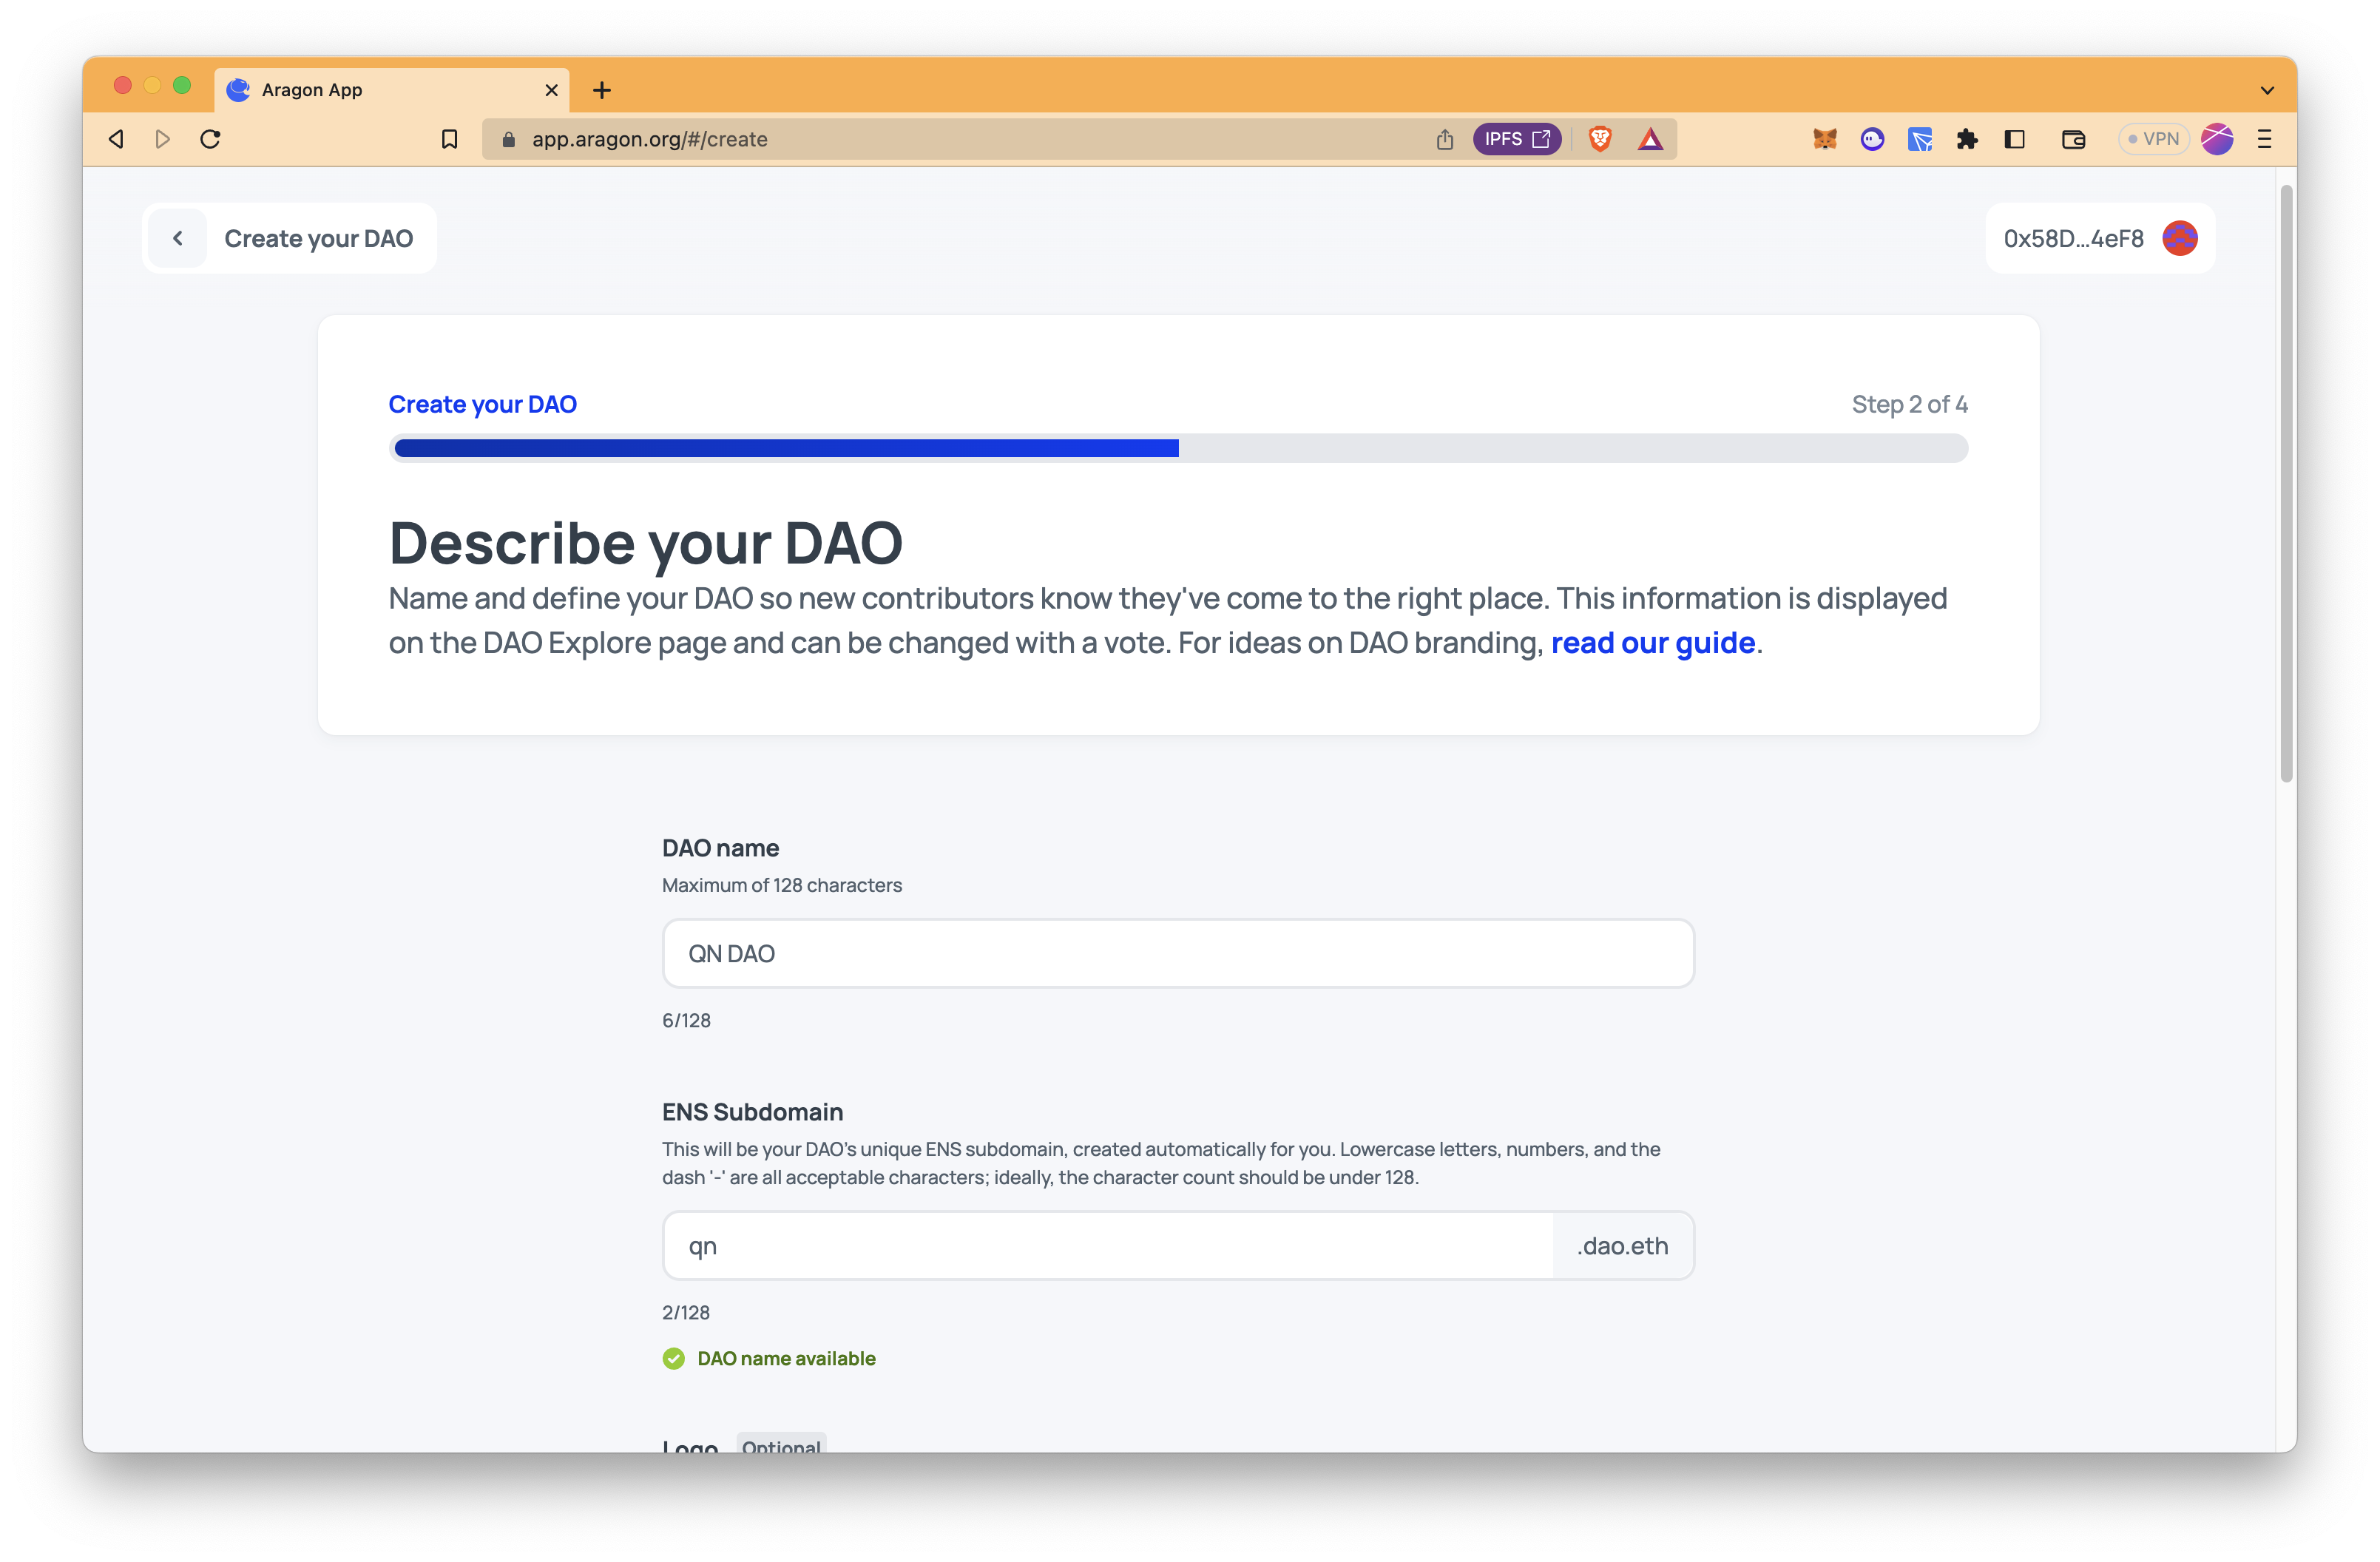
Step 5: Describe your DAO.
Step 6: Define membership. We select "Token holders" as those who can participate in governance.
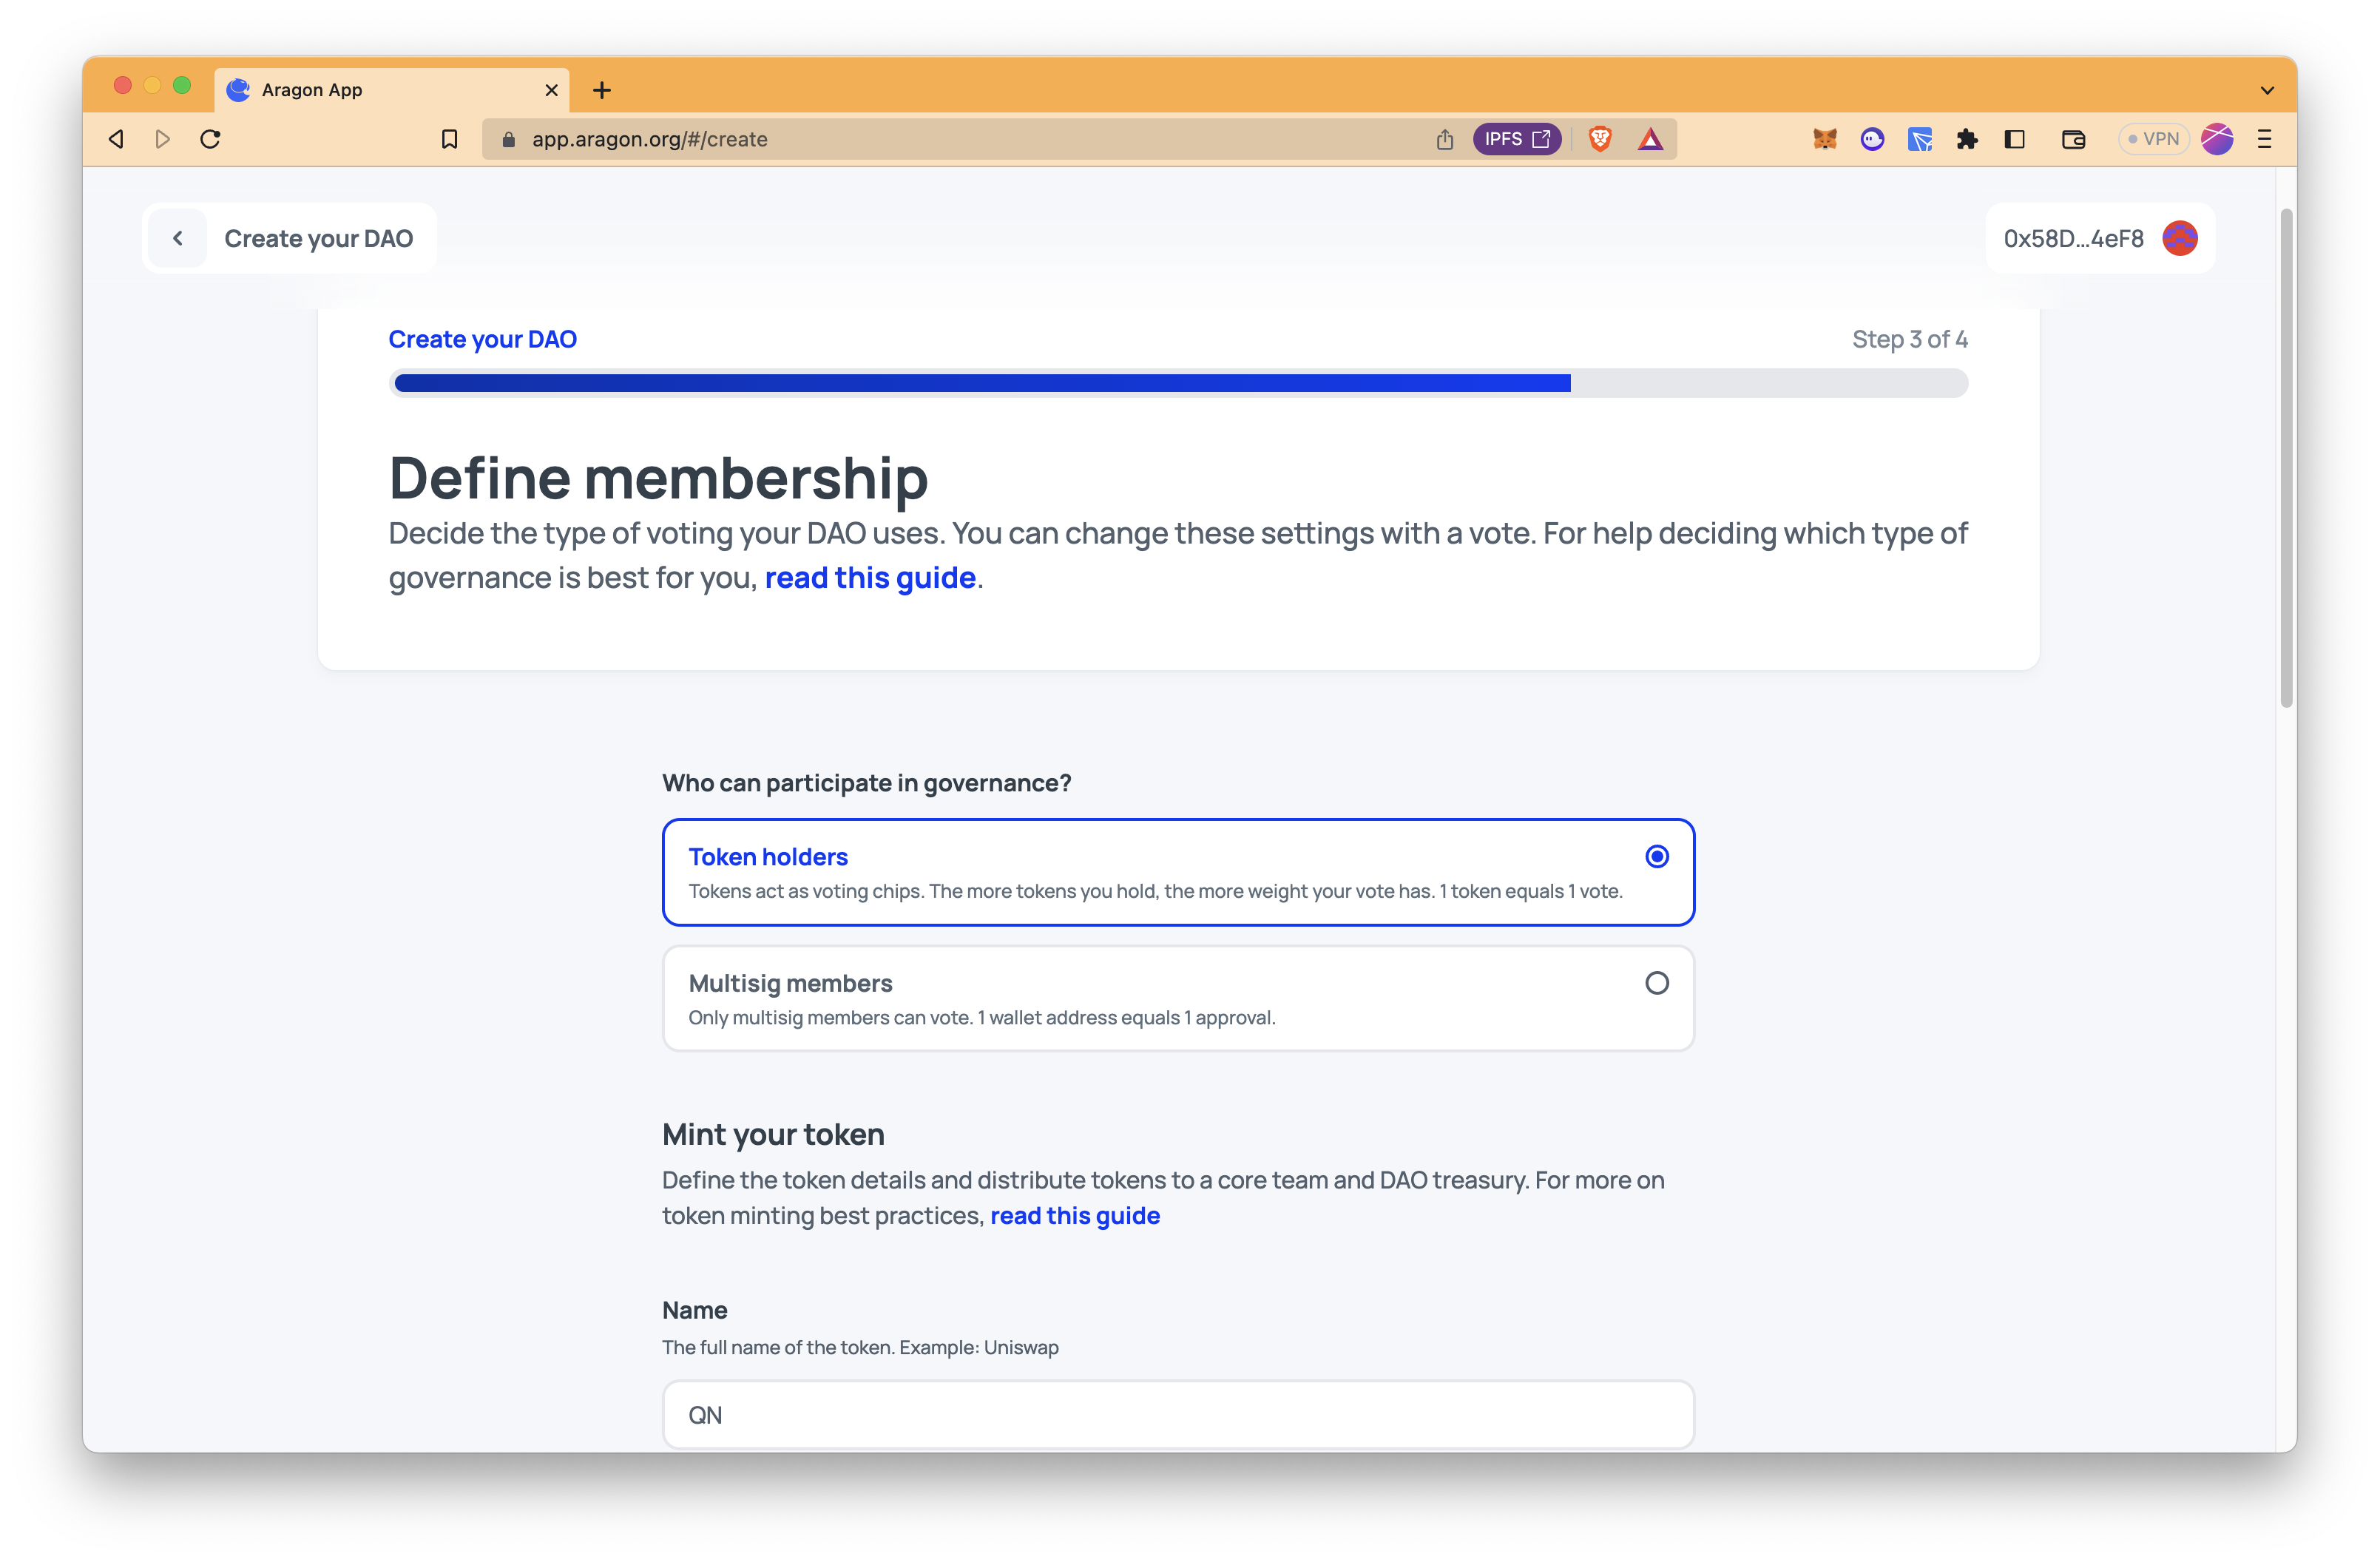
If you select "Token holders" as those who can participate in governance, the token name, the token symbol, the wallet addresses that you would like to distribute tokens, and token amounts for each wallet address are required.
If you select "Multisig members", multisig members' addresses are required.
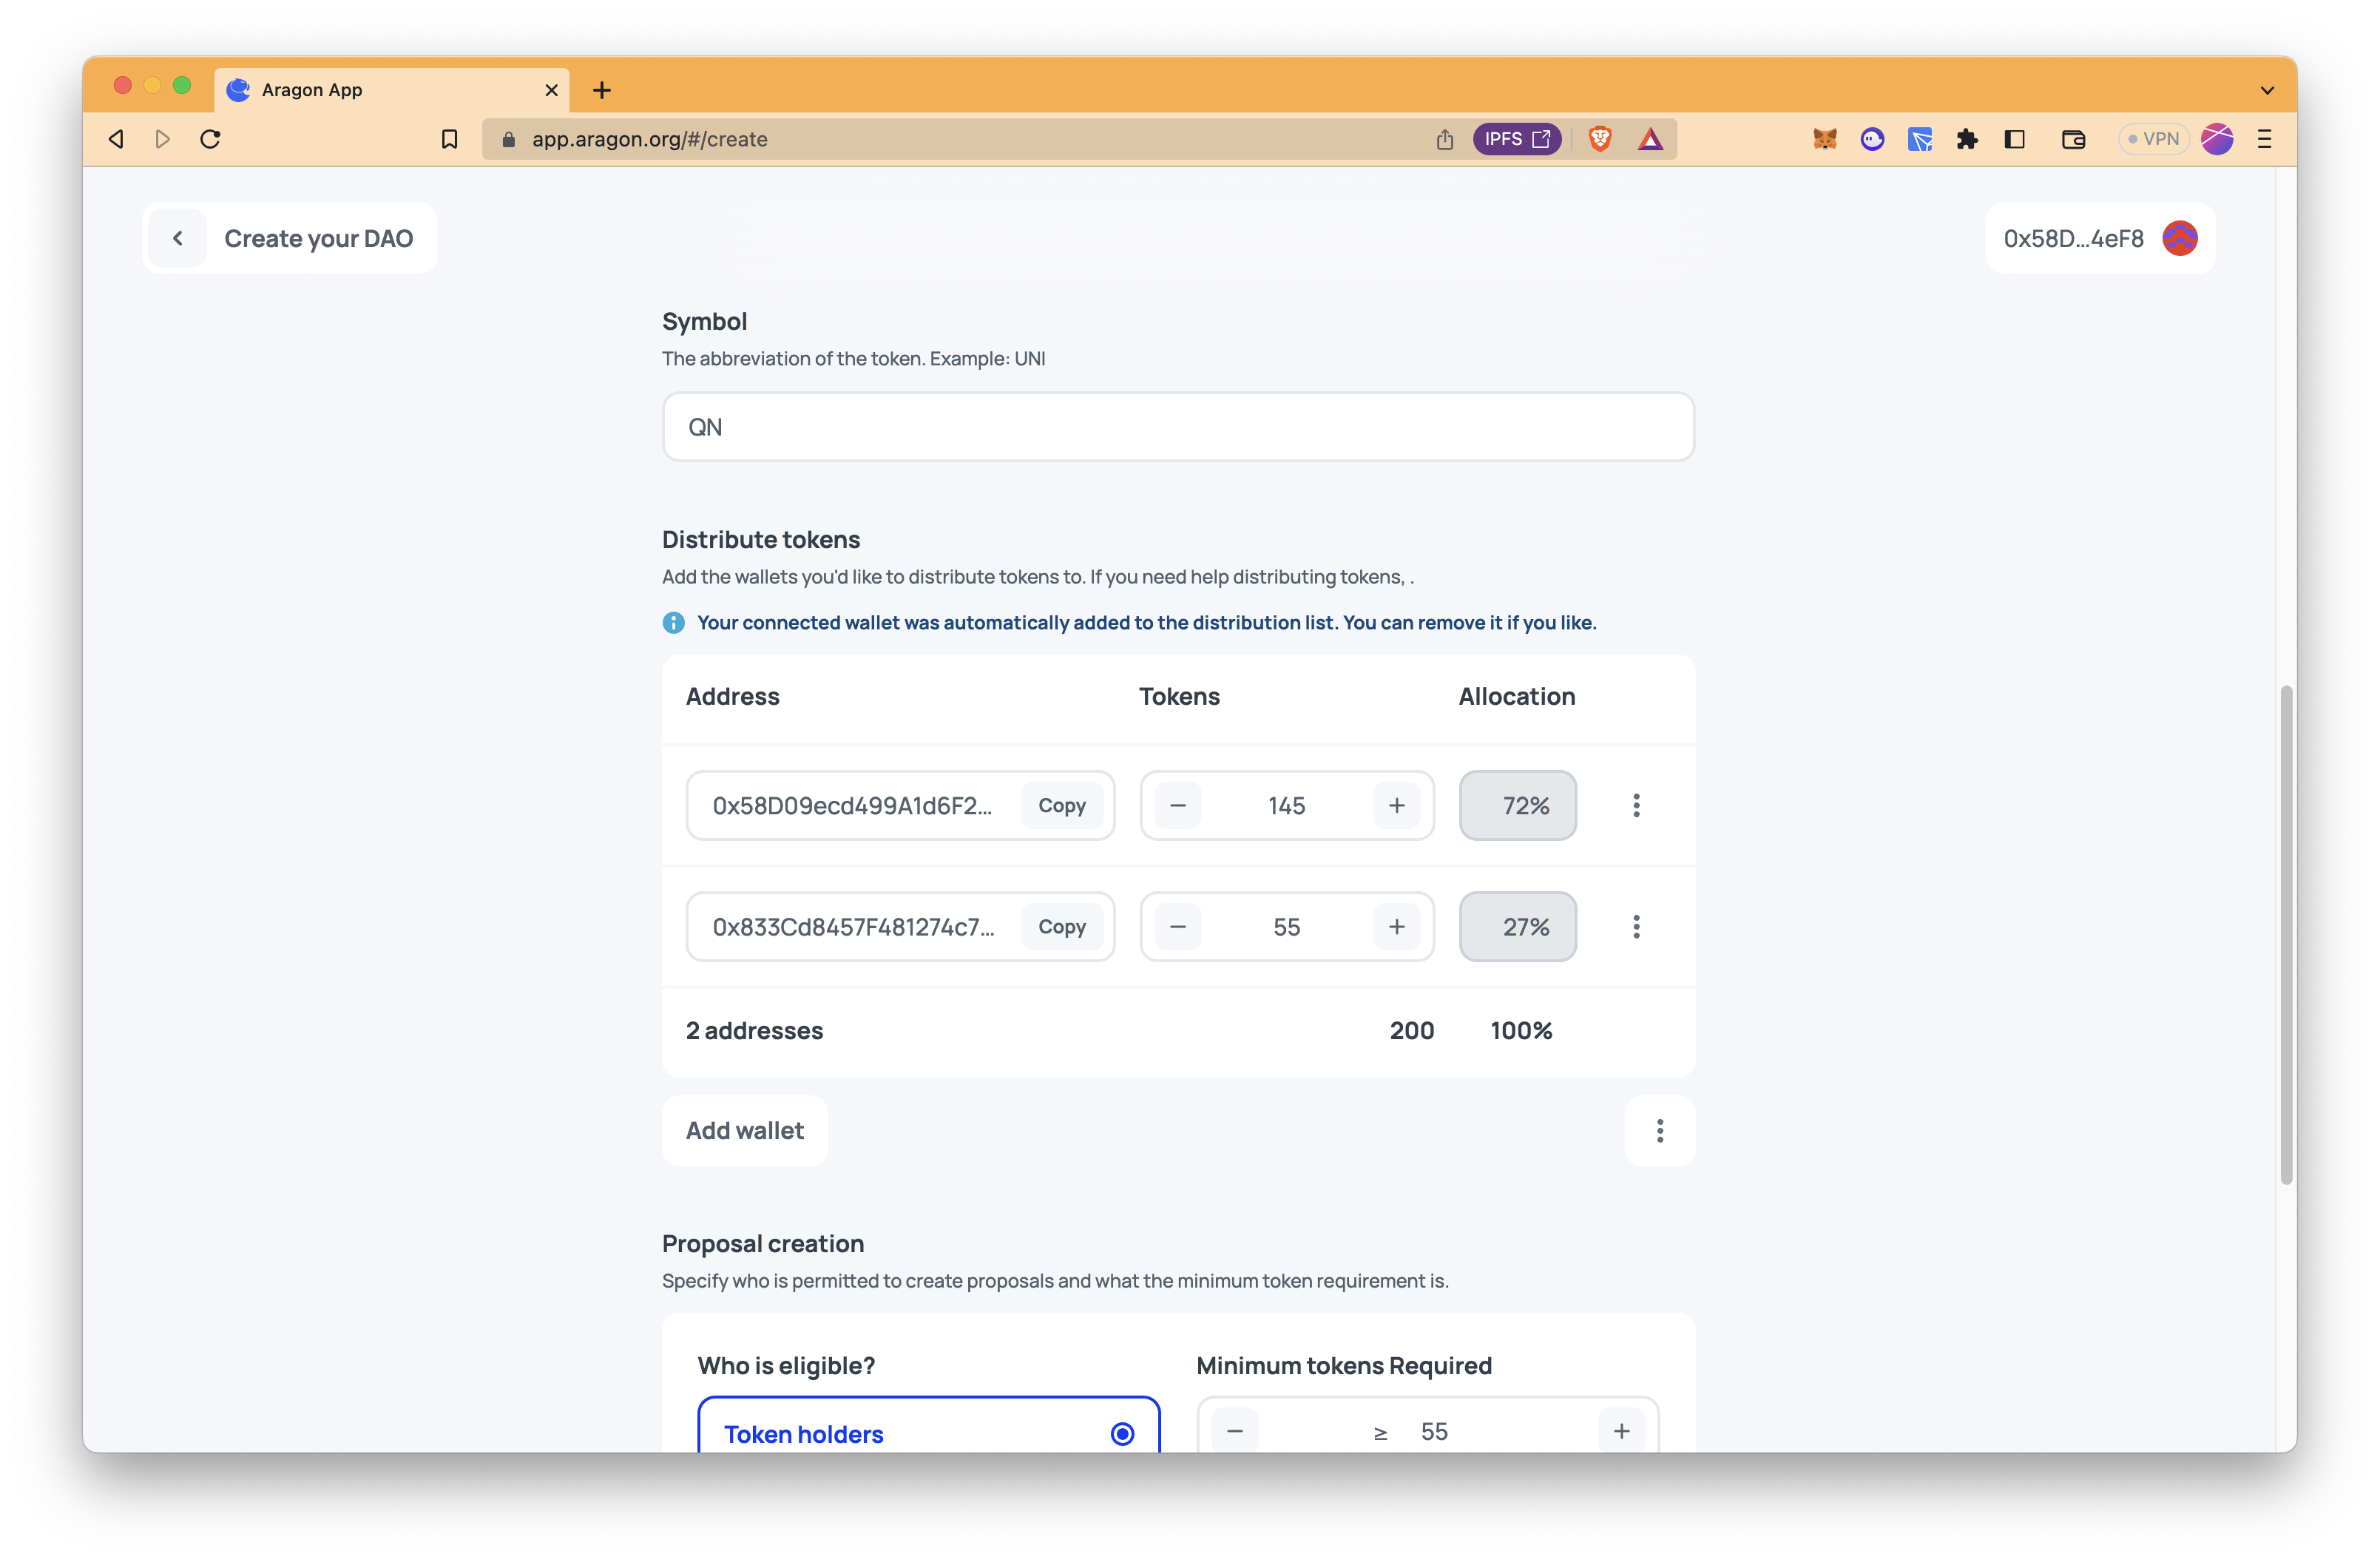
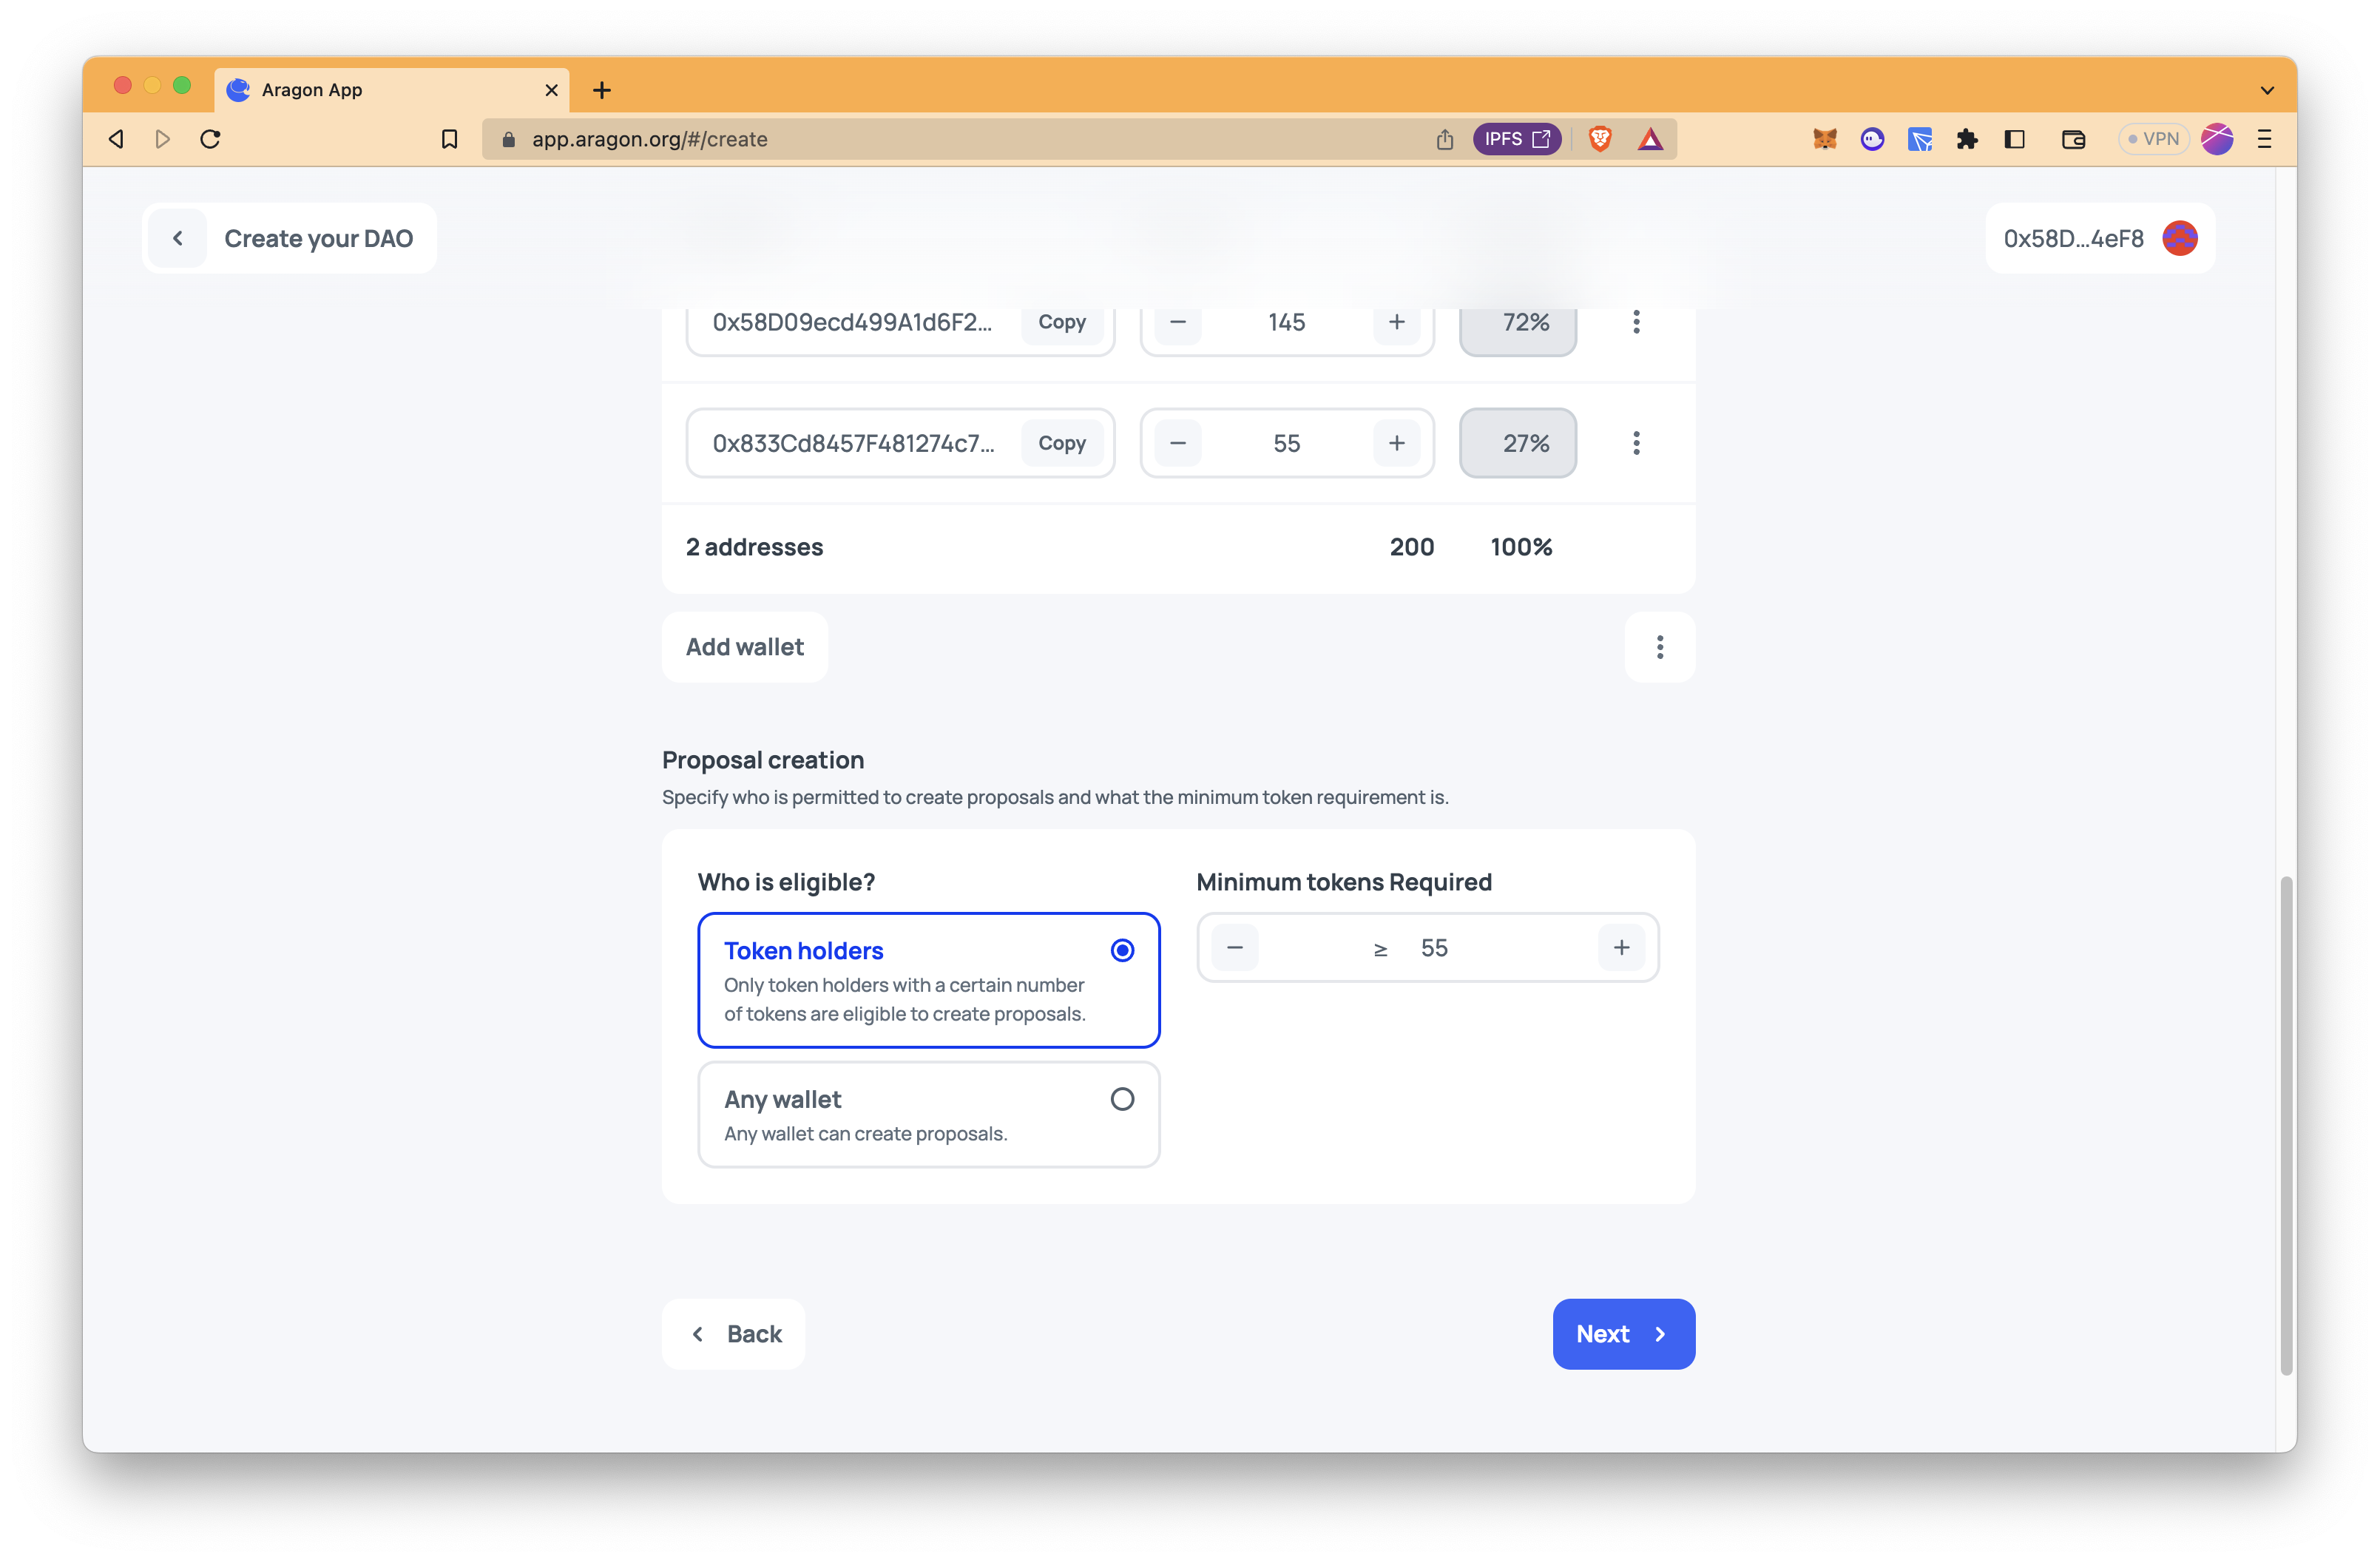
As the last setting in the membership, specify who can create proposals.
If you select "Token holders" as those who can participate in governance and who can create proposals, you need to specify a minimum amount of tokens to create proposals. It is advised to avoid spam proposals.
Step 7: Select governance settings to determine how voting works.
Support threshold: This is the percentage of tokens required to approve the voting in favor of a yes; for example, if the support percentage is set to 50%, more than 50% of the overall votes must be yes to get the proposal passed.
Minimum participation: The minimum proportion of the token supply that must vote on a proposal in order for the vote to be valid. For example, if the total token supply is 100 and minimum participation is selected as 15%, there should be 15 votes at least on a proposal to be a valid proposal.
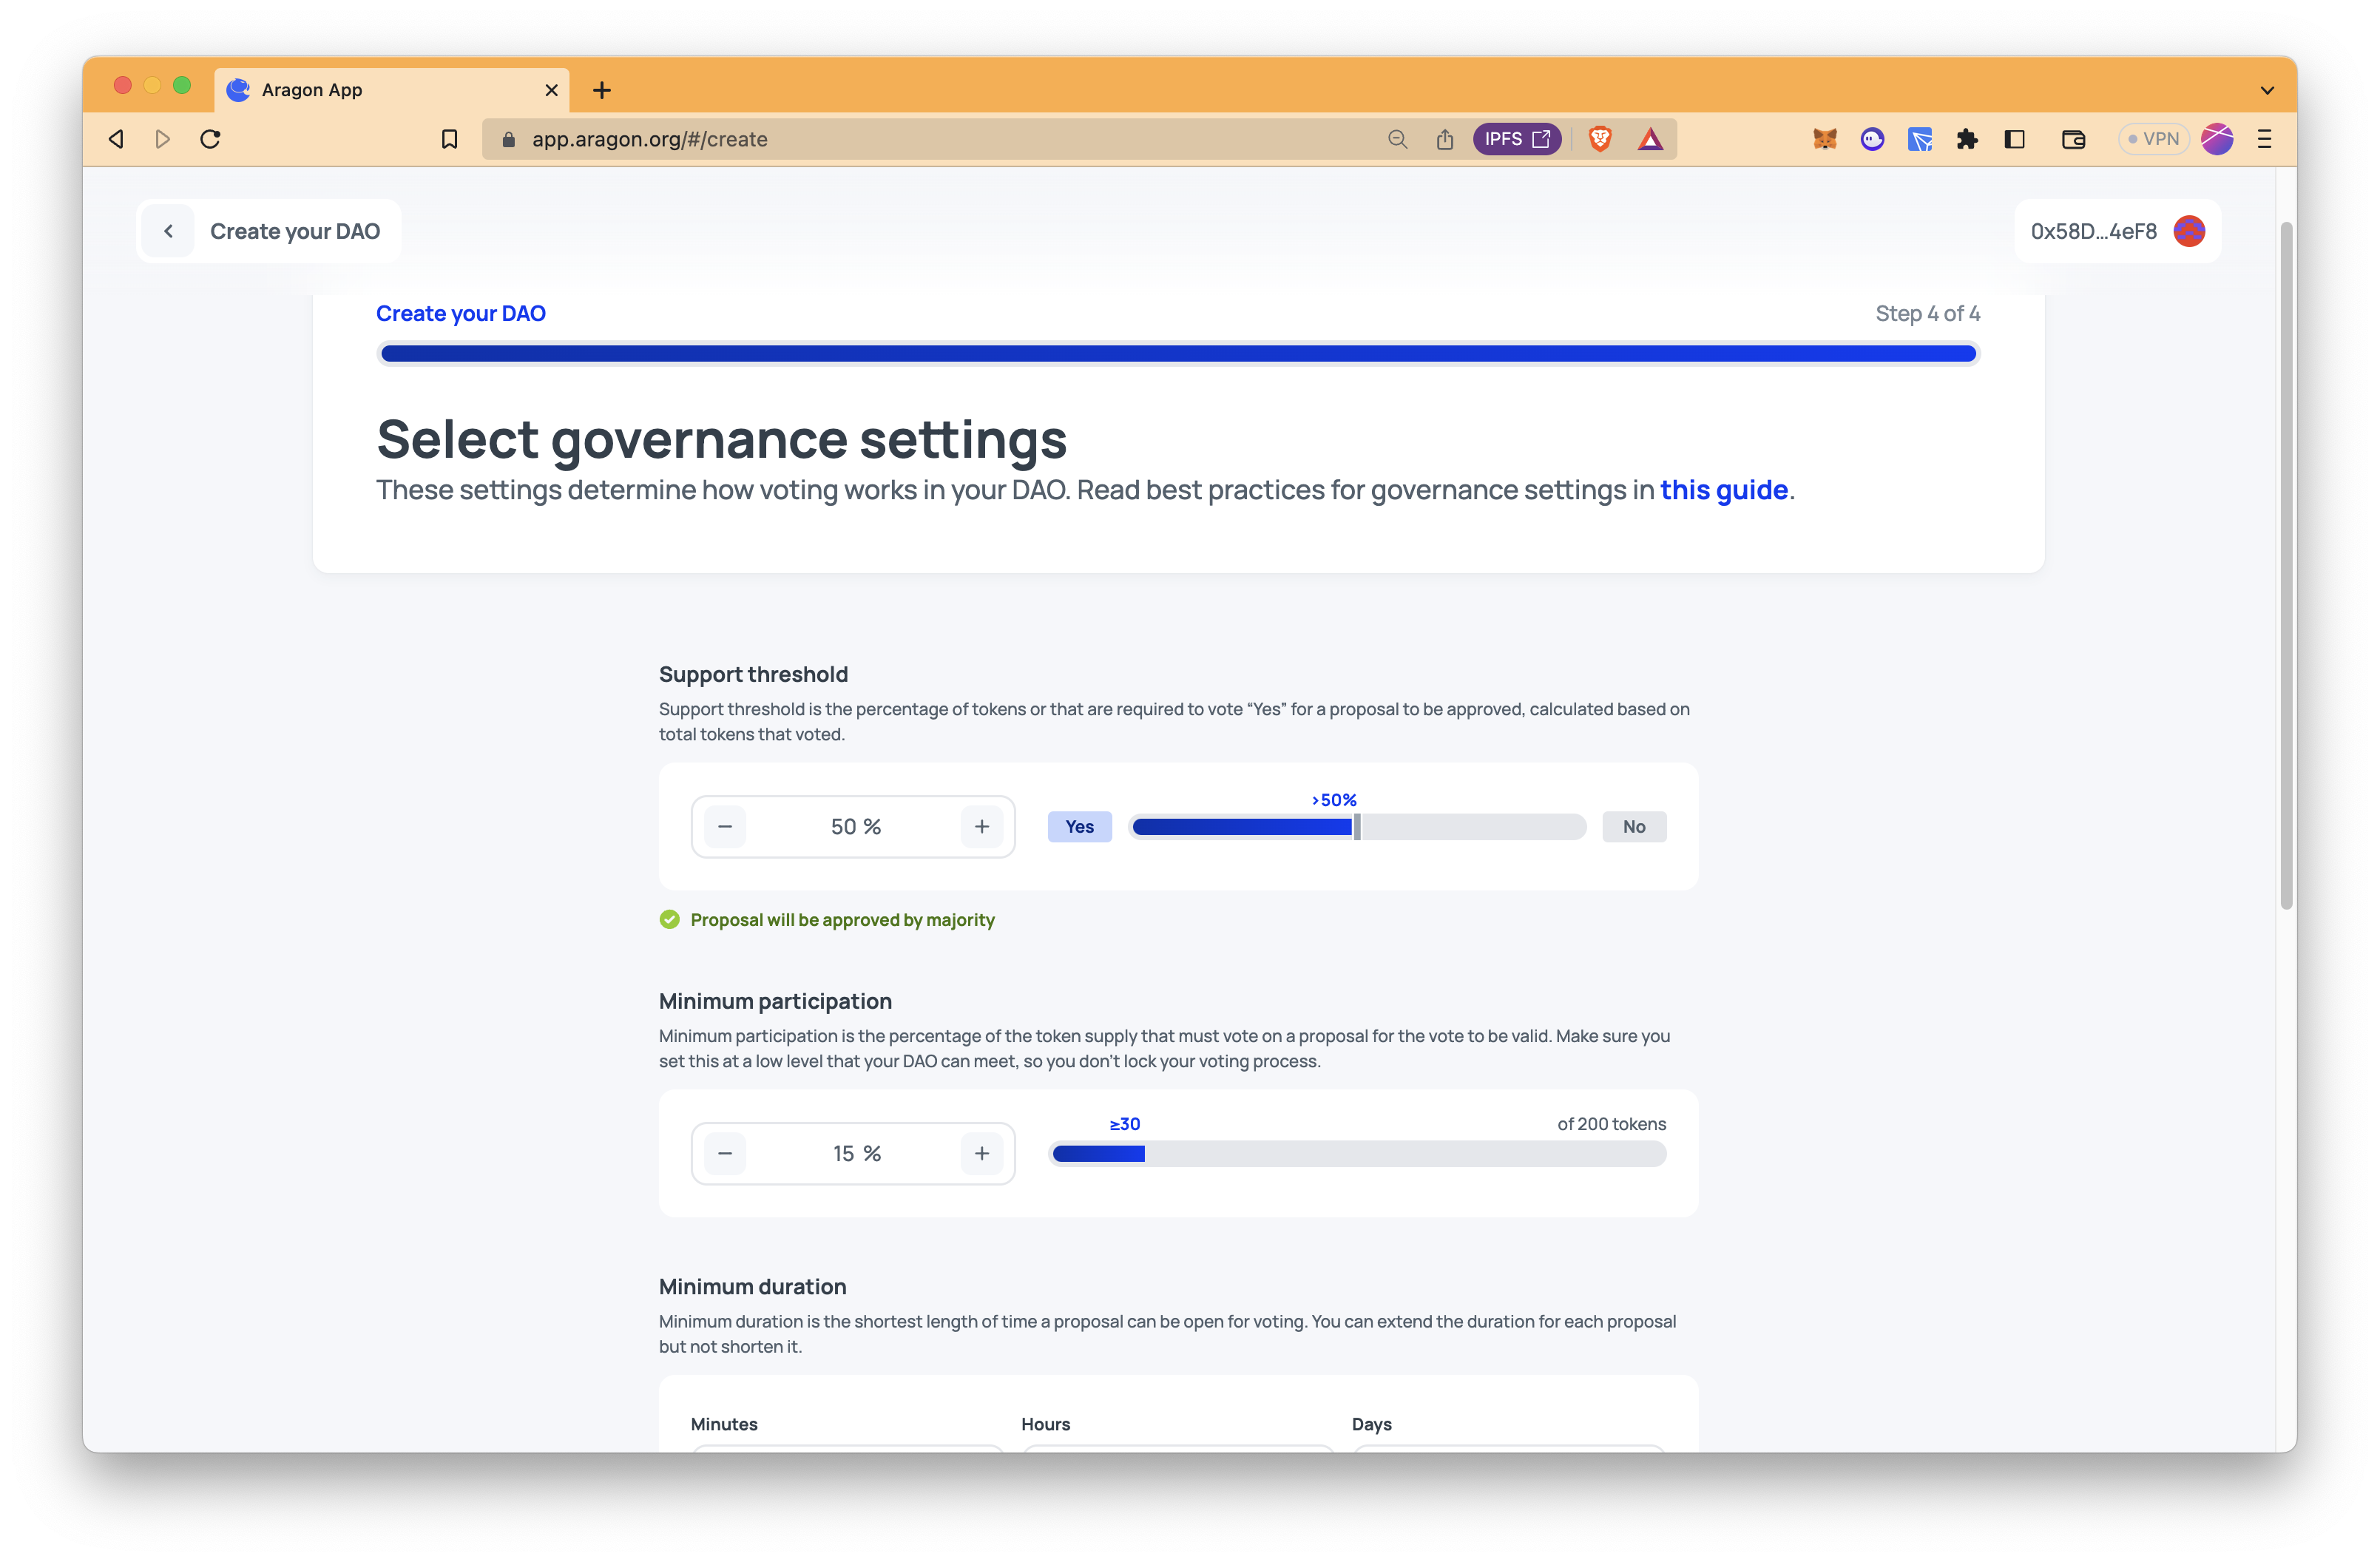
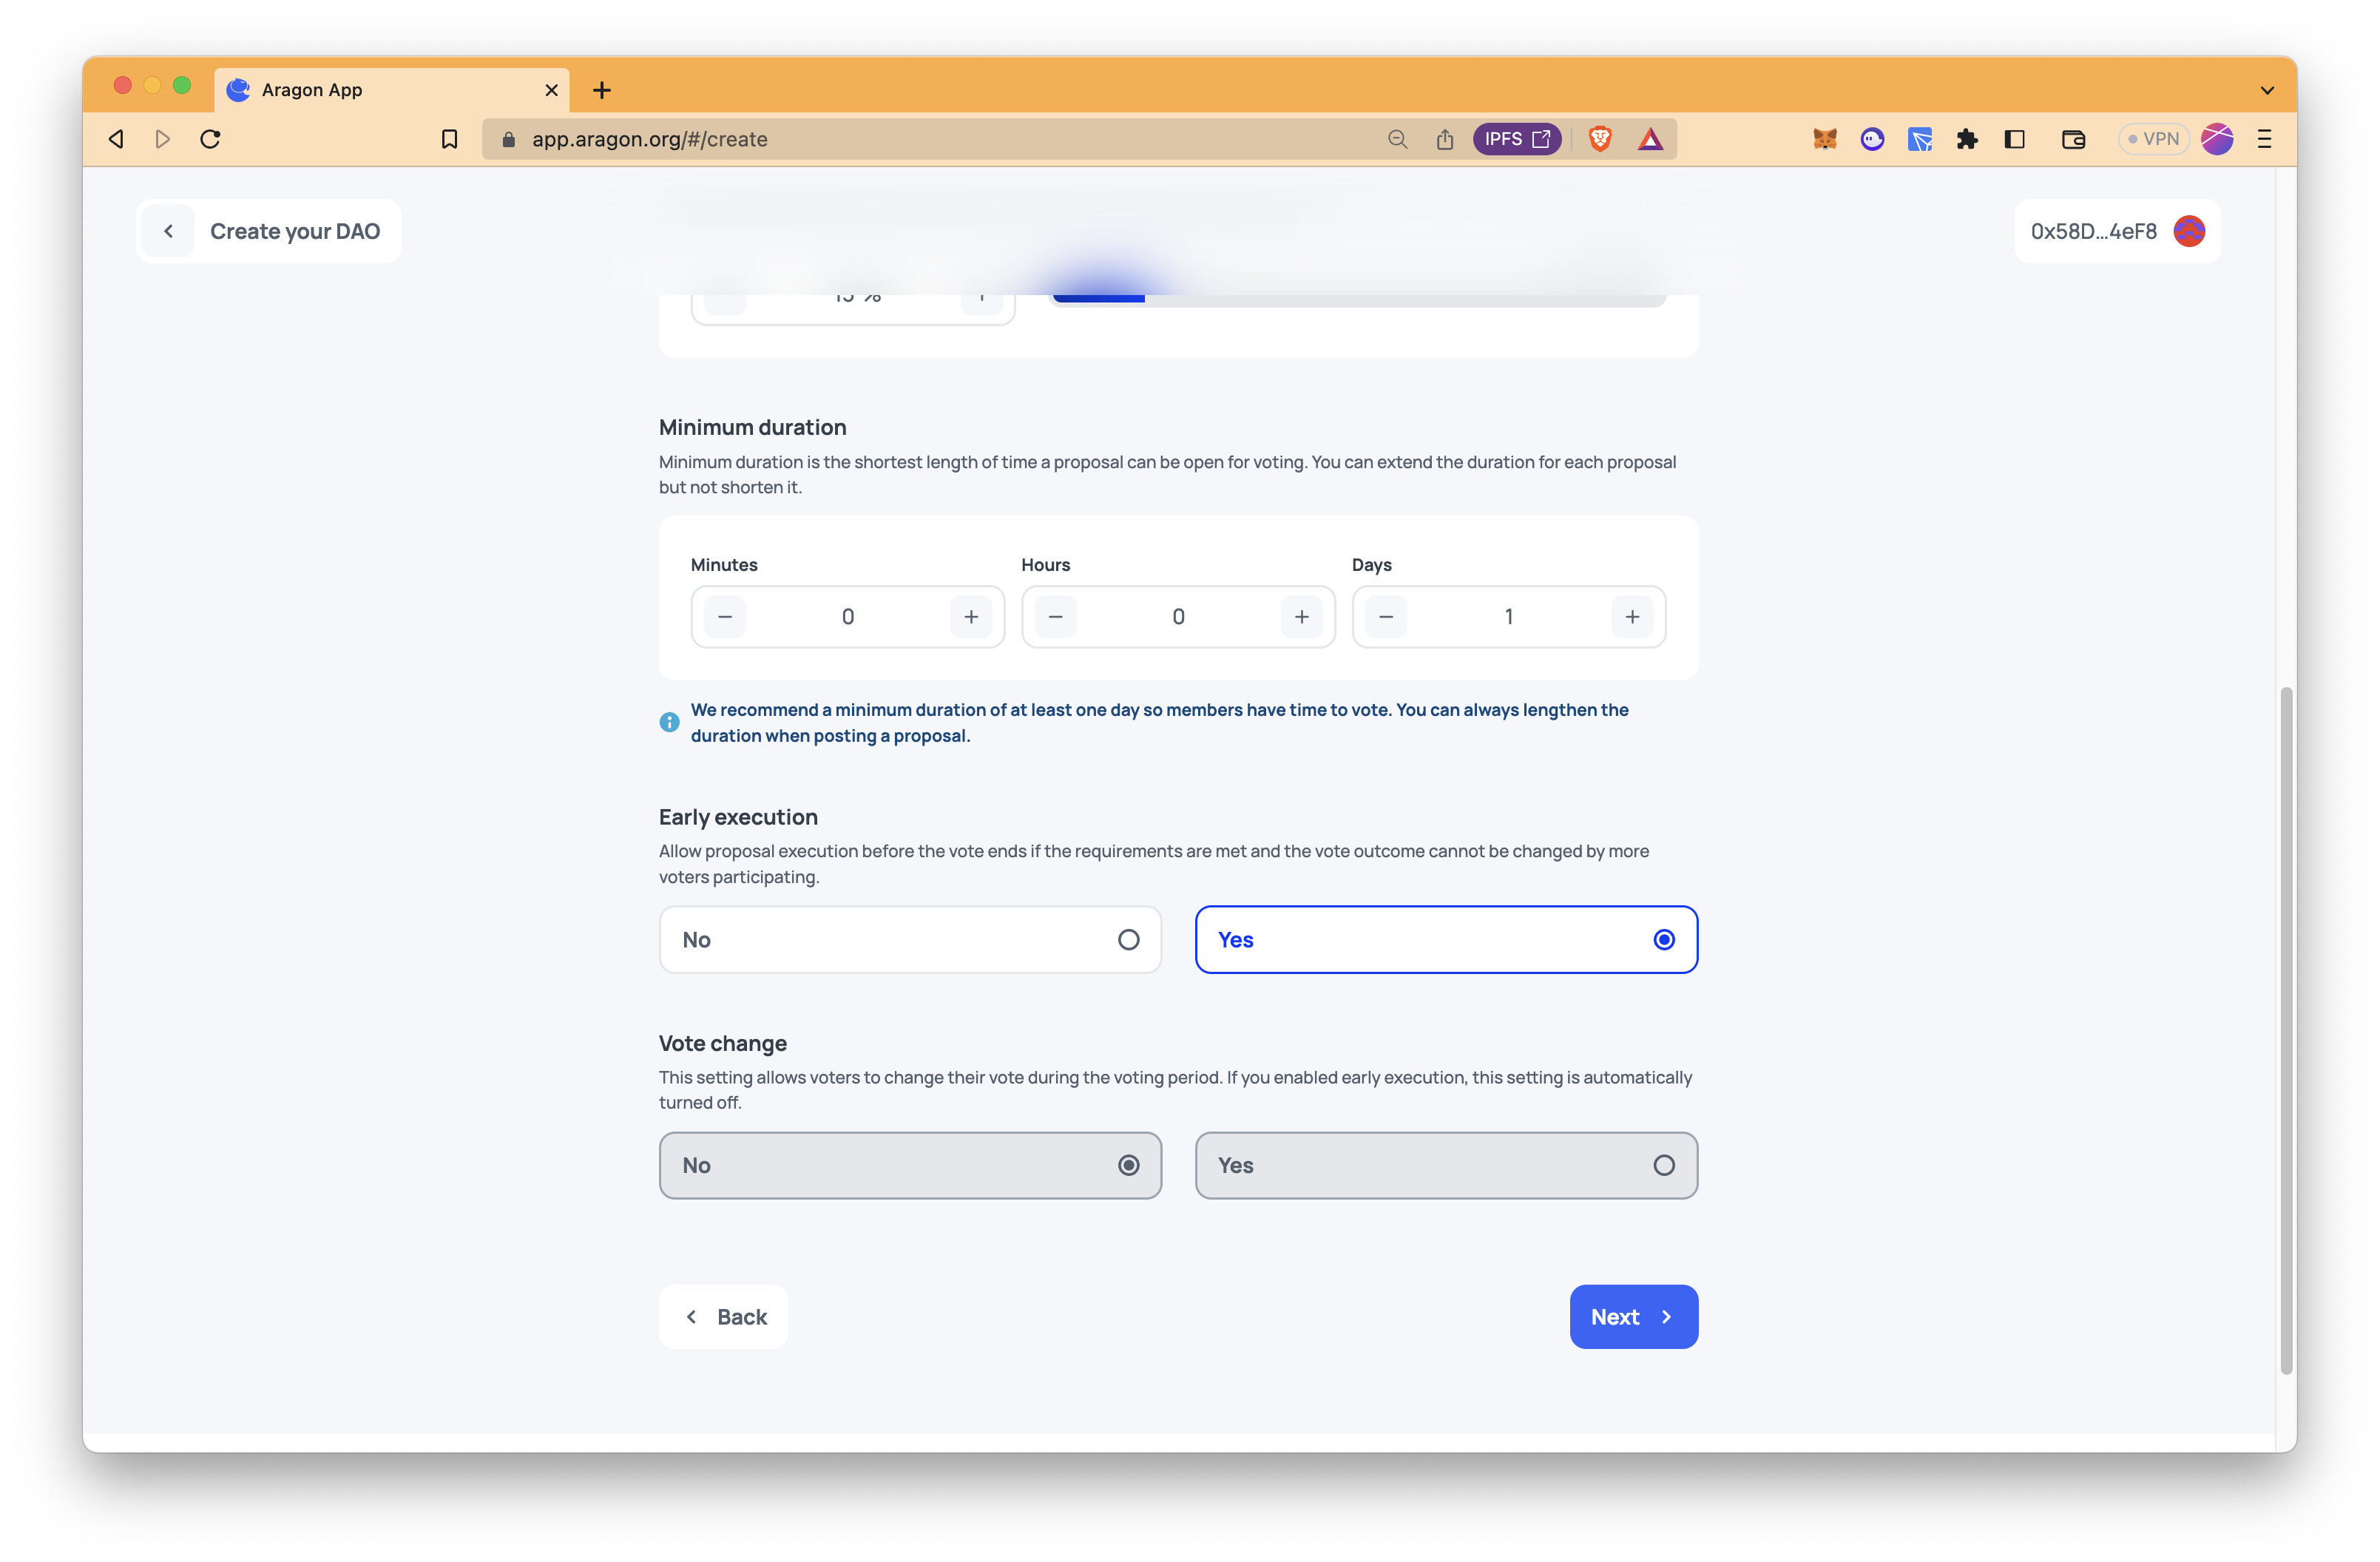
Minimum duration: The duration for which the participating members can vote.
Early execution: This option allows early execution if unused votes do not change the result.
Vote change: This option allows voters to change their vote during voting. If early execution is enabled, this option is automatically turned off.
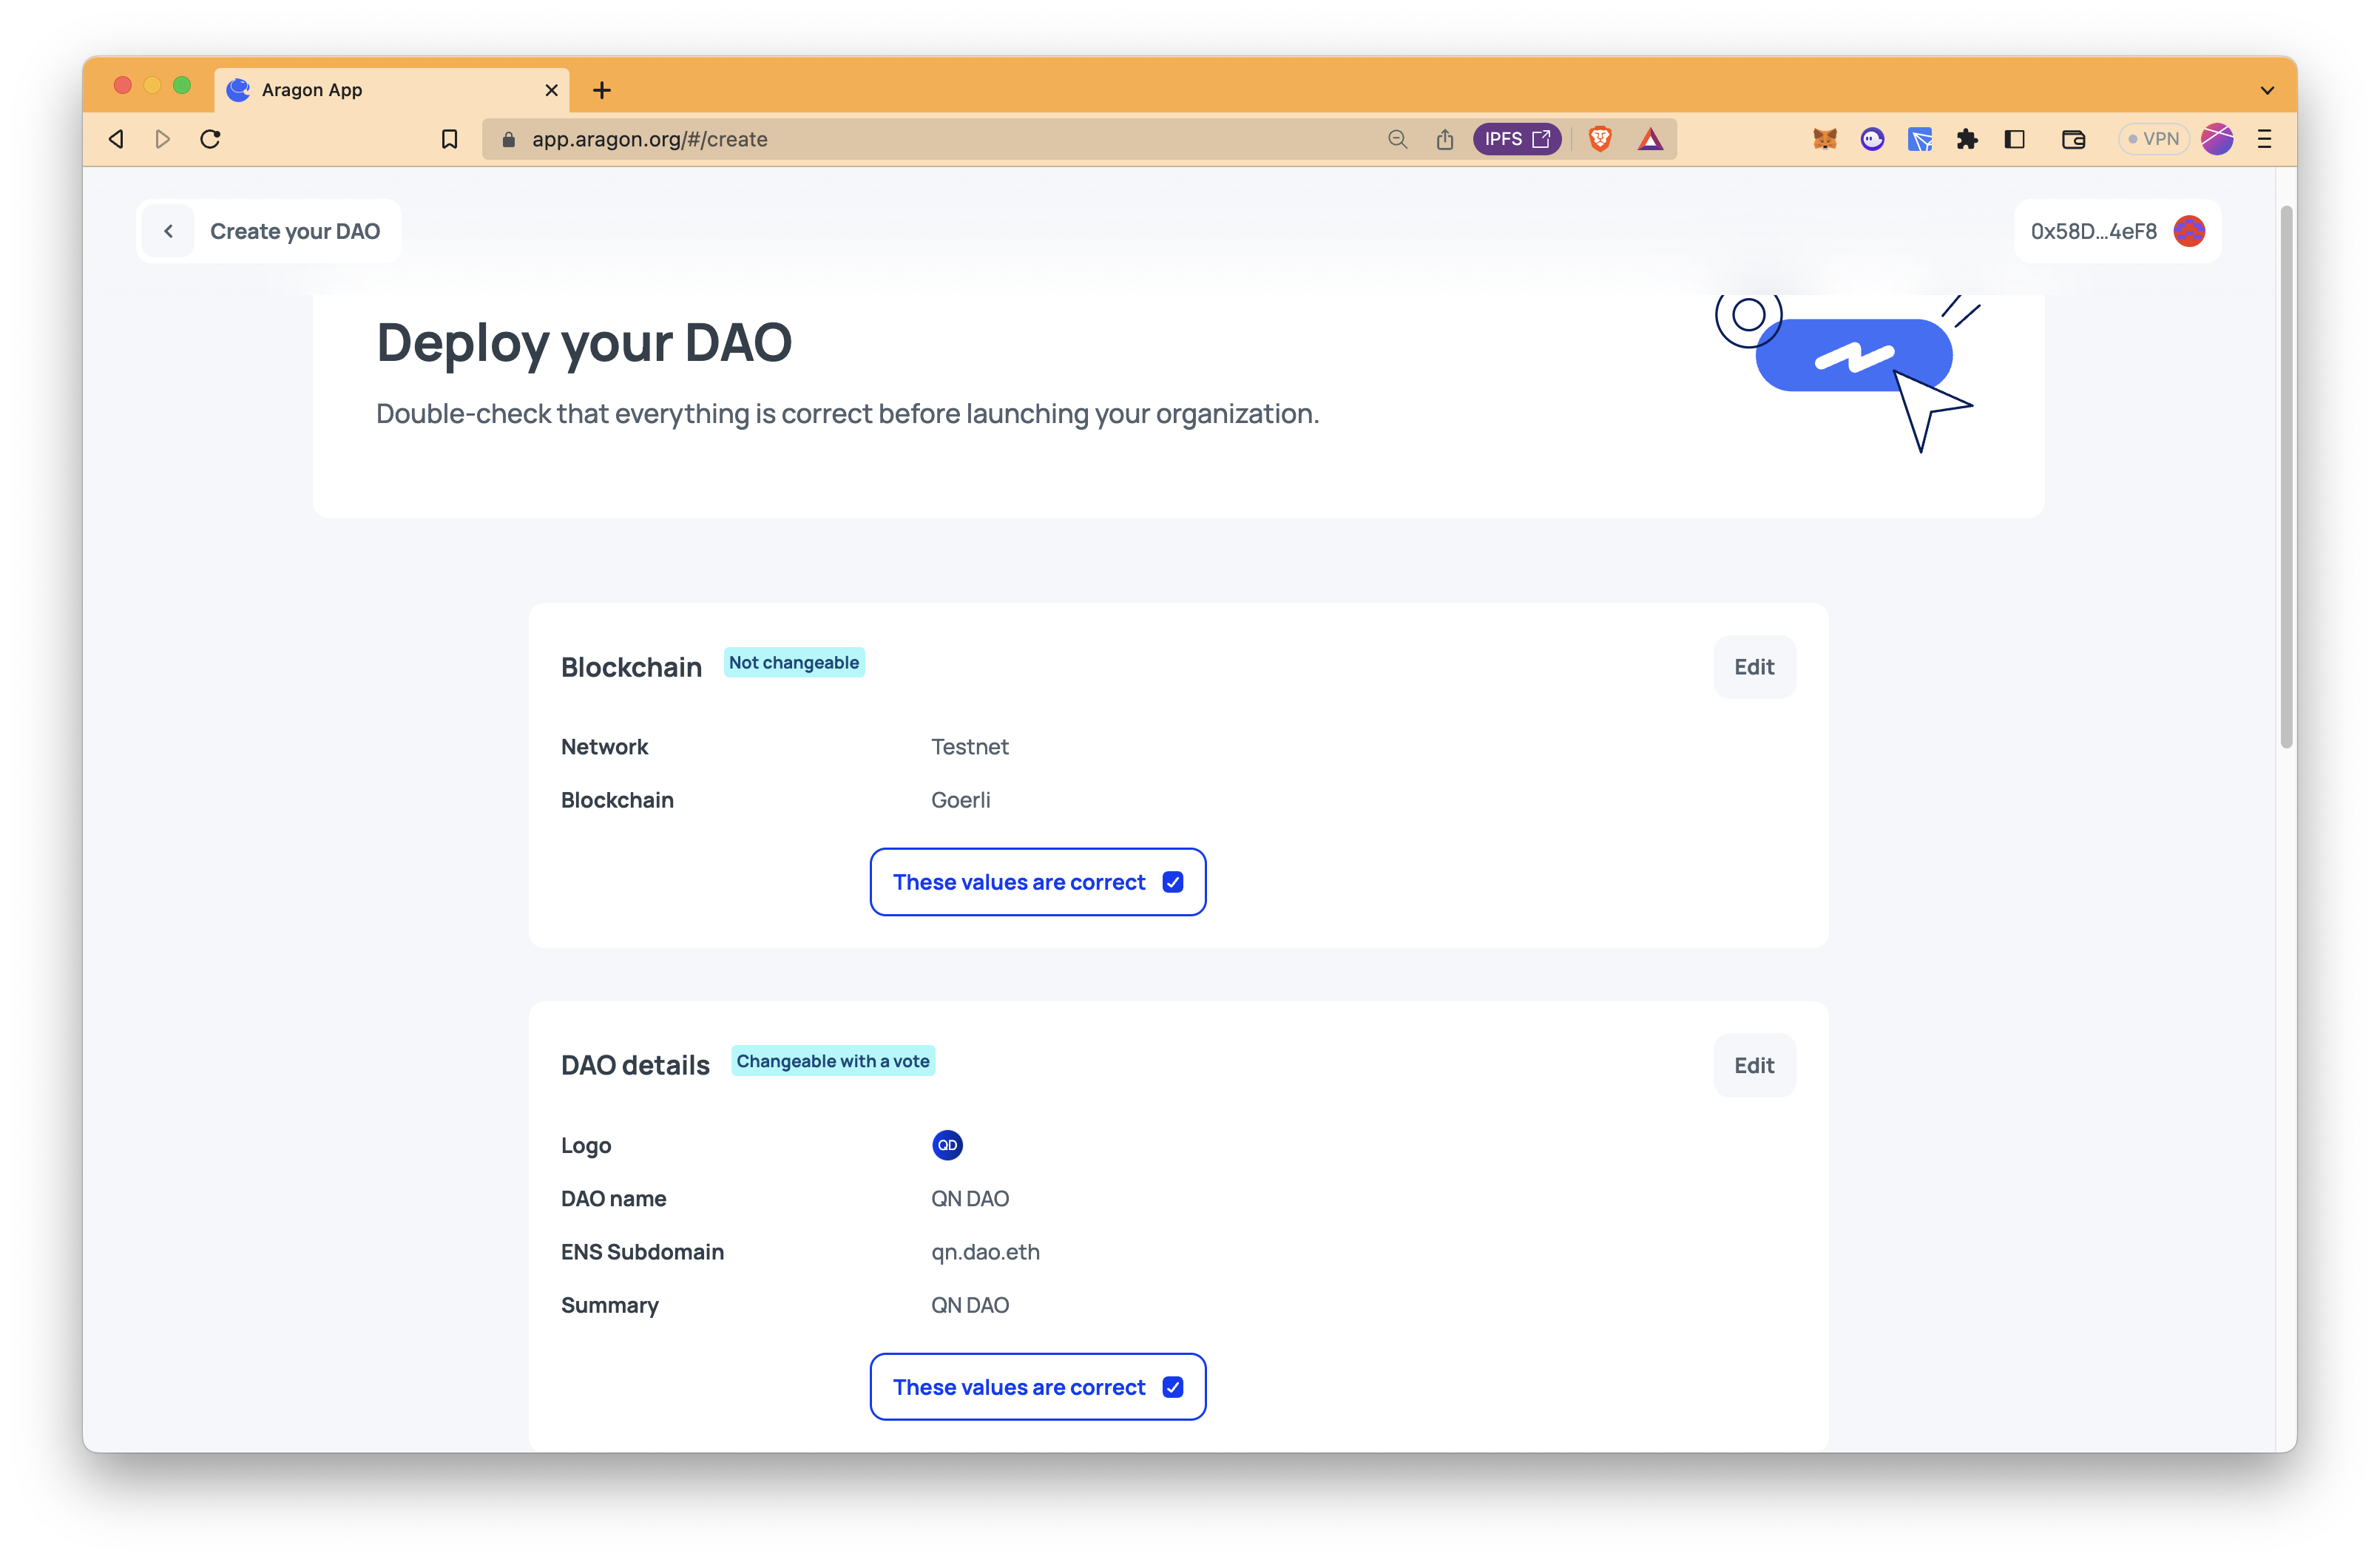
Step 8: Check if everything is correct before launching your DAO. If everything seems fine, select the "These values are correct" box for each and click on "Deploy your DAO".
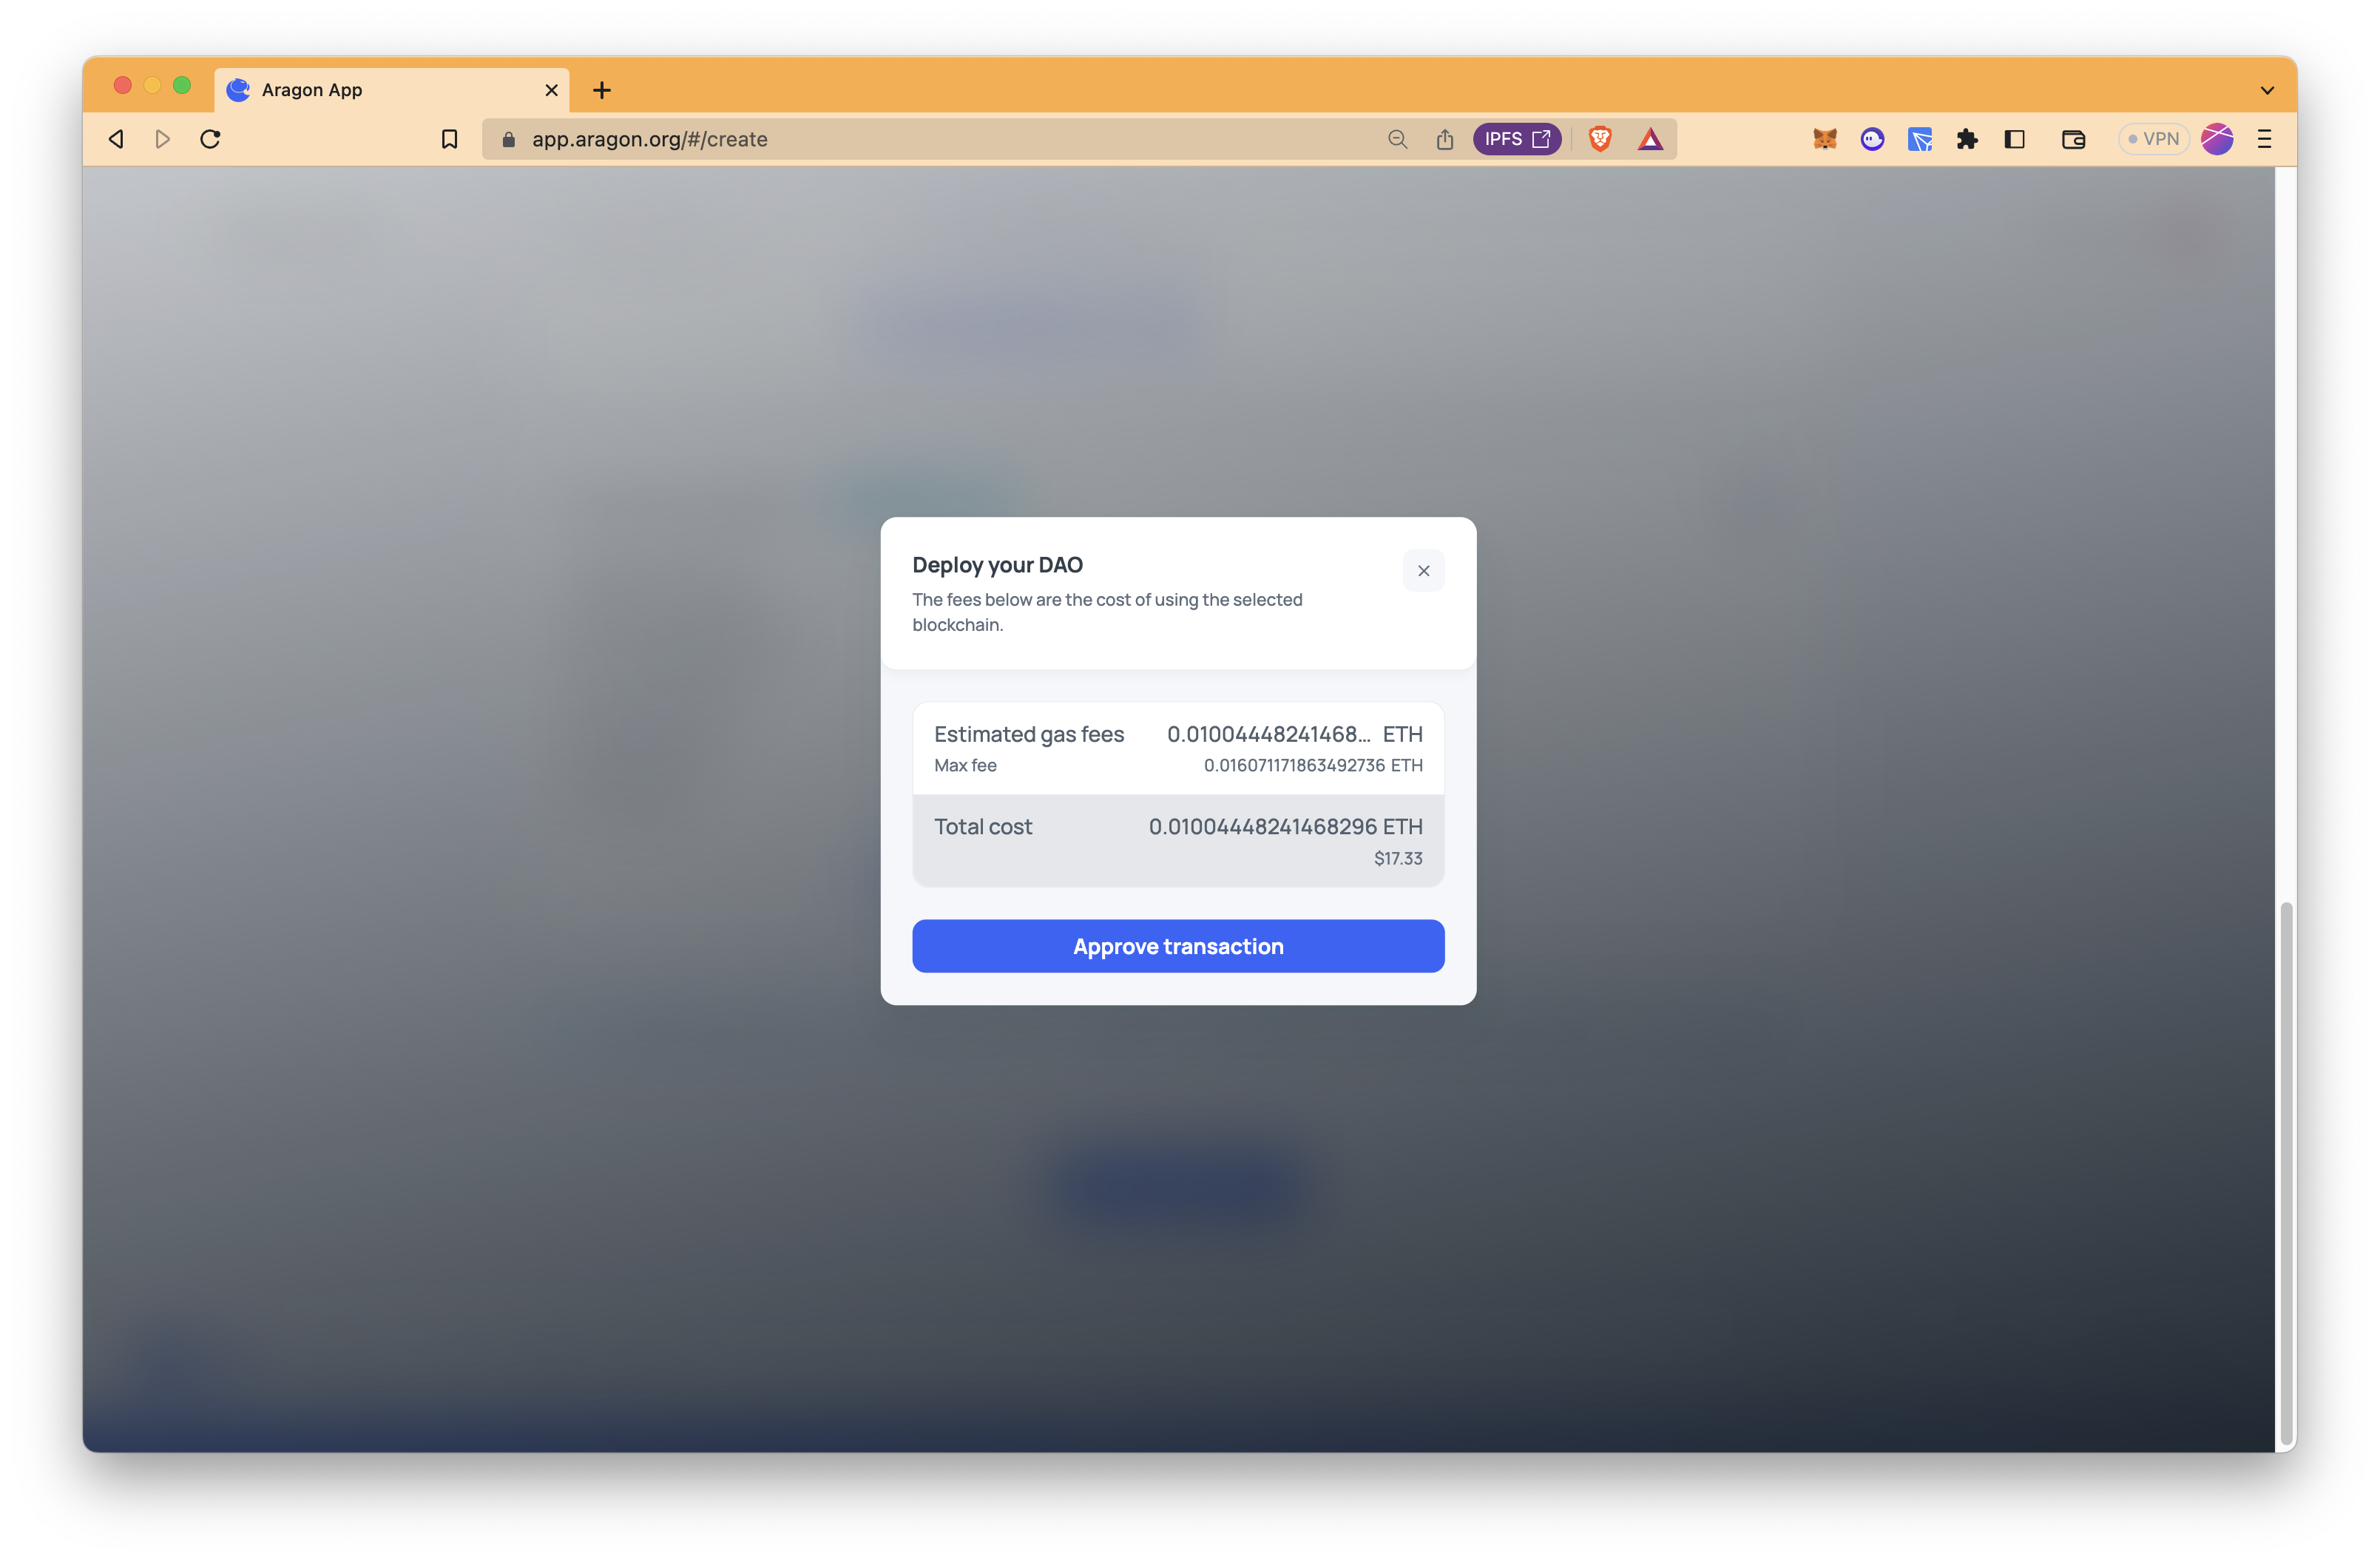
Step 9: Make sure that your wallet balance has sufficient funds to cover the total cost and click on "Approve transaction". Then, confirm the transaction that popped up in your wallet.
Once the transaction is executed, you should be presented with a window similar to the below one.
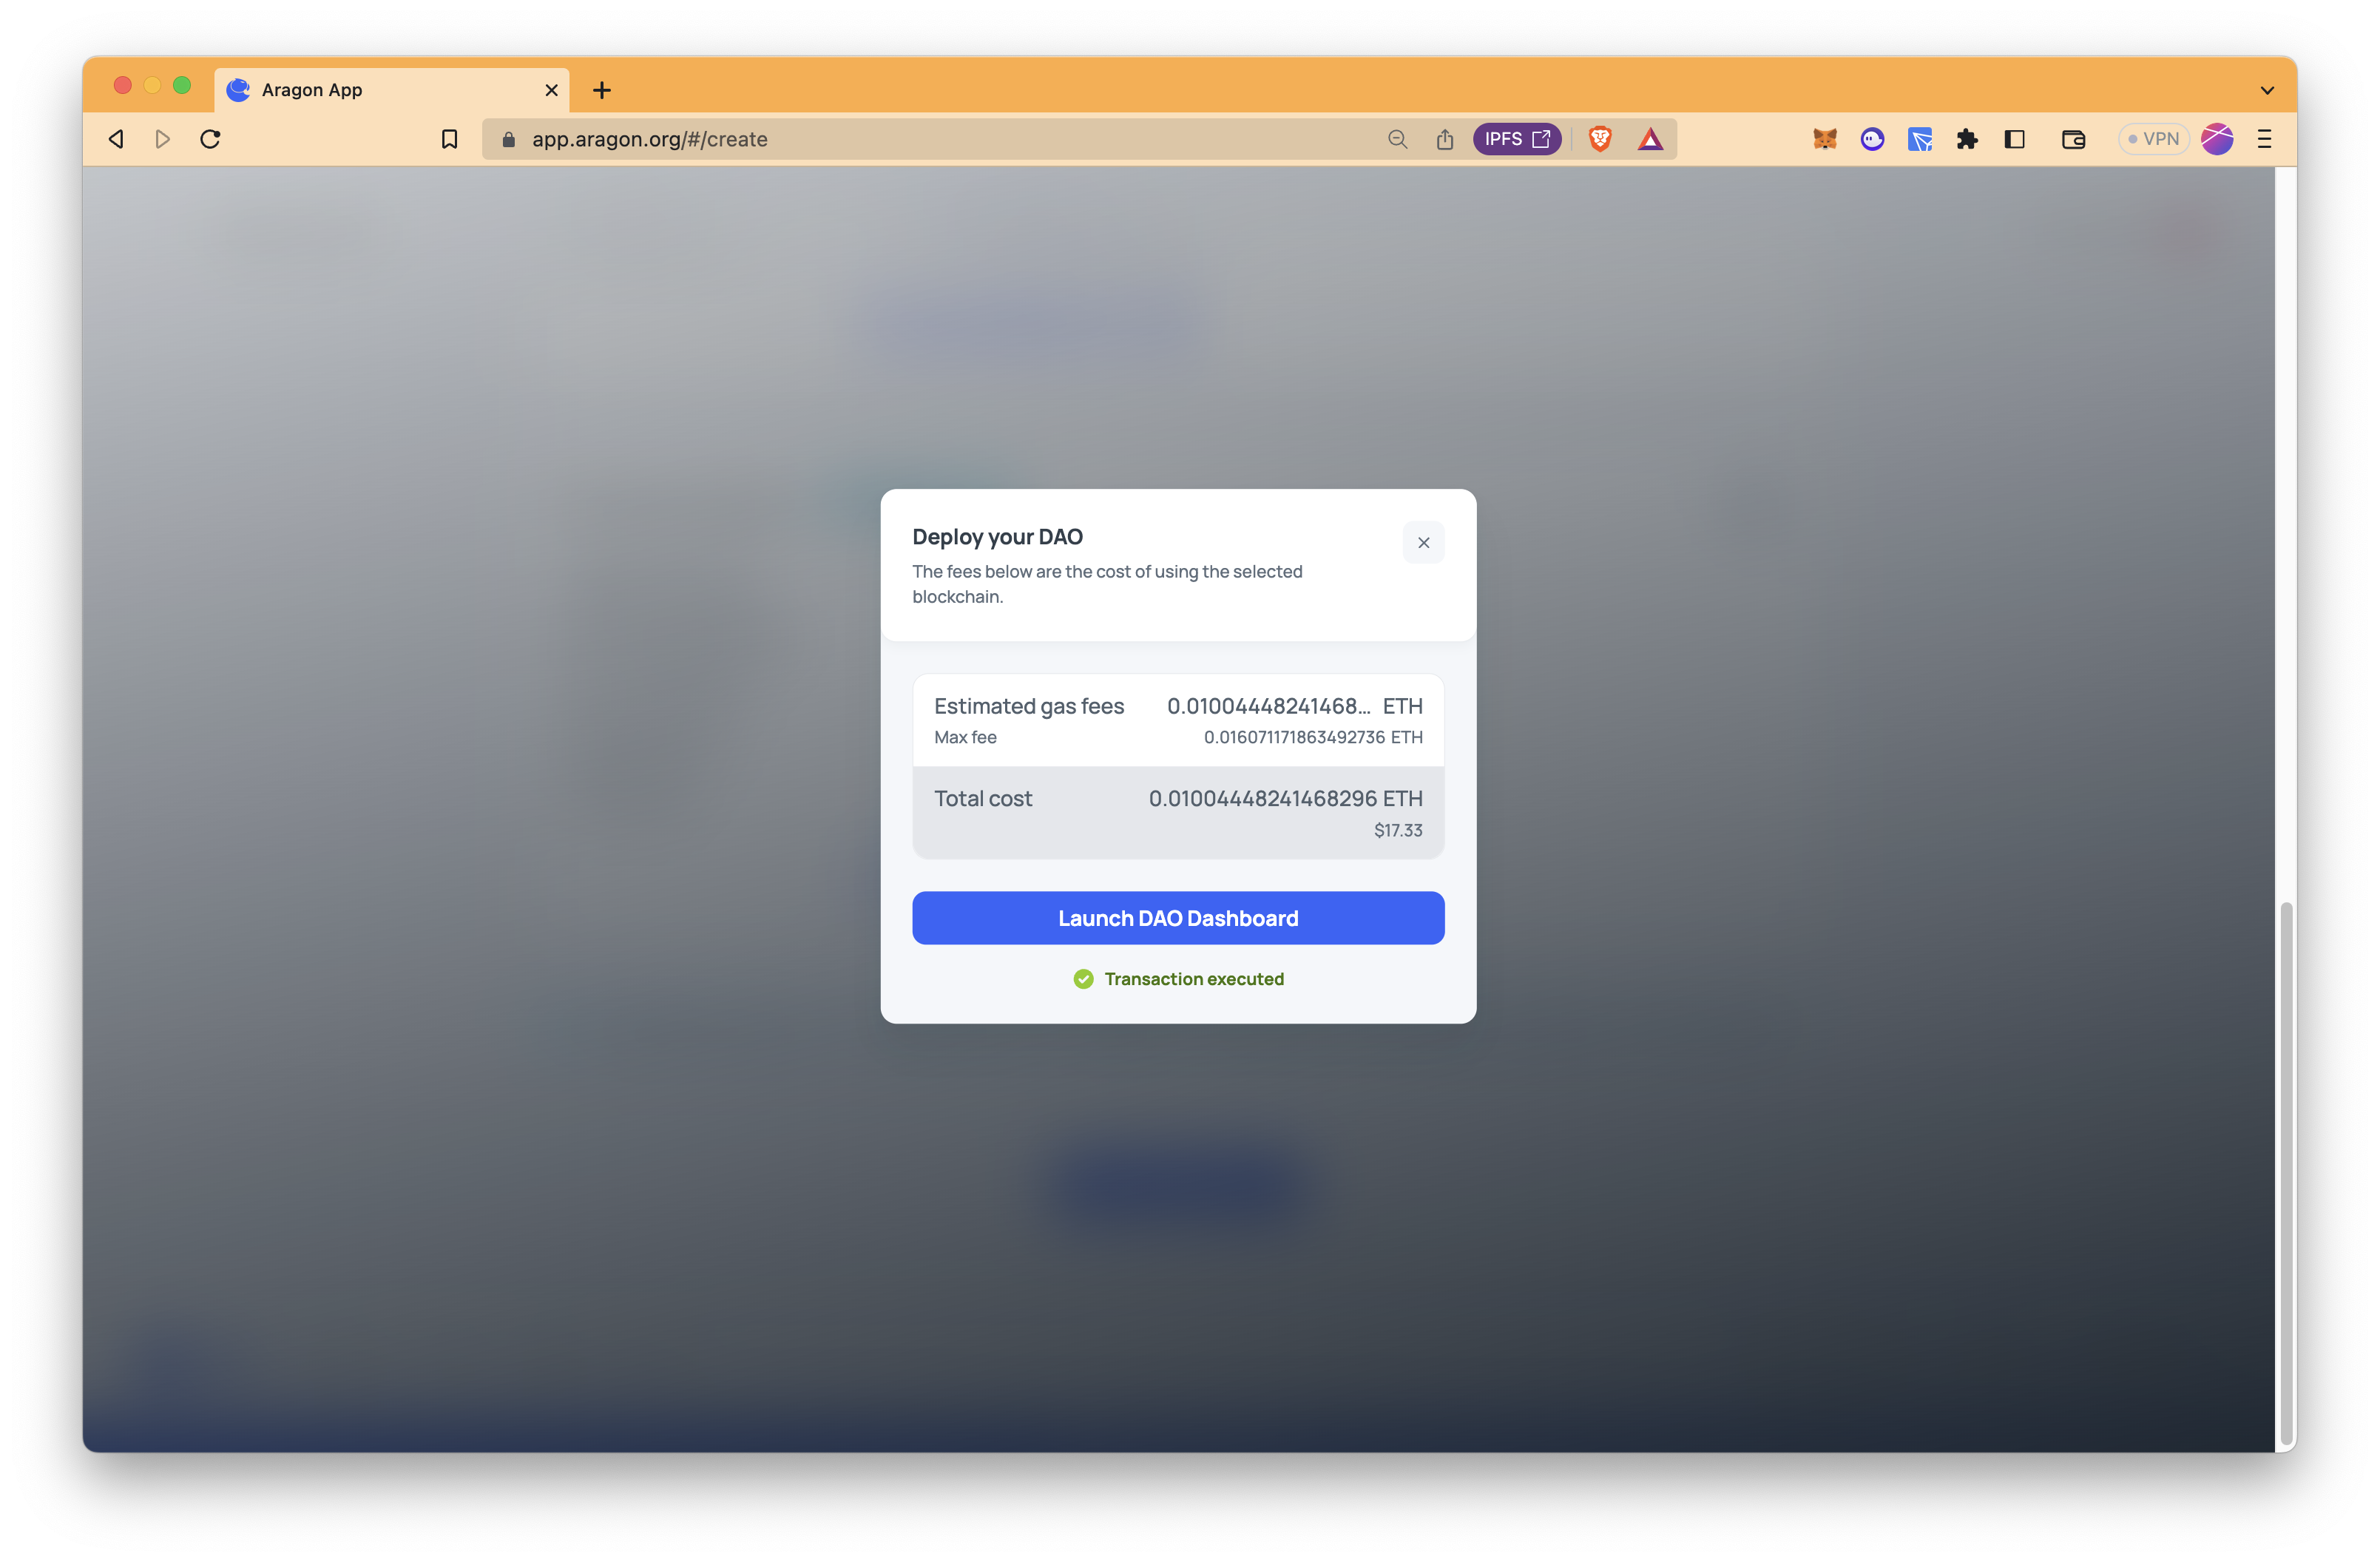
Click on "Launch DAO Dashboard" to see the dashboard of your DAO.
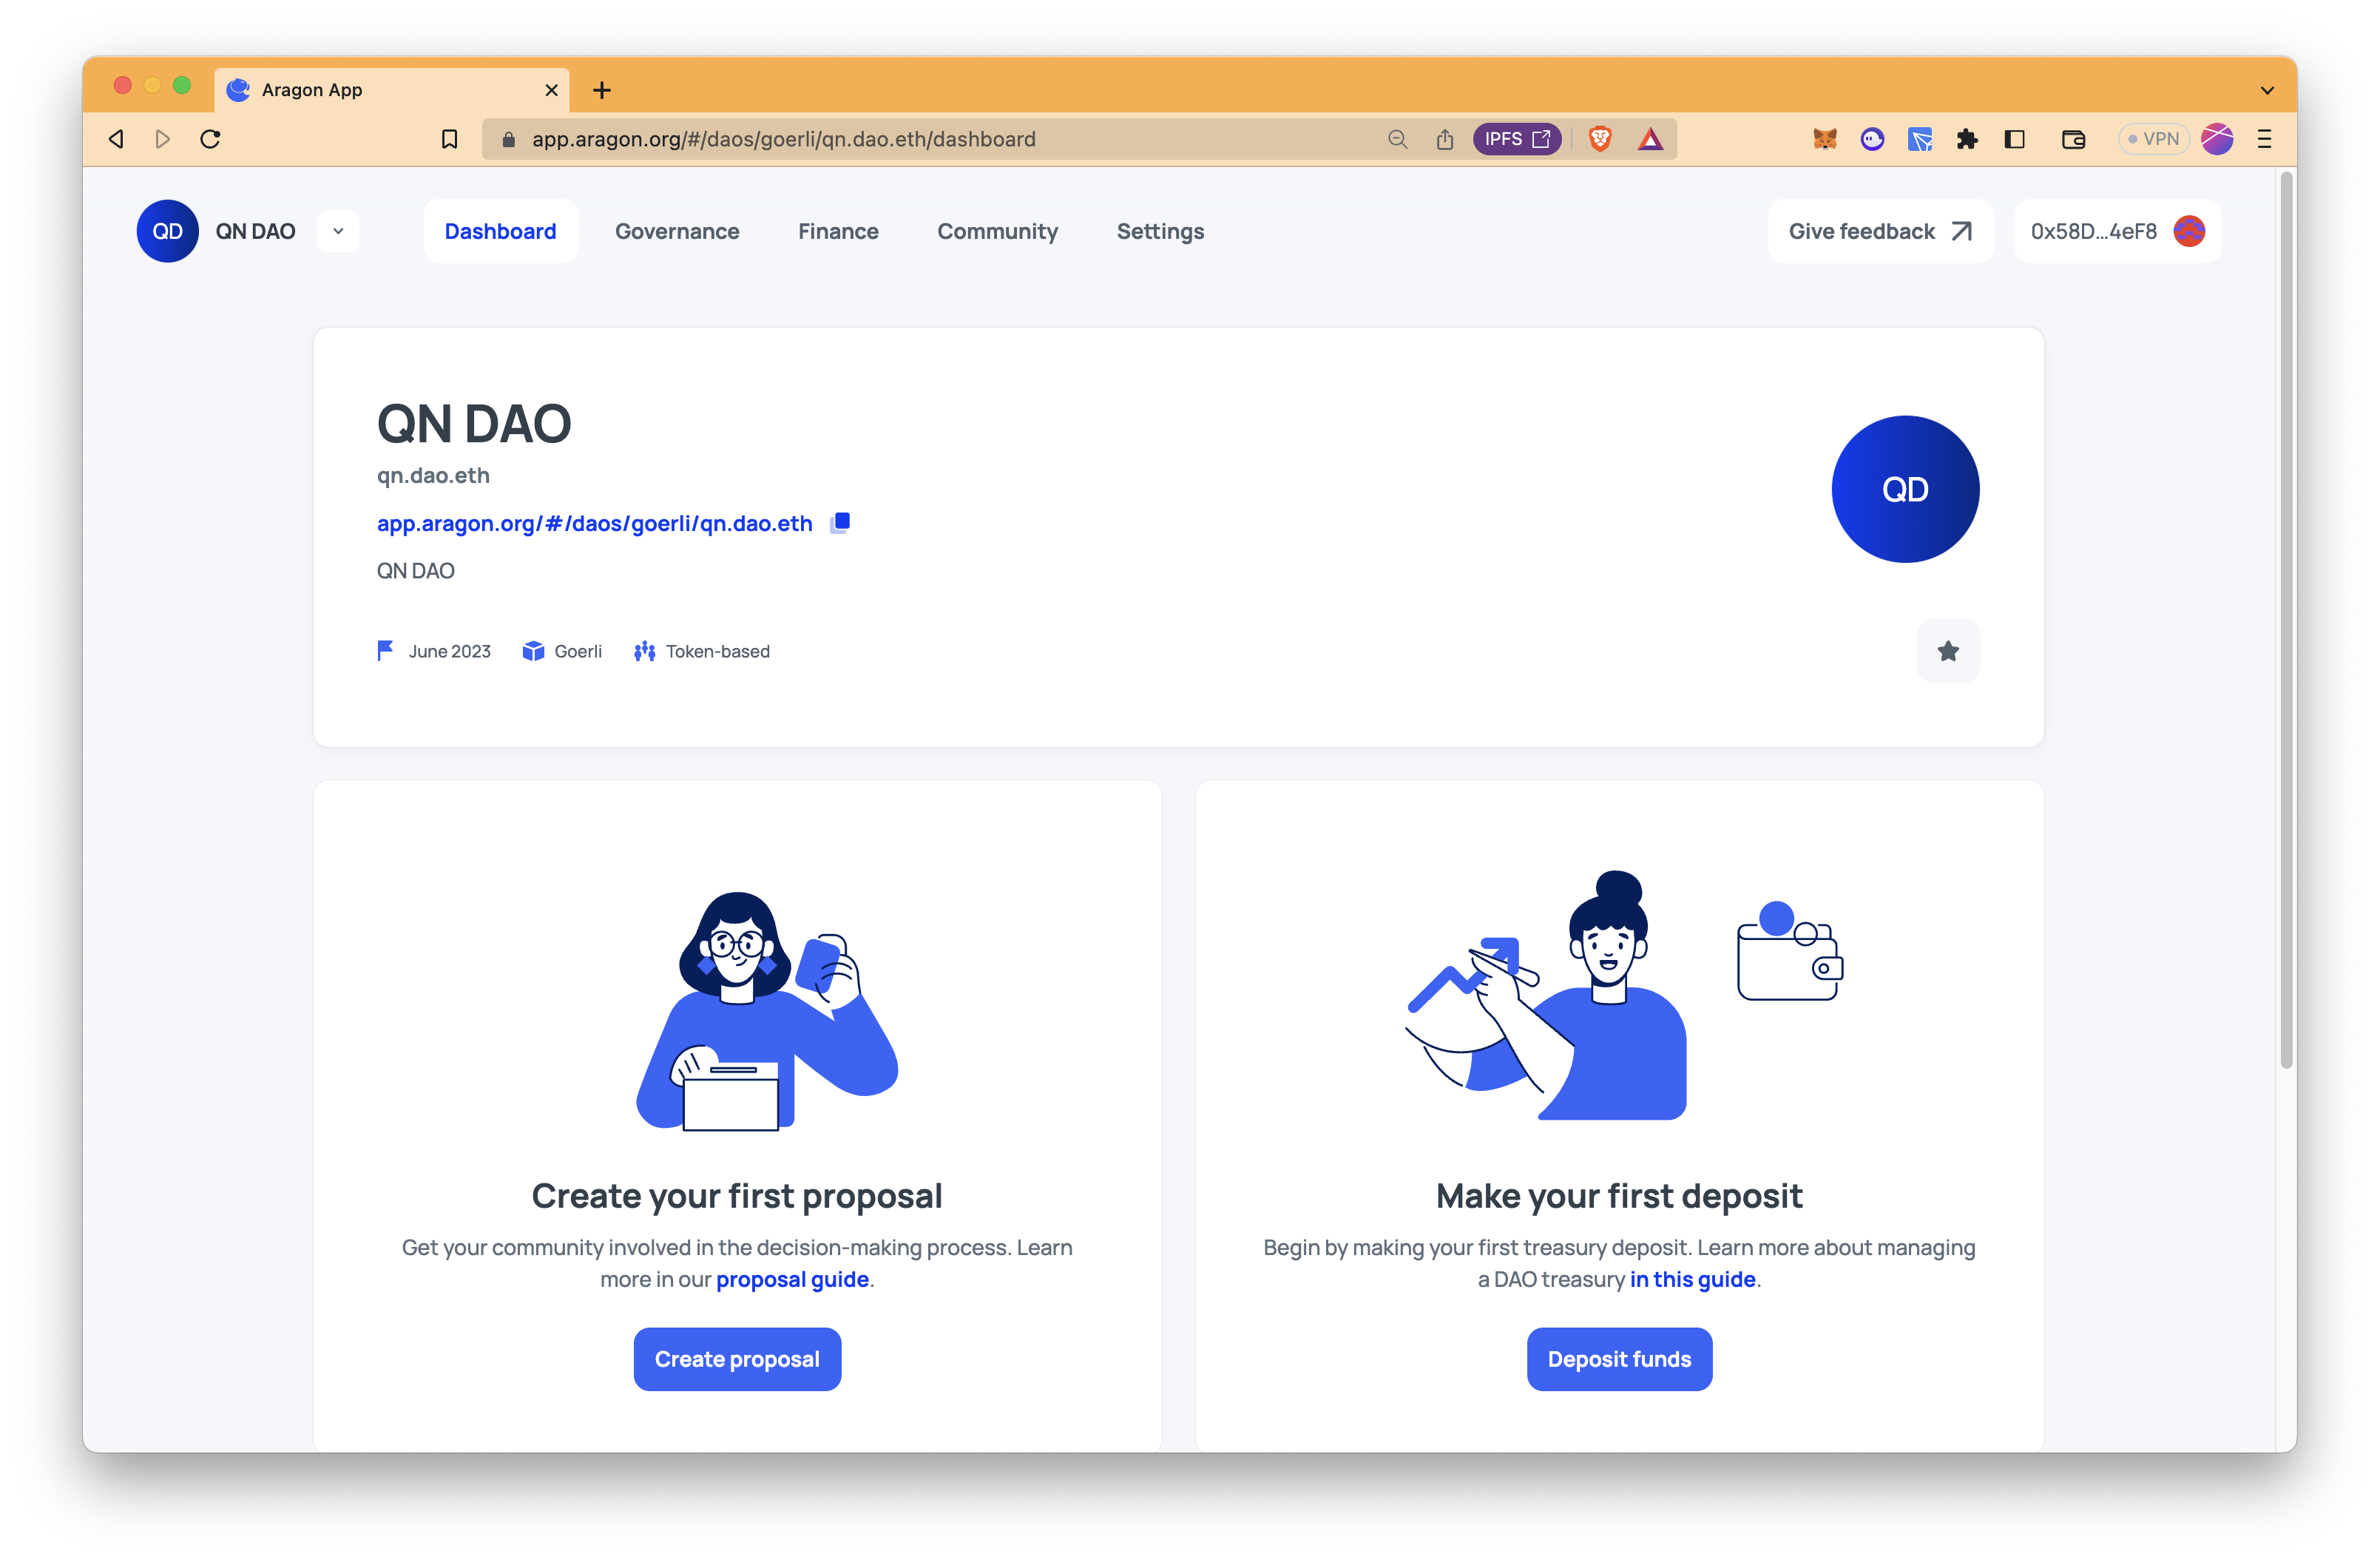
Creating Your First Proposal
Your DAO is just created! 🎉 Now, it is time to create a proposal.
Step 1: Click on "Create proposal".
Step 2: Then, create a new proposal question.

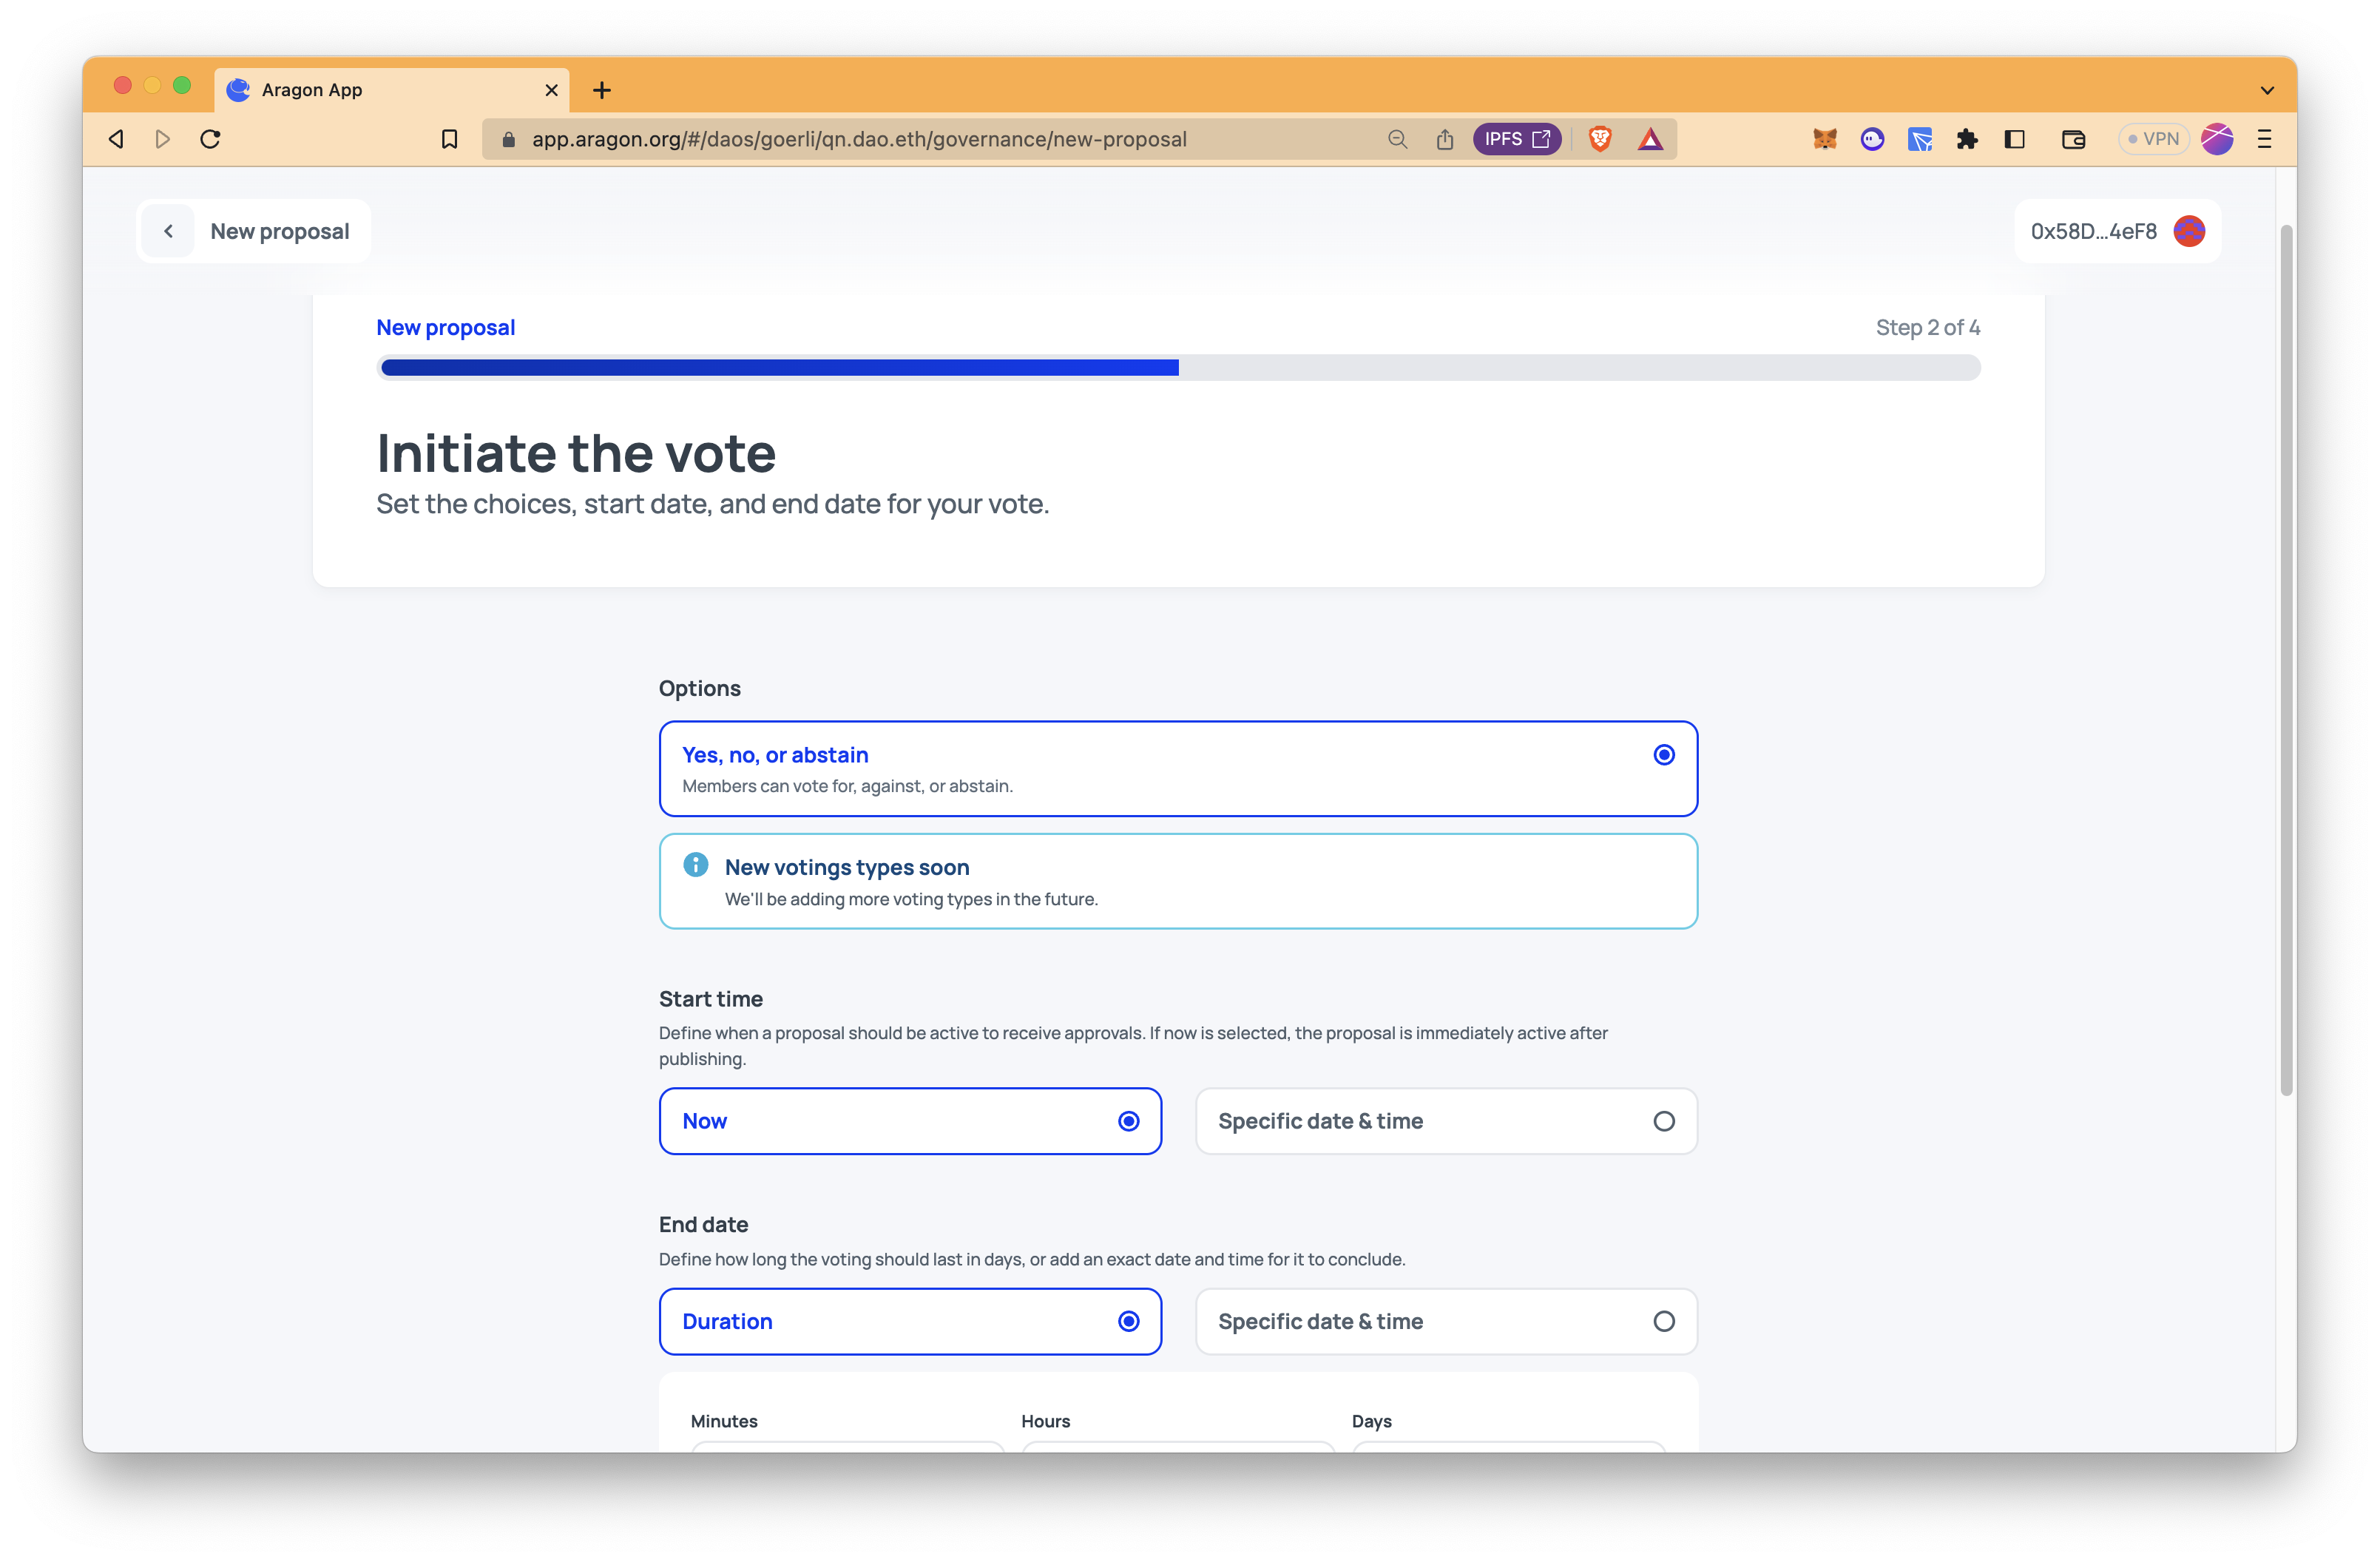
Step 3: Define options for the proposal.
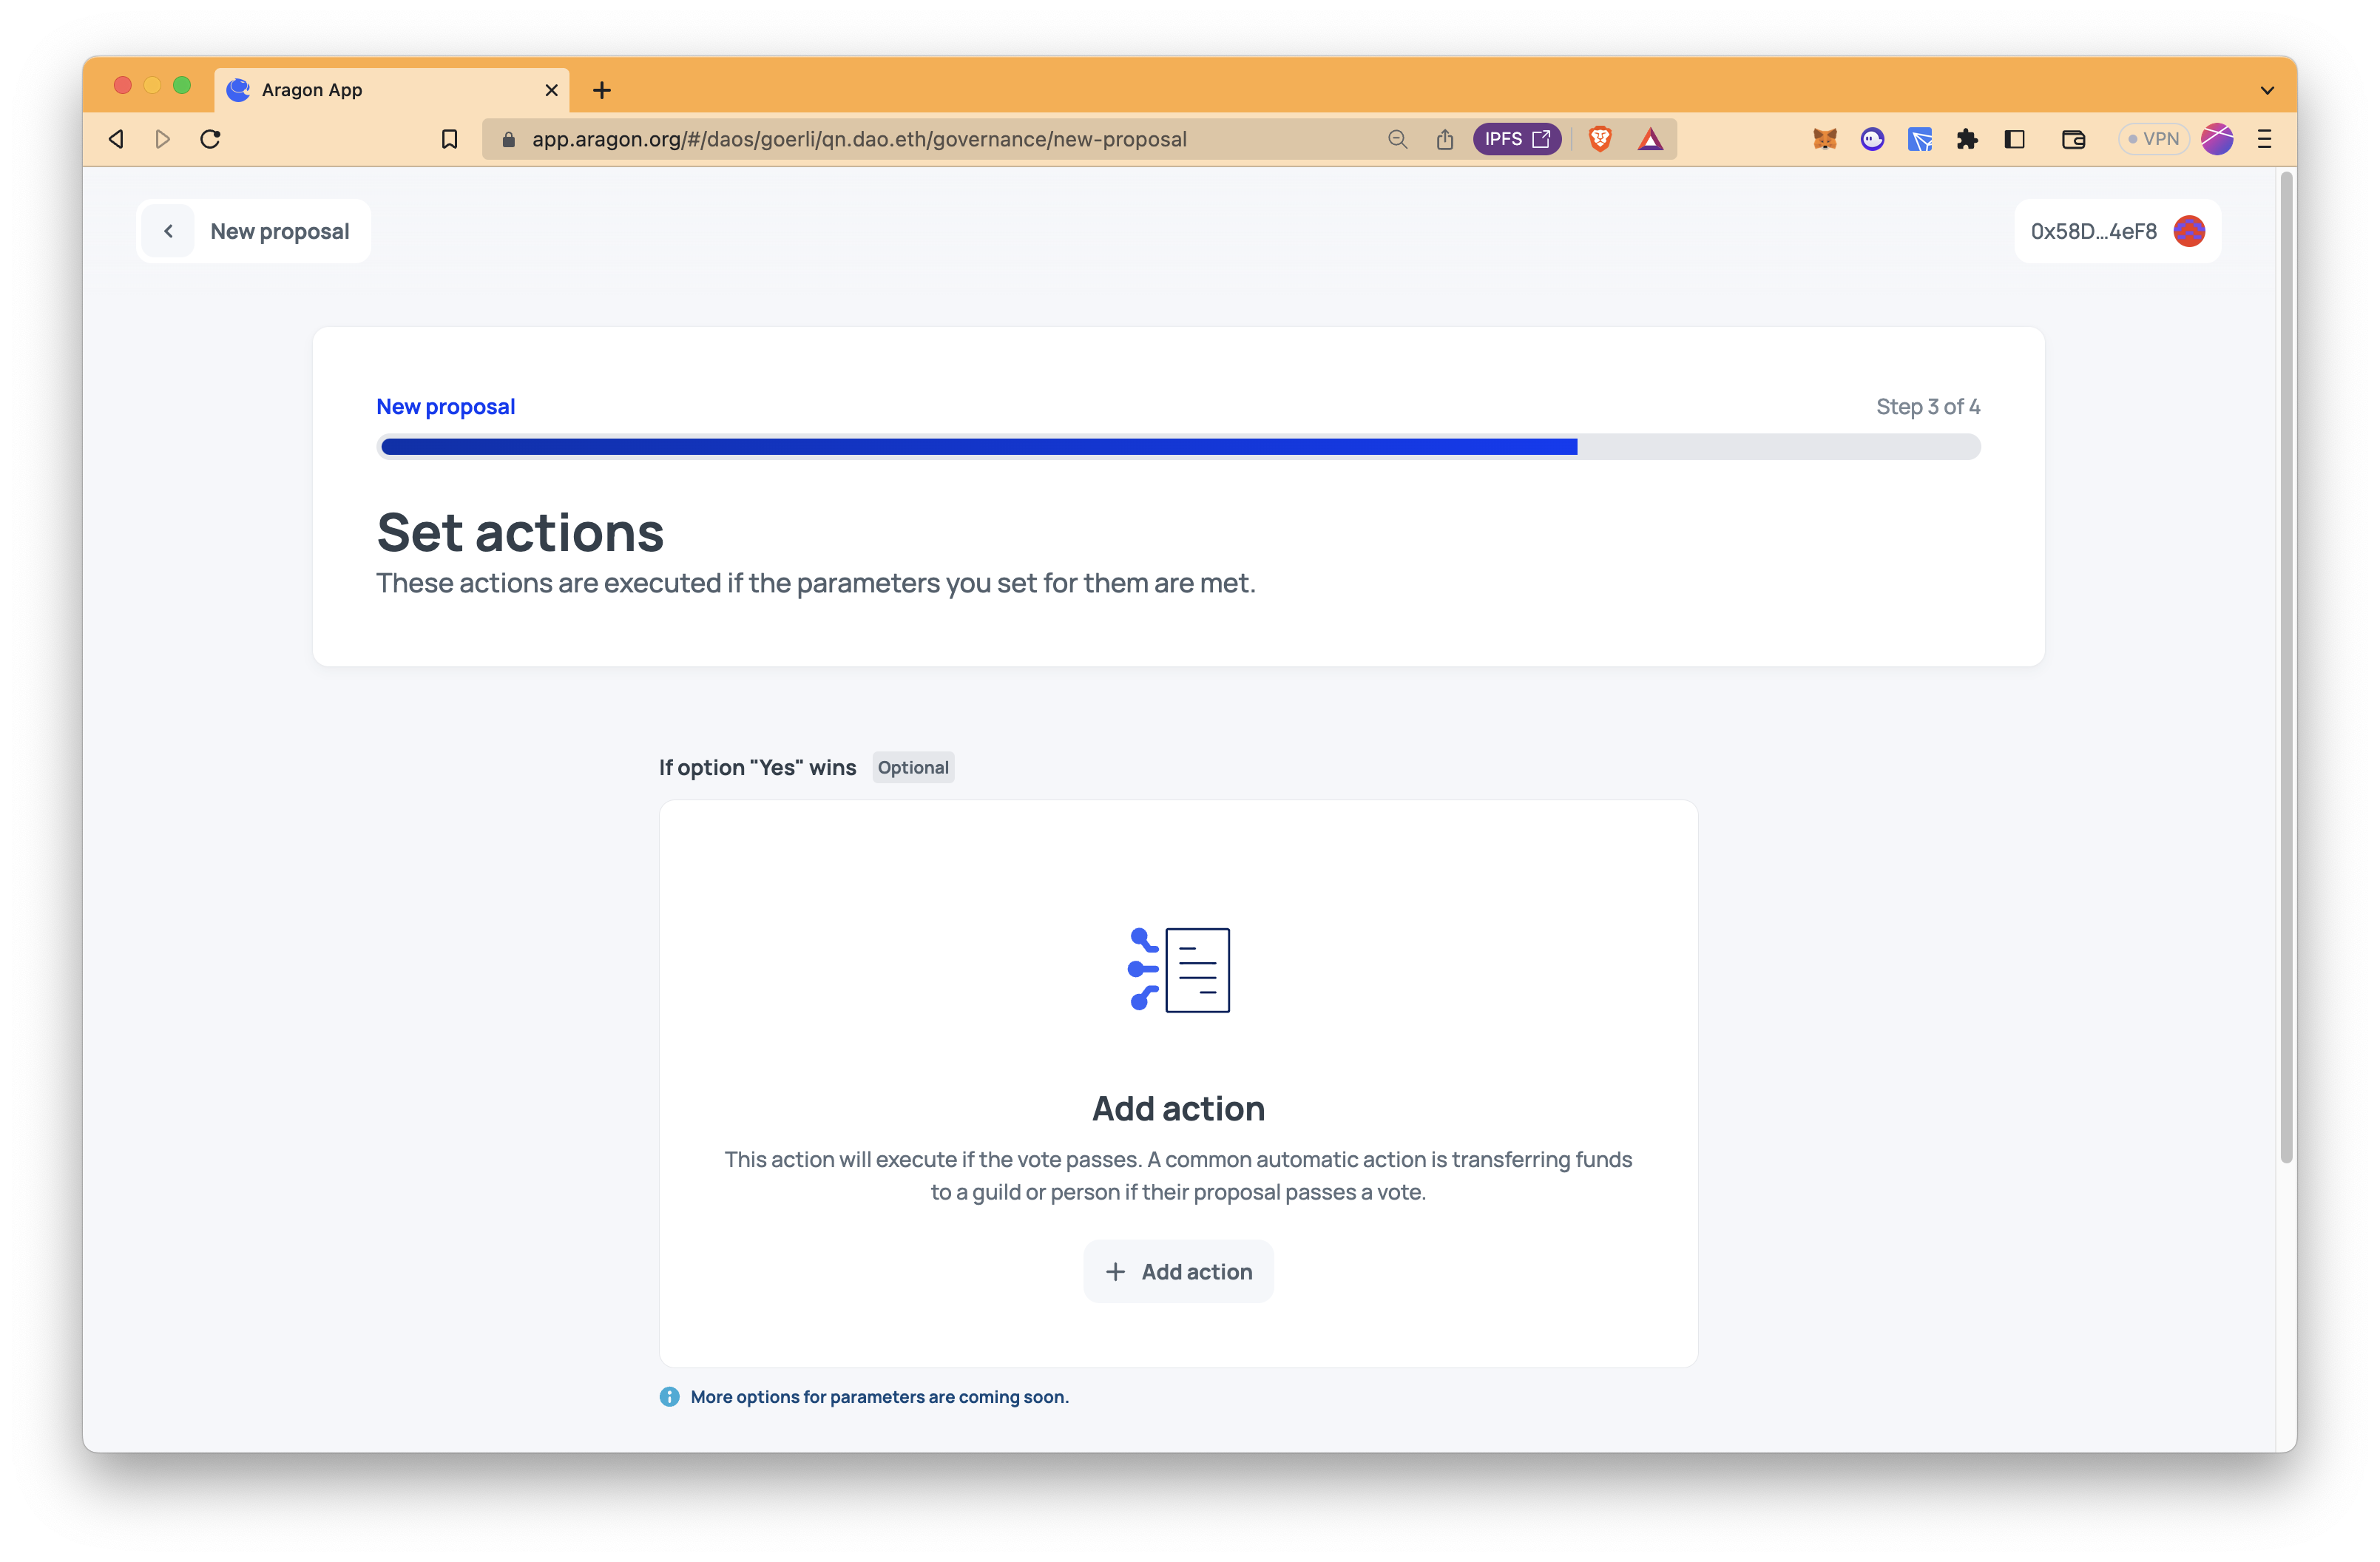
Step 4: Set an action to be executed automatically if the vote passes if you want.
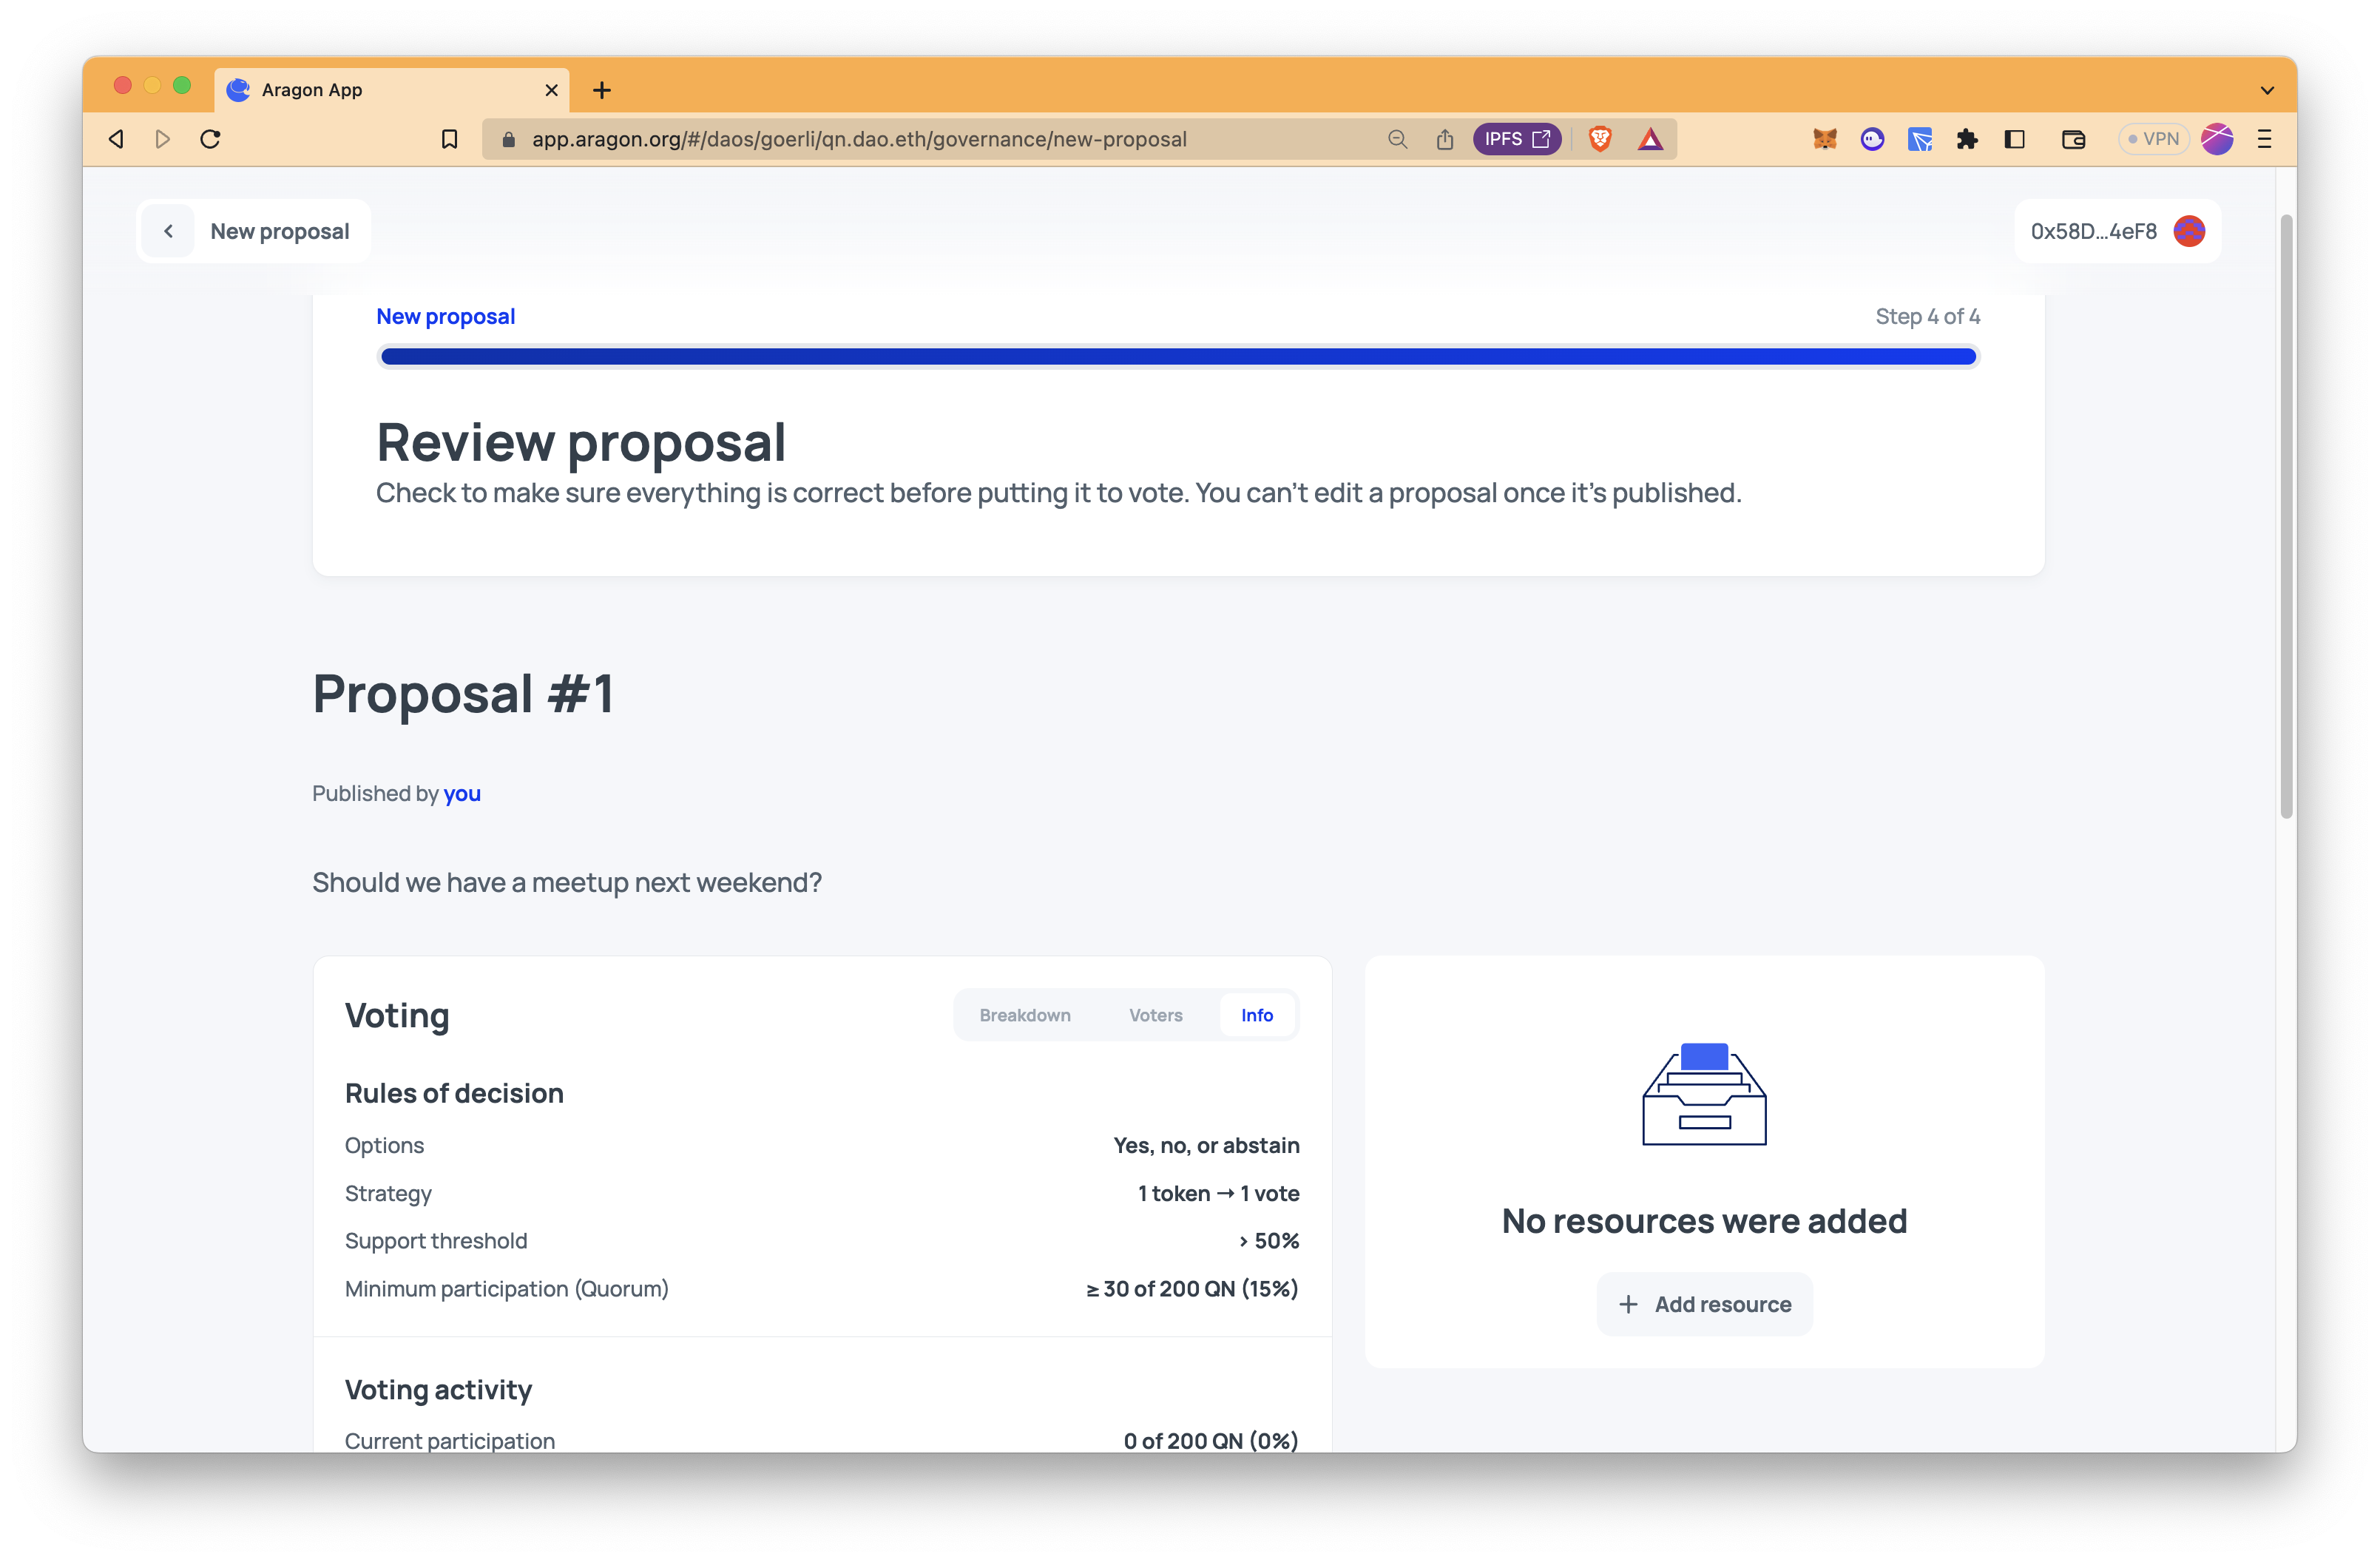
Step 5: Lastly, review the proposal. If everything is fine, click on "Publish proposal".
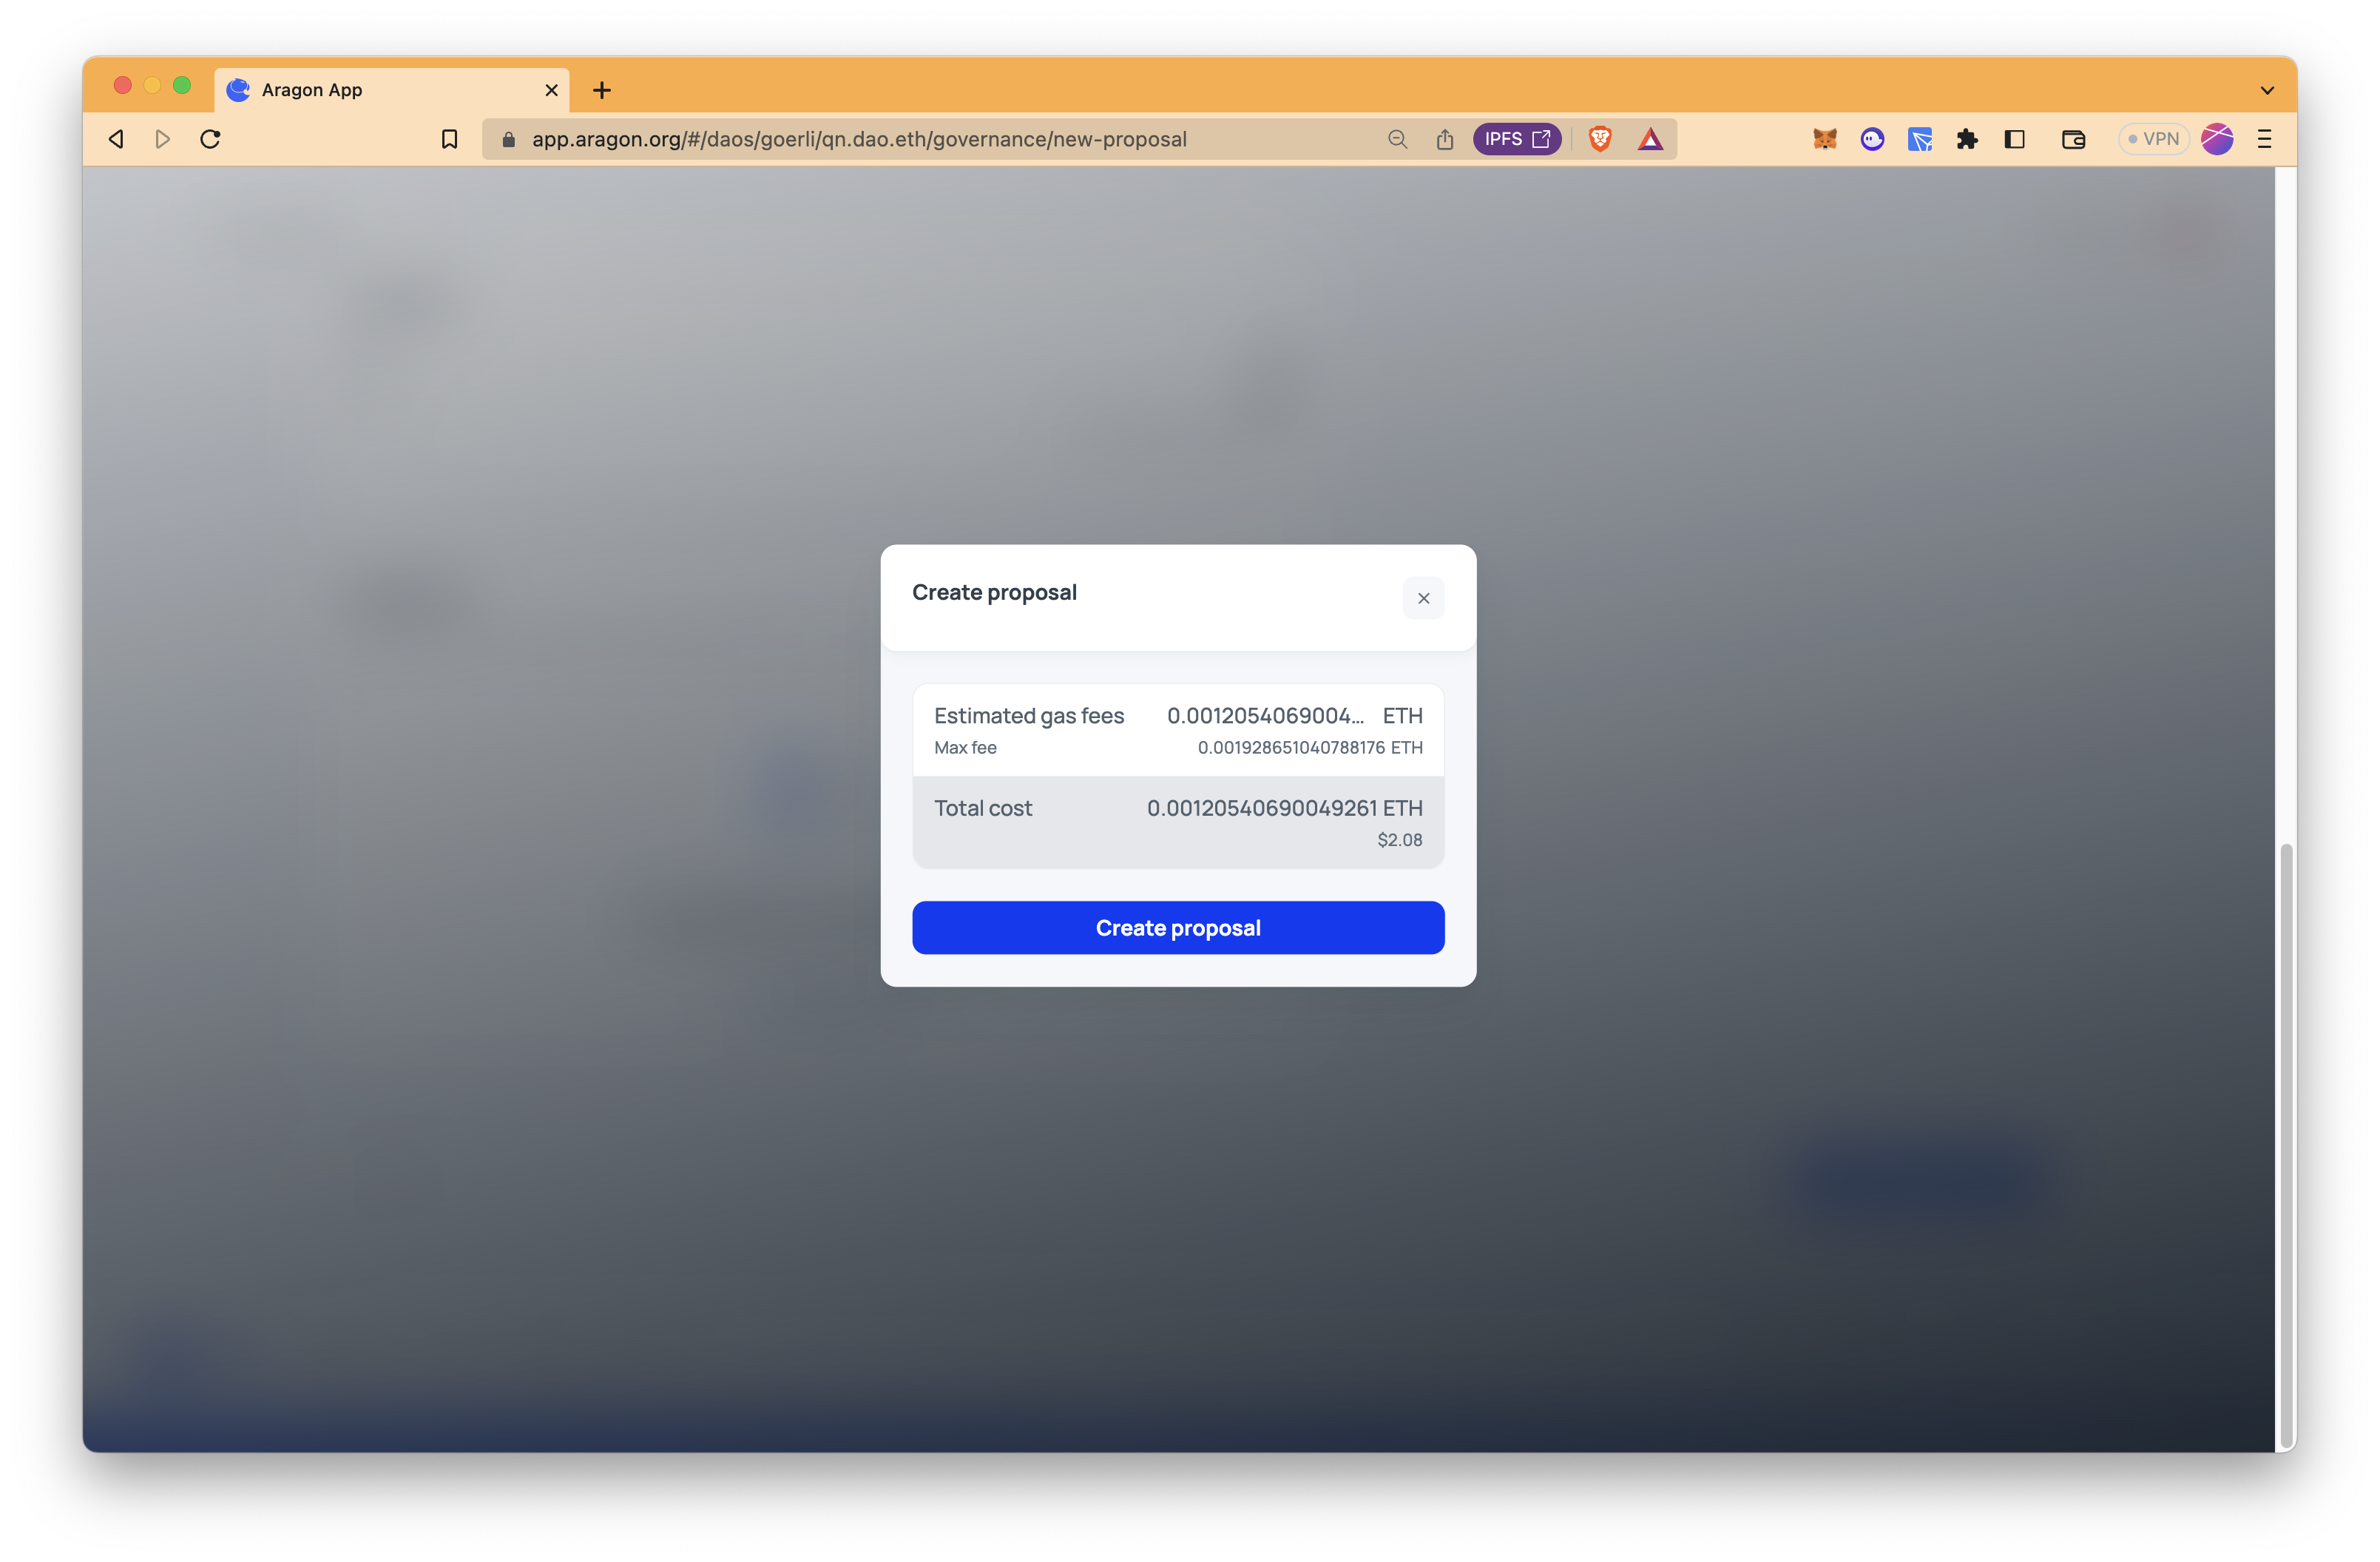
Step 6: Make sure that your wallet balance is enough to cover the total cost and click on "Create proposal". Then, confirm the transaction that popped up in your wallet.
Once the proposal is live, members can vote yes or no, and the voting window will be open for the time duration set in the earlier steps.
Conclusion
Congratulations on being sovereign and creating your decentralized autonomous organization. In this guide, we learned about DAOs, the difference between traditional organizations and DAOs, how to configure a Web3 Wallet like MetaMask, and how to get test ETH; last but definitely not least, we learned how to create a DAO on Aragon and how to vote in a DAO.
Subscribe to our newsletter for more articles and guides. If you encounter any problems or have any questions, we'd love to help you! Find us on Discord or Twitter.
We ❤️ Feedback!
Let us know if you have any feedback or requests for new topics. We'd love to hear from you.