
10 min read
Overview
Often to perform any transaction between two untrusted parties, there is a need for a trusted middle man; smart contracts eliminate this need for a middle man altogether. In this guide, we will learn how to create a dutch auction smart contract which will make the entire auction process trustless.
Prerequisites
- A Quicknode Account (create one for free here)
- A MetaMask wallet
- ETH on Sepolia testnet (you can get some here)
- Knowledge of creating an ERC721 (NFT) smart contract
Auctions using smart contract
Auctions are platforms for selling goods in public through a process of bidding where usually the person with the highest bid wins the auction and gets the ownership of the item. Though this is the primary format of how an auction works, there are some other rules to an auction as well.
The different types of auctions are:
-
English auction (Open ascending price auction): This is the traditional auction known to everyone where the highest bidder is the winner of the auction.
-
Dutch auction (Open descending price auction): This type of auction is mainly used for perishable items like flowers, food, clothes, etc. There is a start price, and the price goes down by a certain percentage as time goes and the bidder who bids more than or equal to the current price wins the auction or when a preset duration is over the last bidder who places a bid wins.
-
First-price sealed-bid auction (Blind auction): In this type of auction, all the bidders submit their bids in an envelope unaware of each other’s bids, then later the auctioneer opens the envelopes, and the highest bid wins.
-
Second-price sealed-bid auction (Vickrey auction): This is the same as a first-price sealed-bid auction. The only difference is that the winner is the second-highest bid.
In every type of auction, a middle man is an auctioneer responsible for conducting the auction and determining a winner and charges fees to conduct this, usually a percentage of the total selling price. A smart contract can eliminate the need for an auctioneer, and the entire process can be made automatic, trustless, and secure as we will perform this on the Ethereum blockchain.
What is Dutch auction?
A Dutch auction, also known as the open-descending auction, is a type of auction where the seller first sets a starting price, duration, and a discount rate. As time passes, the item's price keeps decreasing until the preset duration time has ended. For example, suppose there is a really good bag you want to get but it is out of your budget. In that case, as time goes on the bag will get cheaper; first a 10% discount, then 30%, then 50%, until the bag is cheap enough for you to purchase. This is the concept of Dutch auctions. To make this work on Ethereum we will need to create and deploy both an ERC721 contract and a dutch auction smart contract.
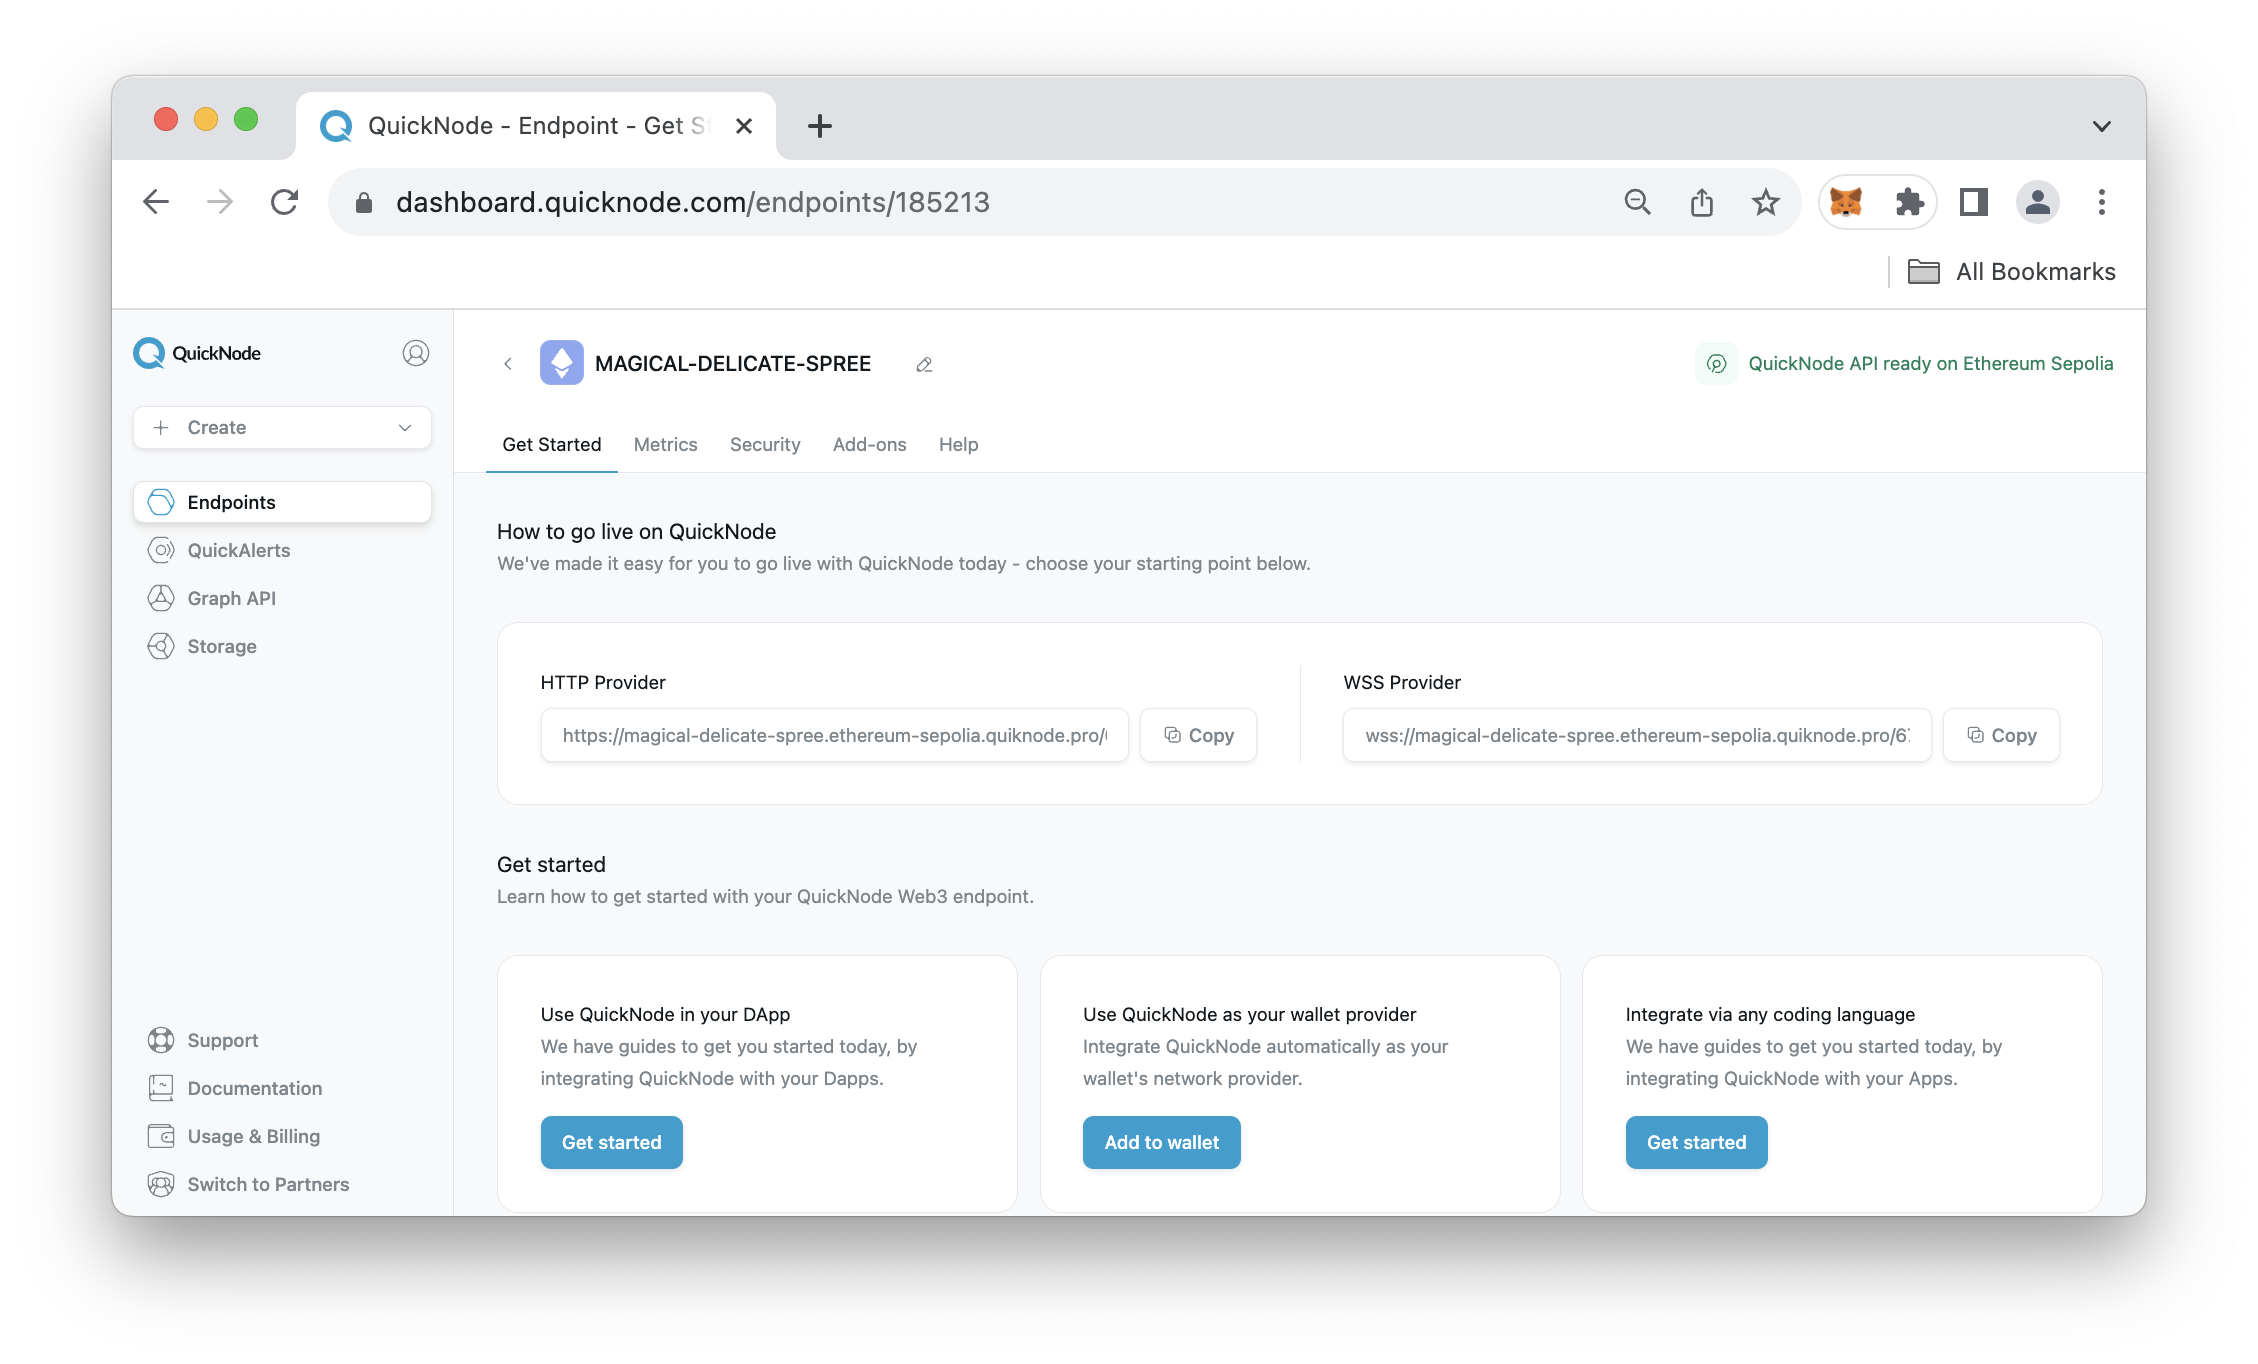
Set Up Your Quicknode Ethereum Endpoint
We will deploy our contract on the Sepolia testnet of Ethereum using the Remix IDE and a MetaMask wallet. We can use the default Sepolia network on MetaMask, but MetaMask is a very popular tool used by the majority of Ethereum developers so sometimes the network can get congested. To avoid this we will create a free Quicknode account here, create an Ethereum Sepolia endpoint, and add Quicknode as a custom provider in MetaMask.
Add Custom Network on MetaMask
Now, you may be wondering why we want to set a custom network in MetaMask. Although we could use the default Sepolia testnet found in the networks list. We'll use a custom one so we're not rate-limited and can enjoy up to 8x faster times.
Open your MetaMask wallet and click the ellipses in the top-right. Click Settings --> Networks --> Add Network. Once the new page opens, click the Add a network manually button in the bottom of the MetaMask extension page.
You'll be asked to input the following fields:
- Network name: Sepolia Quicknode
- New RPC URL:
YOUR QUICKNODE HTTP PROVIDER URL - Chain ID: 11155111
- Currency symbol: ETH
- Block explorer URL (Optional): https://sepolia.etherscan.io/
Quicknode Multi-Chain Faucet
We'll need to get some test ETH in order to pay for the deployment and interaction of our smart contract.
Navigate to the Quicknode Multi-Chain Faucet and connect your wallet or paste in your wallet address. You'll need to select the Ethereum chain and Sepolia network and then request funds.
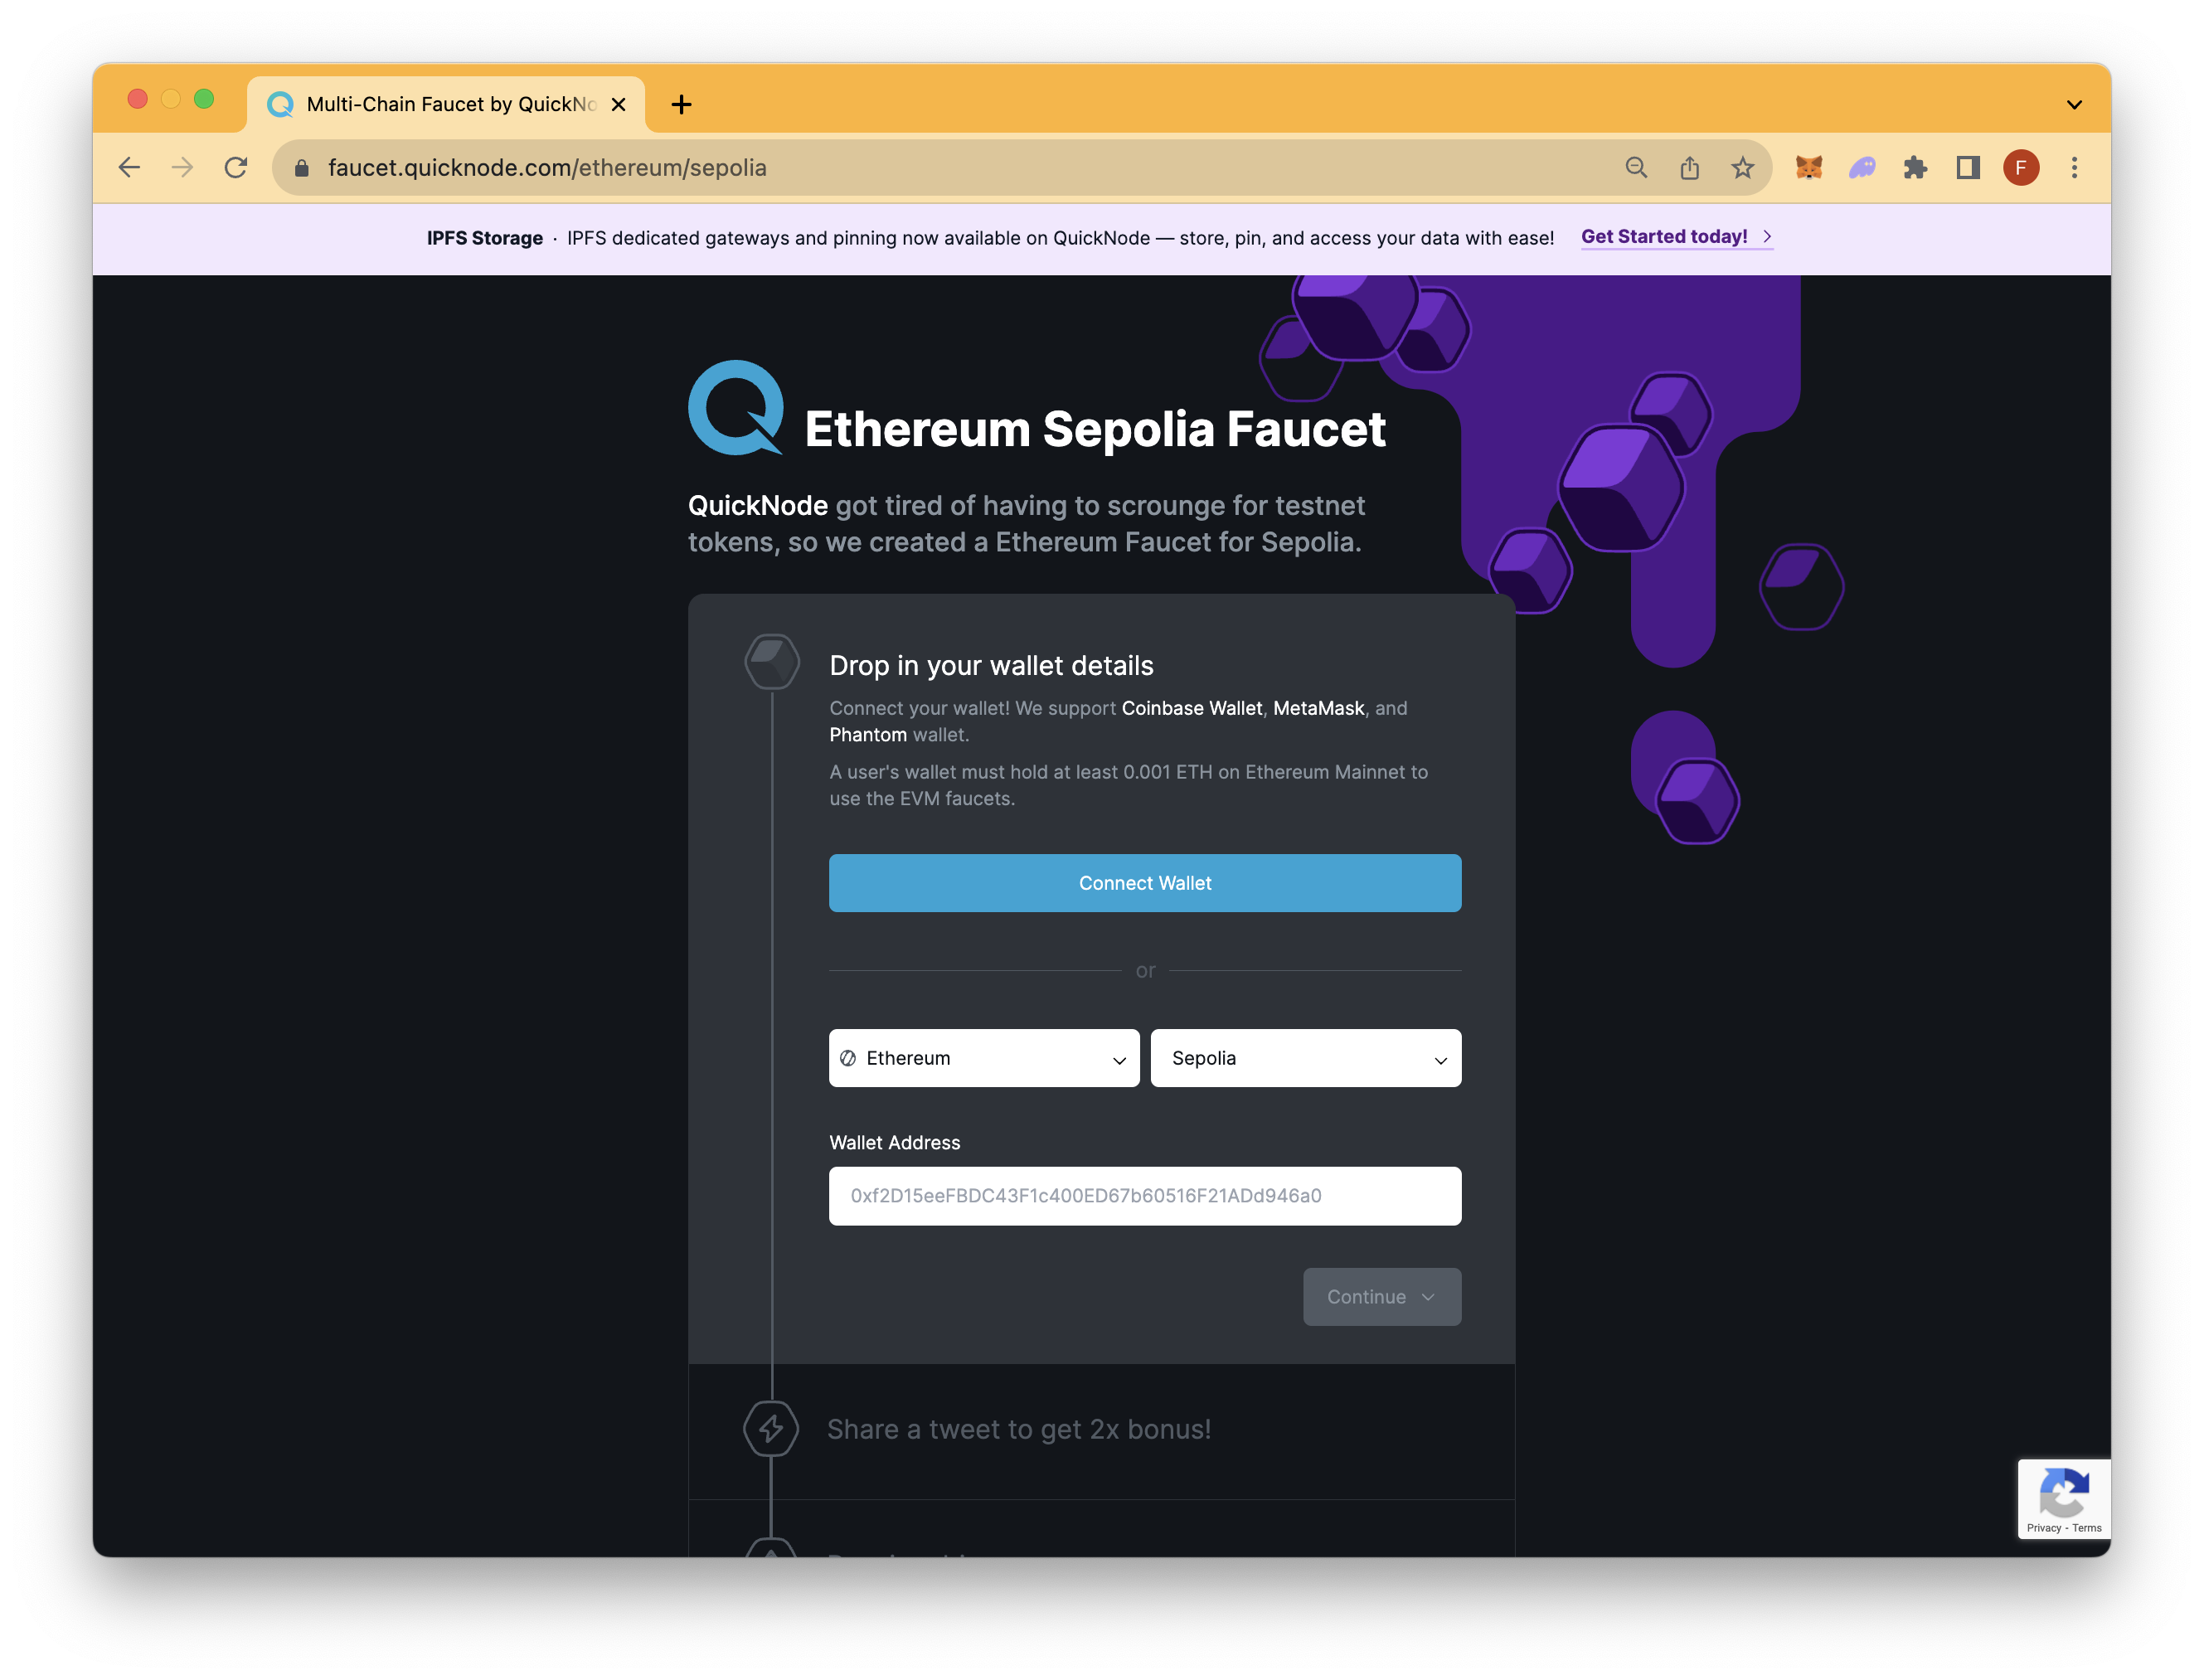
Note, you'll need at least 0.001 ETH on the Ethereum Mainnet to use the Faucet
With our wallet funded, we can move onto the deployment section.
Creating and deploying the Dutch auction contract
Now, navigate to Remix.IDE and create two new solidity files, one called dutchAuction.sol, and the other NFT.sol. We'll need to first create and deploy an NFT which will be an ERC-721 token that we use in the dutch auction contract.
Open the NFT.sol file and input the following code:
// SPDX-License-Identifier: MIT
pragma solidity ^0.8.20;

import "@openzeppelin/contracts/token/ERC721/ERC721.sol";
import "@openzeppelin/contracts/access/Ownable.sol";

contract MyToken is ERC721, Ownable {
    constructor(address initialOwner)
        ERC721("MyToken", "MTK")
        Ownable(initialOwner)
    {}

    function safeMint(address to, uint256 tokenId) public onlyOwner {
        _safeMint(to, tokenId);
    }
}
The code above comes from OpenZeppelin's Contracts Wizard, which has pre-configured code templates developers can use.
The code makes use of the OpenZeppelin library, specifically importing the ERC721 and Ownable modules. The ERC721 module provides the basic functionality required for creating and managing NFTs, while the Ownable module ensures that certain functionalities of the contract can only be accessed by the owner of the contract. The contract is initialized with a name MyToken and a symbol MTK. The constructor of the contract takes an initialOwner address parameter, setting this address as the initial owner. A core functionality of this contract, the safeMint function, allows the owner to safely mint new tokens. This function ensures that only the owner can mint new NFTs by using the onlyOwner modifier. When the owner decides to mint a new token, the internal _safeMint function from the ERC721 module is called, which takes care of the actual minting process.
Go ahead and deploy the contract in Remix.IDE by first compiling it (on the Solidity Compiler tab), then deploying it (on the Deploy & Run Transactions tab). Note the contract utilizes a constructor so you will need to input a wallet address in the initialOwner field. Once deployed, you can call the safeMint function on the smart contract which will mint an NFT that you'll use in the next section. Note to save the contract address of the minted NFT as you'll need it when deploying the dutchAuction contract.
Next, in the dutchAuction.sol file, paste the following code:
// SPDX-License-Identifier: MIT
pragma solidity ^0.8.0;

interface IERC721 {
    function transferFrom(
        address _from,
        address _to,
        uint _nftId
    ) external;
}

contract dutchAuction {
    uint private constant DURATION = 7 days;

    IERC721 public immutable nft;
    uint public immutable nftId;

    address payable public immutable seller;
    uint public immutable startingPrice;
    uint public immutable discountRate;
    uint public immutable startAt;
    uint public immutable expiresAt;

    constructor(
        uint _startingPrice,
        uint _discountRate,
        address _nft,
        uint _nftId
    ) {
        seller = payable(msg.sender);
        startingPrice = _startingPrice;
        discountRate = _discountRate;
        startAt = block.timestamp;
        expiresAt = block.timestamp + DURATION;

        require(_startingPrice >= _discountRate * DURATION, "Starting price is too low");

        nft = IERC721(_nft);
        nftId = _nftId;
    }

    function getPrice() public view returns (uint) {
        uint timeElapsed = block.timestamp - startAt;
        uint discount = discountRate * timeElapsed;
        return startingPrice - discount;
    }

    function buy() external payable {
        require(block.timestamp < expiresAt, "This auction has ended");

        uint price = getPrice();
        require(msg.value >= price, "The amount of ETH sent is less than the price of token");

        nft.transferFrom(seller, msg.sender, nftId);
        uint refund = msg.value - price;
        if (refund > 0) {
            payable(msg.sender).transfer(refund);
        }
        selfdestruct(seller);
    }
}
Explanation of the above contract:
Key Variables:
DURATION: A constant denoting the duration of the auction, set to 7 days.nft: An immutable variable representing the ERC721 token being auctioned.nftId: The specific ID of the ERC721 token up for auction.seller: The original owner of the ERC721 token, initialized to the deployer of the contract.startingPrice: The initial price of the token at the beginning of the auction.discountRate: The rate at which the token's price is reduced over time.startAt: The timestamp of when the auction starts.expiresAt: The timestamp of when the auction ends, calculated as the start time plus the DURATION.
Key Functions:
1. constructor
This function sets the initial state of the contract by initializing core variables like the seller, starting price, and others. Additionally, it checks if the starting price isn't too low compared to the discount rate and duration.
2. getPrice
A public view function that calculates the current price of the token based on the elapsed time and the discount rate. The formula used is the starting price minus the accumulated discount over time.
3. buy
This external payable function allows users to purchase the token. It contains checks to ensure:
- The auction hasn't ended.
- The sent amount is at least equal to the current token price.
- Upon successful purchase, the ERC721 token is transferred to the buyer using the transferFrom method. Any excess ether sent is refunded to the buyer, and the contract is terminated, sending its balance to the seller.
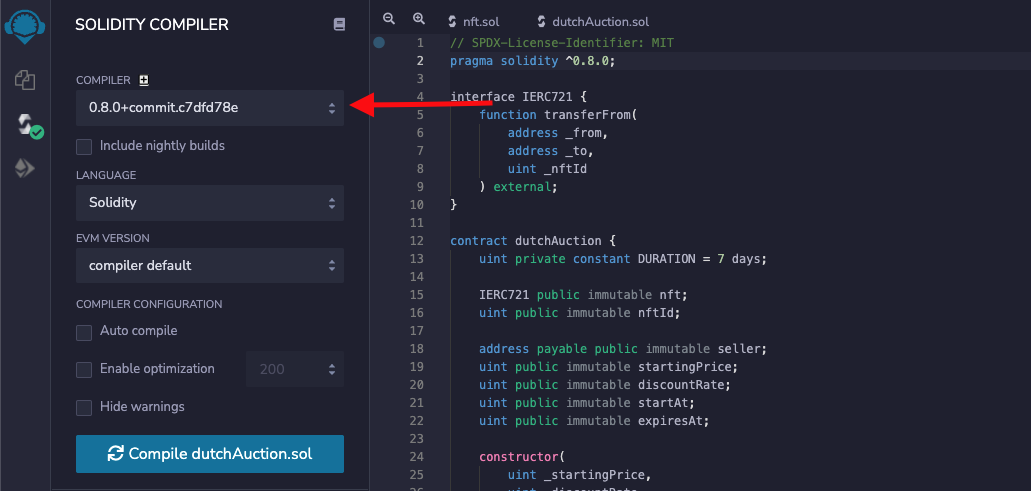
Compile the contract; if you get an error during compilation, make sure you select the correct solidity compiler version.
Now, go to the deploy tab, select Injected Web3 under the ENVIRONMENT option, also make sure you see Sepolia (11155111) network’written below it; if not, select the Quicknode Sepolia node which we added earlier and select dutchAuction from the drop-down CONTRACT option then click on the small arrow beside the deploy button and fill in the following details.
- Starting price of the NFT in gwei, 10,000,000 gwei here.
- The discount rate at which the price of NFT will decrease every second since the contract is deployed until seven days or until the price is greater than zero, whichever is earliest. 1 here.
- Address of the NFT contract which we deployed earlier.
- ID of our NFT.
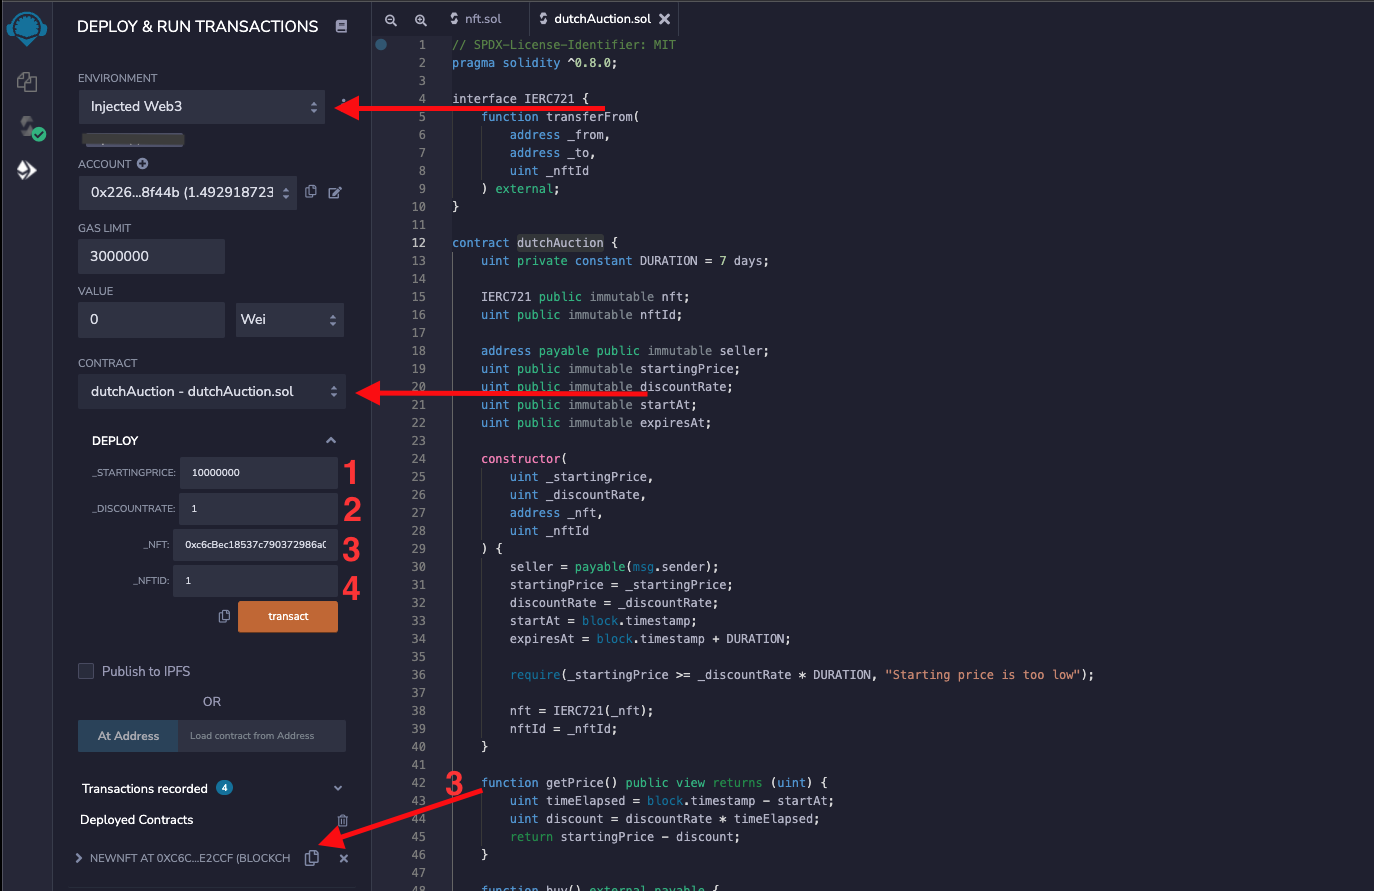
Now click on the ‘transact button’ and approve the transaction from MetaMask. Once the transaction is approved, our Dutch auction contract is deployed.
Performing the auction
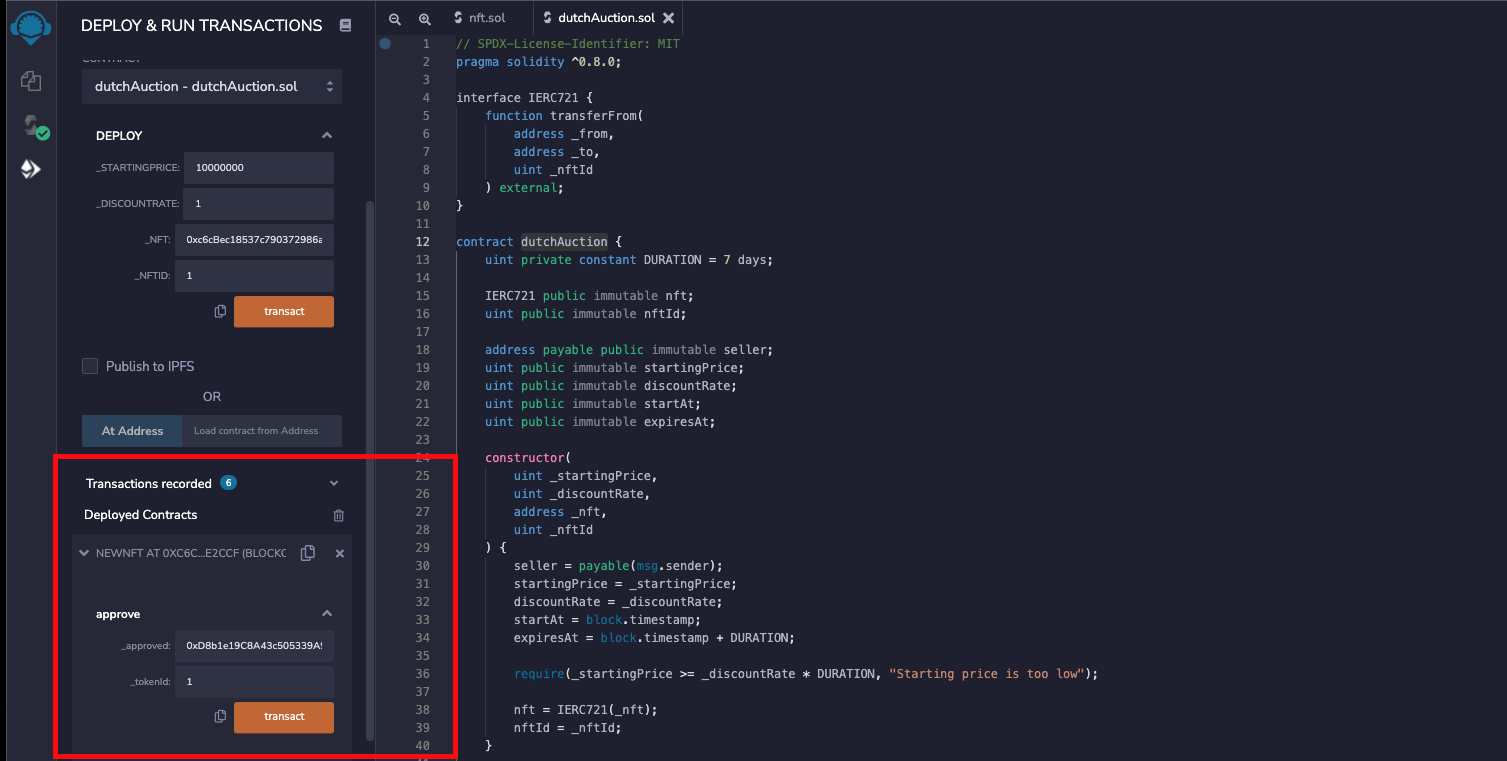
Now that our Dutch auction contract is deployed let us see it in action. The first step here would be to approve the dutchAuction contract to be able to transfer NFT. Go to the deployed NFT contract and expand the approve function, paste the address of the dutchAuction contract in the first field and NFT id of the token that we are selling.
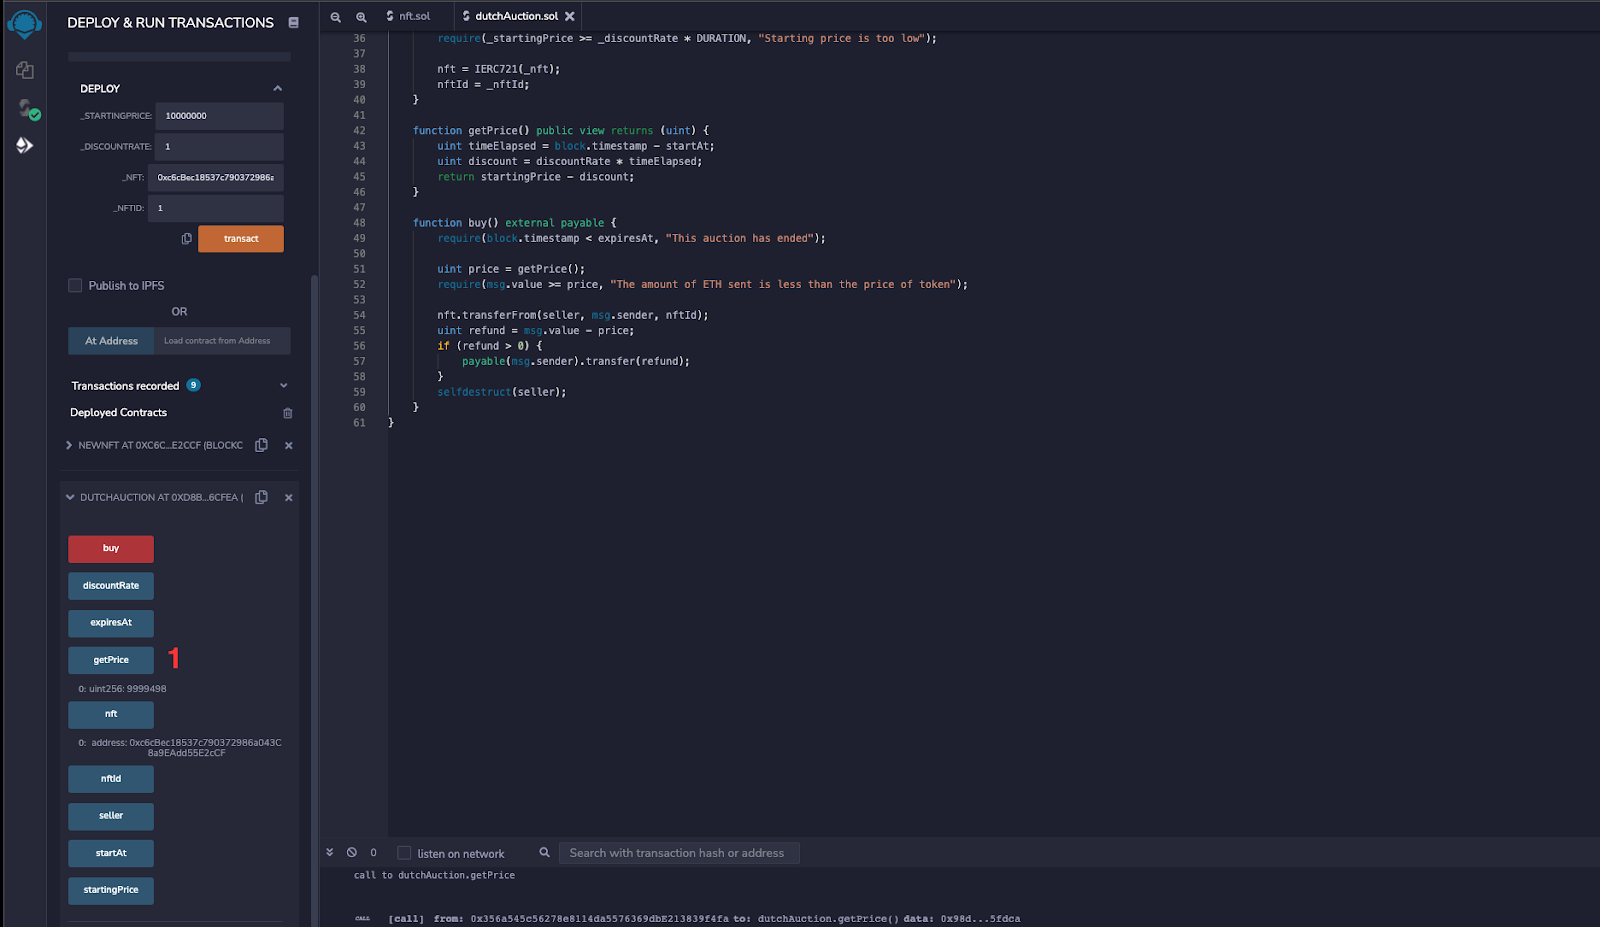
Now, change to another account in MetaMask, then expand the deployed dutchAuction contract and perform the following steps:
- Click on the ‘getPrice’ button to get the current price of the NFT.
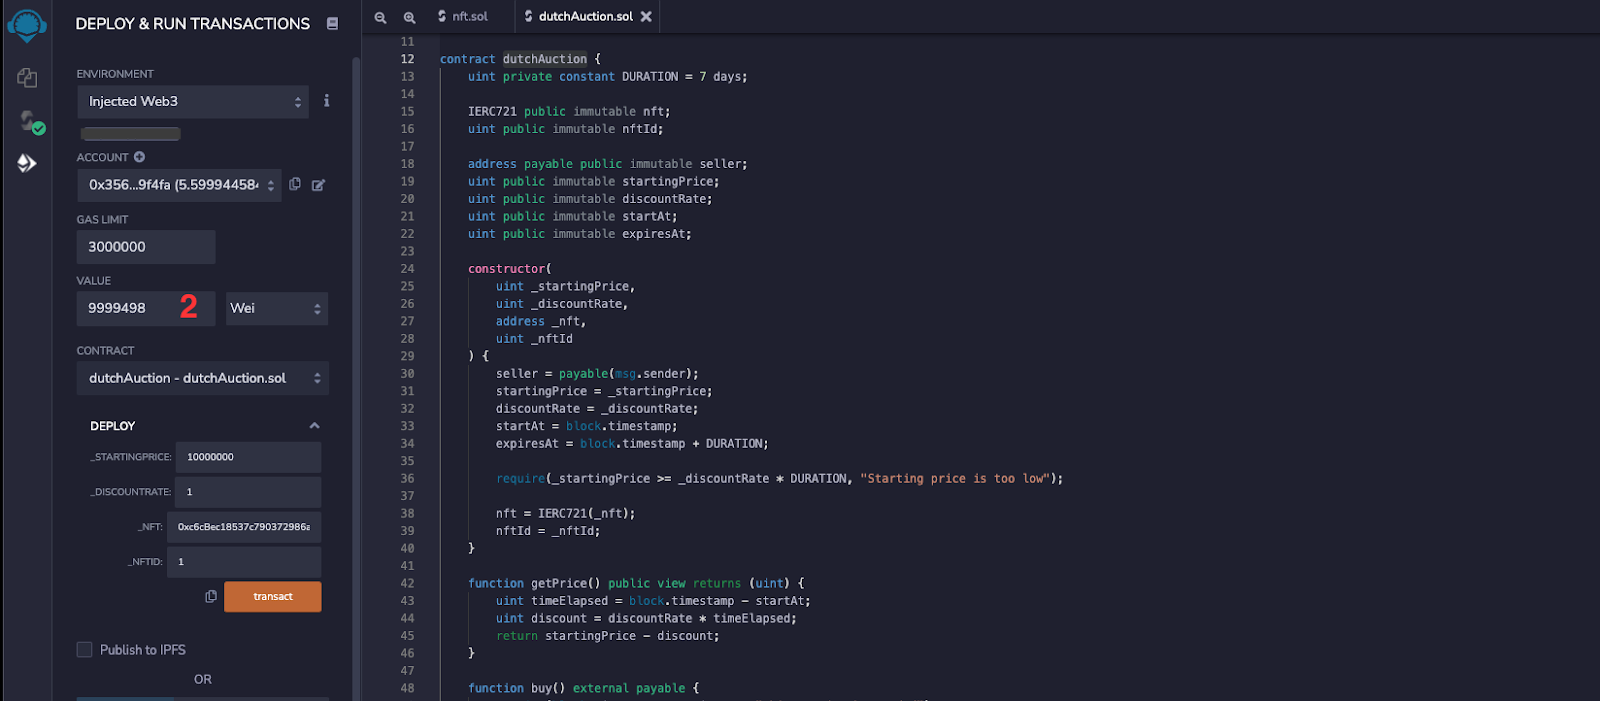
- Copy the value and scroll up and paste it in the value field right above where we selected the contract name while deploying our contract.
- Now scroll down back to the deployed dutchAuction contract and click on buy.
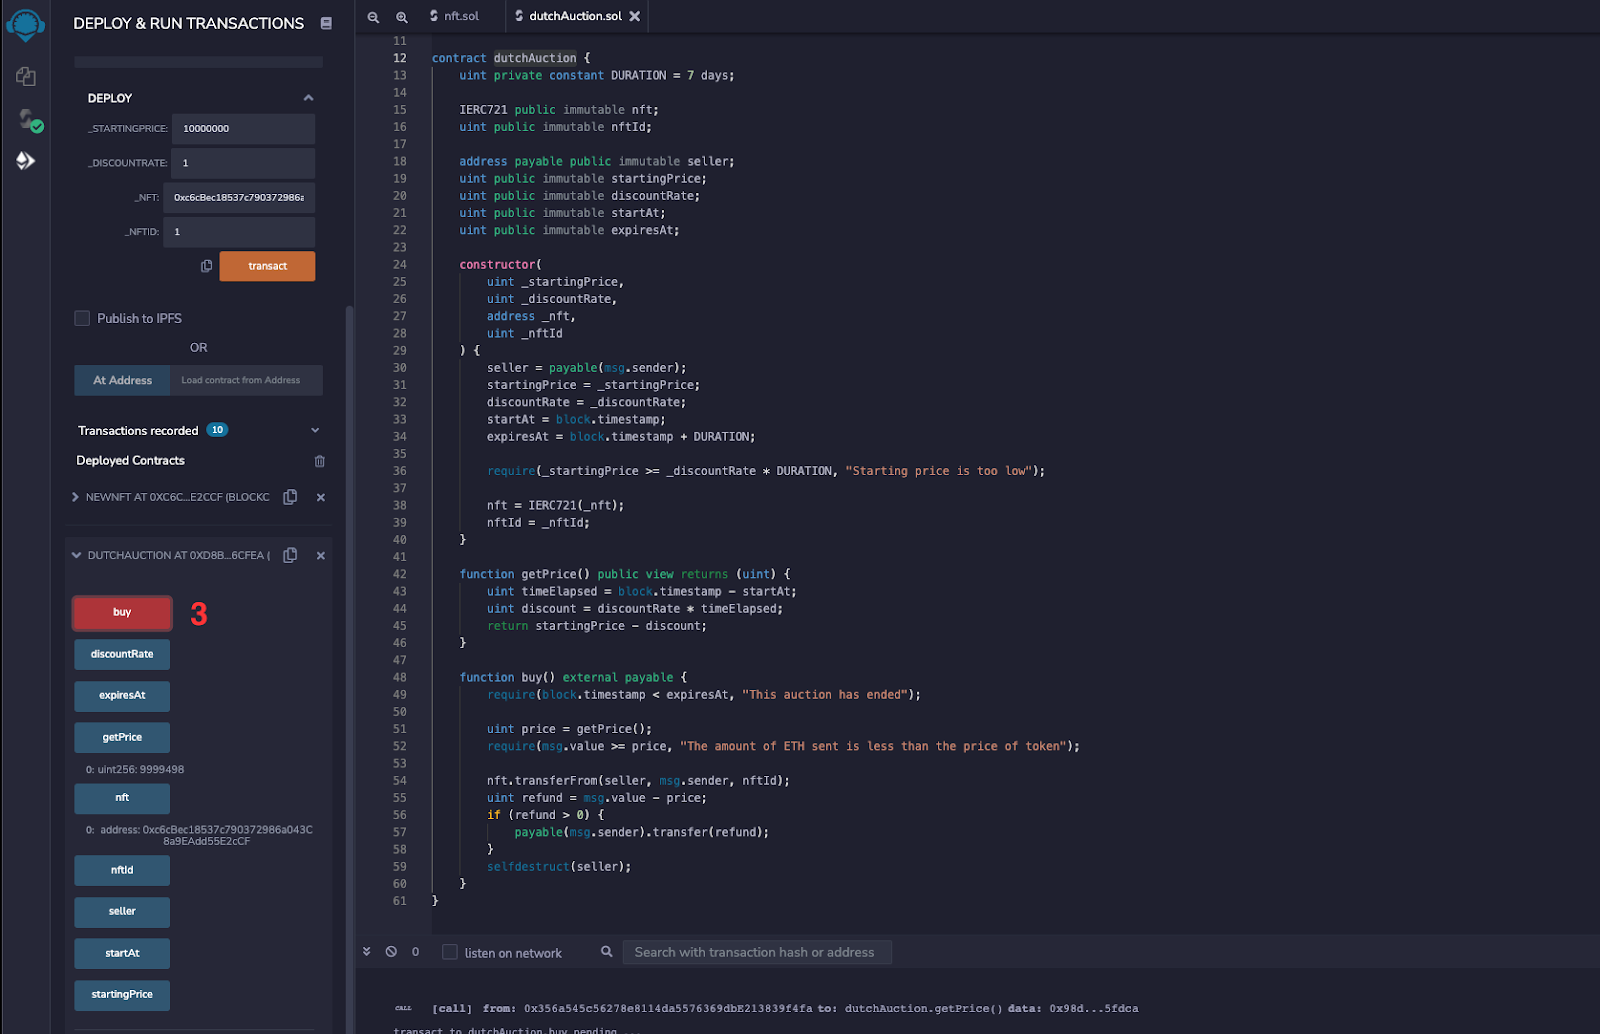
Once the transaction is complete, the ownership of the NFT will be transferred, and the Dutch auction will be completed.
Also, the contract is now destructed. It will not return any output:

Conclusion
If you made it here, congratulations; you are on your way to becoming a Solidity expert. In this guide, we learned about auctions with smart contracts and writing and deploying a smart contract on solidity to perform Dutch auction.
Subscribe to our newsletter for more articles and guides on Ethereum. If you have any feedback, feel free to reach out to us via Twitter. You can always chat with us on our Discord community server, featuring some of the coolest developers you’ll ever meet :)
We ❤️ Feedback!
Let us know if you have any feedback or requests for new topics. We'd love to hear from you.