6 min read
Overview
Ethereum development environments such as Hardhat make it easier to work with smart contracts and Ethereum nodes. They provide a set of tools to seamlessly write, test, and deploy smart contracts. In this guide, we’ll create a Hello World smart contract and deploy it on the Sepolia testnet using Hardhat and QuickNode.
Prerequisites
- A QuickNode Account (create one for free here)
- An EVM-compatible wallet (e.g., MetaMask)
- Node.js installed
- Hardhat installed (we will cover it as well during the guide)
- CLI/Terminal Window
- Code or Text Editor (e.g., VSCode)
- ETH on Sepolia testnet (you can use the QuickNode Multi-chain Faucet to retrieve some for free)
What is Hardhat?
Hardhat is a development environment that helps developers compile, deploy, test, and debug their Ethereum applications. It has some of the cleanest, most detailed documentation. Hardhat also provides console.log() functionality, similar to JavaScript for debugging purposes. Hardhat also has many plugins, which further increases its functionality.
Installing Hardhat and Other Dependencies
We’ll install Hardhat using npm, which comes with node.js.
First, create a new project directory and navigate into it. Feel free to use your own names here instead:
mkdir HardhatTutorial
cd HardhatTutorial
You can now access Logs for your RPC endpoints, helping you troubleshoot issues more effectively. If you encounter an issue with your RPC calls, simply check the logs in your QuickNode dashboard to identify and resolve problems quickly. Learn more about log history limits on our pricing page.
Open terminal/cmd in your project directory and type the following commands.
npm init --y
npm install --save-dev hardhat
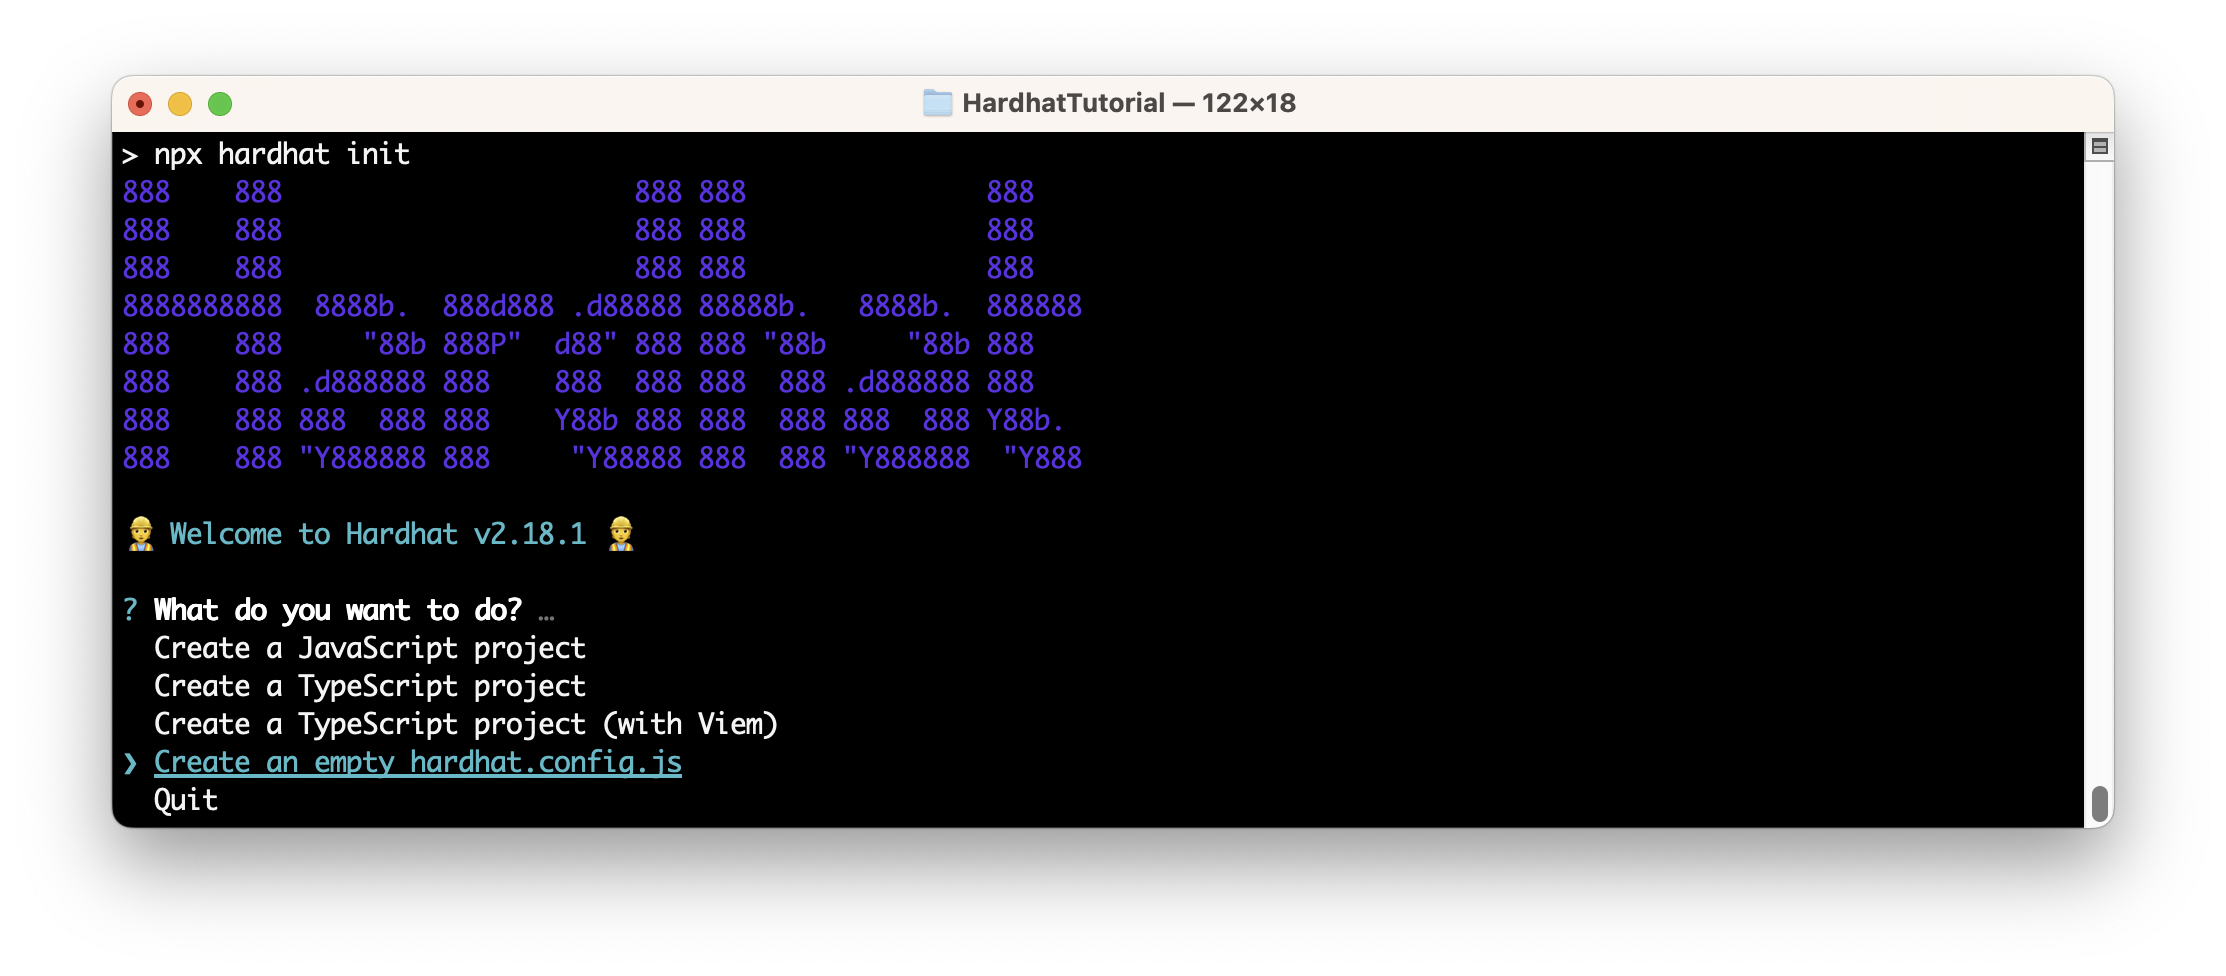
Now that we have Hardhat installed let’s start a new Hardhat project. We’ll use npx to do so. Npx helps process node.js executables.
npx hardhat init
You’ll be greeted with a CLI Hardhat interface. Select "Create an empty hardhat.config.js", and press enter.
Now, let’s install other dependencies required to work with Hardhat.
npm install --save-dev @nomiclabs/hardhat-ethers ethers @nomiclabs/hardhat-waffle ethereum-waffle chai
We need these dependencies to write automated tests for contracts.
The most common issue while installing packages with npm can be an internal failure with `node-gyp`. You can follow node-gyp installation instructions here.
Note: You will need to have your python version match one of the compatible versions listed in the instructions above if you encounter the node-gyp issue.
Another common issue is a stale cache. Clear your npm cache by simply typing the below into your terminal:
npm cache clean
Now, let’s get a private key for our wallet, some test ETH for gas, and an Ethereum node in place; all of which we'll need to deploy our smart contract.
Creating/Retrieving the Private Key
We’ll need an Ethereum wallet in order to pay for the deployment of our smart contract.
Once your wallet is created, and you have retrieved its private key, we will add it to the Hardhat config file (e.g., hardhat.config.js) in the next section.
You can follow QuickNode guides to generate a private key and an Ethereum address in JavaScript, Ruby, Python, Go, PHP.
To get the private key from your MetaMask wallet, follow these instructions:
- Click MetaMask icon, a stylized fox head, on your browser. If it is not seen, check the Extensions page of your browser.
- Click ⋮ symbol and then Account details.
- Then, click Show private key and follow the instructions.
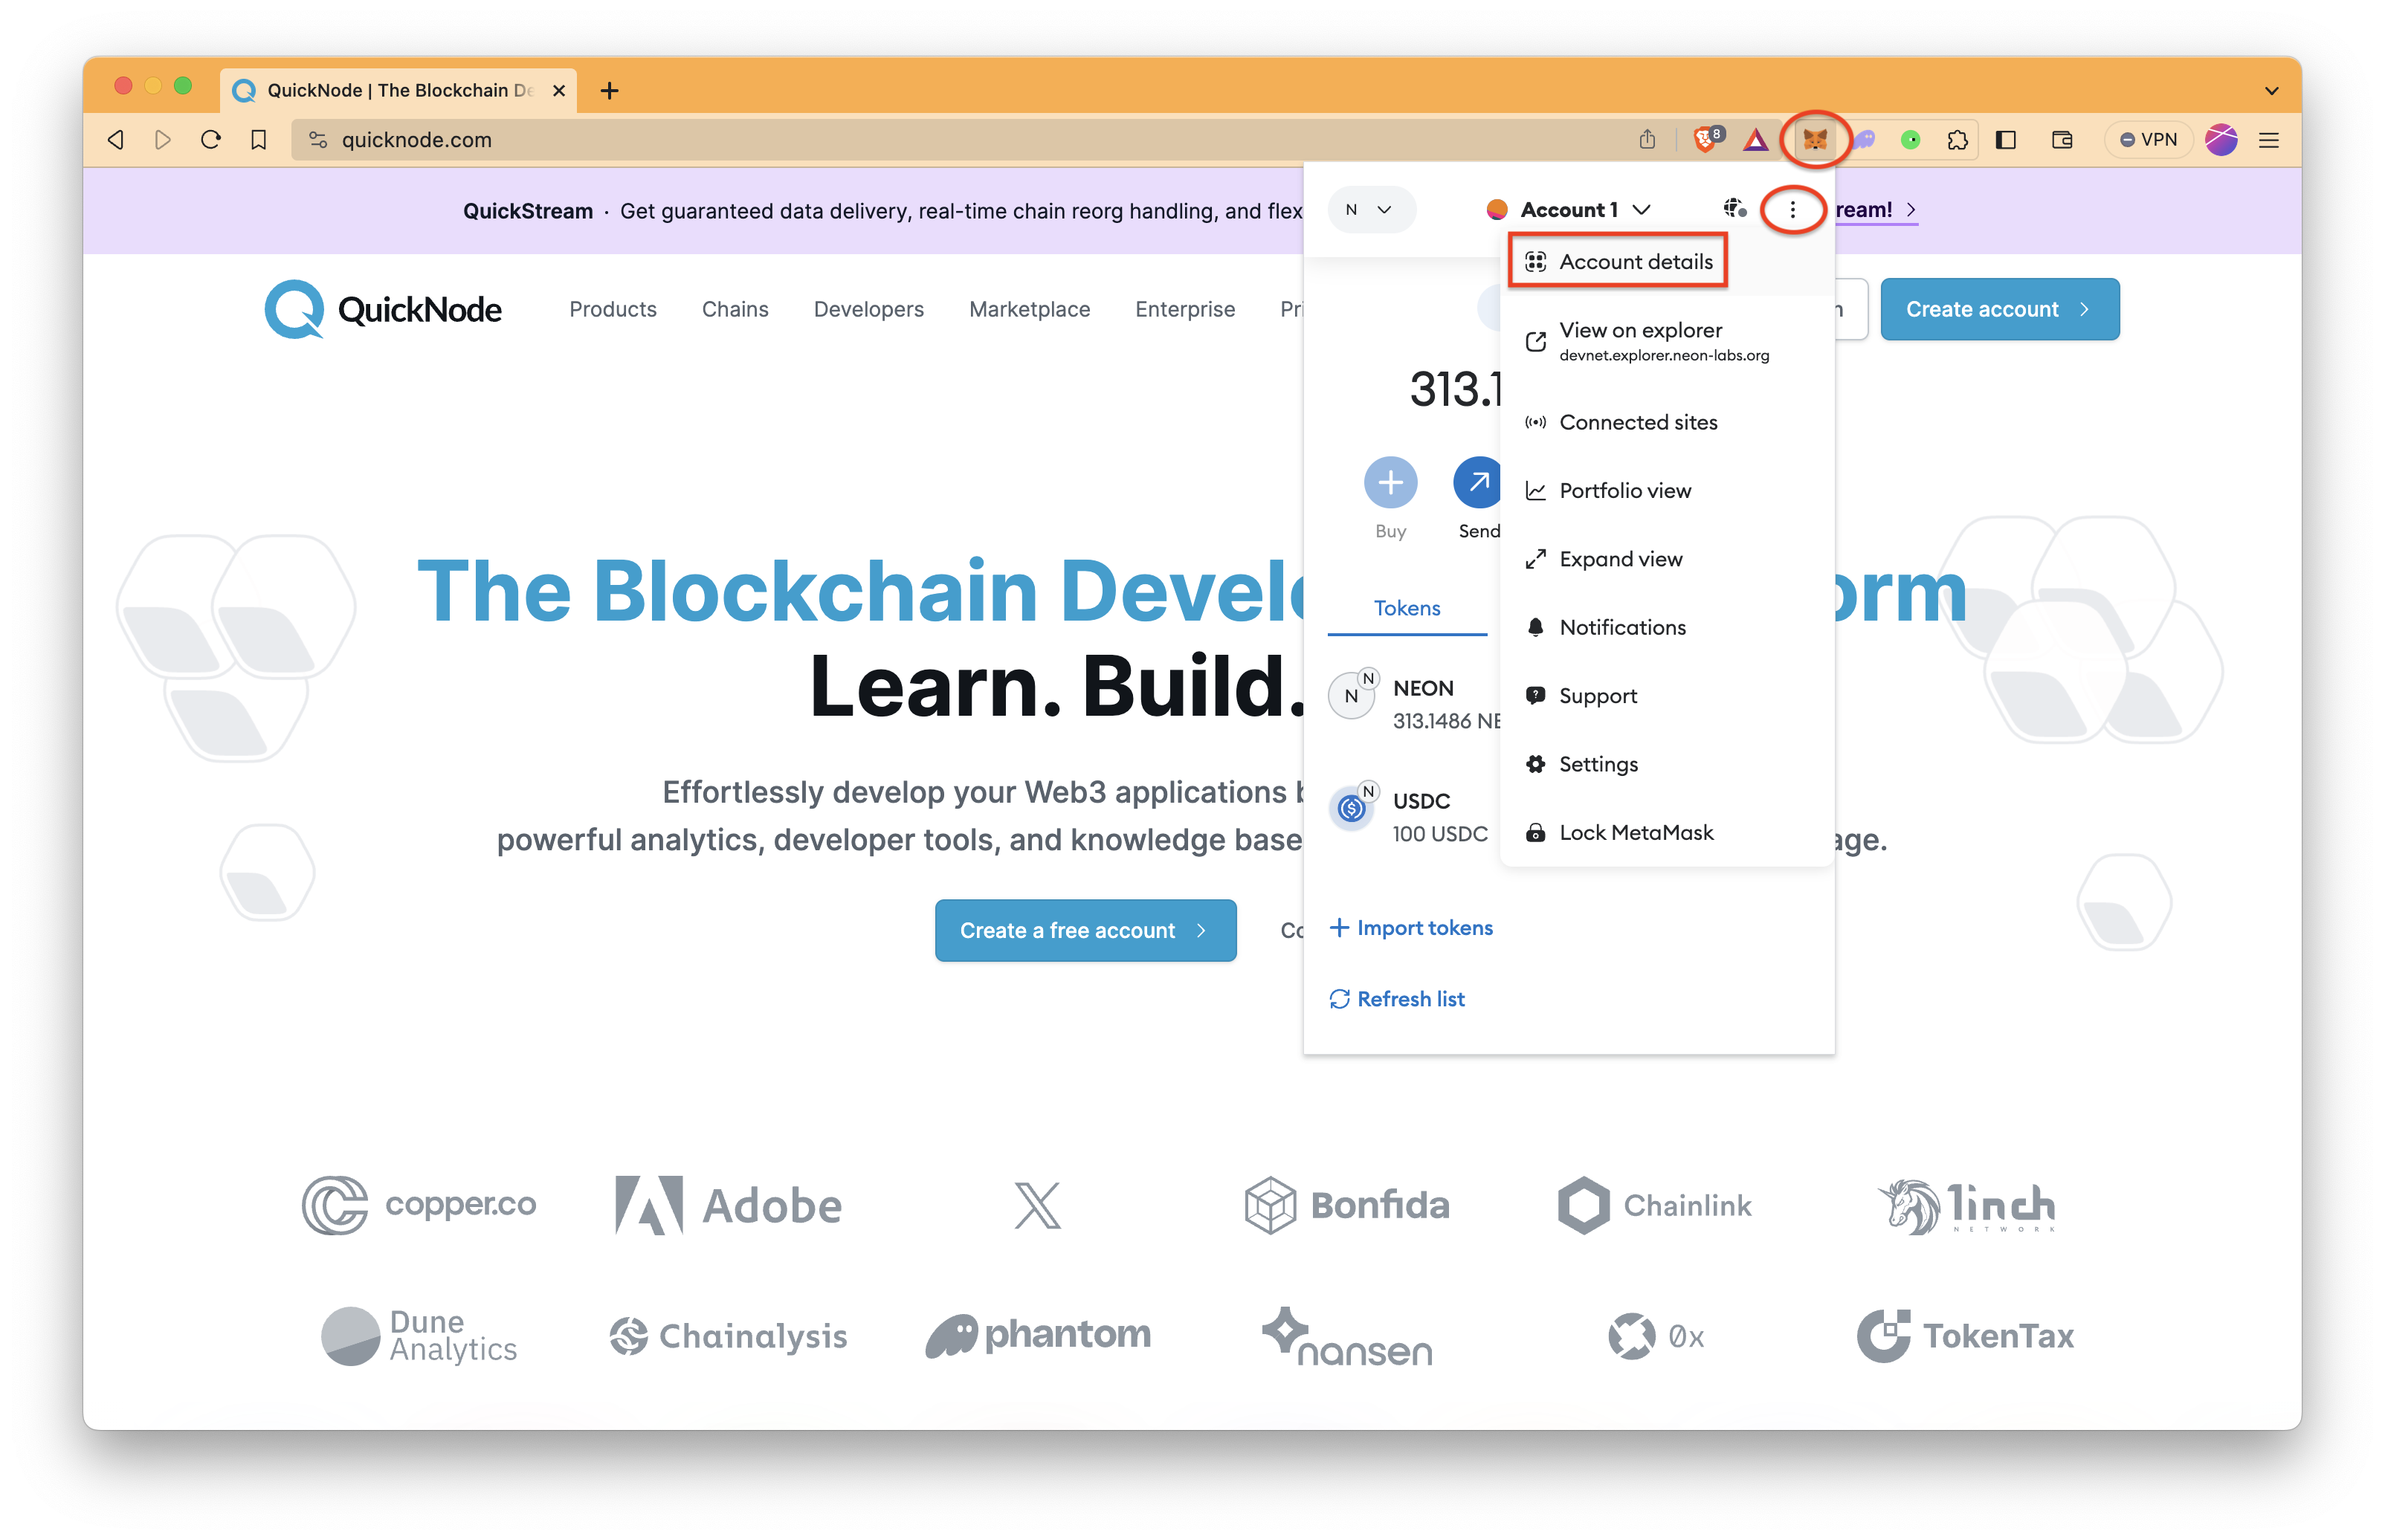
Copy and save the private key; we’ll need it in the later steps.
It is recommended to store sensitive information like private keys in a .env file and get it into the config file using environment variables or to make a new secondary MetaMask wallet solely for development purposes.
Getting Testnet ETH
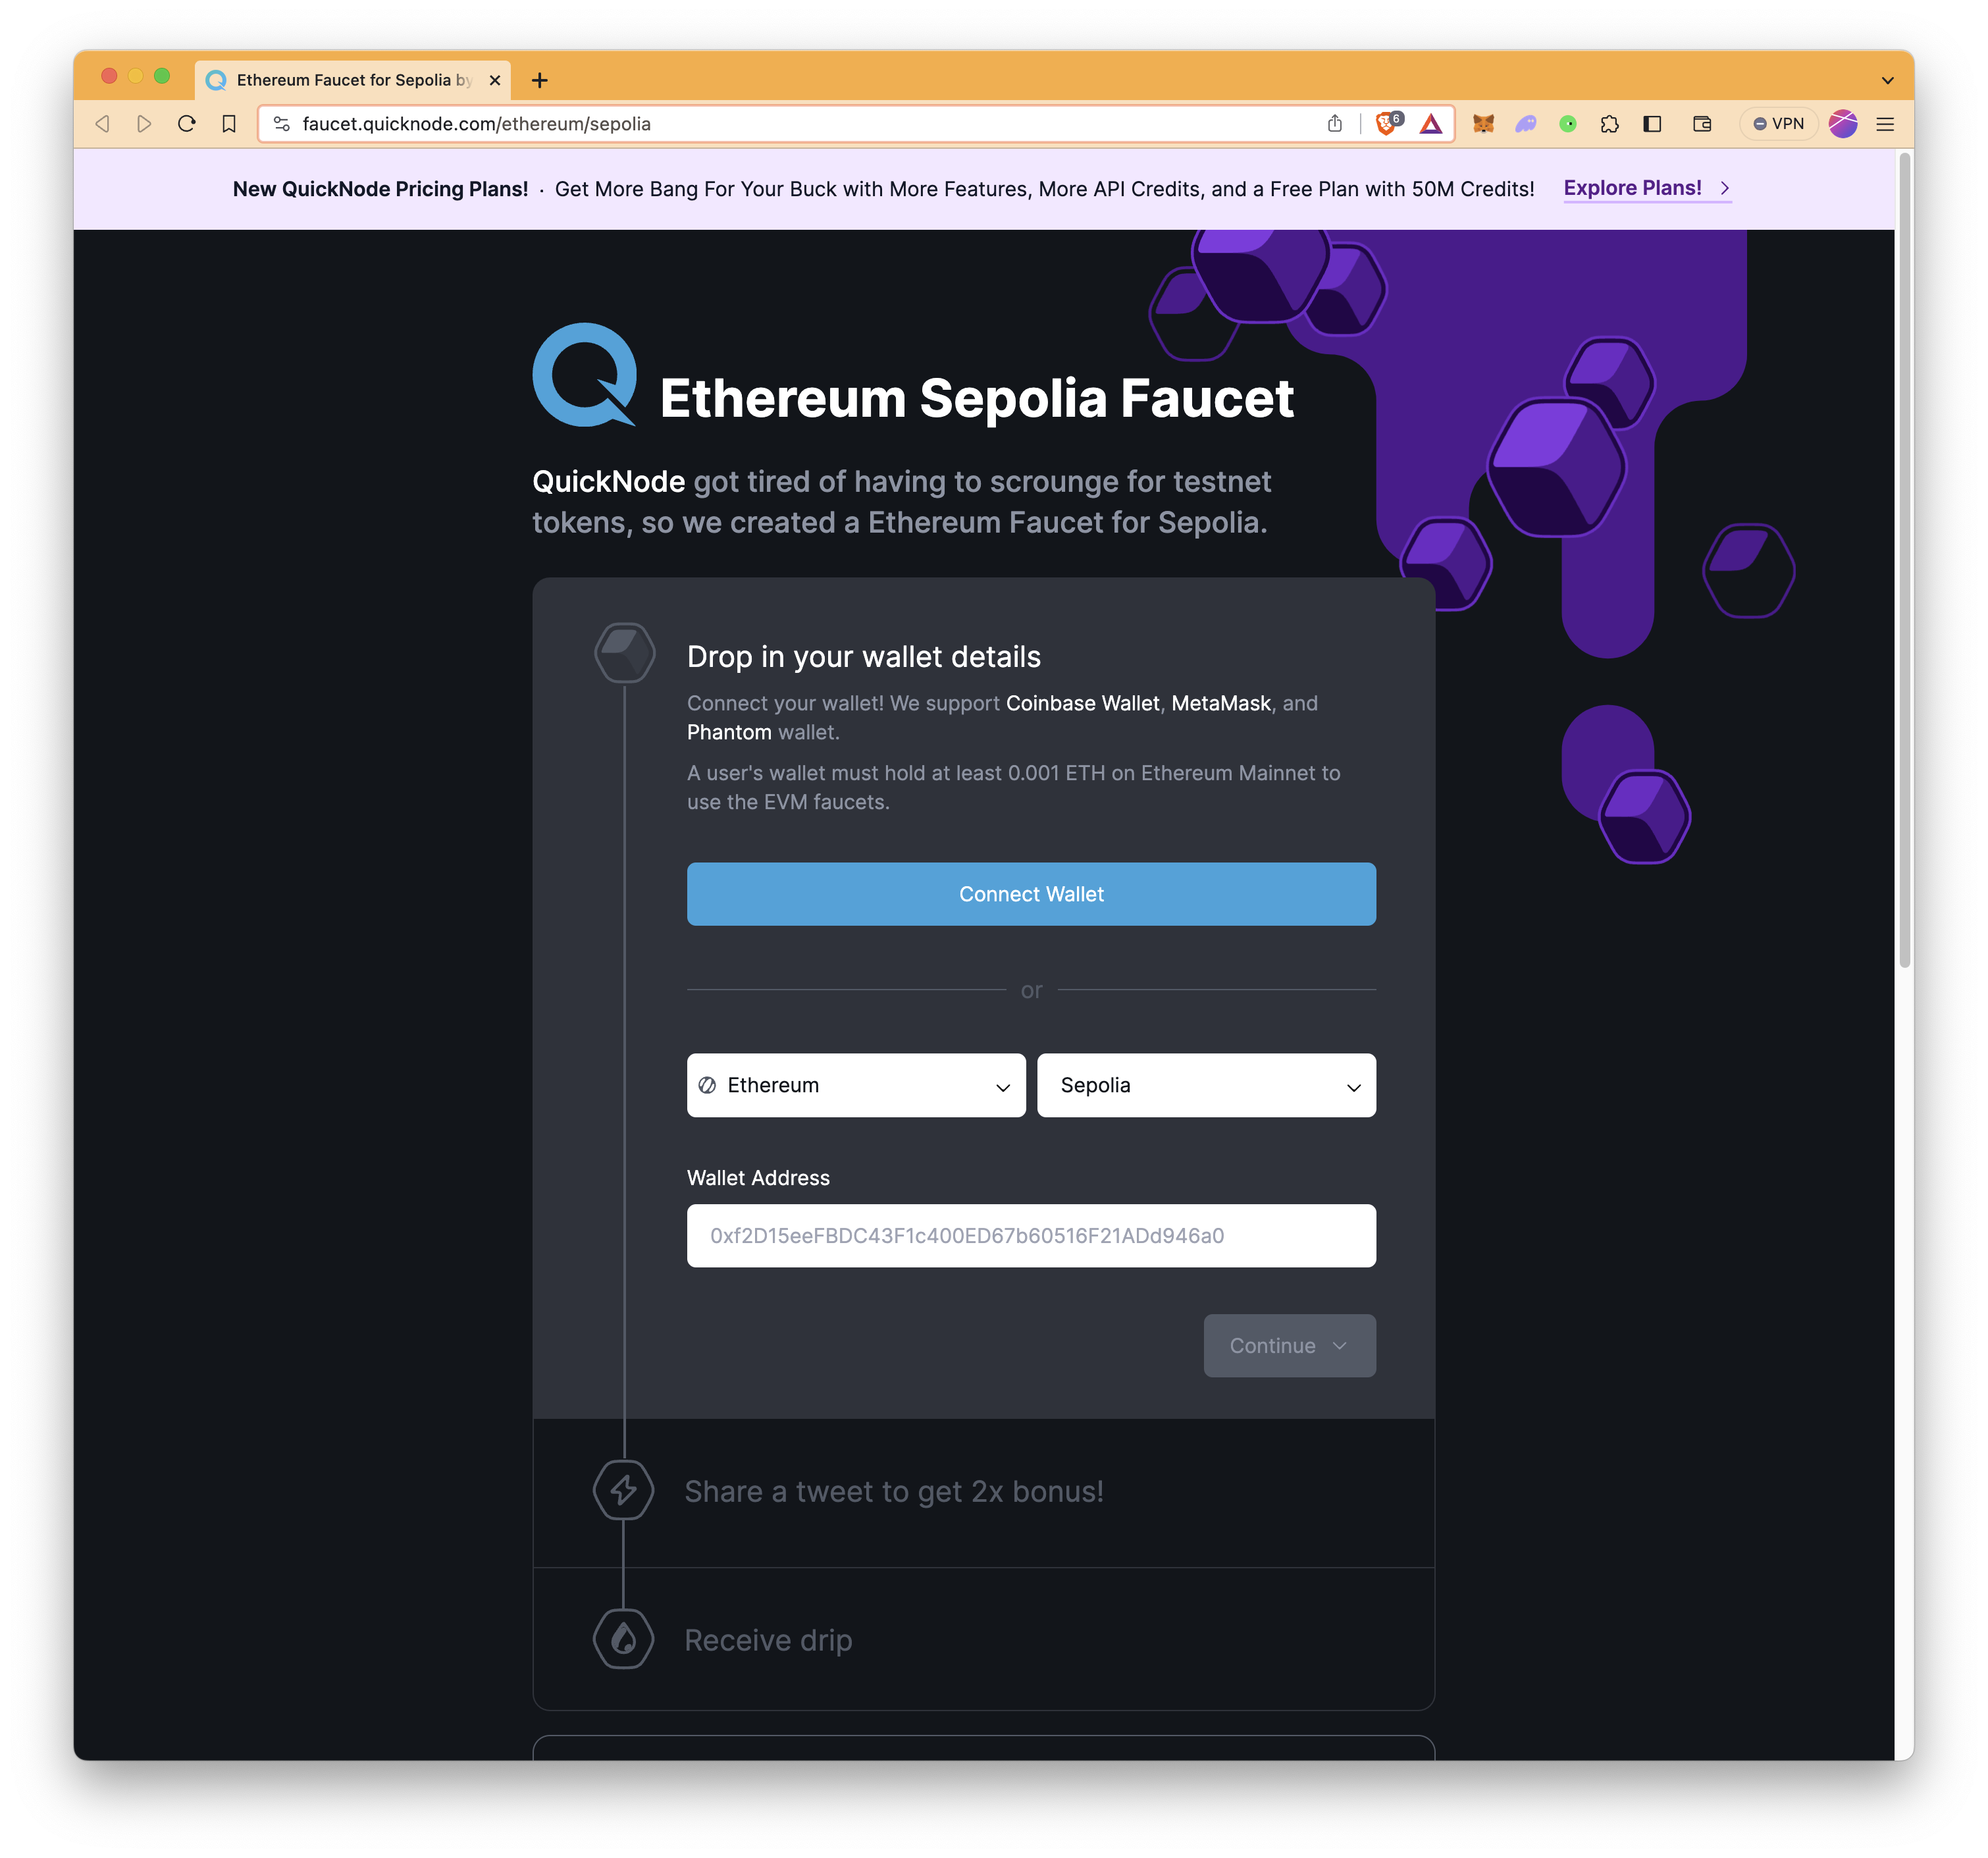
We’ll deploy our contract on the Sepolia testnet. To get started, we will need some test ETH in our MetaMask wallet, which we saw in the last step.
Navigate to the QuickNode Multi-Chain Faucet and connect your wallet or paste in your wallet address. You'll need to select the Ethereum chain and Sepolia network and then request funds.
Note: you will need a Ethereum mainnet balance of at least 0.001 ETH in order to be eligible to use the faucet.
Setting Up a QuickNode Ethereum Endpoint
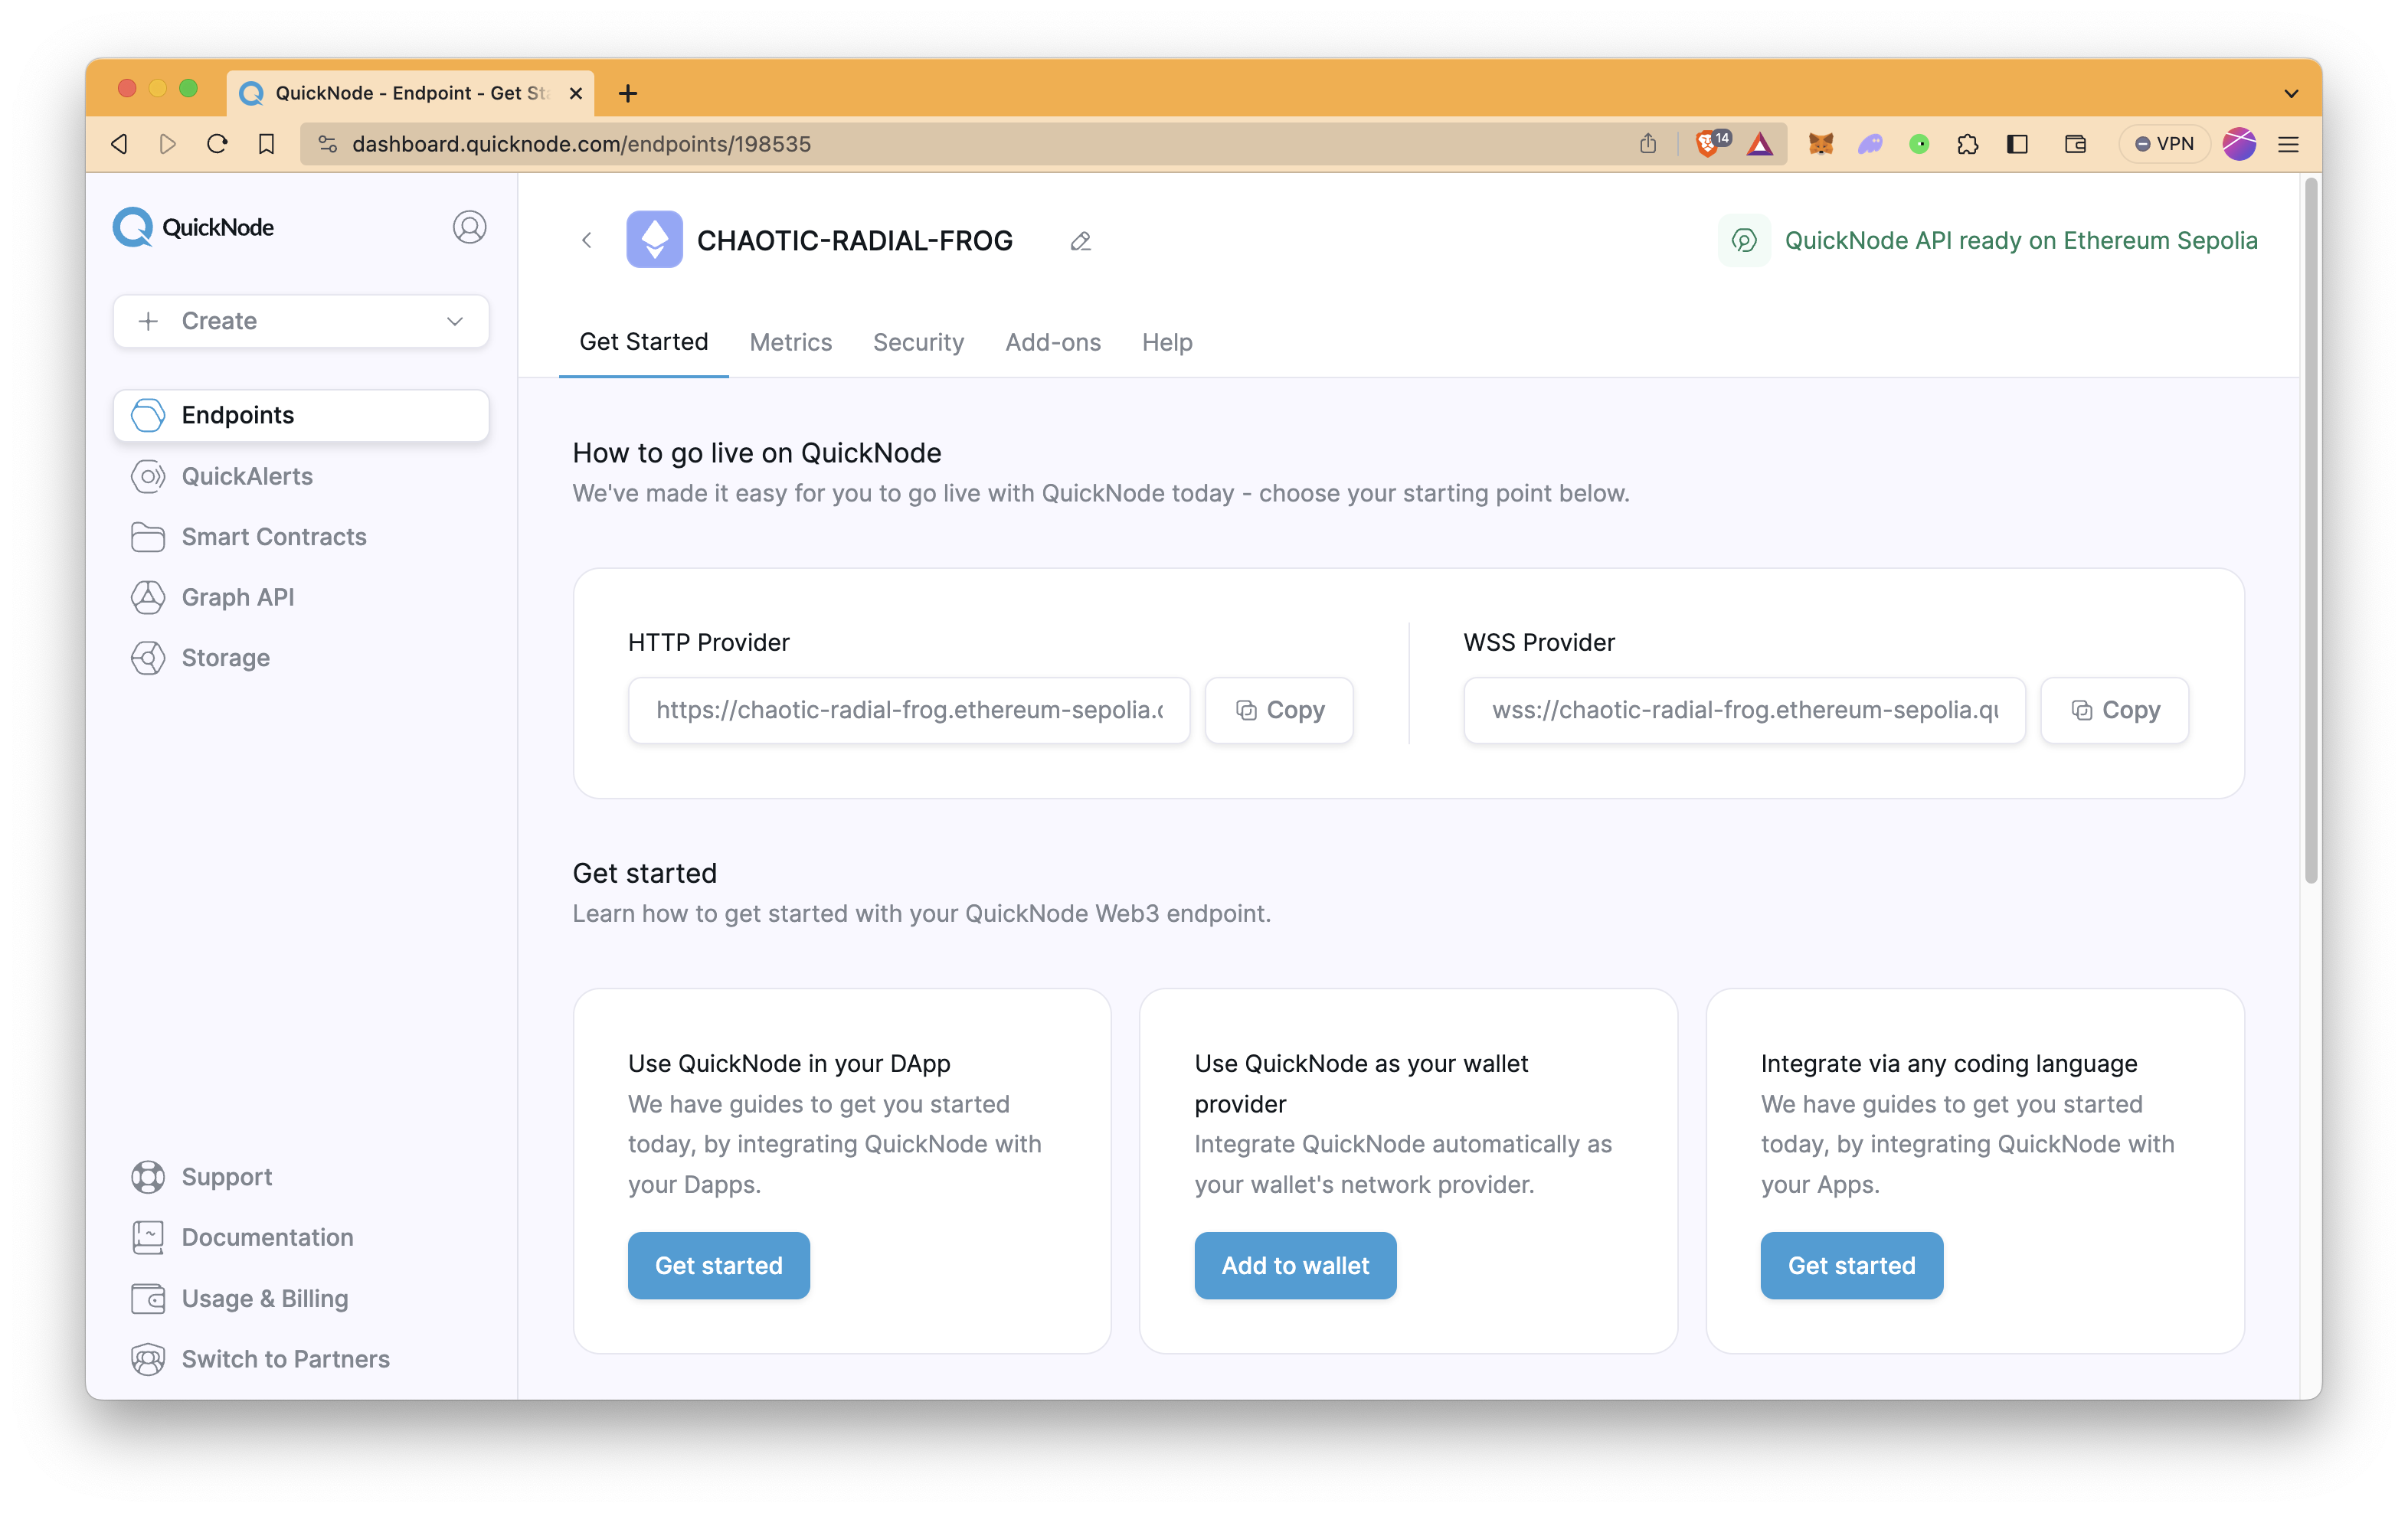
To deploy our contract on Ethereum’s Sepolia blockchain we will need access to an Ethereum Sepolia node. For that, we could use pretty much any Ethereum client such as Geth or OpenEthereum (fka Parity). Since that is a bit too involved for deploying a single contract, we'll just create a free QuickNode account here and easily generate an Ethereum endpoint. After you have created your free Ethereum Sepolia endpoint, keep your HTTP Provider URL handy as you'll need it in the next section.
Setting Up the Config File
Open the hardhat.config.js file and paste the following into it:
require("@nomiclabs/hardhat-waffle");

const endpointUrl = "ADD_YOUR_QUICKNODE_URL_HERE";
const privateKey = "ADD_YOUR_PRIVATE_KEY_HERE";

module.exports = {
  solidity: "0.8.21",
  networks: {
    sepolia: {
      url: endpointUrl,
      accounts: [privateKey],
    },
  },
};
Replace ADD_YOUR_PRIVATE_KEY_HERE with the private key we obtained in the previous step and replace ADD_YOUR_QUICKNODE_URL_HERE with the HTTP node URL we obtained in the previous step, and save the file.
Explanation of the code above:
-
Line 1: Importing the hardhat-waffle package.
-
Line 3-4: Defining the endpoint URL and private key.
-
Line 6-14: Mentioning Solidity version and defining the network sepolia.
Creating Contract
Now, for our contract, create a new directory contracts and place a new file HelloWorld.sol inside it.
mkdir contracts && echo > contracts/HelloWorld.sol
Copy-paste the following code into your HelloWorld.sol Solidity file:
// SPDX-License-Identifier: MIT
pragma solidity ^0.8.0;

contract HelloWorld {

    string saySomething;

    constructor() {
        saySomething = "Hello World!";
    }

    function speak() public view returns(string memory) {
        return saySomething;
    }
}
Explanation of the code above:
- Line 1: Specifying SPDX license type, which is an addition after Solidity ^0.6.8.
Whenever the source code of a smart contract is made available to the public, these licenses can help resolve/avoid copyright issues. If you do not wish to specify any license type, you can use a special license UNLICENSED or simply skip the whole comment (it won’t result in an error, just a warning).
-
Line 2: Declaring the Solidity version.
-
Line 4: Starting our contract named
HelloWorld. -
Line 6: Creating a variable
saySomethingof type string. -
Line 8-10: Initiating the constructor and storing the string “Hello World!” in the
saySomethingvariable. -
Line 12-14: Creating a function called
speakof type public, which will return the string stored in thesaySomethingvariable.
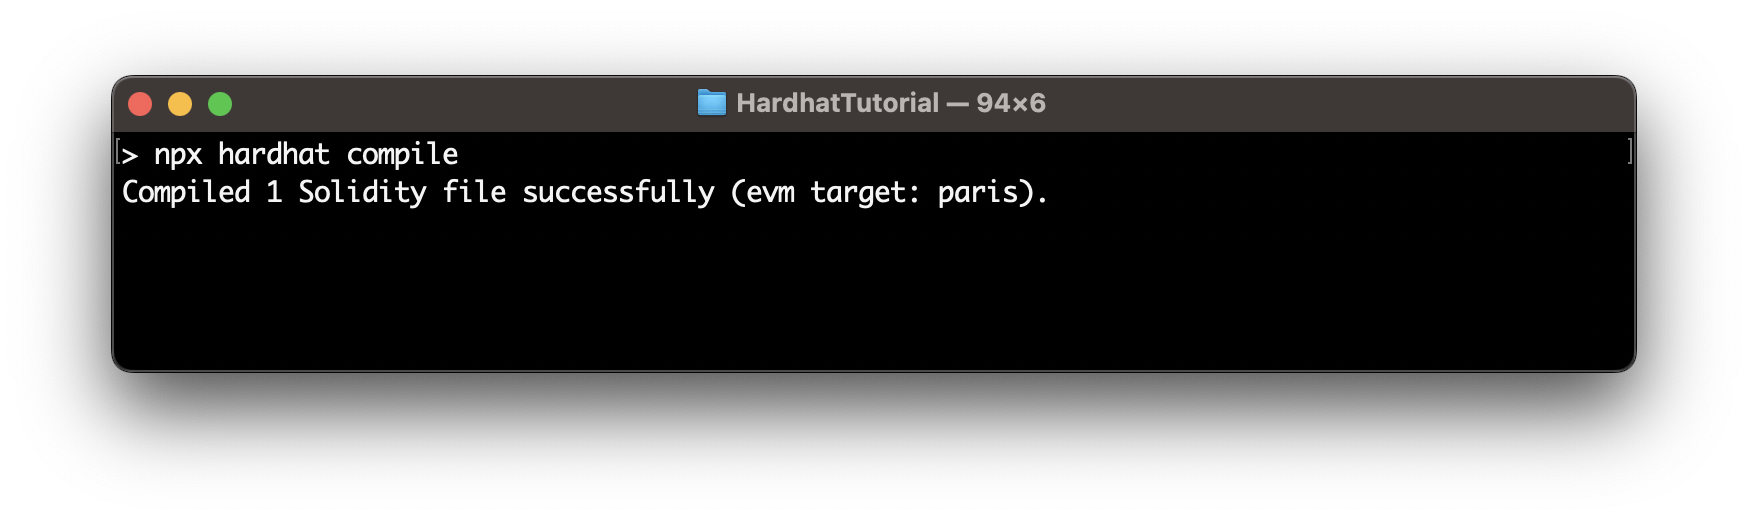
Save the file and compile the contract using the following Hardhat command.
npx hardhat compile
If your contract compiles successfully, it will give an output like this:
Deploying the Hello World Smart Contract
Now to deploy our contract, let’s create a deploy.js file in a new directory named scripts.
mkdir scripts && echo > scripts/deploy.js
Copy-paste the following into your deploy.js file:
async function main() {

	const [deployer] = await ethers.getSigners();

	console.log(
	"Deploying contracts with the account:",
	deployer.address
	);

	const HelloWorld = await ethers.getContractFactory("HelloWorld");
	const contract = await HelloWorld.deploy();

	console.log("Contract deployed at:", contract.address);

	const saySomething = await contract.speak();

	console.log("saySomething value:", saySomething);
}

main()
  .then(() => process.exit(0))
  .catch(error => {
	console.error(error);
	process.exit(1);
  });
Explanation of the code above.
-
Line 1: Starting an async function called
main. -
Line 3: Getting the Ethereum address to sign the transaction and storing it in the deployer address.
-
Line 5-8: Printing the Ethereum address along with a string to the console.
-
Line 10: Calling the ethers.js method ContractFactory. This will look for the
HelloWorld.solfile, and return an instance that we can useContractFactorymethods on. -
Line 11: Calling deploy on
ContractFactoryto deploy the contract. -
Line 13: Printing the address of the deployed contract to the console.
-
Line 15: Calling the function
speakof the deployed contract. -
Line 17: Printing the return value of the function
speakto the console. -
Line 20: Invoking the function
main. -
Line 21-24: Checking for error, printing if any error, and exiting the process.
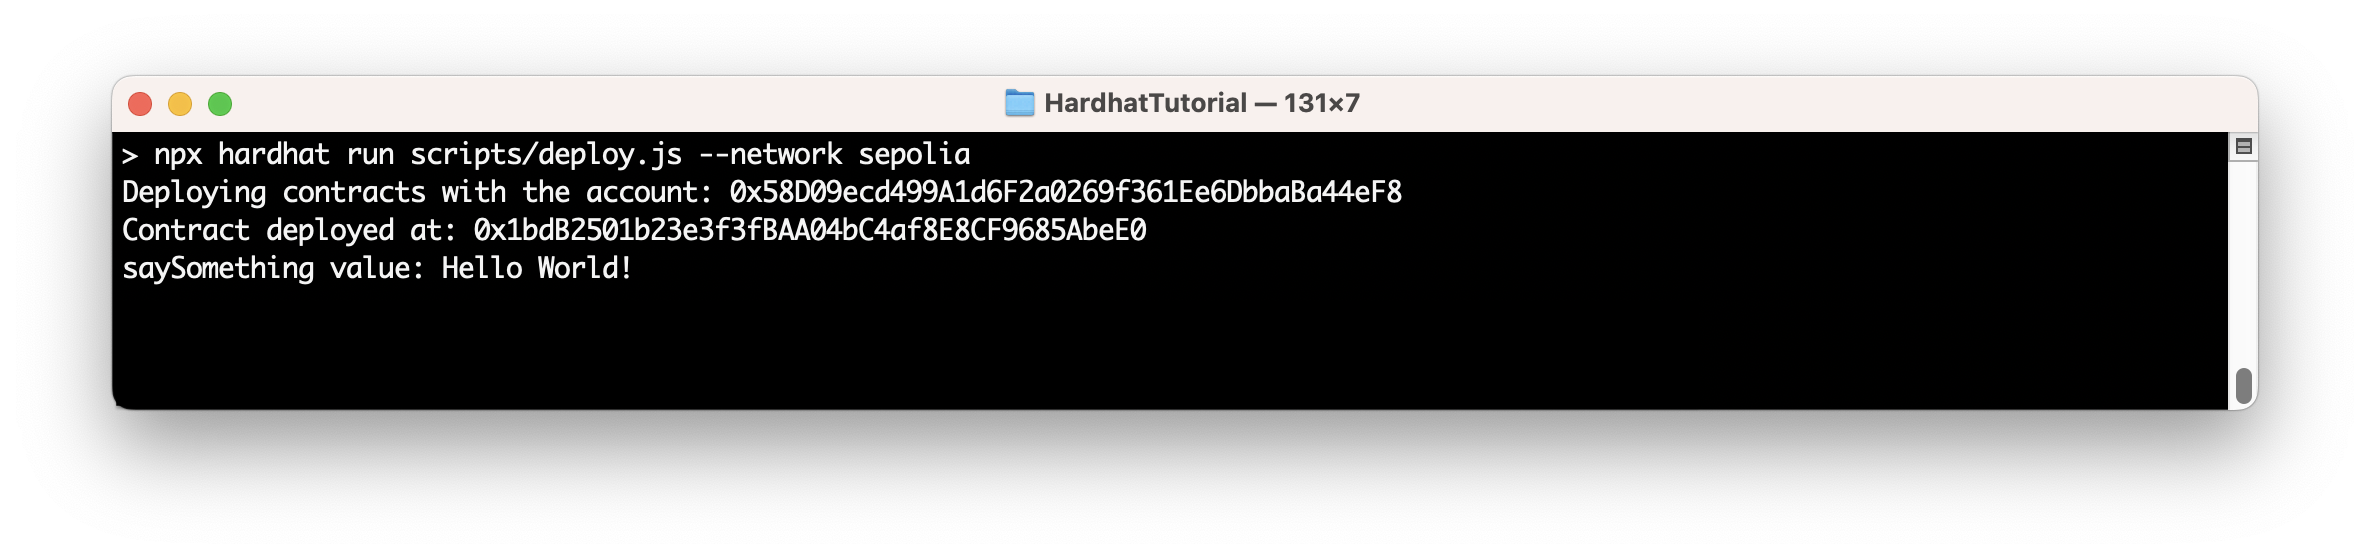
Save the file and run the following to deploy the contract.
npx hardhat run scripts/deploy.js --network sepolia
On the successful deployment of the contract, you will see an output containing the deployed contract’s address and the return value of the speak function, value of saySomething.
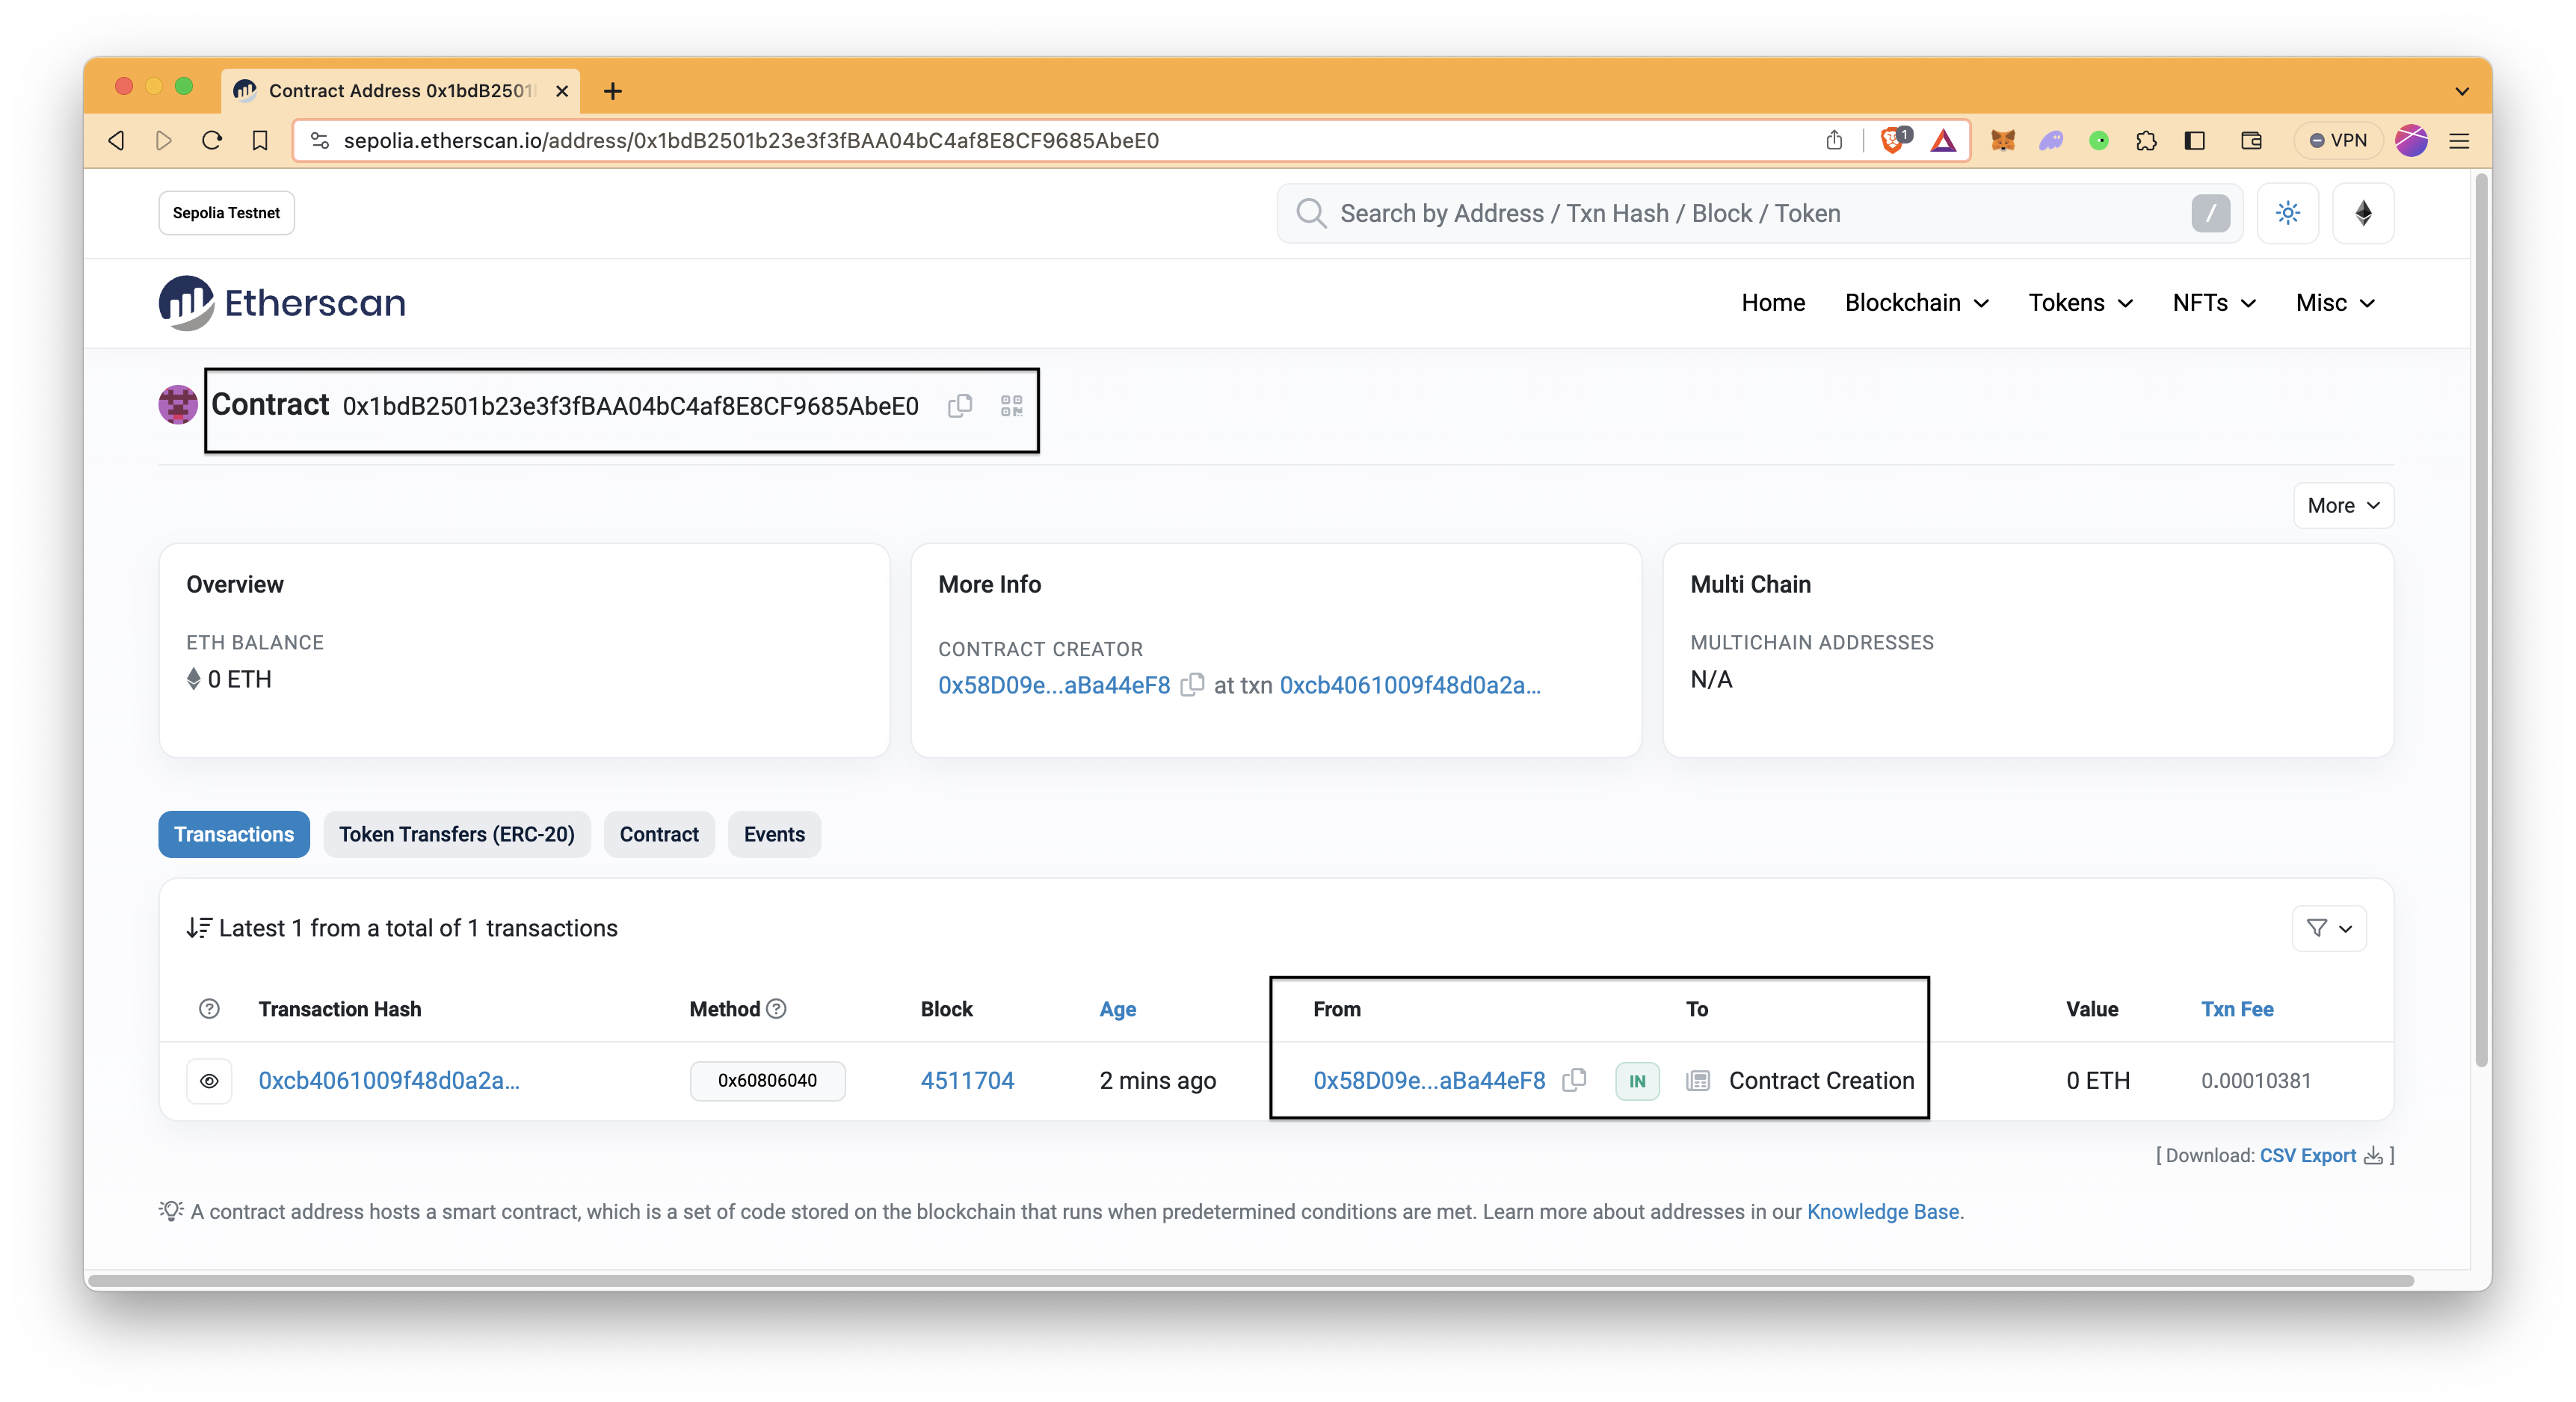
We can verify the deployment by copying and pasting the deployed contract’s address in Sepolia Etherscan’s search bar. This will display information about the deployed contract.
Conclusion
There you have it! You have now mastered the basics of creating, compiling, and deploying smart contracts with Hardhat. But that's not all – Hardhat also offers tools for testing and debugging your code. For a deeper dive, check out Hardhat’s official documentation.
Subscribe to our newsletter for more articles and guides on Ethereum. If you have any questions, feel free to use our dedicated channel on Discord or provide feedback using the form below. Stay up to date with the latest by following us on Twitter and our Telegram announcement channel.
We ❤️ Feedback!
Let us know if you have any feedback or requests for new topics. We'd love to hear from you.