11 min read
This guide includes references to either Truffle or Ganache, which are no longer actively maintained. We recommend exploring the Hardhat framework as an alternative, as Consensys has established a new partnership with Hardhat after sunsetting Truffle and Ganache. You can find our Hardhat-related guides here. If you’d like to see an updated version of this guide, please let us know!
Overview
The success story of blockchain started with Bitcoin and was given wings by Ethereum. Ethereum was the first blockchain to introduce programmable software to the immutable ledger; these programs that live on the blockchain are called smart contracts. Solidity is the programming language where you write smart contracts.
To build smart contracts we need a development environment to work in. Here you have two options. You can either setup your development environment in the browser, or on your machine. In the former's case we have Remix IDE and EthFiddle. And when it comes to the latter we have Hardhat and Truffle. This article will focus on a local environment to develop, test, and deploy our smart contracts.
Prerequisite
- NodeJS
- VS Code editor
- Terminal familiarity
- A curious mind
What is Solidity?
According to the official docs:
Solidity is an object-oriented, high-level language for implementing smart contracts. Smart contracts are programs which govern the behavior of accounts within the Ethereum state.
Solidity takes its inspiration from some of the popular programming languages like C++, JavaScript, and Python. It is an ideal choice to develop smart contracts. Some well-known DeFi projects that leverage Solidity for designing smart contracts are UniSwap, SushiSwap, and Aave. Now that you know some of the places Solidity is used, let us break down some its characteristics.
-
It is a statically typed language.
-
It supports Object-Oriented core paradigms like inheritance, user-defined datatype, libraries, and encapsulation.
-
Solidity's compiler compiles the smart contract down to Bytecode and ABI. Bytecode is the low-level language interpreted by Ethereum Virtual Machine(EVM) to execute the functions. On the other hand, ABI or Application Binary Interface is a JSON file used by the web application to call the smart contract functions.
Environments to Write Solidity Smart Contracts
Now that you are geared up with a basic understanding of Solidity, let's talk of places where we can write and execute our smart contracts. Let's start with online editors.
1. Remix
Remix is a popular browser-based IDE (Integrated Development Environment) to write your smart contracts. It even enables you to compile and deploy your contract. By default, it provides the Javascript Virtual Machine, which simulates the Ethereum Virtual Machine. With the recent London upgrade, you can see two versions of Javascript Virtual Machine: Berlin and London. They each provide 15 Ethereum addresses with 100 dummy Ether. These are ideal for testing, deploying, and otherwise interacting with your contract functions. The next step is to deploy your contract to any of the test networks using Injected Web3. This enables you to connect to your MetaMask wallet, and gives a feel for how the functions will work on the mainnet. The last option, Web3 Provider, you can use to provide a custom provider using Geth. It is used to test contract functions in a private Ethereum Blockchain.
2. EthFiddle
EthFiddle is another well-known online editor by Looms Network. It has limited functionality compared to Remix, but developers use it widely to test their contract functions. You can share your contracts known as fiddles with your fellow developers.
Now, let's talk about local development. Online editors are good enough when you are learning Solidity or using them for your blogs. But when it comes to production level work, it's recommended to set up a local development environment.
Truffle Suite
Truffle Suite is a famous development suite that makes the smart contract development cycle sweet, just like any dish sizzled with Truffle. In the suite we have -
- Truffle: A development and testing framework for your smart contracts. It manages the complicated stuff for you, so development can be focused on the logic for your smart contract. It enables you to write automated test cases to bulletproof your contract from external attacks. Finally, it provides the necessary support for you to deploy your contract to any network.
- Ganache: Instantly spawn a private Ethereum network with just a few clicks/commands. It comes with both a CLI and GUI. No matter which one you choose, they provide 10 Ethereum accounts with 100 dummy Ether by default. With a few clicks you can set your block time. It also comes with a blockchain explorer to gain deeper insights into any transactions that take place. Ganache is compatible with Truffle and vice-versa. This creates a powerful combination of tools that enable seamless smart contract development.
Truffle overall is a solid choice for development. It shouldn't leave you out in the wind, and plenty of developers rely on it in their everyday work. Next up we will talk about another alternative choice to the Truffle Suite.
Hardhat
Hardhat is an all-around development environment where you can compile, deploy, test, and benchmark your smart contracts. Hardhat implements various toolkits to aid you in smart contract development. The first one to cover is a task. Tasks are commands to be run from your terminal; one example of a task is hardhat deploy , which will deploy your contract to a blockchain network. The second addition to Hardhat's tool belt is the plugin ecosystem. You can use plugins to extend and bend Hardhat to your specific use case. Another unique feature of Hardhat is console.log which enables you to use a JavaScript console. Hardhat even provides the flexibility to override the built-in features and use them at your convenience.
With that in mind, let's get started with testing a sample contract using the Truffle Suite and Hardhat.
Truffle
Installation
1. Create a folder named Hero.
2. Inside the folder, open your terminal.
3. In the terminal, type:
npm install -g truffle
truffle init
## You may need to run this if on MacOS or Linux
sudo npm install -g truffle
truffle init
4. You can open the project folder in your favorite editor. The initial folder structure will look something like this:

5. Inside the contracts folder, create a file named Hero.sol.
6. If you are seeing the Solidity code for the first time, you can checkout our comprehensive guide on how to write an Ethereum smart contract using Solidity. Otherwise, go ahead and copy and paste the following code.
// SPDX-License-Identifier: UNLICENSED
pragma solidity >=0.7.0 <0.9.0;

contract Hero{
    address owner;
    string hero;
    constructor(string memory _hero)
    {
        owner=msg.sender;
        hero=_hero;
    }

    function setHero(string memory _hero)public
    {
        require(msg.sender==owner,"Not the owner");
        hero =_hero;
    }
    function getHero() public view returns(string memory)
    {
        return hero;
    }

}
7. Inside the truffle-config.json, use the following code snippet to define your compiler verison. We will be using 0.8.1. You can remove all of the starter code in the file.
module.exports = {
	compilers: {
		solc: {
			version: '0.8.1',
		},
	},
}
8.Now, head back to your terminal and type:
truffle compile
It should compile your code without any error.
9. Now, you should see a build folder with two json files. Each houses the ABI code and the Bytecode of the smart contracts. If you have made this far, just give yourself a pat on the back.
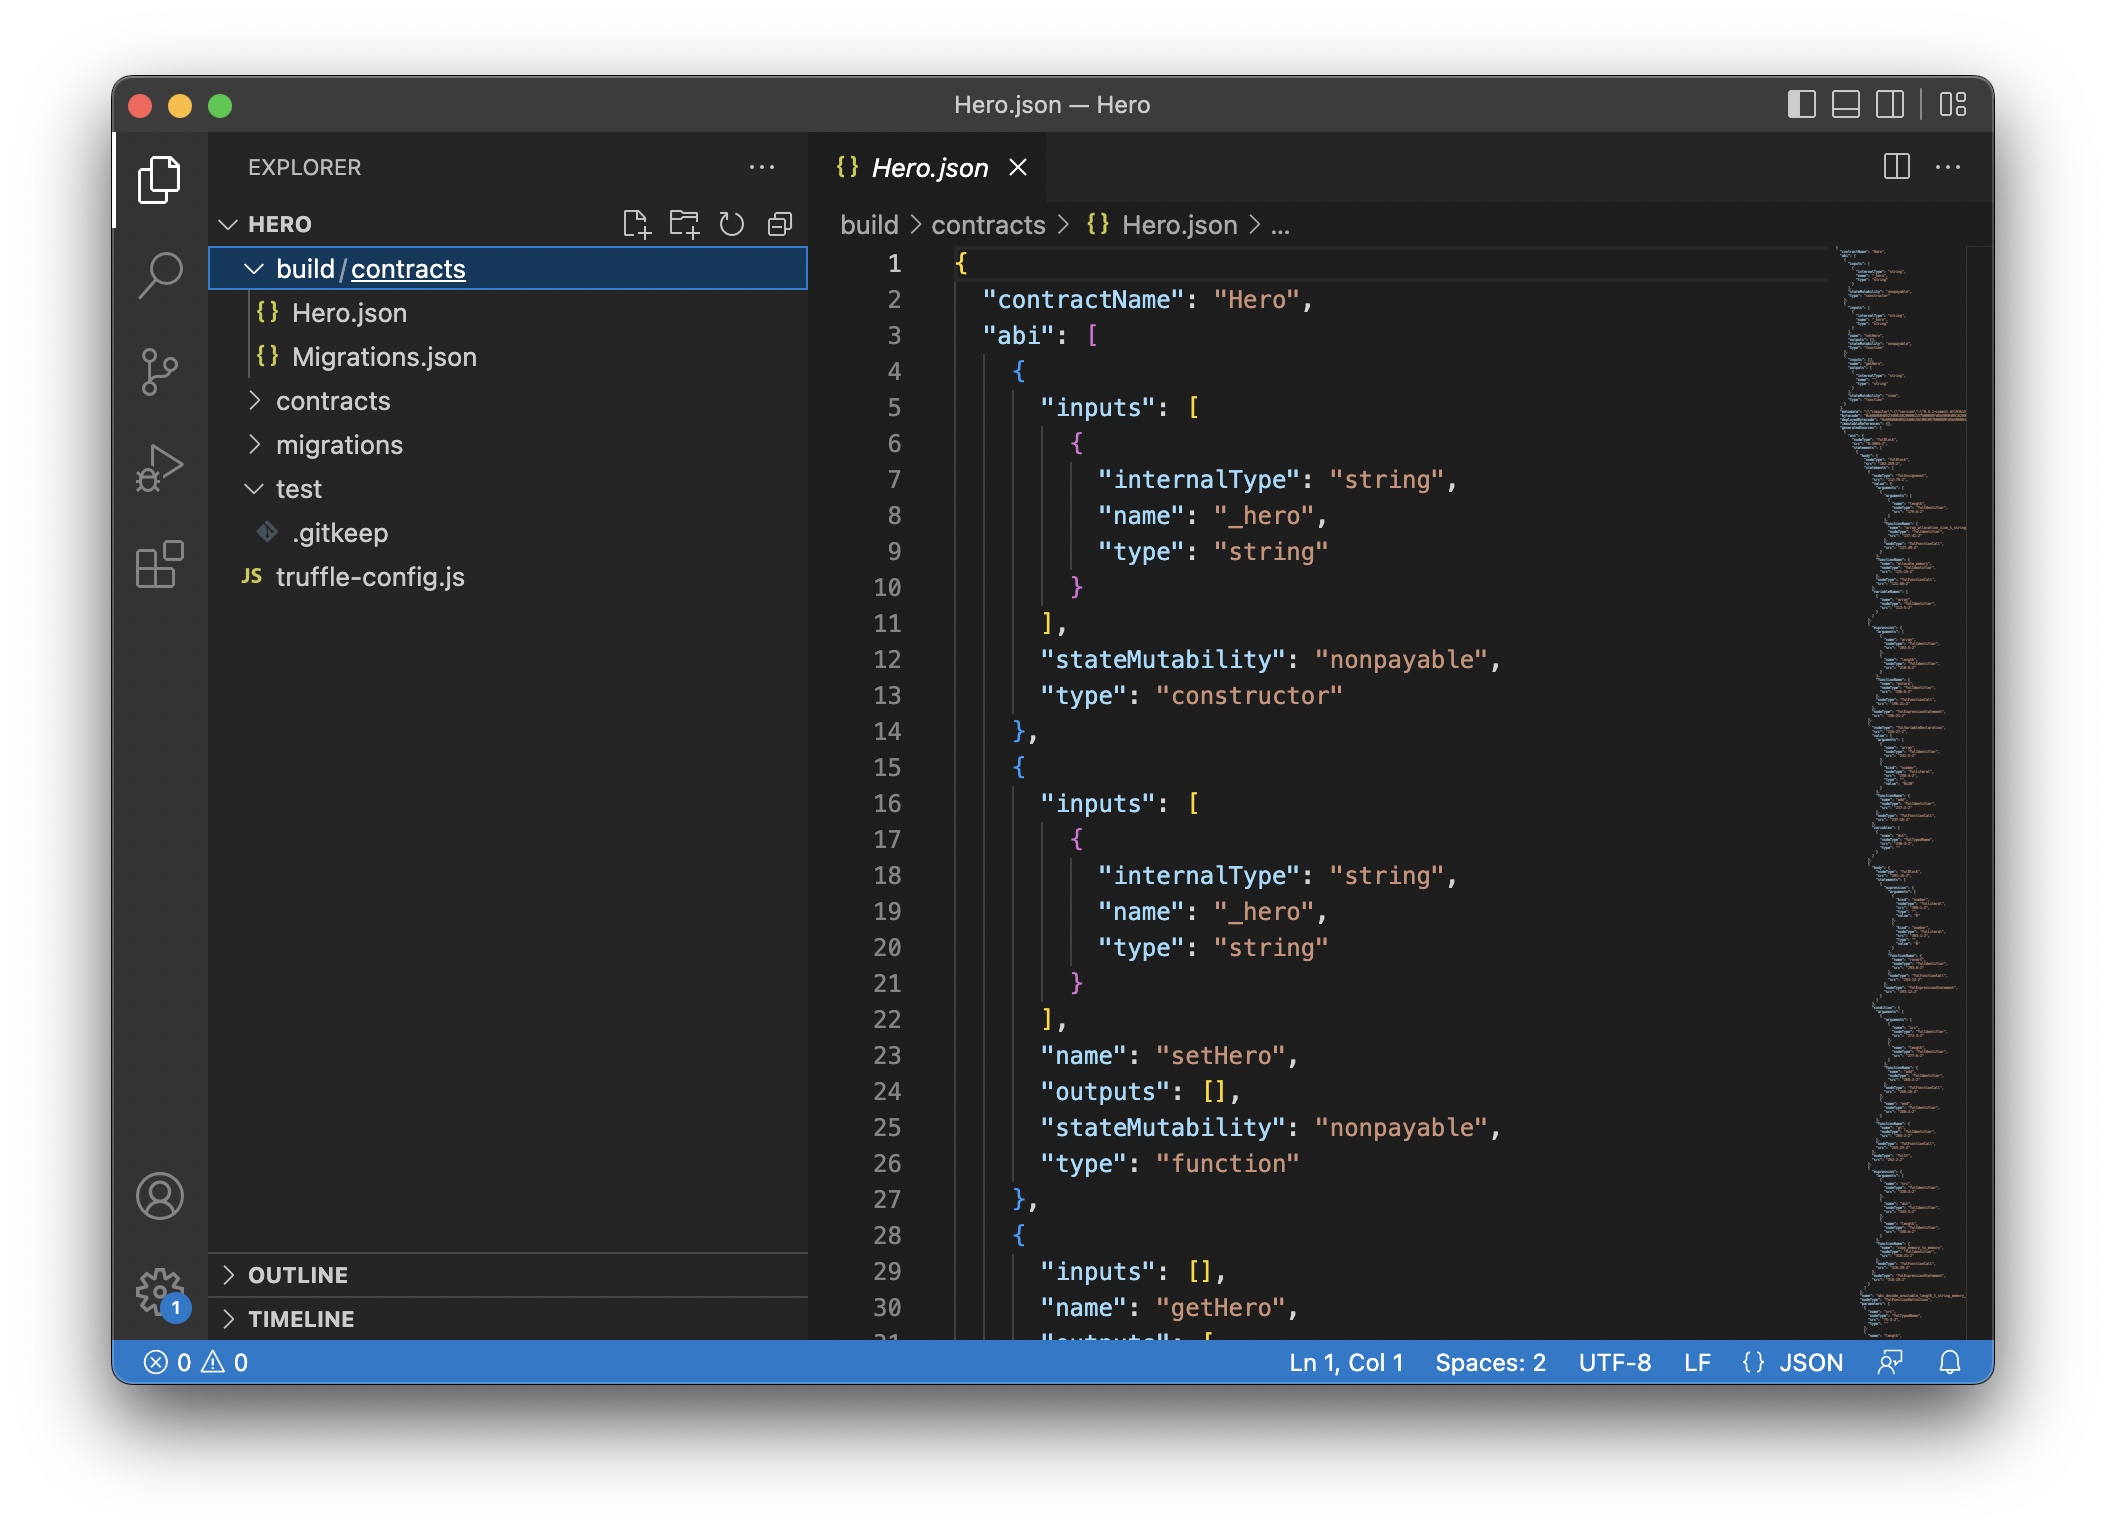
The project after running Truffle compile
Deploying to Ganache
Now that our contract is ready and configured our truffle let's deploy the contract to Ganache and test its functionalities.
1. Now, let's deploy to our local Ethereum Network, which Ganache will provide.
2. For this, you can download Ganache from the official website and install it. After that, you can fire it up. It should show a screen like this
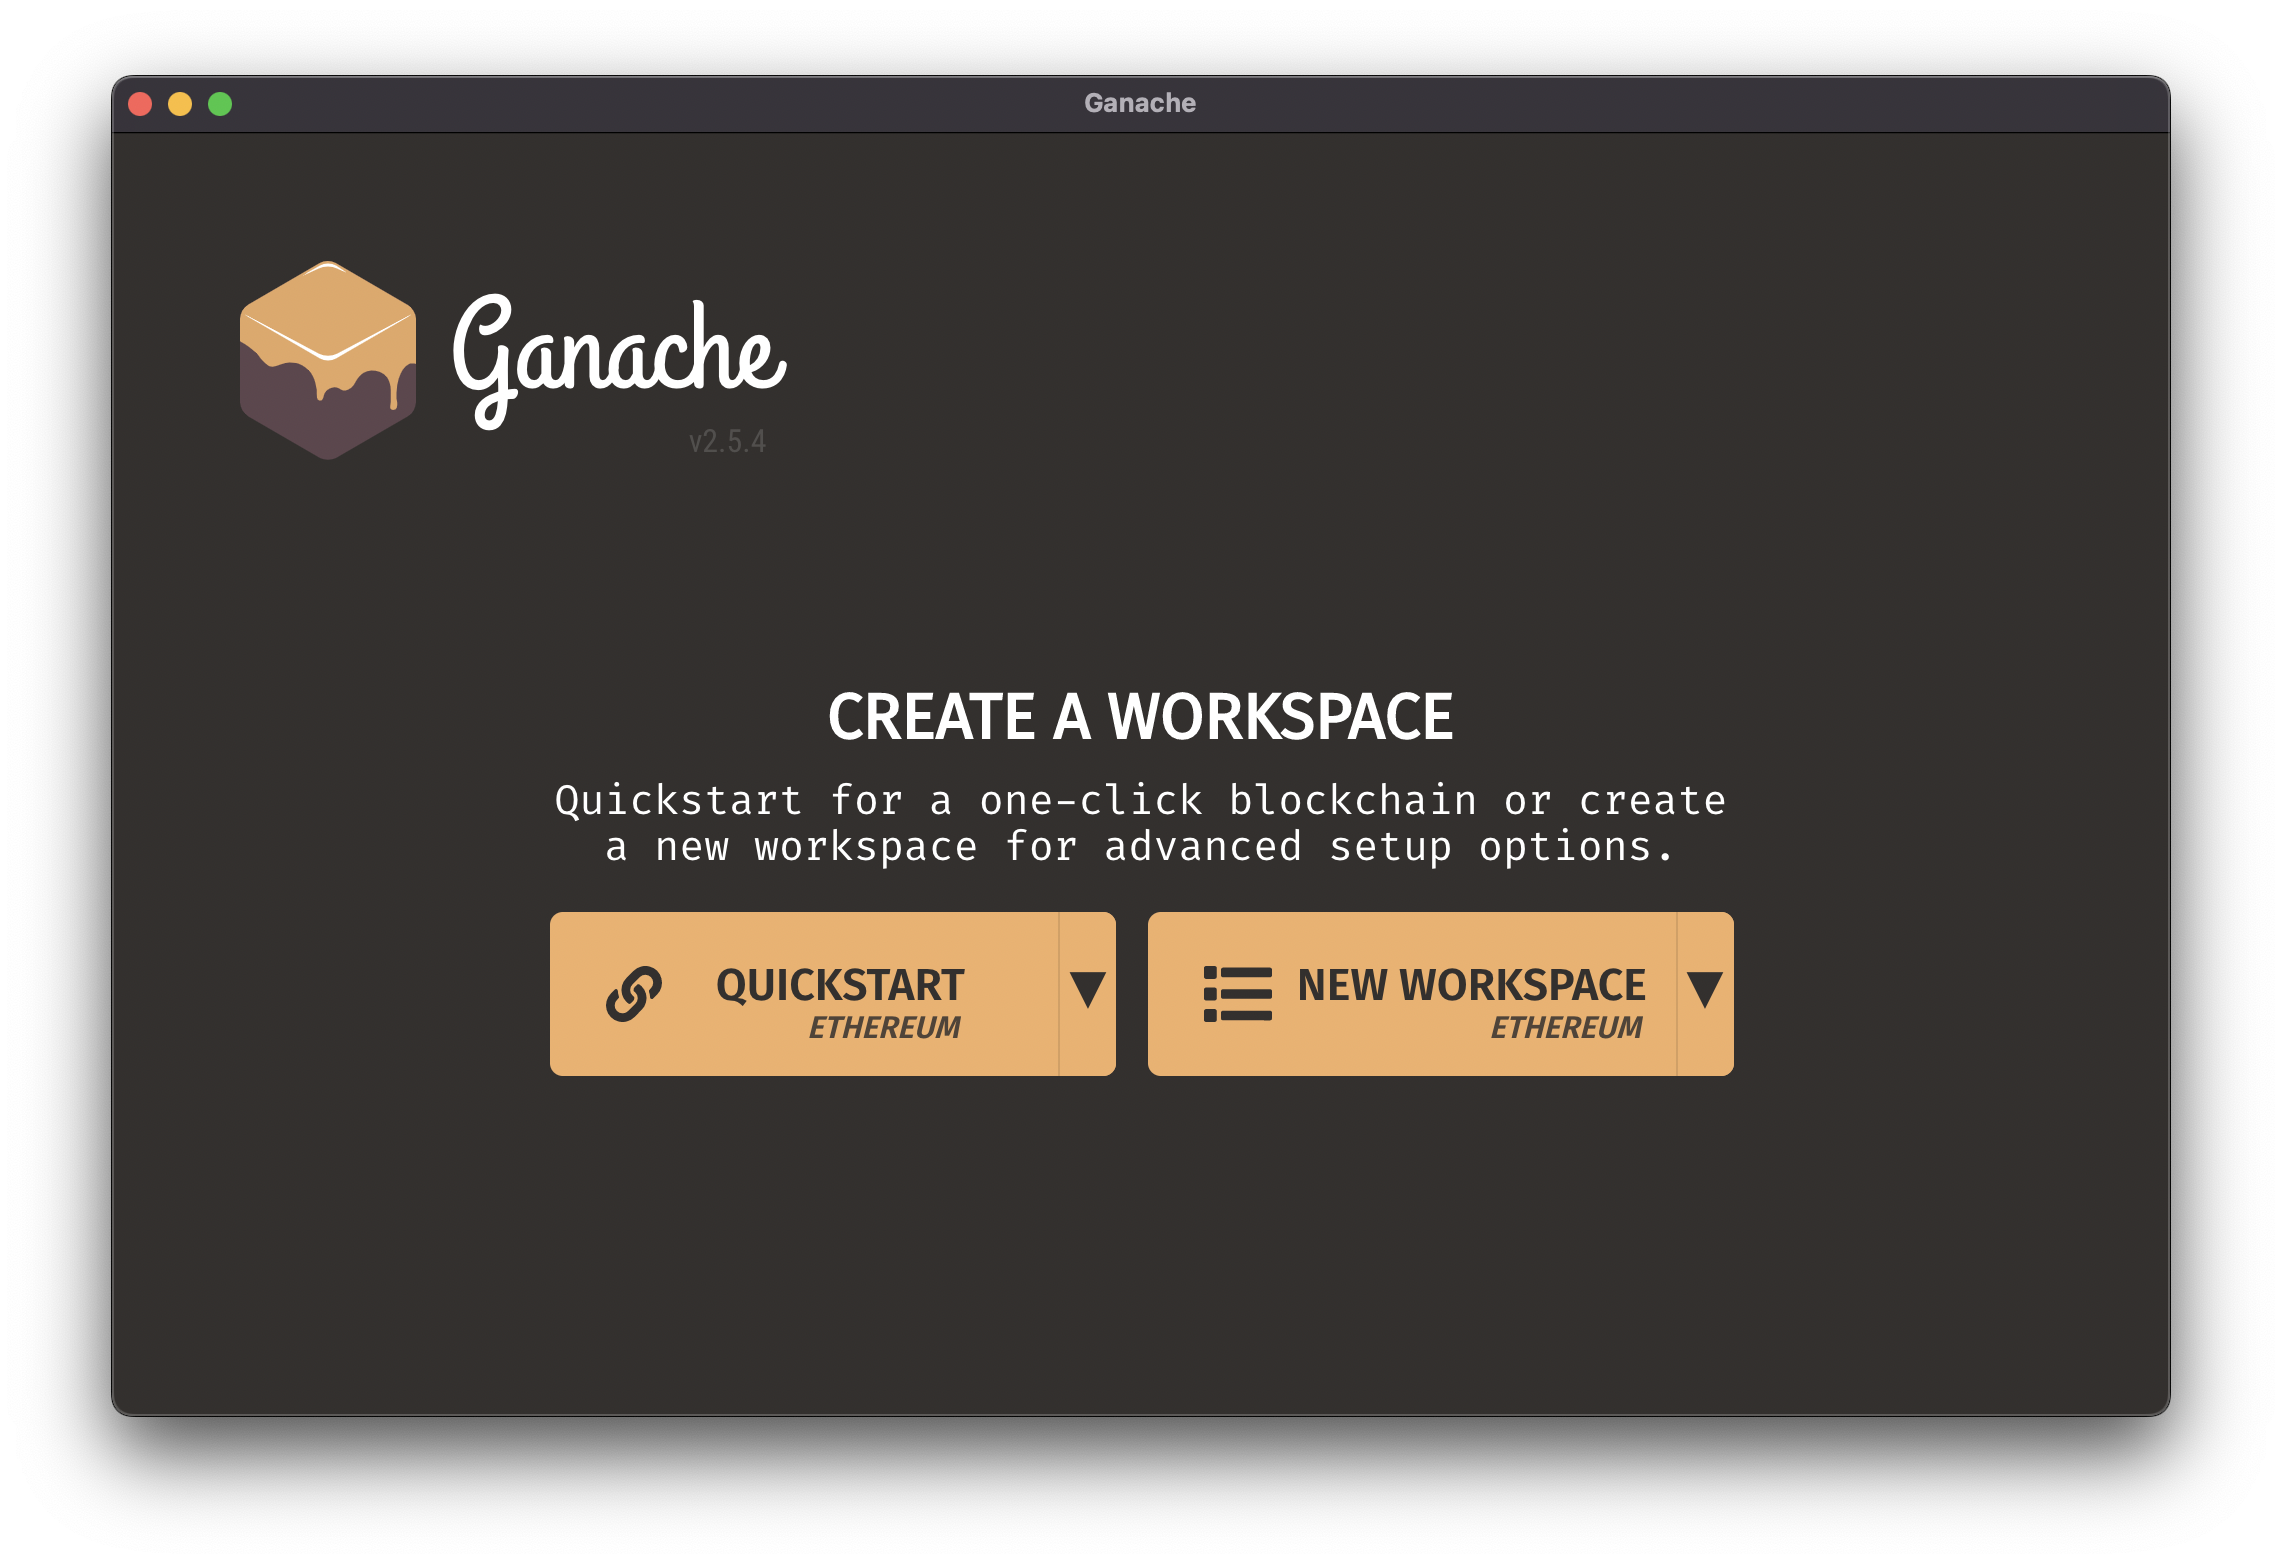
3. Click on QUICKSTART, it should open a screen with 10 wallets.
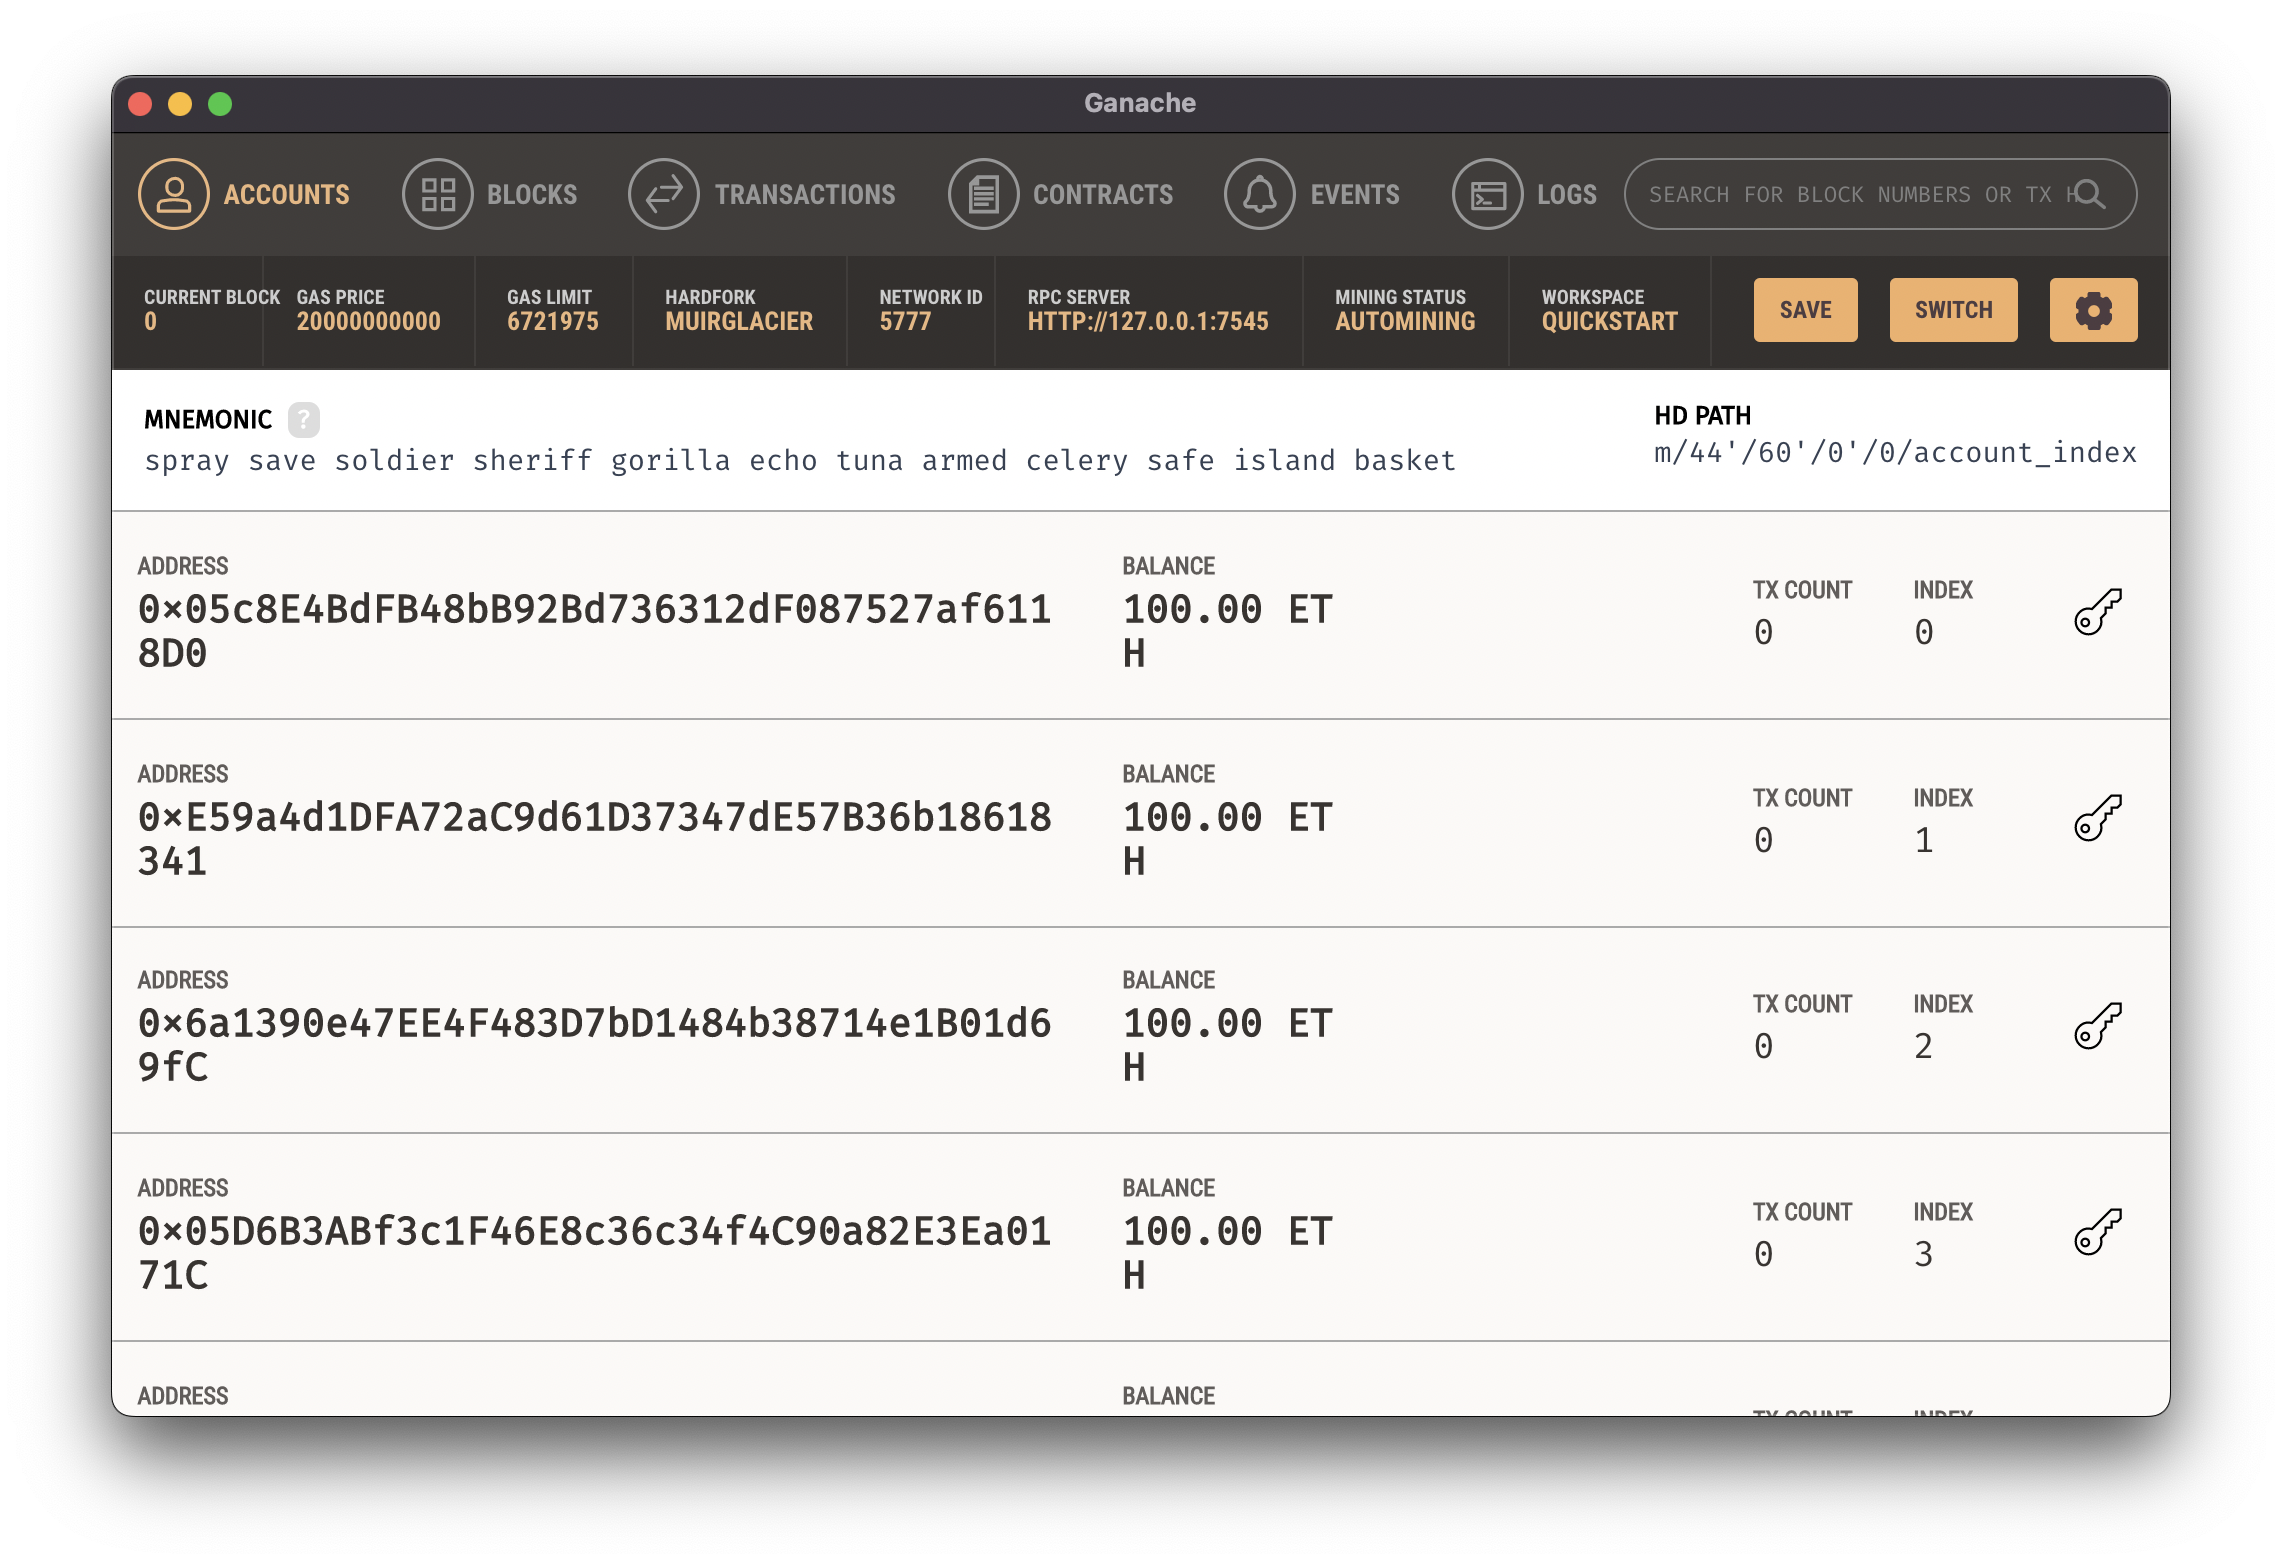
4. Keep note of the port number visible under RPC Server. In this case, its 7545.
5. Now, we will have to update the truffle-config.js to enable deploying to the local network.
module.exports = {
	networks: {
		development: {
			host: '127.0.0.1',
			port: 7545,
			network_id: '*',
		},
	},
	compilers: {
		solc: {
			version: '0.8.1',
		},
	},
}
6. Now, we have to develop a migration script for deploying our contract. The following code snippet will enable you to do that In the migrations folder delete the starter file and create a new file: 2_deploy_contract.js.
var Hero = artifacts.require('Hero')
module.exports = function (deployer) {
	deployer.deploy(Hero, 'Hulk')
}
- Line 1: It imports the artifacts from the build folder
- Line 2: It exports the module which takes deployer as a function parameter.
- Line 3: The deployer deploys the contract. It takes the Hero artifact we defined earlier, and we are passing the constructor parameter. In this case, we are passing Hulk.
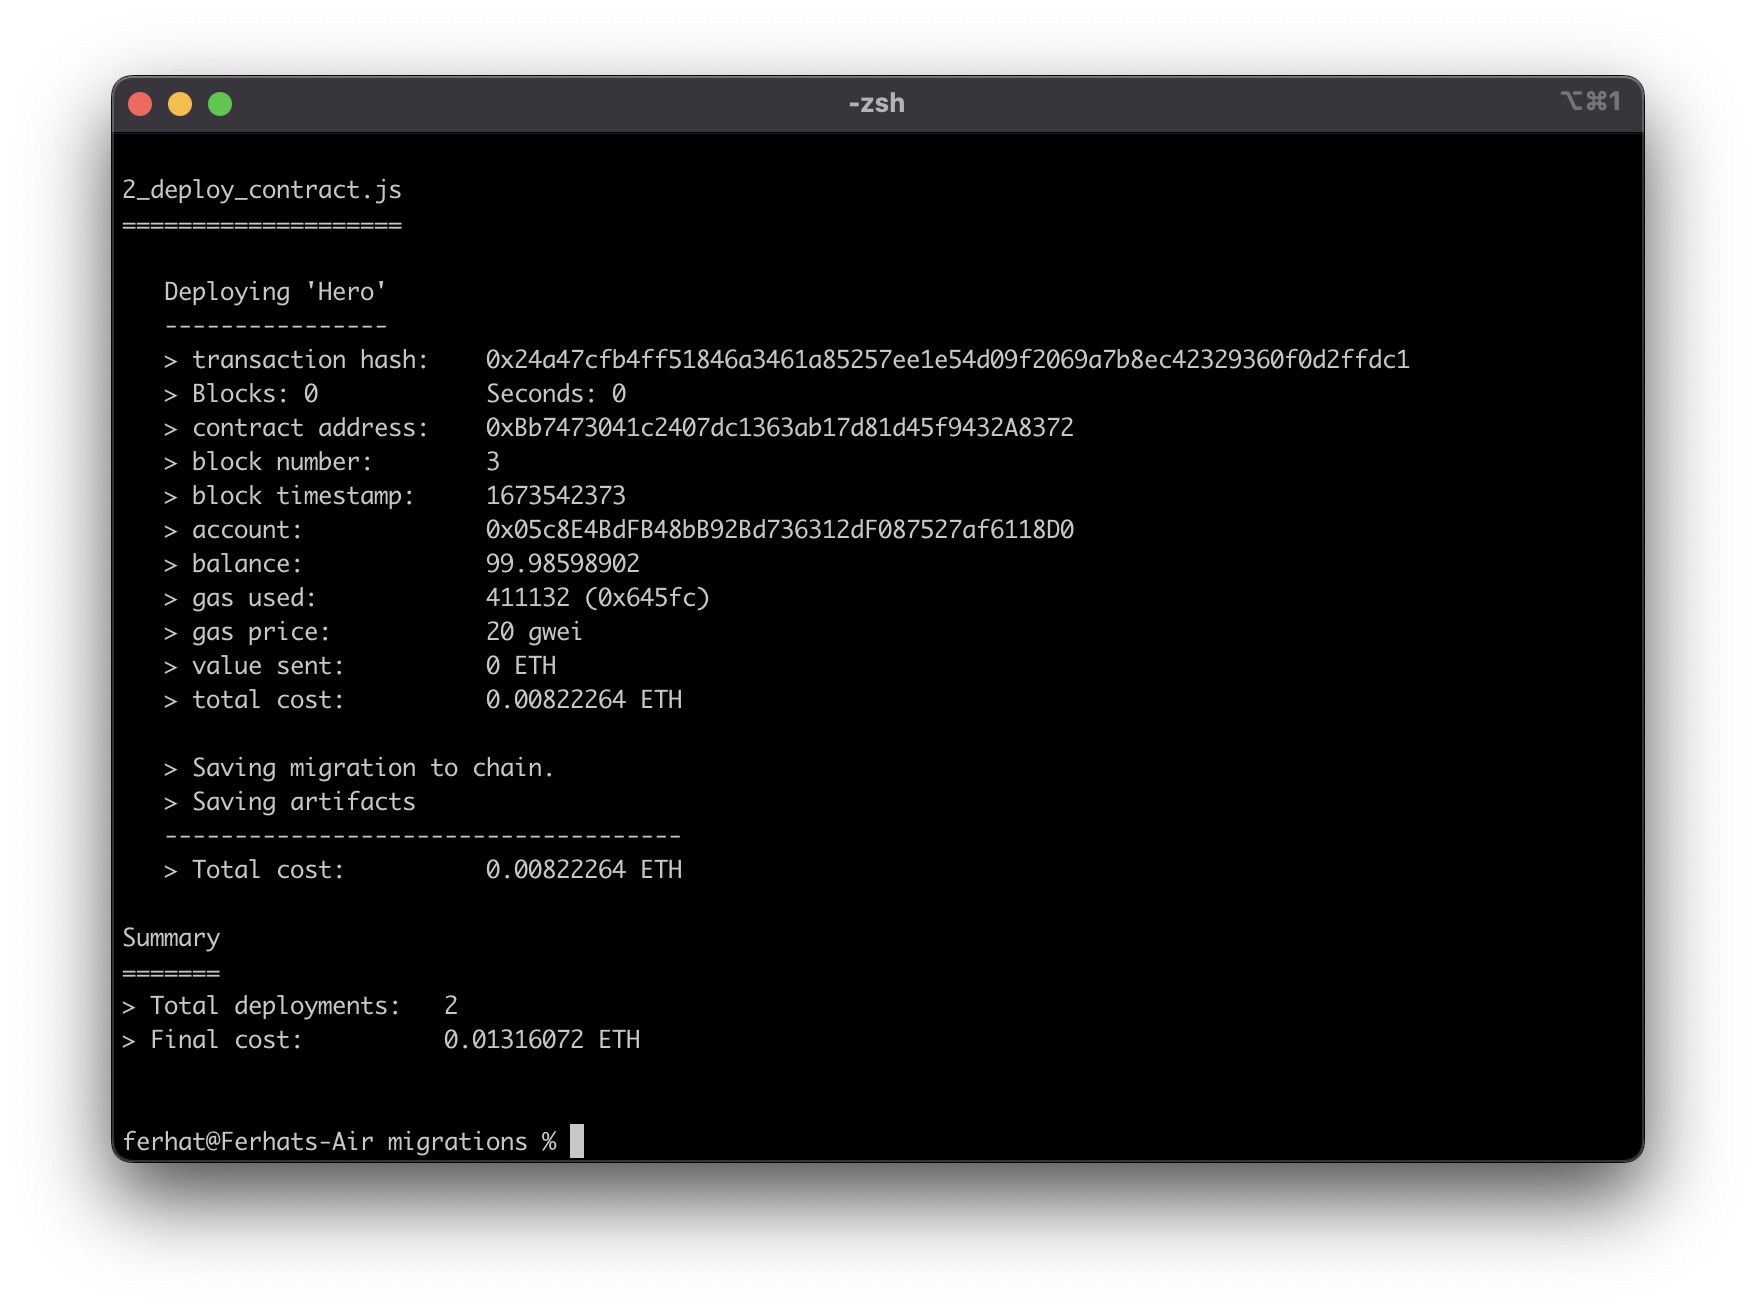
7. Run the following in your terminal to deploy your contract to the local network:
truffle migrate
With that done you should see a log like the one below. Keep note of the contract address you see in there. In our case, it is 0x571dF6CbCAF5A64DDe1862D90689f2D503565Bf0. Notice the contract is being deployed from the first address you see in Ganache.
8. We can easily interact with the contract in the terminal itself. Run this command in your terminal:
truffle console
This command wraps your shell in the truffle console. You should see your shell change to: truffle(development)>
9. Let's store an instance of the contract by typing this command in the Truffle console:
let instance = await Hero.deployed()
10. Let's also store the addresses in a variable so that we can easily use them:
let accounts = await web3.eth.getAccounts()
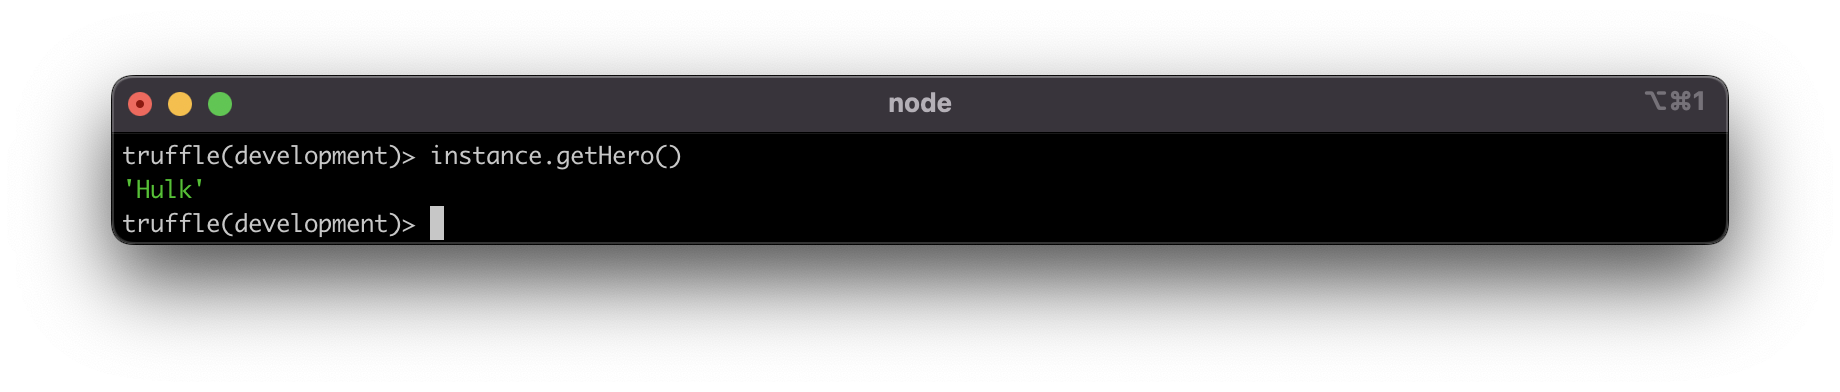
11. With all in place, Let's call getHero function to see our hero. We will use instance.getHero() in the console window for that to happen.
## Make sure you're still in the truffle console ell
instance.getHero()
You should see an output with the name of the hero you passed during deployment.
Test Cases for The Contract
Now, let's write some test cases!!
1.Create a file named Hero.test.js under the test folder. It should look like the following:
2.Now, copy and paste the following code into the file.
const Hero = artifacts.require('Hero')
contract('Hero', accounts => {
	let hero
	before(async () => {
		hero = await Hero.deployed()
	})

	it('It should return Hulk', async () => {
		const receivedHero = await hero.getHero()
		assert.equal(receivedHero, 'Hulk')
	})

	it('It should set hero to Iron Man', async () => {
		await hero.setHero('Iron Man', { from: accounts[0] })
		const receivedHero = await hero.getHero()
		assert.equal(receivedHero, 'Iron Man')
	})
})
Line 1: We have imported the contract we want to test i.e Hero contract using artifacts.require.
Line 2: Next, we define the contract for testing which is Hero and then we pass the accounts as a parameter that contains all the addresses.
Line 3: The hero variable is defined which stores the instances of the deployed contract.
Line 4-7: before is a command that will ensure that whatever is inside it gets called before the test will move forward. In this case, we need to ensure the contract Hero is deployed before we test it.
Line 9: it encloses a short description of what test we want to run, it as an async function that contains all the test related scripts.
Line 10: We are calling getHero() and storing it inside the recivedHero.
Line 11: We are asserting if the output from earlier matches with our expectation i.e. Hulk.
Line 14-18: It is used to test the setHero() function. Keep note that in the function parameter, we are passing from:accounts[0] because we deployed using the first address and according to the contract only the owner can change the value. If you use other values like accounts[1], accounts[2] and so on, it would throw an error.
3. Now that our test cases are complete, let's test it out. Run the following command in your terminal:
You should see a similar output as below:
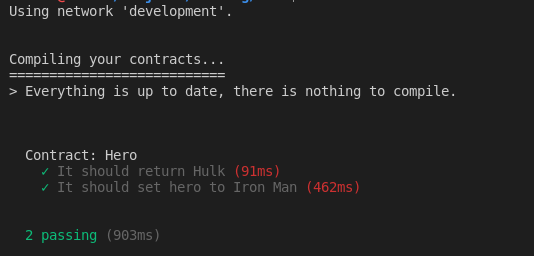
This means, the output we are getting matches the behavior we are expecting. Now that we know our contracts work how we want them to, we can deploy them to the network!
Deploying to Goerli Testnet
The last thing, we need to do is to deploy it to a public test network. Before we can do that we will need to get some test Ether for the Goerli network. We will need this to pay the gas fees for deploying a smart contract to the network. Go to the Quicknode Faucet and paste in your wallet address to send yourself some test Ether. Now you are ready to start deploying!
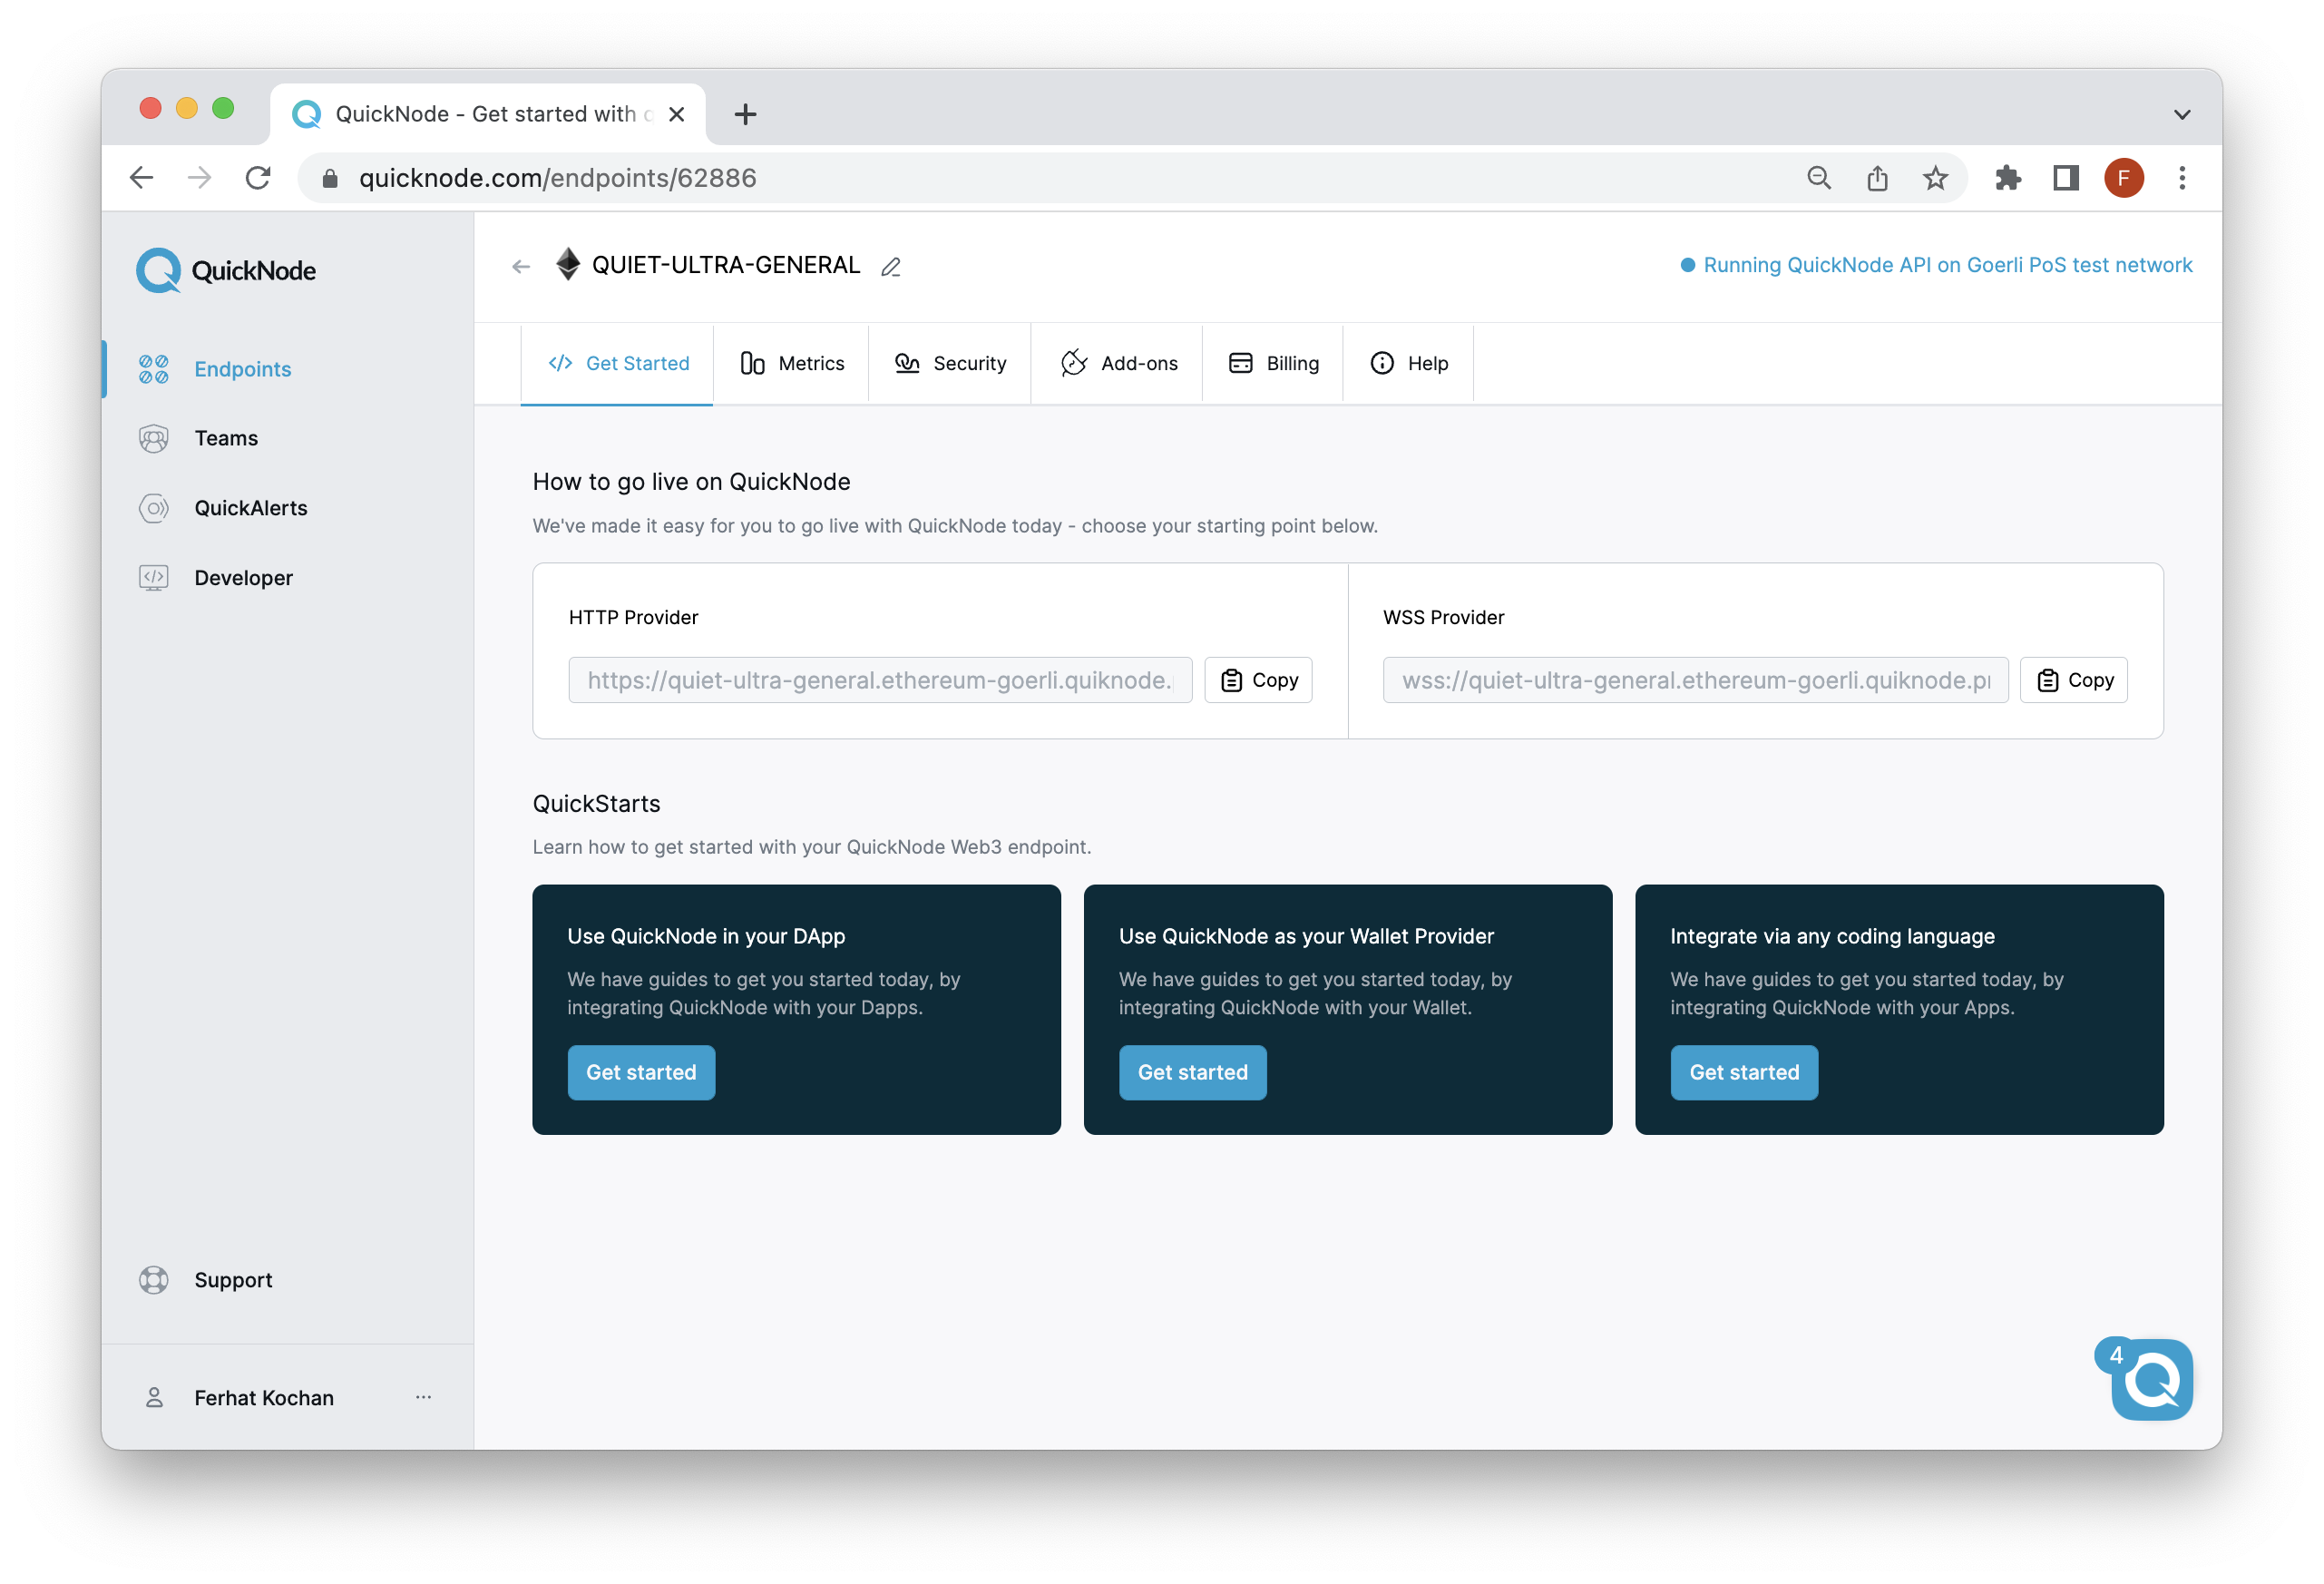
1. Grab the HTTP Provider URL from your Quicknode dashboard.
2. Now, you will grab the mnemonics from MetaMask. Go to Settings→Security & Privacy → Reveal Secret Recovery Phase. Enter Your Password and it should reveal the seed phase.
3. Update the truffle-config.js to include the network detail that will assist us in deploying to Goerli.
const HDWalletProvider = require('@truffle/hdwallet-provider')
const mnemonic = '<YOUR WALLET MNEMONICS>'
const QuicknodeURL = '<YOUR NODE URL>'
module.exports = {
	networks: {
		development: {
			host: '127.0.0.1',
			port: 7545,
			network_id: '*',
		},
		goerli: {
			provider: () => new HDWalletProvider(mnemonic, QuicknodeURL),
			network_id: 5, // goerli's chain id
			gas: 550000, // goerli has a lower block limit than mainnet
			confirmations: 0, // # of confs to wait between deployments. (default: 0)
			timeoutBlocks: 200000, // # of blocks before a deployment times out  (minimum/default: 50)
			skipDryRun: false, // Skip dry run before migrations? (default: false for public nets )
		},
	},
	compilers: {
		solc: {
			version: '0.8.1',
		},
	},
}
4. After updating your config, you will need to install an additional package. Run the following command to install it:
npm install @truffle/hdwallet-provider
5. In your terminal, run the following command to deploy to test network:
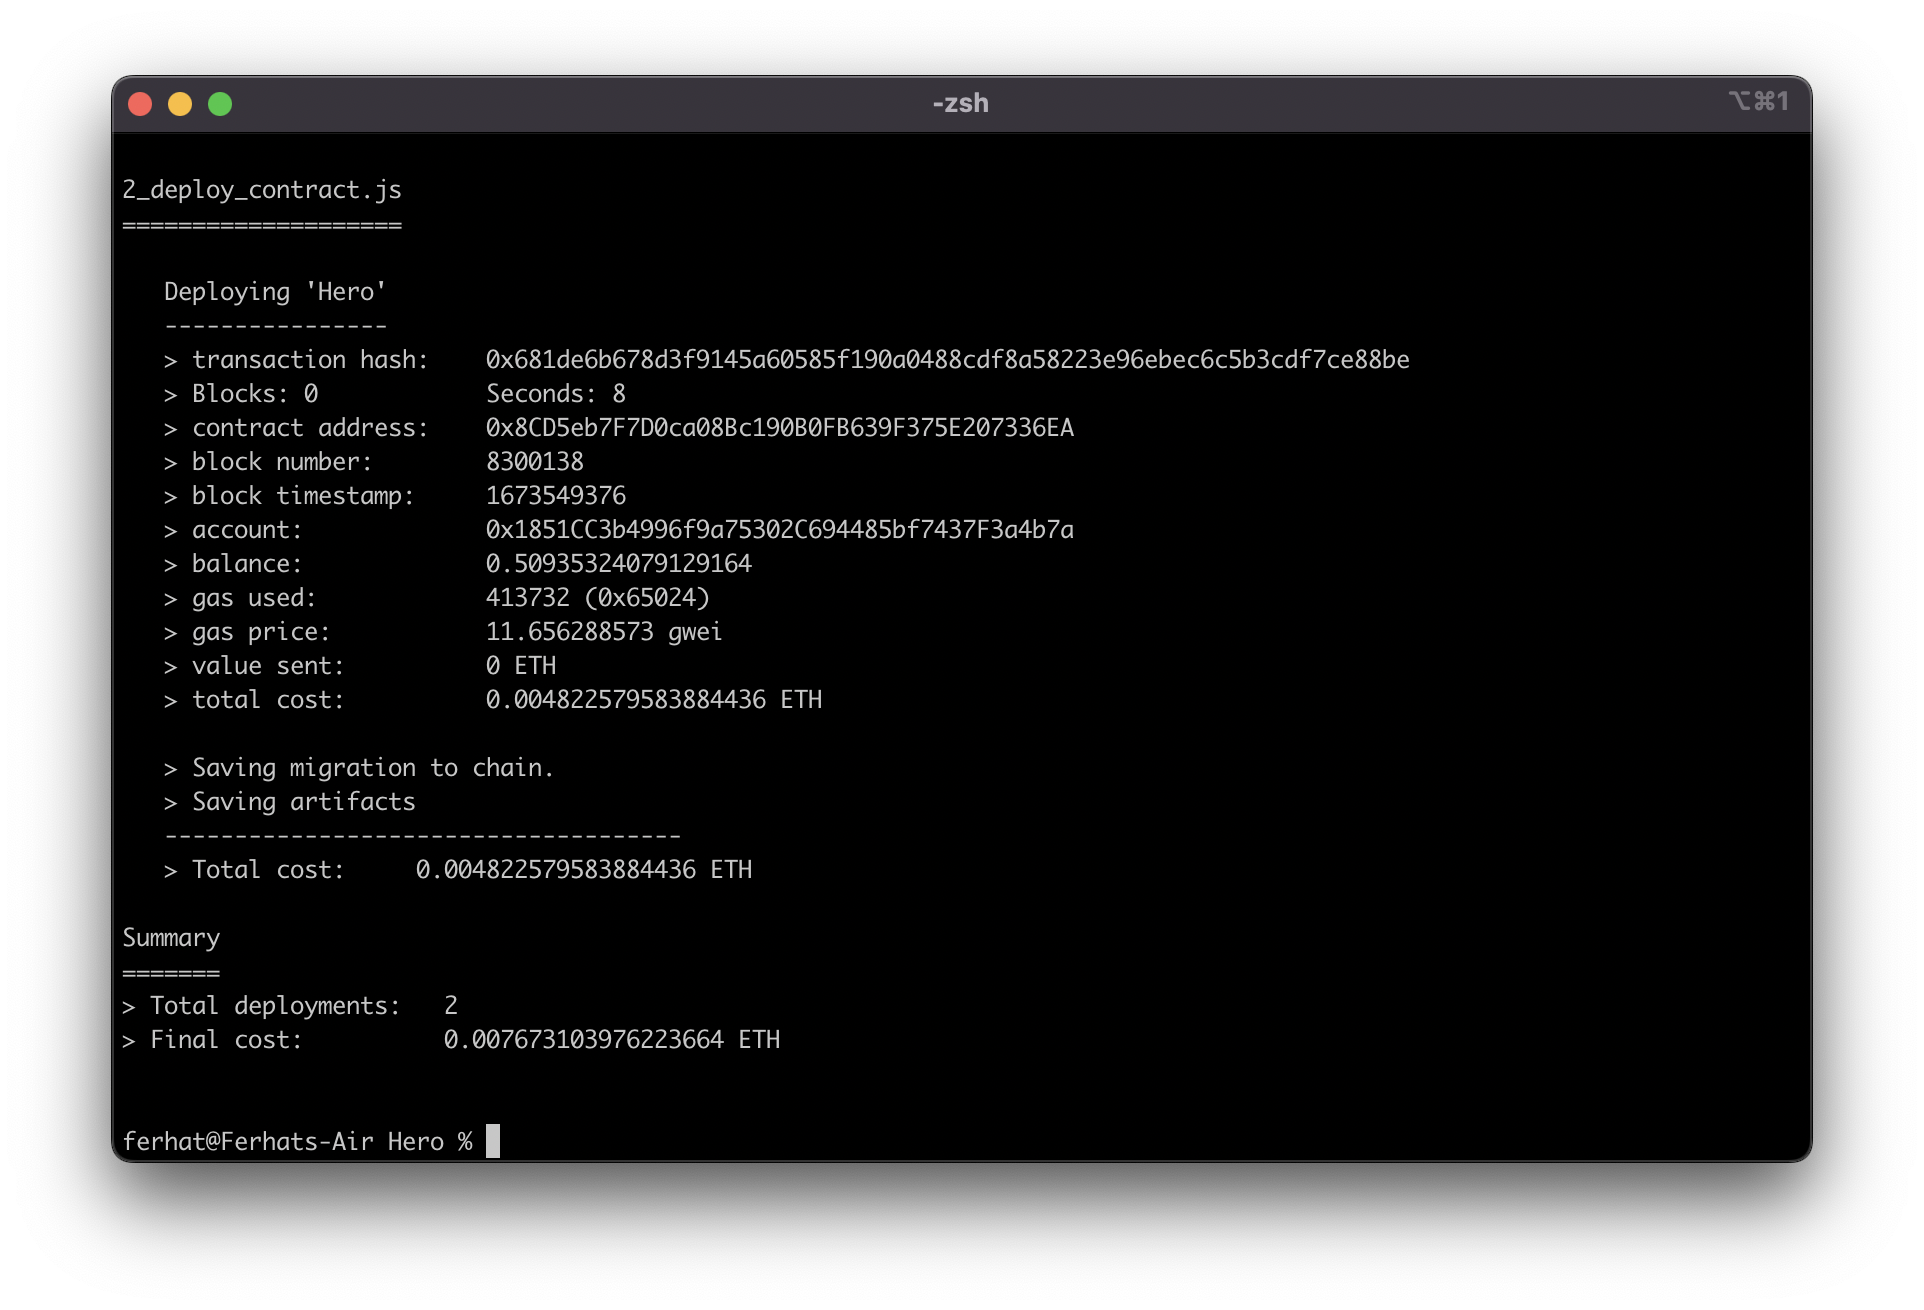
truffle migrate --network goerli
It may take sometime, so hold on!! At the end, you will get a log like the below. Keep note of the contract address. In our case, it is 0x675aC09AC86dfc3CE15C93Ab307c0Da17eBE84F3.
6. Head over to Goerli Block Explorer and paste the contract address in the search bar. You should see something like this:

Congratulations on completing the life-cycle of smart contract development!!! You can go ahead and treat yourself with some Dark Chocolate Ganache Truffles! :)
Hardhat
For deploying using hardhat, you can follow our tutorial on How to create and deploy a smart contract with Hardhat.
Conclusion
Here we saw how to work with Truffle and hardhat. Using them, you can write tests for your contracts and debug them efficiently. You can also refer to their official documentation for more information.
Official Documentation of Truffle
Official Documentation of HardHat
Subscribe to our newsletter for more articles and guides on Ethereum. If you have any feedback, feel free to reach out to us via Twitter. You can always chat with us on our Discord community server, featuring some of the coolest developers you’ll ever meet :)