
7 min read
This guide includes references to the Goerli testnet, which is no longer actively maintained. While specific steps related to this chain may not be applicable, the overall process may be valid for other chains. We recommend exploring current alternatives for your implementation. If you’d like to see an updated version of this guide, please let us know!
Overview
In Part one of the Diamond standard series, we learned about the Diamond contracts (i.e., Multi-Facet Proxy) and how it works. In this guide, you will learn how to create, deploy, and test an EIP-2535 compliant Diamond smart contract using the diamond-1-hardhat repository and louper.dev, which is a tool for inspecting diamond smart contracts on EVM-based chains.
What You Will Do
- Configure and examine the diamond-1-hardhat repository
- Create and Deploy the set of Diamond smart contracts
- Test the Diamond smart contract functionality
What You Will Need
- Basic understanding of Diamond smart contracts
- Git installed
- Hardhat installed
- Crypto Wallet (e.g., MetaMask)
- Goerli ETH (you can get some at this faucet)
- Text Editor or IDE
Setting Up The Project
For this tutorial, we will be creating a Diamond smart contract using the diamond-1-hardhat repository (created by Nick Mudge, the author of EIP-2535). If you want to see other implementations, check out these other resources. Note there are also diamond-2-hardhat and diamond-3-hardhat repositories that demonstrate alternative methods of implementing and deploying a Diamond smart contract (e.g., gas optimized and implementing loupe functions).
Now, let us get started with setting up our project. Open a terminal window and run the following command to clone the repository and navigate inside it:
git clone https://github.com/mudgen/diamond-1-hardhat && cd diamond-1-hardhat
Then, installed the required dependencies:
npm install && npm install --save-dev @nomiclabs/hardhat-etherscan
Open up the project in your code editor of choice and open the hardhat.config.js file. Add the following import at the top of the file:
require("@nomiclabs/hardhat-etherscan");
Requires the plugin for automatic smart contract verification with Etherscan
Then, add the following code to the end of the module.exports object in the hardhat.config.js file:
networks: {
goerli: {
    url: "YOUR_QUICKNODE_HTTP_ENDPOINT",
    accounts: ["YOUR_PRIVATE_KEY"]
}
},
etherscan: {
    // Your API key for Etherscan
    // Obtain one at https://etherscan.io/
    apiKey: "YOUR_ETHERSCAN_API_KEY"
}
Now we will take a moment to ensure we have enough testnet ETH (on Goerli) and will fill in the placeholder values above with our actual RPC URL, private key, and Etherscan API key.
First, retrieve your private key and replace it with YOUR_PRIVATE_KEY above (if you're using MetaMask, find instructions here). Next, navigate to the Quicknode Multi-Chain Faucet to retrieve some ETH on Ethereum Goerli testnet. You can connect your wallet or paste your public address; however, note you'll need at least 0.001 ETH on Ethereum Mainnet to use the testnet faucet.
You will also need to input your API keys from Etherscan.io (which we will need later when verifying our Facet on louper.dev). Lastly, we will need access to the Ethereum Goerli testnet blockchain. You're welcome to use public nodes or deploy and manage your own infrastructure; however, if you'd like up to 8x faster response times, you can leave the heavy lifting to us. Sign up for an account here. Once you have your RPC url, replace it with YOUR_QUICKNODE_HTTP_ENDPOINT in hardhat.config.js and save the file.
With all those tasks accomplished, you now have our Hardhat project configured to deploy to Ethereum Goerli testnet and verify source code using the Hardhat-etherscan plugin. Next, we will create and deploy the set of diamond smart contracts.
Create and Deploy the Diamond Smart Contract
The diamond-1-hardhat repository is a reference implementation for EIP-2535 Diamonds. It has the boilerplate code needed to create a Diamond contract. It even has test Facets you can use; however, for the purpose of learning, we will create our own Facet.
In your contracts/facets folder, create a FacetA.sol file and add the following code:
pragma solidity ^0.8.0;

library LibA {

struct DiamondStorage {
    address owner;
    bytes32 dataA;
}


function diamondStorage() internal pure returns(DiamondStorage storage ds) {
    bytes32 storagePosition = keccak256("diamond.storage.LibA");
    assembly {
    ds.slot := storagePosition
    }
}
}

contract FacetA {
    function setDataA(bytes32 _dataA) external {
        LibA.DiamondStorage storage ds = LibA.diamondStorage();
        ds.dataA = _dataA;
    }

    function getDataA() external view returns (bytes32) {
        return LibA.diamondStorage().dataA;
    }
}
Let's recap the code!
-
Line 1: Set our pragma version. Note setting the version instructs the compiler to check if the version matches the one required by the pragma. If it does not match, the compiler issues an error.
-
Line 3-17: Create a library that implements DiamondStorage. The library contains a struct that stores the Facets variables and a diamondStorage function which specifies a random position from a hash of a string, and sets the position of our struct in contract storage.
-
Line 19-28: Create a contract that implements two functions, setDataA, which takes a bytes32 value and sets diamond storage defined above, and getDataA, which reads from the set storage.
Now that we have our Facet created, we can move on to compiling and deploying the smart contracts. The process for deploying a Diamond smart contract and adding our Facet will look like this:
- Deploy DiamondInit.sol
- Deploy DiamondCutFacet.sol
- Deploy DiamondLoupeFacet.sol
- Deploy OwnershipFacet.sol
- Deploy Diamond.sol
- Deploy FacetA.sol
- Call diamondCut function to add FacetA
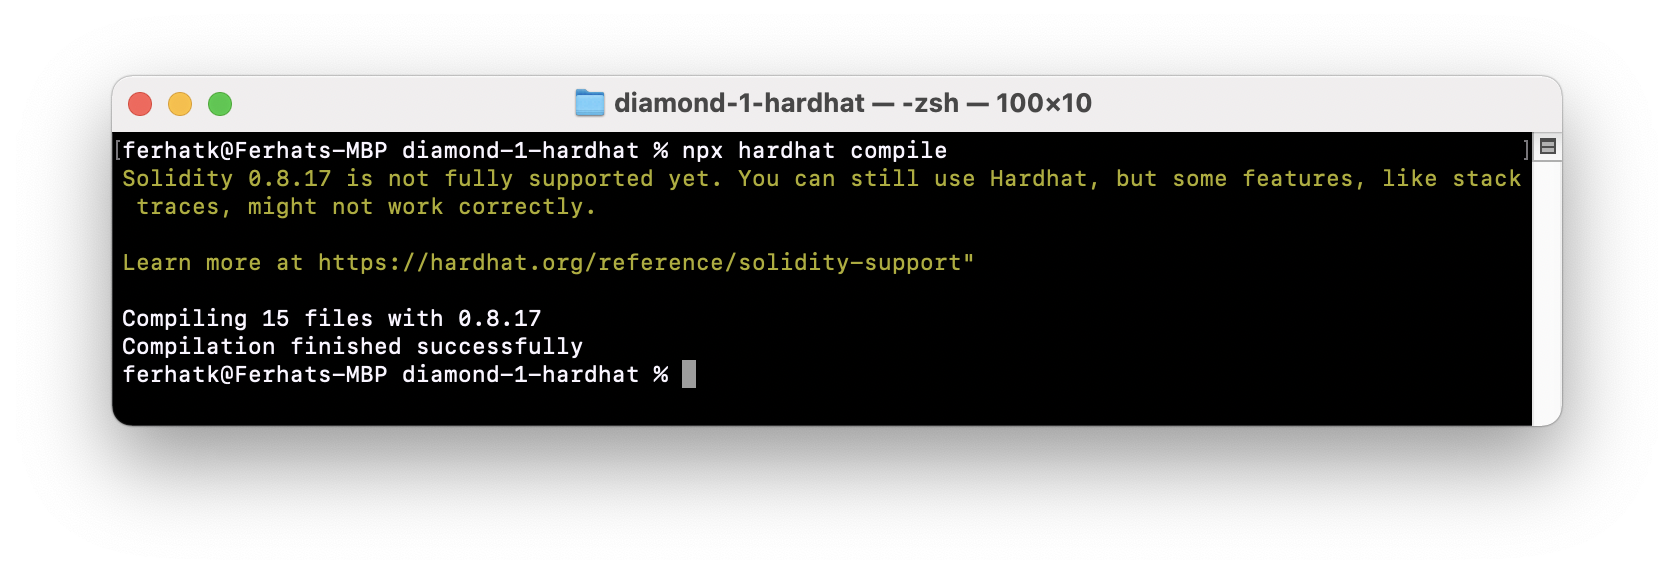
In your terminal, navigate to your root project directory and run the command npx hardhat compile, you should get a similar response to this:
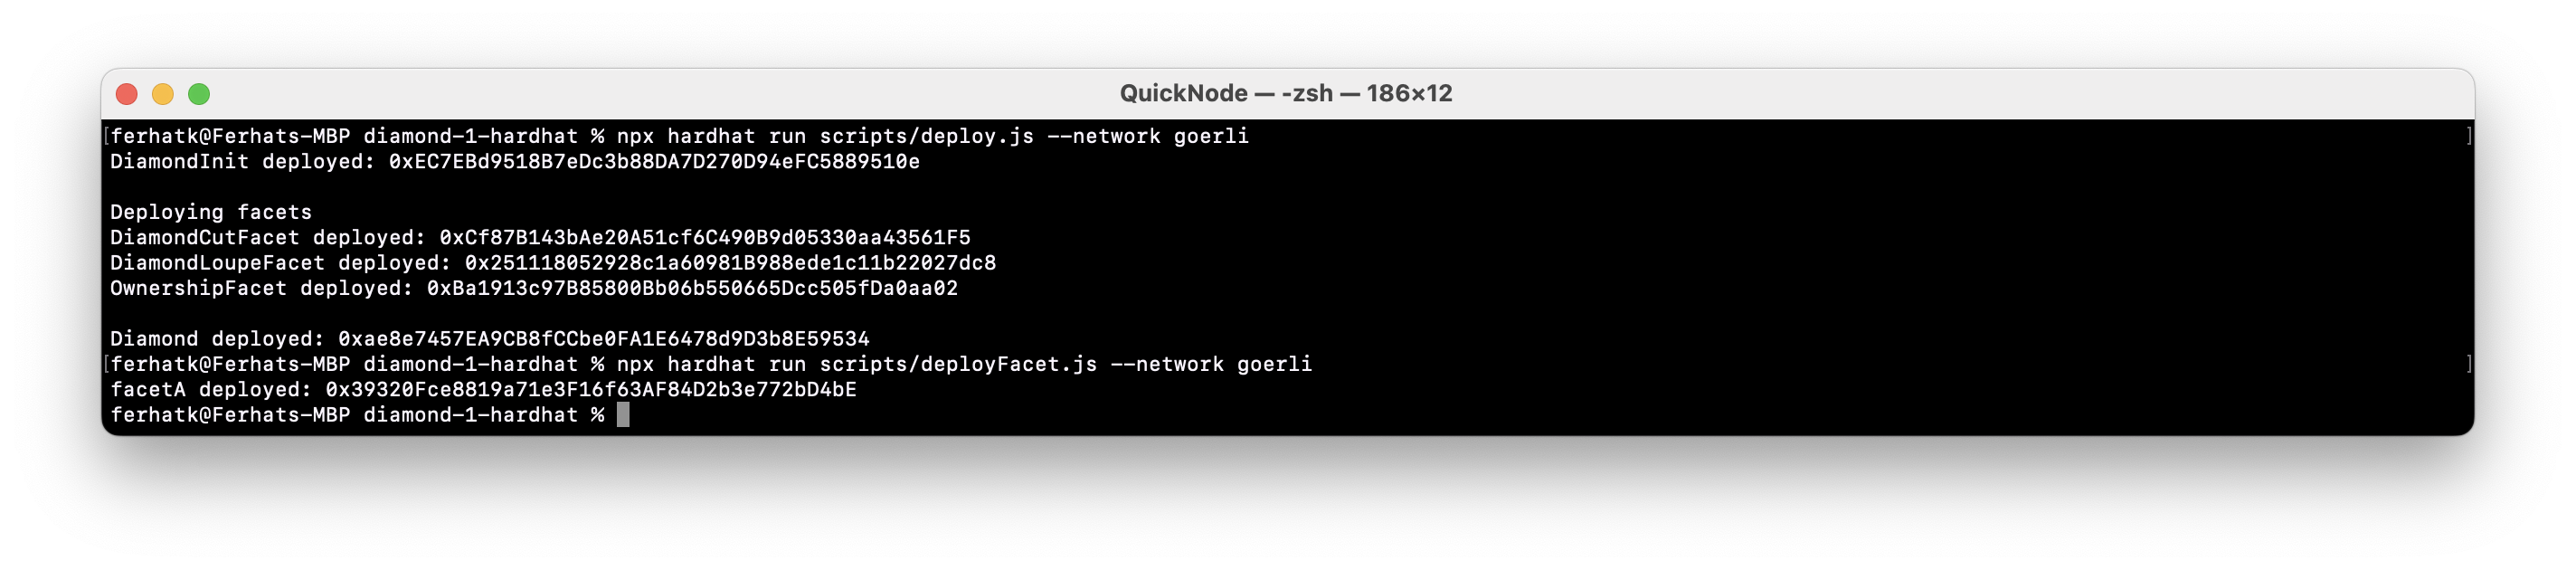
Then to deploy the contracts, run the command: npx hardhat run scripts/deploy.js --network goerli. It may take a couple of minutes to deploy but when its finished you'll see each deployed contract address outputted in the terminal.

Next, we will deploy the Facet contract. In your scripts folder, create a file called deployFacet.js and input the following code:
/* global ethers */
/* eslint prefer-const: "off" */

async function deployFacet() {
  const FacetA = await ethers.getContractFactory('FacetA');
  const facetA = await FacetA.deploy();
  await facetA.deployed();
  console.log('facetA deployed:', facetA.address);

  return facetA.address;
}

// We recommend this pattern to be able to use async/await everywhere
// and properly handle errors.
deployFacet().catch((error) => {
  console.error(error);
  process.exitCode = 1;
});
Save the file and run the command npx hardhat run scripts/deployFacet.js --network goerli to deploy. Your output should contain the address of your deployed FacetA contract:
Before adding our Facet to the Diamond, let's verify the source code on Etherscan. Run the following command with your FacetA smart contract address:
npx hardhat verify --network goerli DEPLOYED_CONTRACT_ADDRESS
You'll receive a link to an Etherscan page where you can view your verified source code.
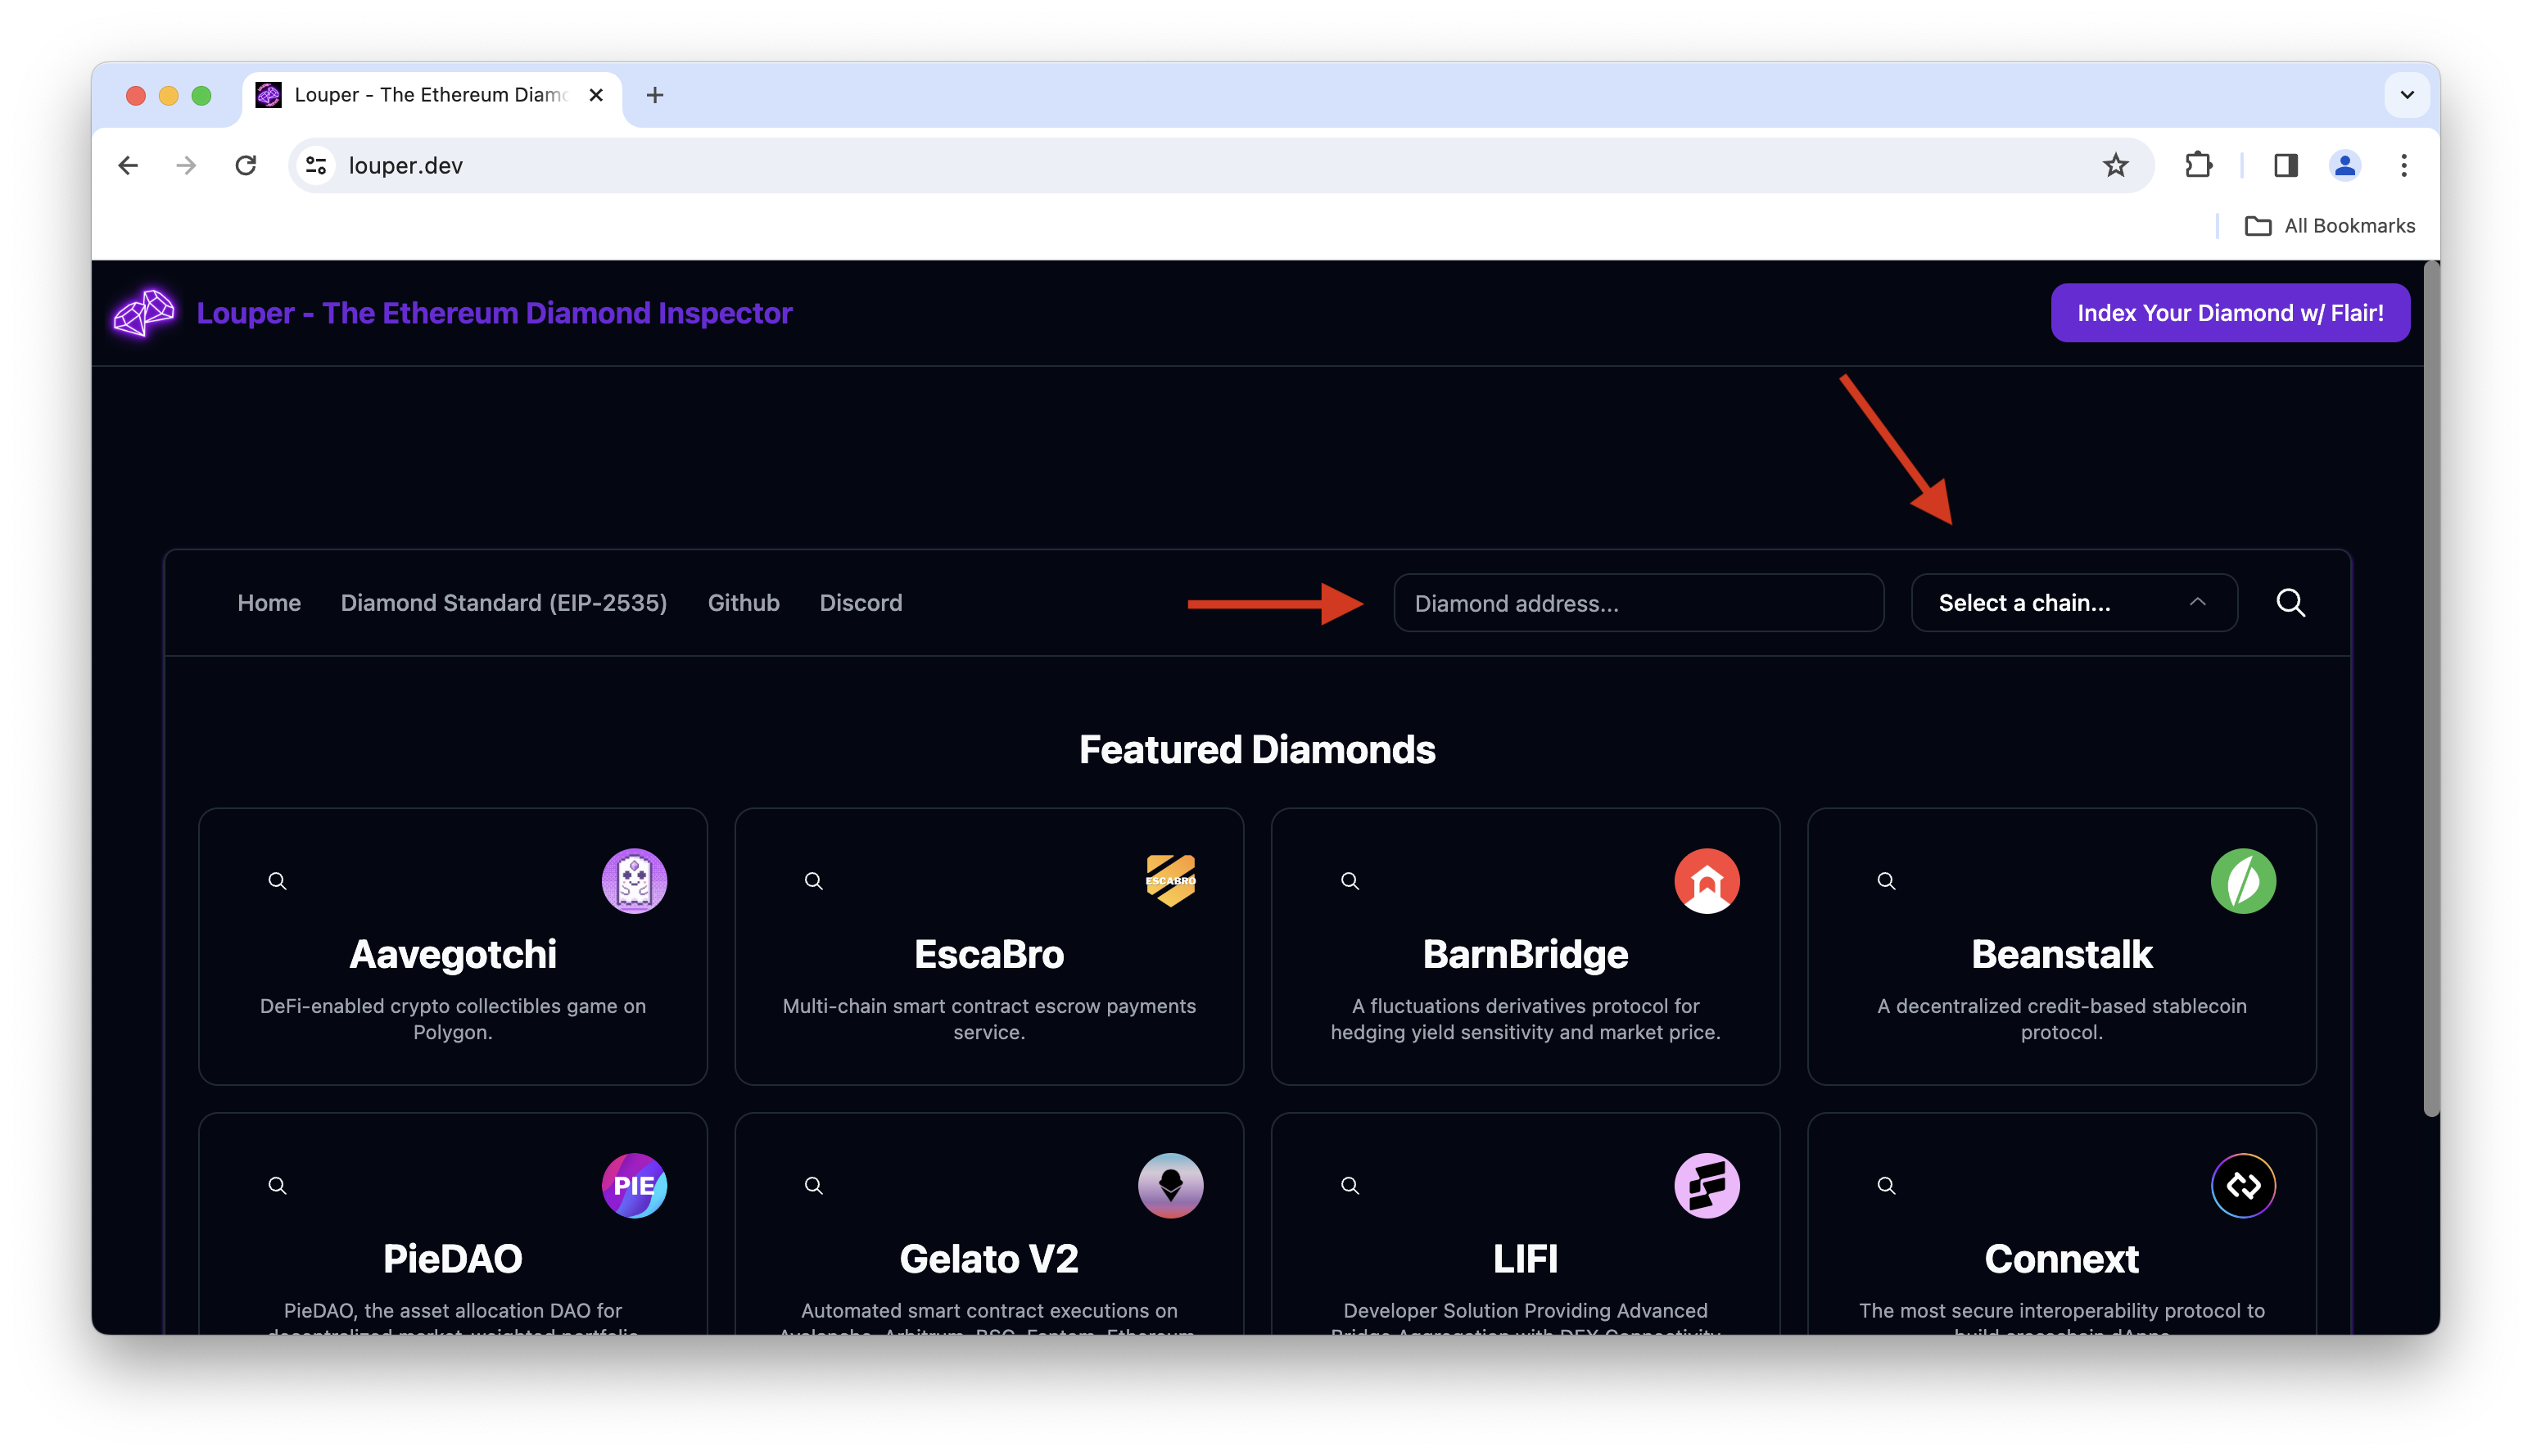
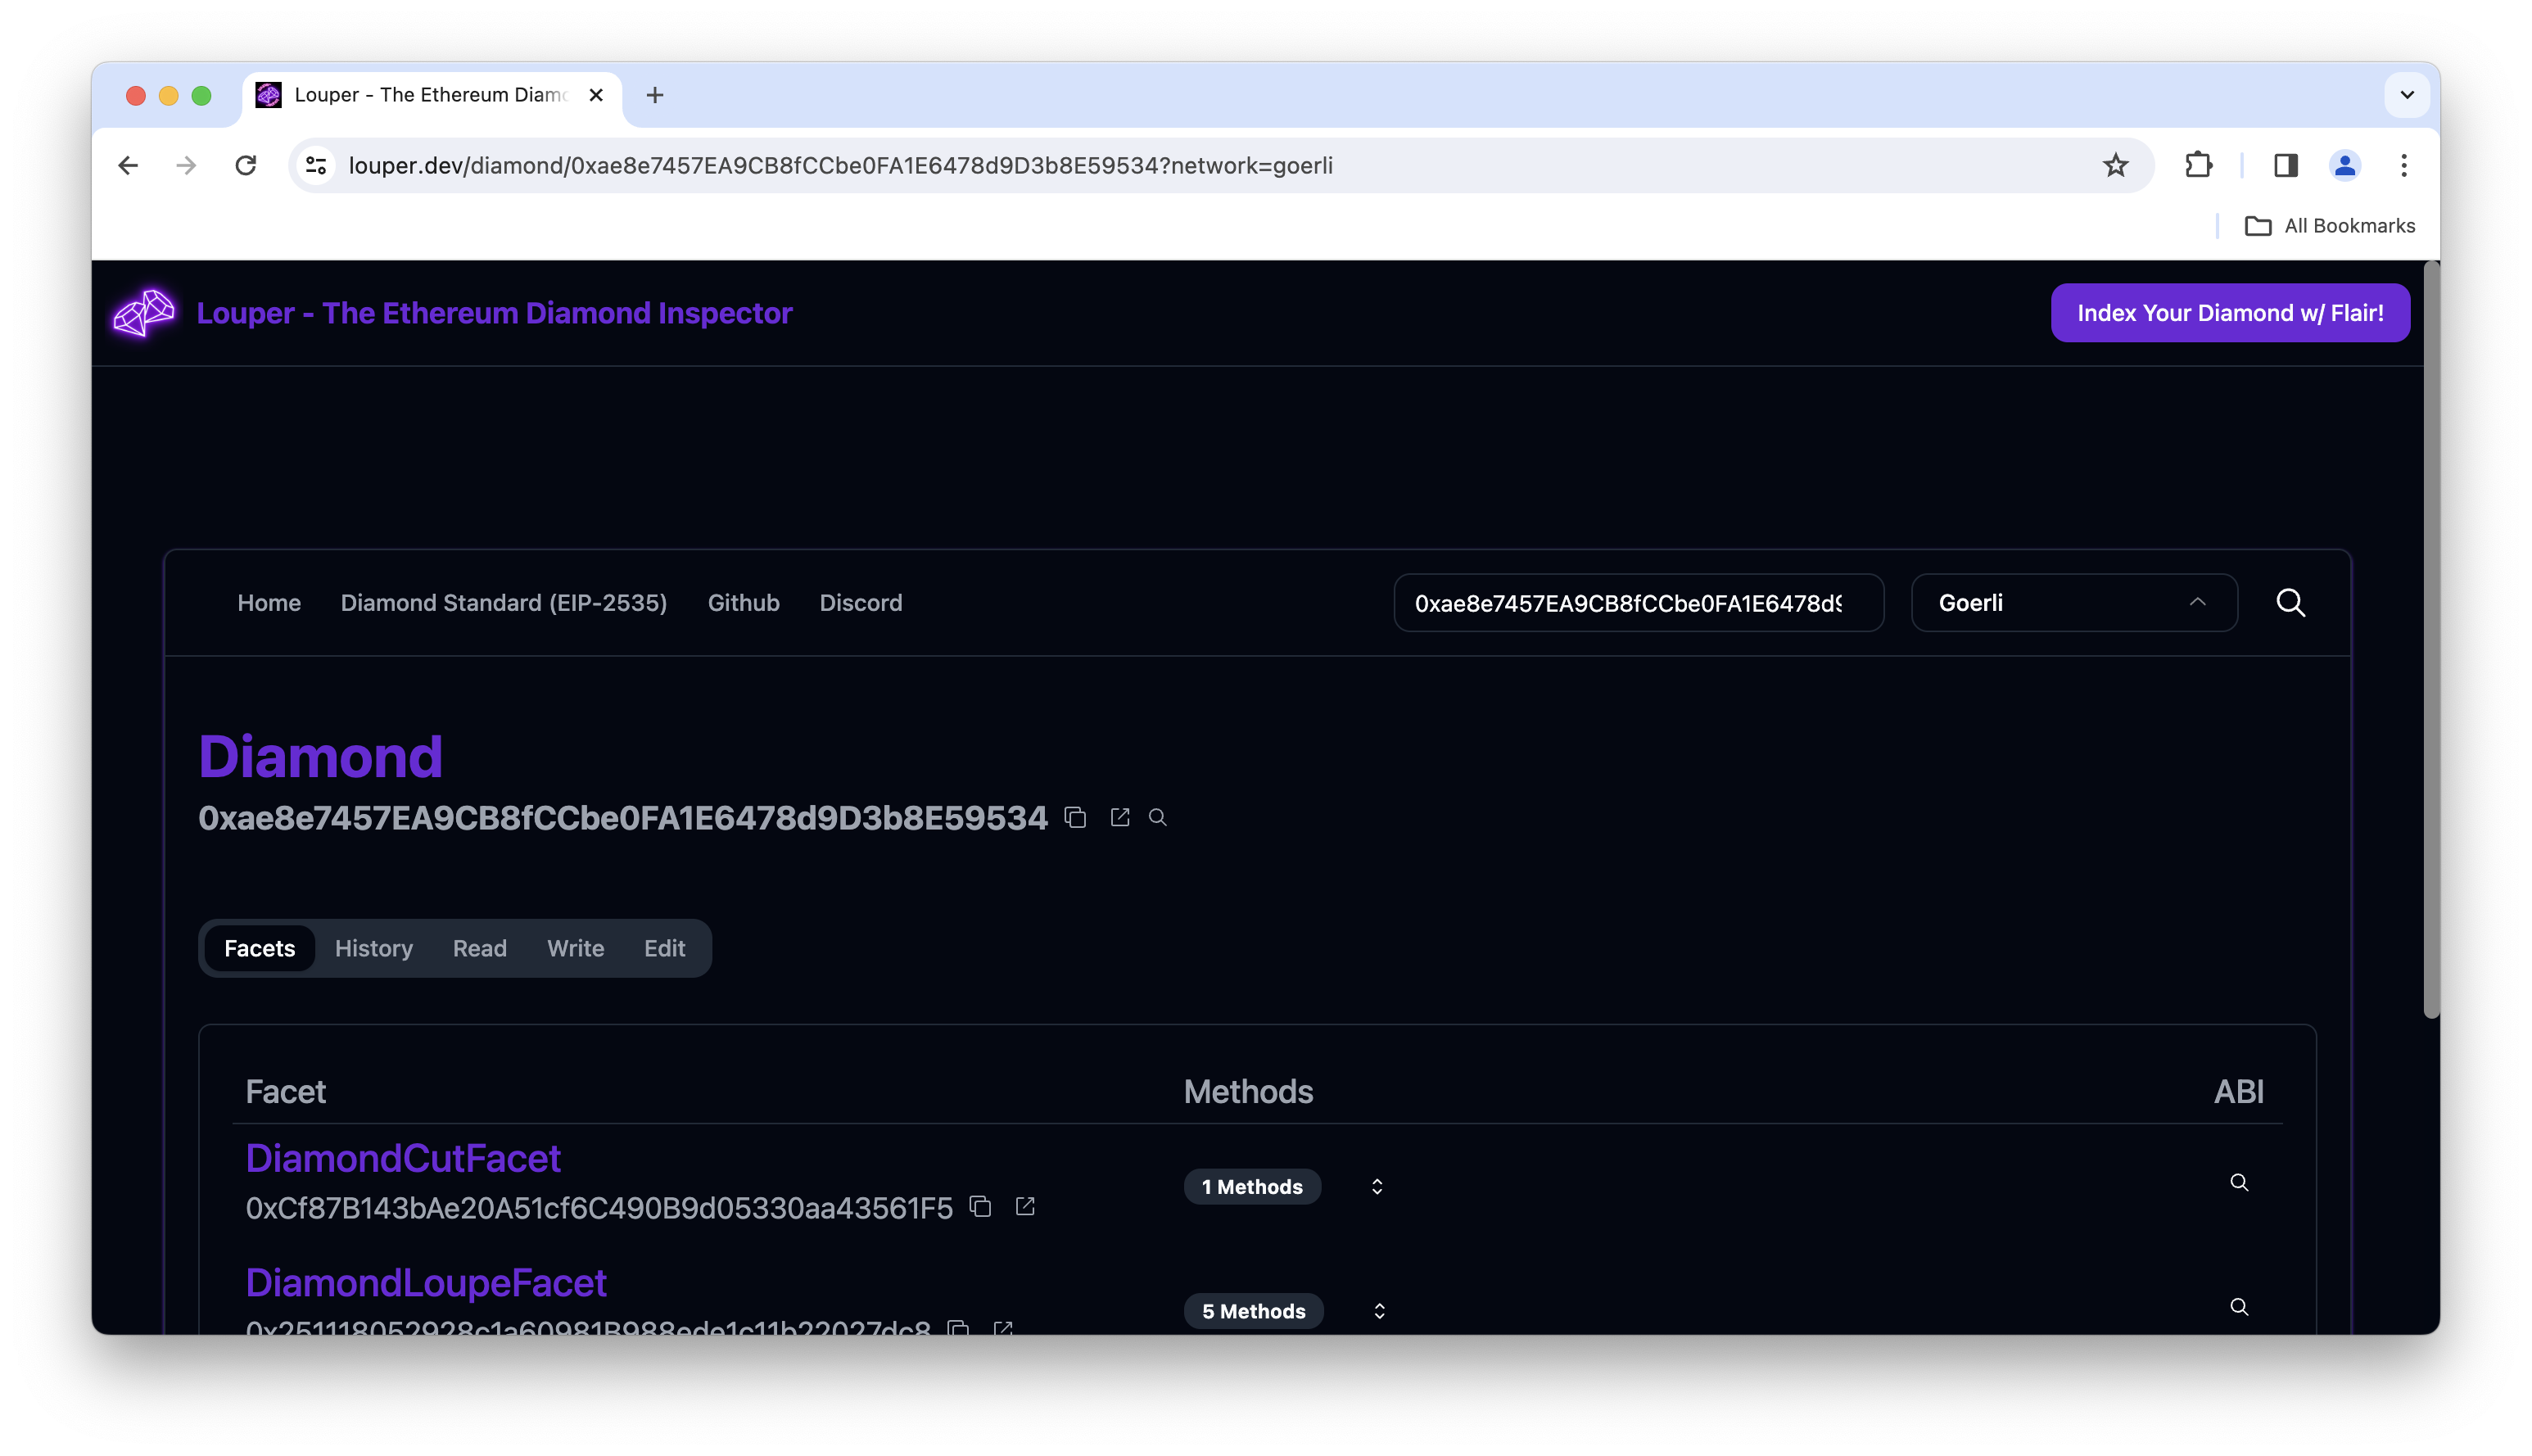
Now that all the necessary contracts are deployed, you'll need to use the diamondCut function to add your Facet contract (FacetA.sol) to your Diamond. We will use louper.dev (a tool for inspecting and interacting with Diamond smart contracts) to do this. Navigate to louper.dev and input your Diamond contract address and network you deployed it on (e.g., goerli).
Then, click the Edit tab and click Connect Wallet button. After connecting your wallet, click the Add Facet button and input your FacetA address that you previously deployed. Then, click the Fetch Facet ABI button.

After clicking Fetch Facet Info, select the two functions and click Upgrade Diamond (you'll need to approve the transaction in your wallet).

This transaction calls the diamondCut function on the Diamond contract.
Once your transaction is confirmed, you can move on to the next section, where you will test the newly added Facet on your Diamond contract.
Testing the Diamond Contract
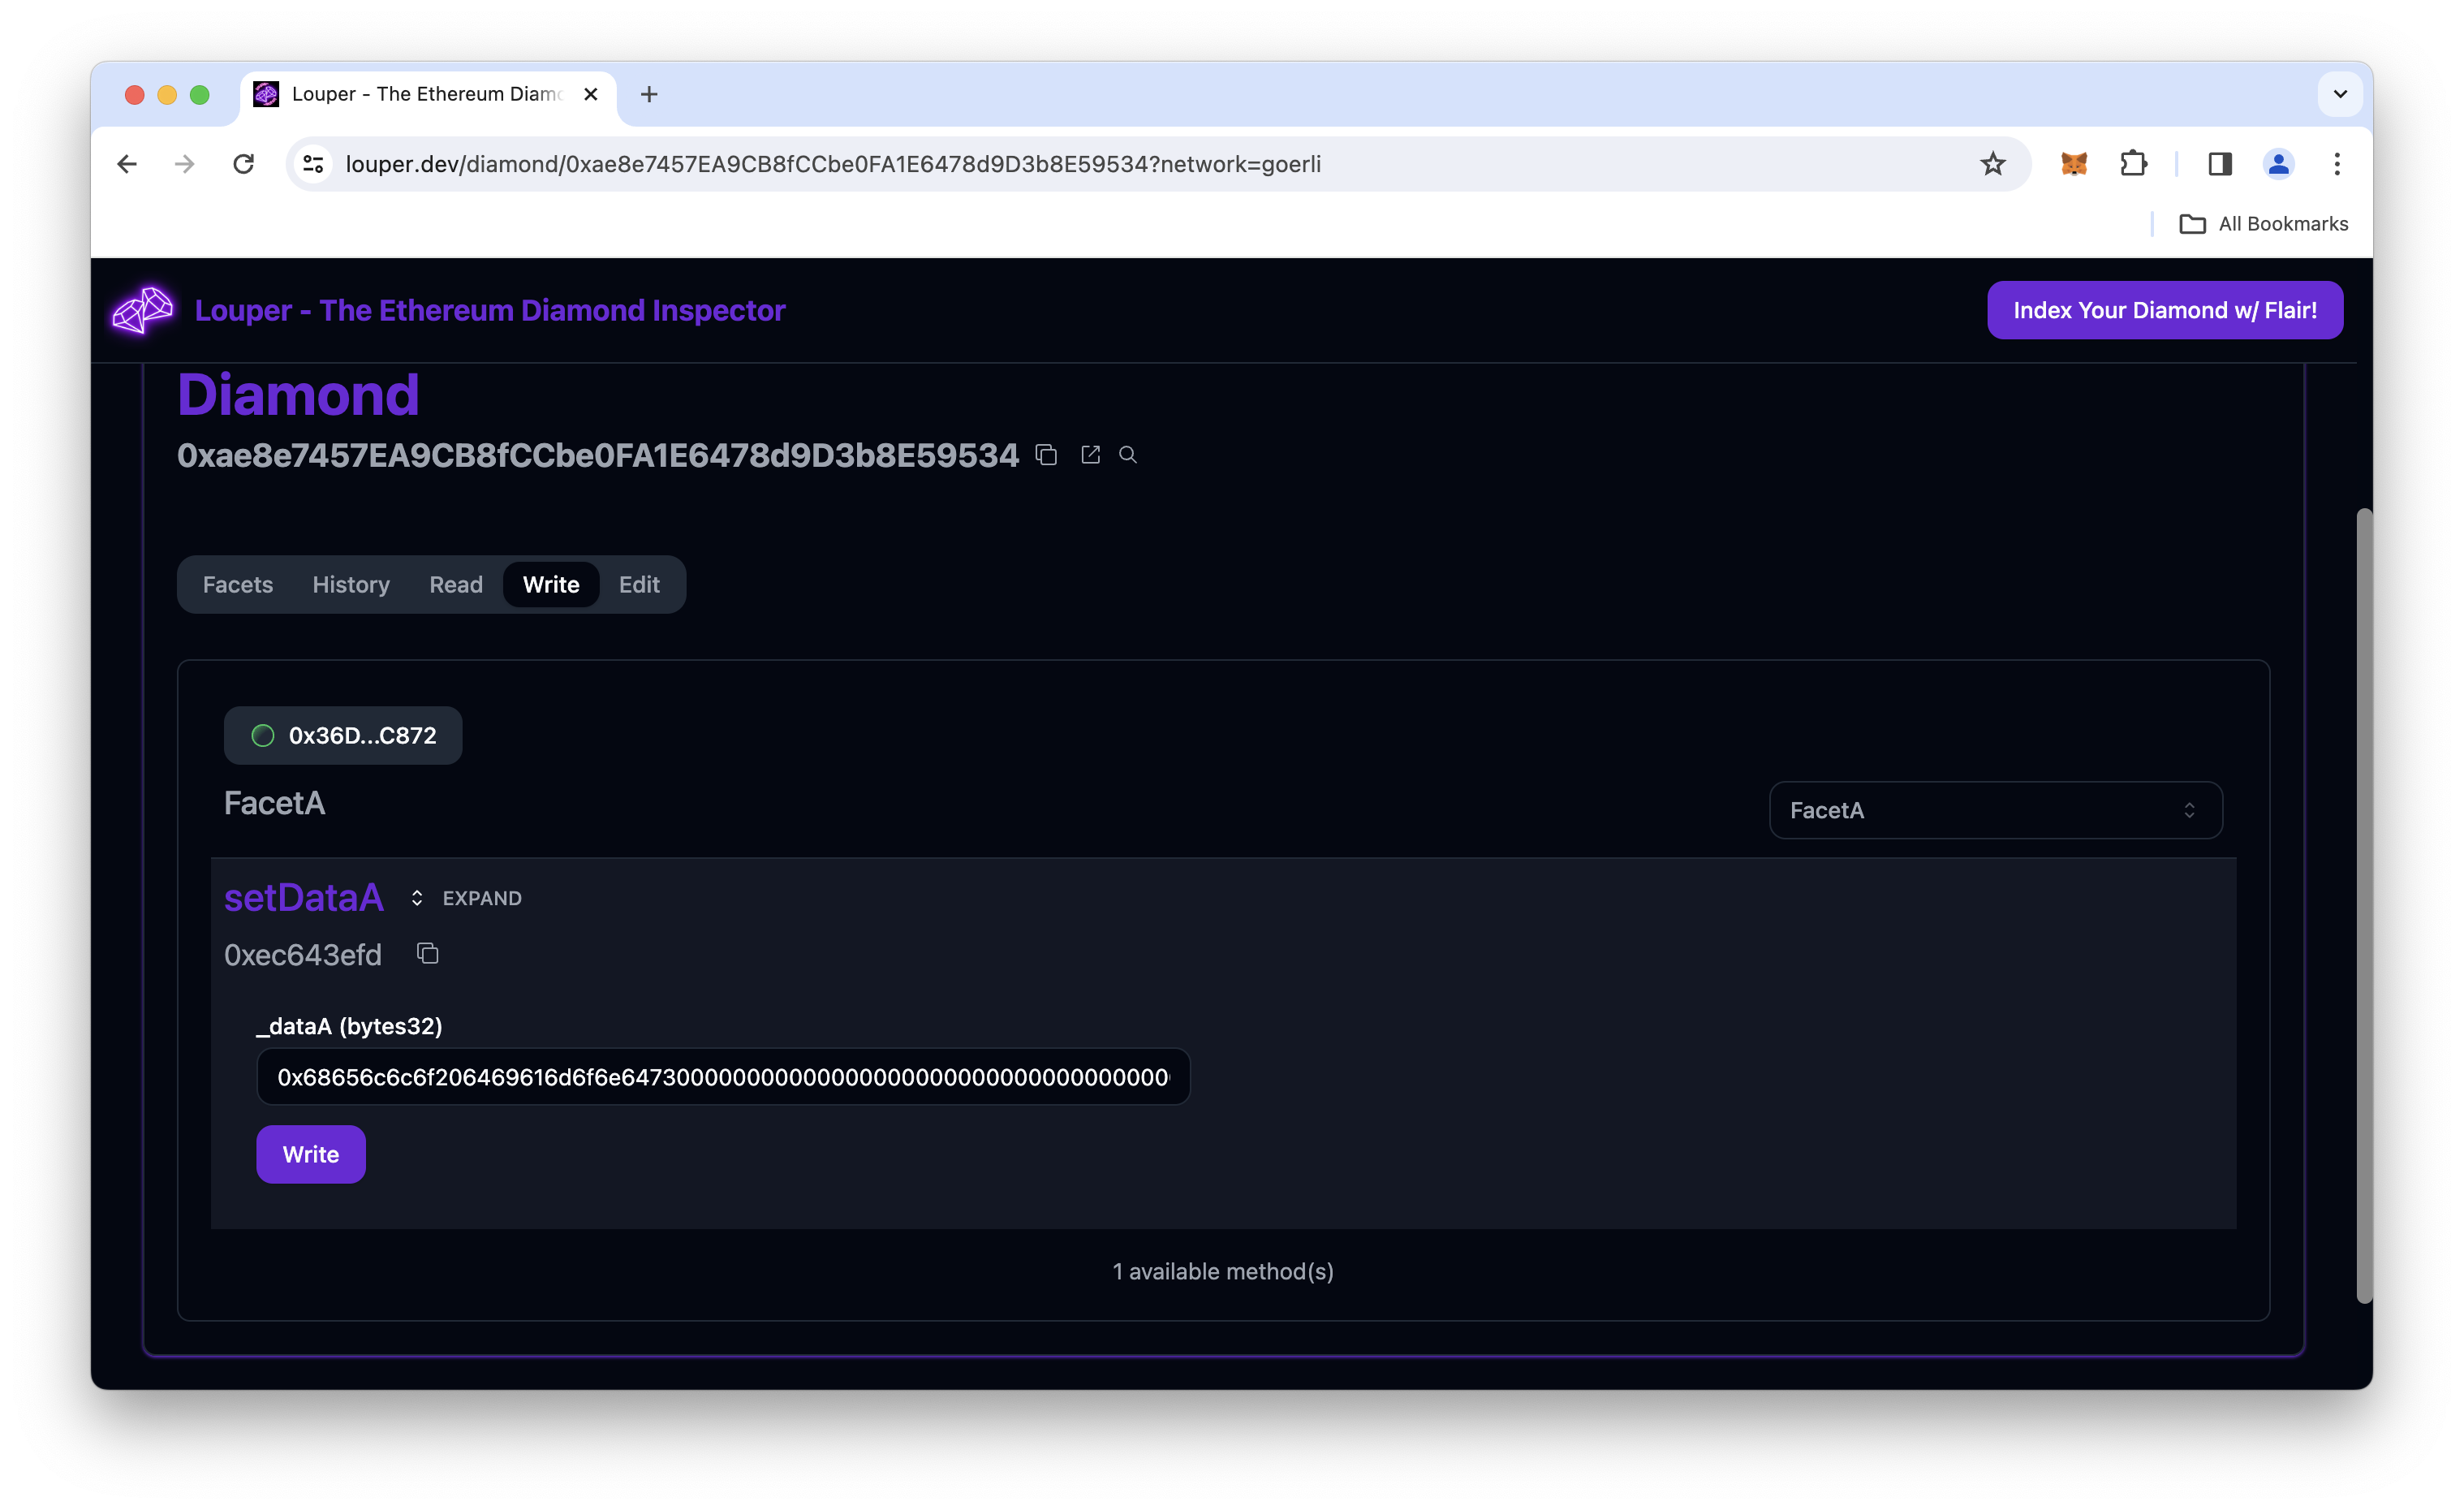
Now that our Diamond contract has context about our FacetA contract, we can test the setDataA and getDataA functions. Navigate to the Write tab of your diamond contract on louper.dev and connect your wallet. Select FacetA in the dropdown, then click the expand section and input the value 0x68656c6c6f206469616d6f6e6473000000000000000000000000000000000000 (which converts to "hello diamonds" in decoded string format). Finally, sign the transaction in your MetaMask wallet.
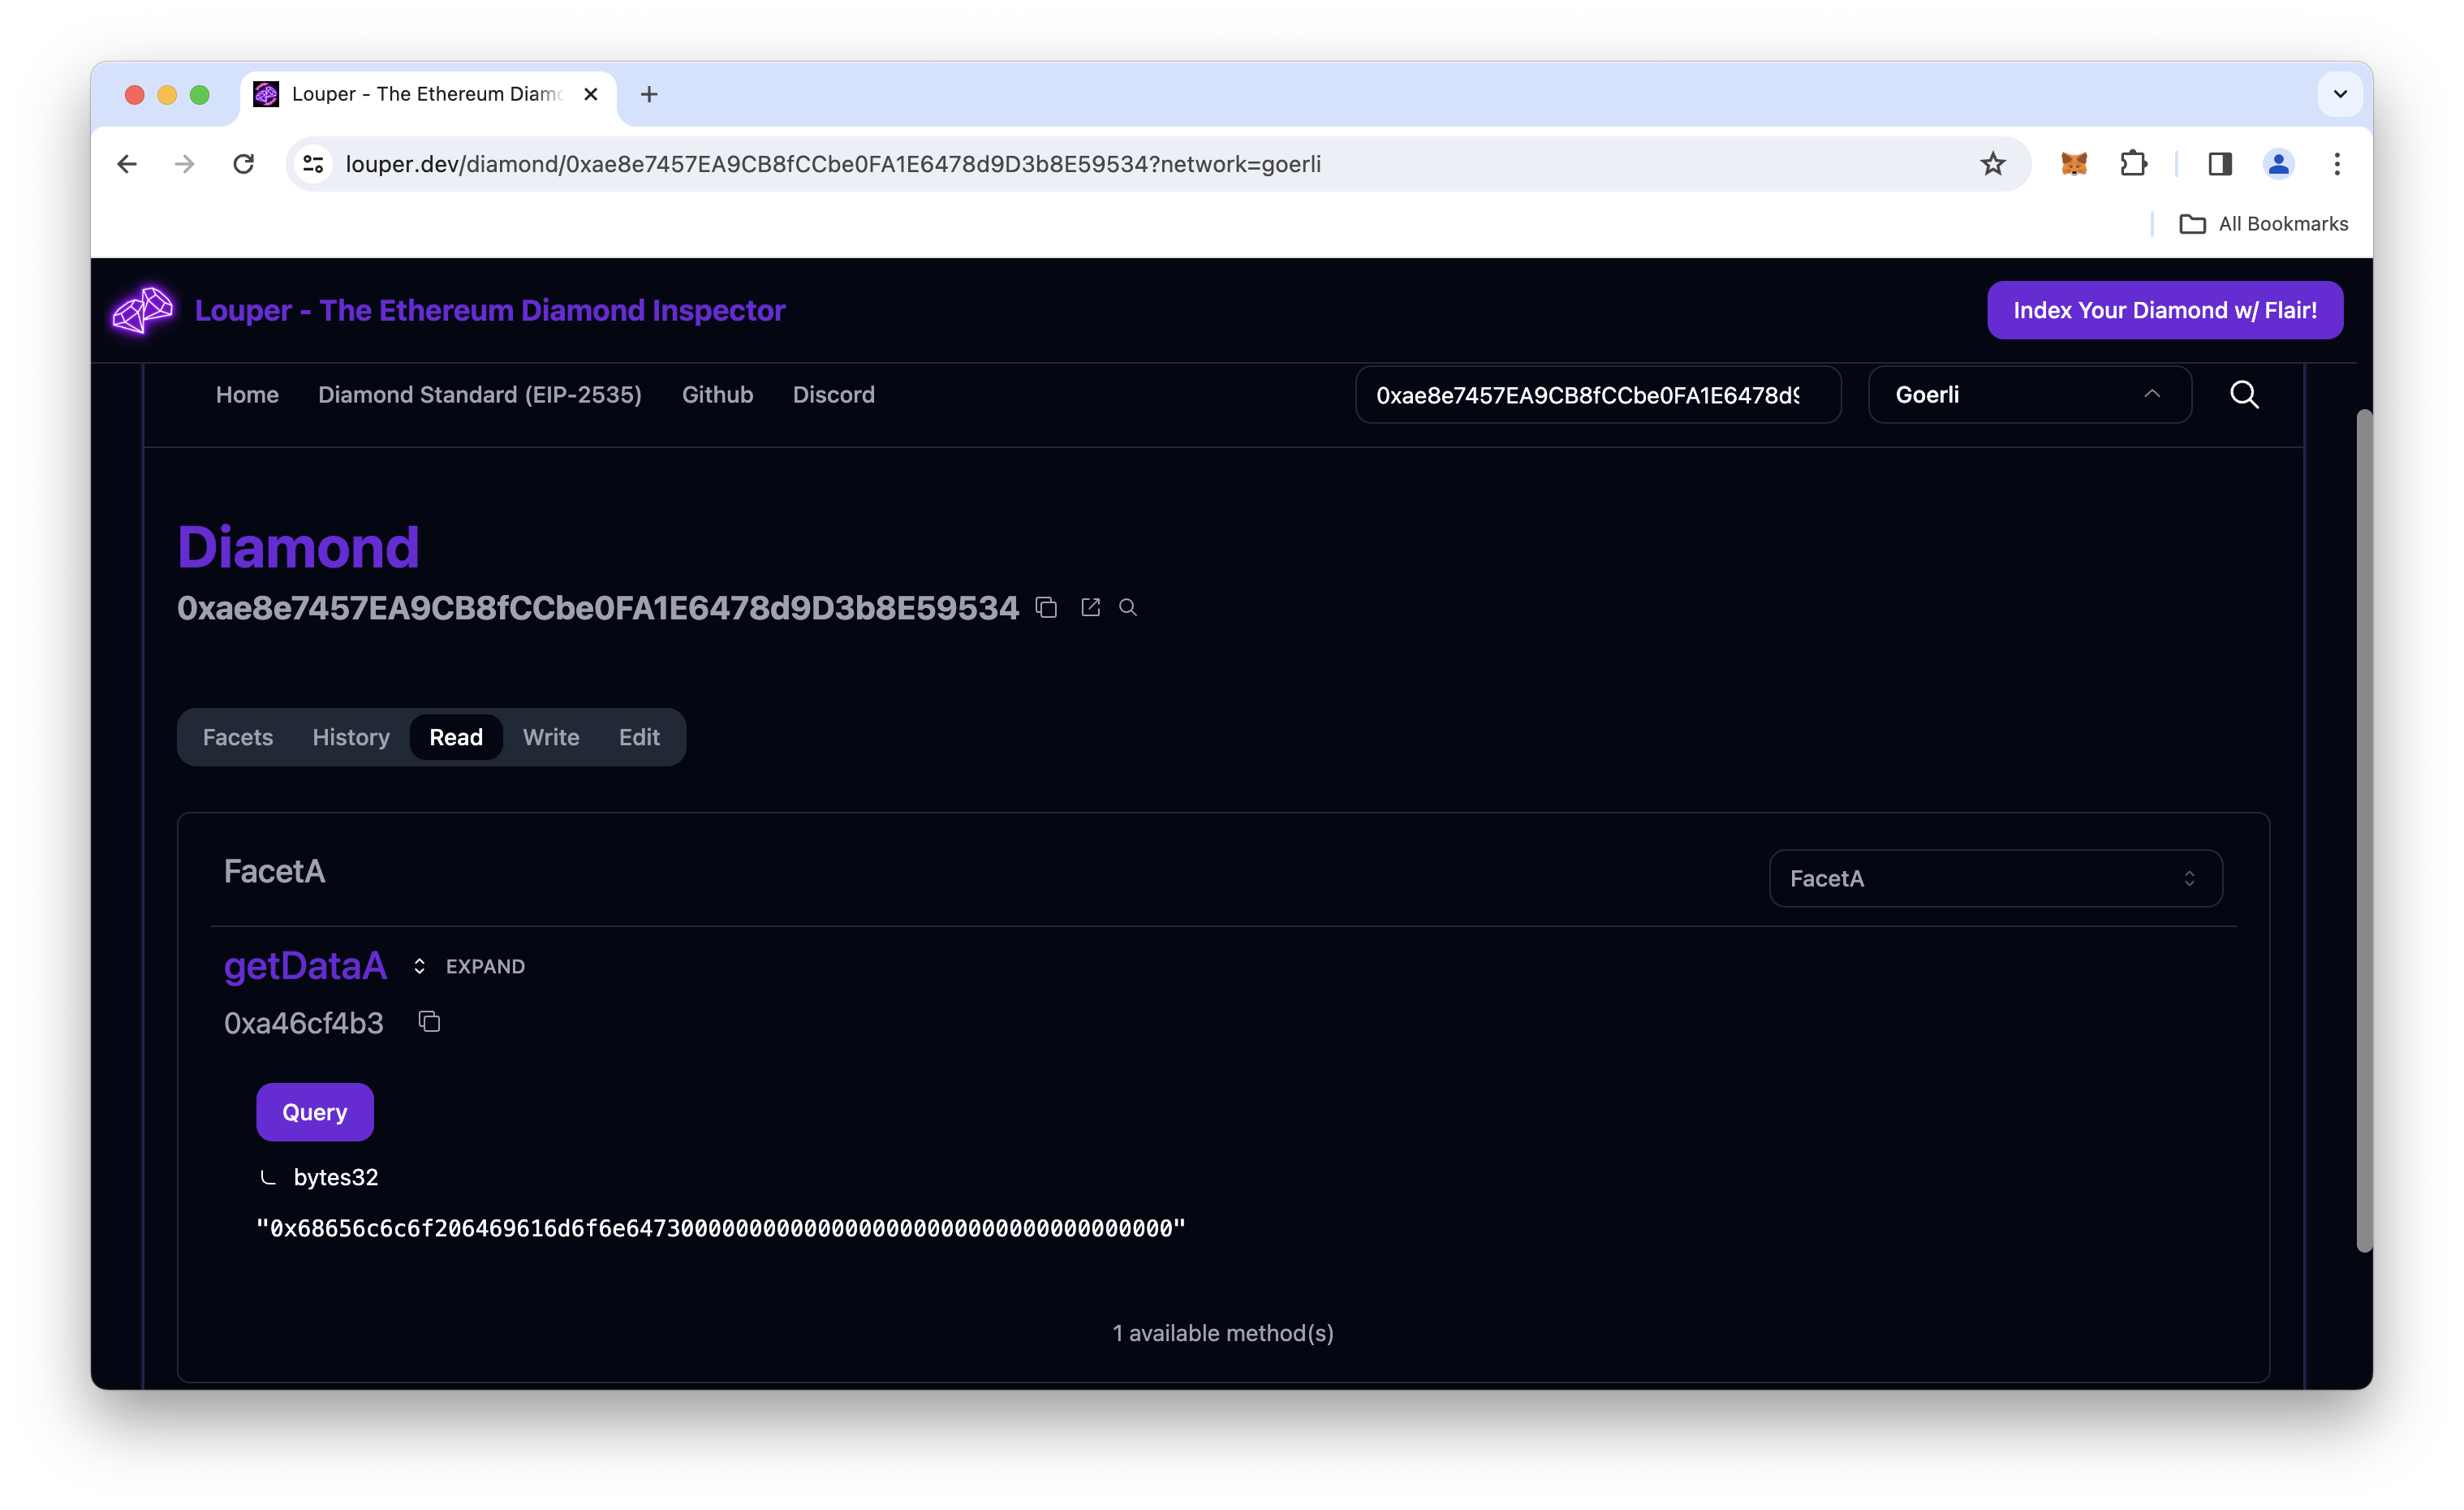
Once your transaction is confirmed, head to the Read tab on your diamond contract on louper.dev. Next, select FacetA in the dropdown list and click the Query button on the getDataA facet. You should see your previously set string!
Final Thoughts
Kudos! You now understand more about the Diamond standard and how to implement it. Got ideas, questions, or want to show off what you have learned? Tell us on Discord or reach out to us via Twitter.
We ❤️ Feedback!
If you have any feedback or questions on this guide, let us know. We'd love to hear from you!