5 min read
Updated on July 30, 2023
The Vyper team has found some vulnerabilities in the Vyper versions 0.2.15, 0.2.16, and 0.3.0 if ya’ll have active contracts in those version please refer to the below tweet and contact the Vyper team. PLEASE ACT WISELY AND DO NOT SHARE ANY PRIVATE KEYS OR SEED PHRASE EVEN IF ITS ASKED BY A TEAM MEMBER OF A REPUTED GROUP🙏.
Overview
Code executing on EVM (Ethereum Virtual Machine) must be highly efficient to minimize the gas needed to execute smart contracts. Any inefficient code in a contract ultimately needs a higher gas fee to get executed, thus becoming prohibitively expensive, which is not ideal, especially in micro-transactions. So here is where Vyper comes in handy; with logical similarity with Solidity and syntactical similarity with Python, Vyper is becoming the choice of many smart contracts developers. So in this article let’s learn about writing an Ethereum smart contract using Vyper.
What is Vyper?
Vyper is a relatively new, pythonic programming language used to write smart contracts. Vyper targets Ethereum Virtual Machine (EVM). Vyper has very simple/intelligible syntax; one of the leading principles of Vyper is to make it virtually impossible for developers to code misleading programs.
Why Vyper?
One may ask why to use Vyper when we already have Solidity as the primary language to write smart contracts. In a study conducted in 2018, where they analyzed nearly one million deployed Ethereum smart contracts, it was found out that many of these contracts had some severe vulnerabilities; the researchers divided these contracts into three categories to better identify and trace vulnerabilities:
- Suicidal Contracts - Smart contracts that arbitrary addresses can kill.
- Greedy Contracts - Sometimes, smart contracts can reach a state where they are unable to release ether, smart contracts in this phase are called Greedy contracts.
- Prodigal Contracts - Smart contracts that can be made to release ether to arbitrary addresses.
These vulnerabilities are produced in the smart contracts via code, which is unintentional, but regardless of the intentions, undesirable code may result in unexpected loss of funds for users. Vyper tries to eliminate this by letting users write secure code and making it difficult for programmers to write misleading or vulnerable code accidentally.
Following are features of Vyper:
- It is strongly typed.
- Has support for signed integers and decimal fixed-point numbers.
- Small and understandable code like Python.
- Has Bounds and Overflow checking.
- Decidability: With Vyper, It is possible to compute a precise upper bound for any function call’s gas consumption.
- Limited support for pure functions: Any constant in Vyper cannot change state.
Vyper vs Solidity:
Vyper tries to eliminate the possibility of writing unsafe code by omitting some of the Solidity’s features. It is crucial for the developers willing to write smart contracts in Vyper to understand the Solidity features which Vyper does not have; the following are the Solidity features which Vyper omits:
- Overflow
- Unbounded arrays
- Infinite Loops
- Modifiers
- Inheritance
- Assembly support
Vyper omits most of the Object-Oriented Programming paradigms - perhaps requires a new paradigm definition for transactional programming.
Getting testnet ETH
We’ll deploy our contract on the Ropsten testnet. To get started, you will need the Metamask browser extension to create an ETH wallet and some test ETH, which you can get by going to the Ropsten faucet. You'll need to select Ropsten Test Network on your Metamask wallet and copy-paste the wallet address into the text field in the faucet, then click Send me test Ether.
How to write and deploy a smart contract in Vyper:
The easiest way to install Vyper on your system is by using Python’s PIP package manager. Vyper requires Python 3.6 or higher installed on your system; you can check if Python is installed on not by typing the following in your terminal/cmd:
$ python --version
If version 3.6 or above is not installed, you can follow the instructions on the Downloads page of Python’s official website.
Now, let’s install Vyper using PIP. Type the following in your terminal/cmd:
$ pip install vyper
If everything goes right, Vyper will be installed in your system.
You can check if Vyper is installed completely or not by typing the following in your terminal/cmd:
$ vyper --version
Now, open your text editor and make a new Vyper file contract.vy (vy is the file extension for Vyper) and paste the following:
# @version ^0.2.0

greet: public(String[100])

@external
def __init__():
	self.greet = "Hello World"
Explanation of the code above:
Line 1: Specifying that version of Vyper this contract is meant for.
Line 3: Declaring a public variable greet, which will be stored on the blockchain, the data type of greet is a string with a maximum length of the string to be 100.
Line 5-6: Marking our init function as @external means that it can only be called via transactions or other contracts. Defining our __init__ function, a pythonic constructor called upon object creation will initialize the greet variable.
Line 7: Passing a string “Hello World” to our variable greet.
Now go to your terminal/cmd and cd into the directory where you saved your contract and compile your Vyper contract by typing the following:
$ vyper contract.vy
$ vyper -f abi contract.vy
If the contract doesn’t have any errors, it will be compiled to a byte code and abi, which will look something like this::

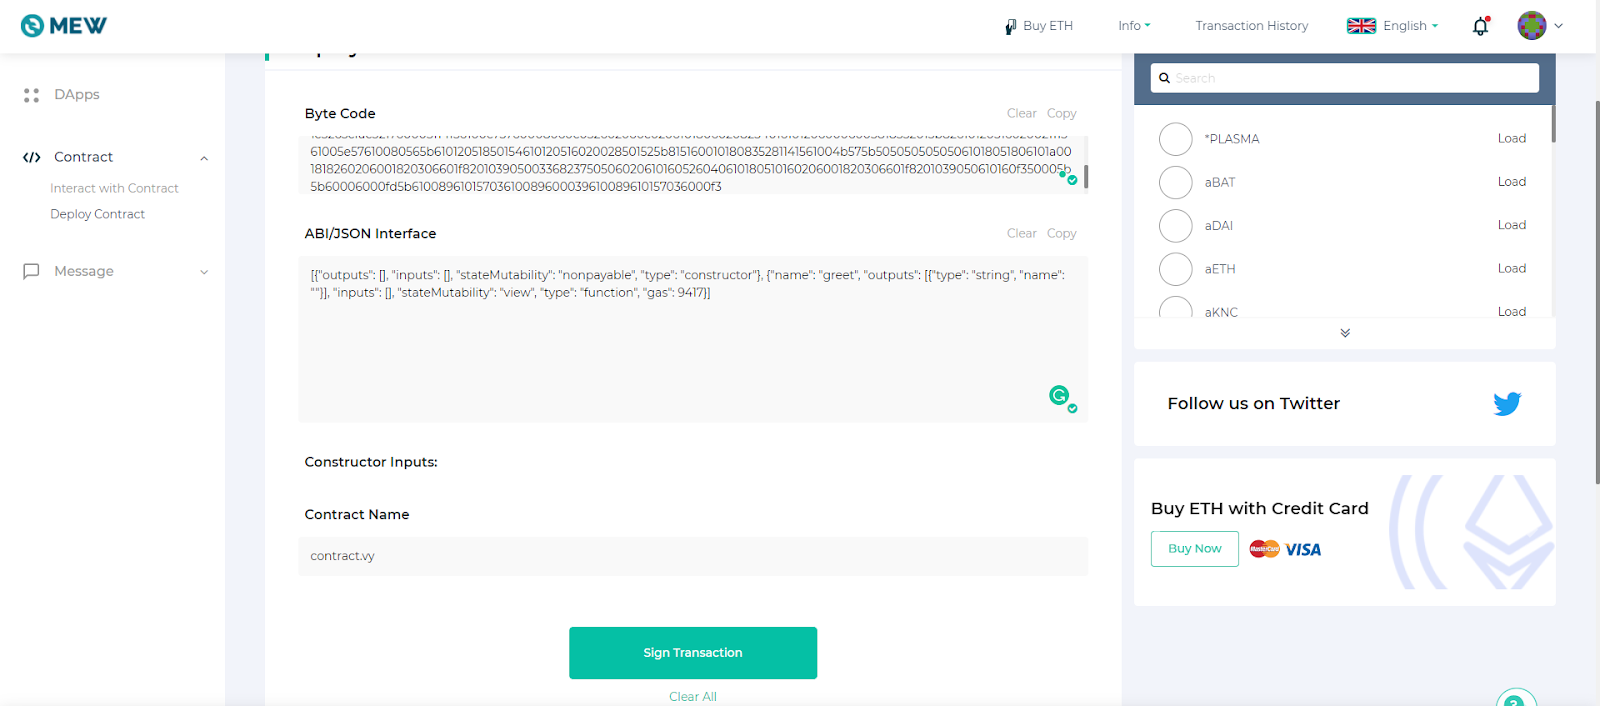
Now, let’s deploy our contract using MyEtherWallet: https://www.myetherwallet.com/interface/deploy-contract
Connect your Metamask wallet with the MyEtherWallet platform and copy-paste the Byte code and ABI from the terminal/cmd into the respective fields, type in the contract's name, and click on Sign Transaction, confirm the transaction from Metamask.
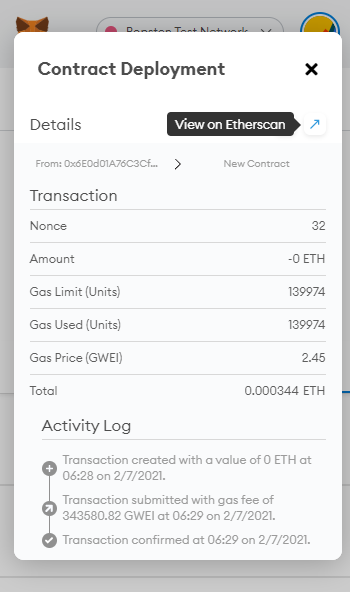
Now that our contract is deployed let’s interact with it. Go to the Activity section in your Metamask plugin, click on the last transaction (which deployed the contract), click on the Etherscan button from the top-right, and then copy the contract address.
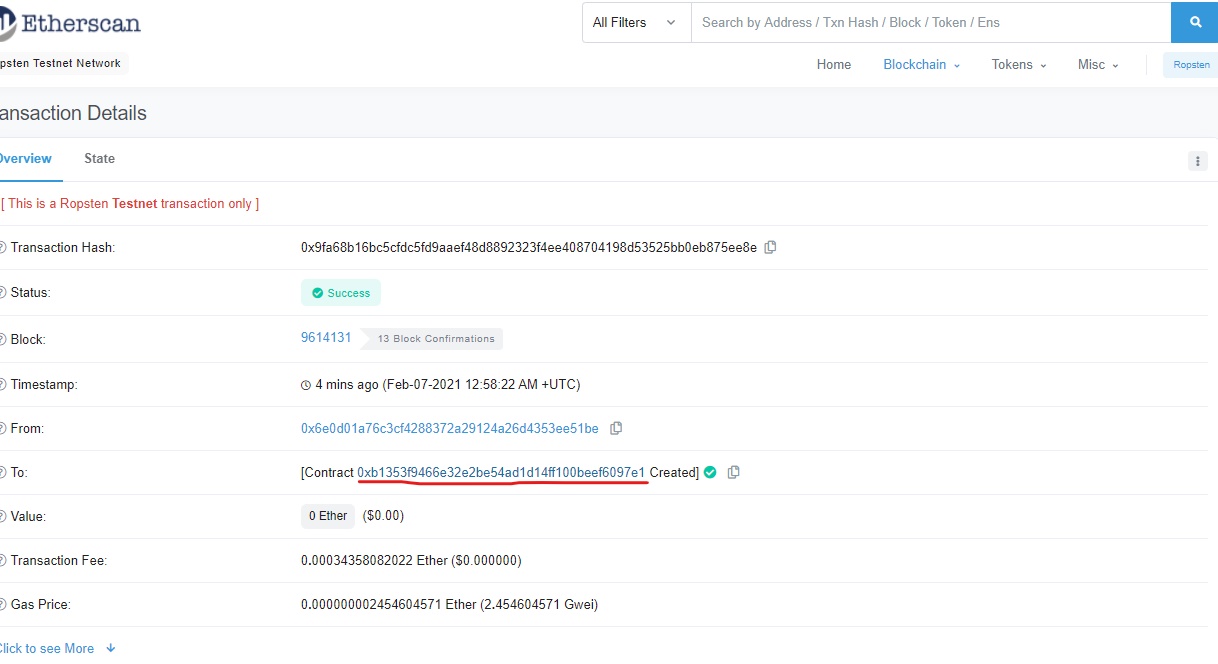
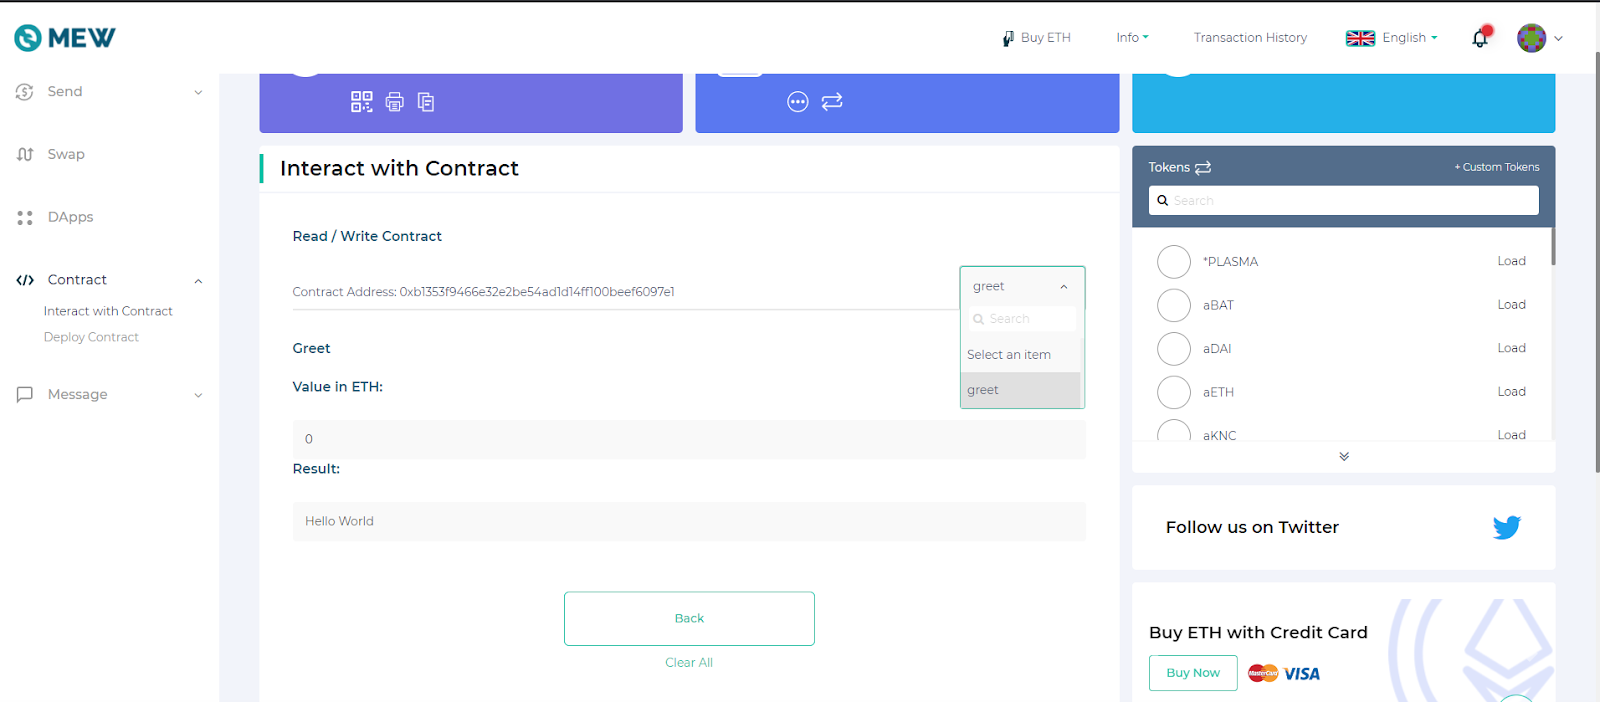
Paste the contract address in the Interact with Contract section on MyEtherWallet along with ABI, then click on continue.
Select the function from the drop named Select an Item and click on greet. You’ll see the Hello World message under the Result section.
Conclusion
Kudos to you on deploying your first Vyper contract; refer to Vyper’s official documentation for more information and shoutout to Jacques Wagener for fixing the remote compiler on the Vyper Remix plugin.
Subscribe to our newsletter for more articles and guides on Ethereum. If you have any feedback, feel free to reach out to us via Twitter. You can always chat with us on our Discord community server, featuring some of the coolest developers you’ll ever meet :)